


Restore Microsoft SQL Server workloads with NetApp Backup and Recovery

 Suggest changes

 PDFs
PDFs
Restore Microsoft SQL Server workloads from snapshots, backups replicated to secondary storage, or backups in object storage. Choose the original system, a different system, or an on-premises ONTAP system as the destination.
You can restore workloads from the following locations:
-
Primary location
-
Replicated resource
-
Object storage backup
You can restore data in the following ways:
-
From a snapshot
-
To a specific point in time when you know the file name, location, and last valid date
-
To the latest backup
If you select a backup file in object storage, and ransomware protection is active for that backup (if you enabled DataLock and Ransomware Protection in the backup policy), then you are prompted to run an additional integrity check on the backup file before restoring the data. We recommend that you run the scan.

|
You pay extra fees to your cloud provider to access the backup file. |
How workload restoration works
When you restore workloads, the following occurs:
-
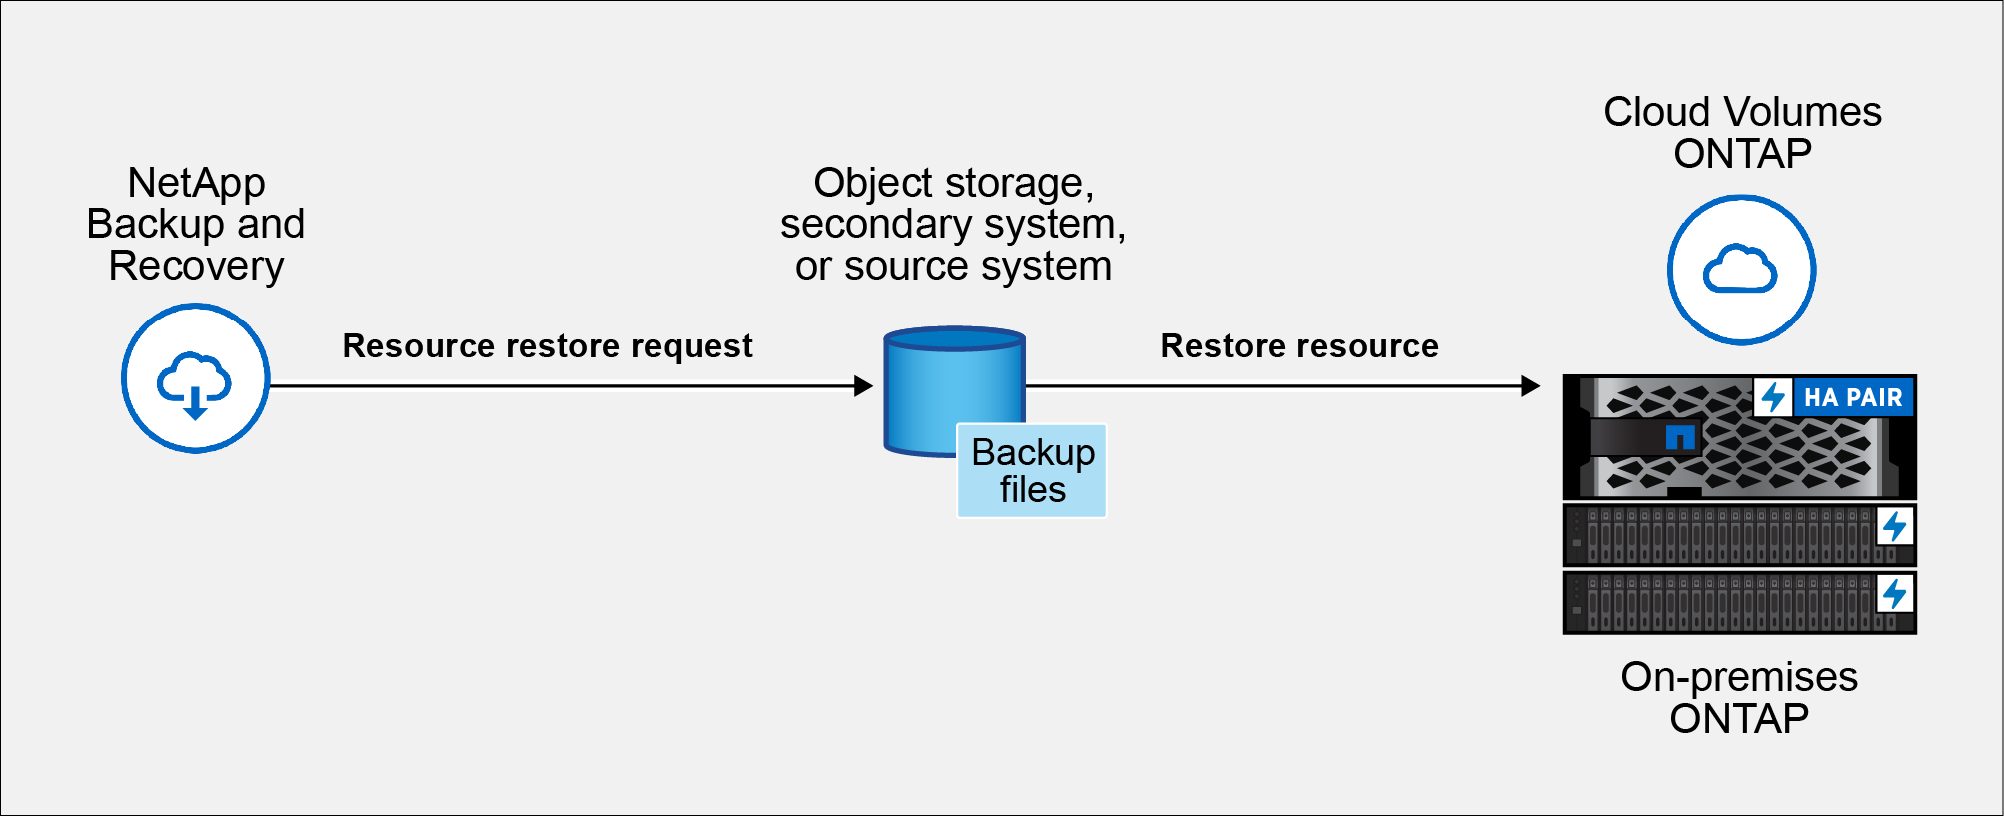
When you restore a workload from a backup file, NetApp Backup and Recovery creates a new resource using the data from the backup.
-
When you restore from a replicated workload, you can restore the workload to the original system or to an on-premises ONTAP system.
-
When you restore a backup from object storage, you can restore the data to the original system or to an on-premises ONTAP system.
Restore methods
Restore workloads using one of these methods:
-
From the Restore page: Use this option to restore a resource when you do not know its name, location, or last good date. Search for the snapshot using filters.
-
From the Inventory page: Use this option to restore a specific resource when you know its name, location, and last good date. Browse the list to find the resource.
Required NetApp Console role
Backup and Recovery super admin or Backup and Recovery restore admin role. If you are protecting data stored on a Cloud Volumes ONTAP cluster, the Cloud Volumes ONTAP Admin role is also required. Learn about NetApp Console access roles for all services.
Restore workload data from the Restore page
Use the Restore page to restore database workloads.
-
From the NetApp Backup and Recovery menu, select Restore.
-
Select the database that you want to restore. Use the filters to search.
-
Select the restore option:
-
Restore from snapshots
-
Restore to a specific point in time if you know the file name, location, and last valid date
-
Restore to the latest backup
-
Restore workloads from snapshots
-
Continuing from the Restore options page, select Restore from snapshots.
A list of snapshots appears.
-
Select the snapshot you want to restore.
-
Select Next.
The destination options appear.
-
In the Destination details page, enter the following information:
-
Destination settings: Choose whether you want to restore the data to its original location or to an alternate location. For an alternate location, select the host name and instance, enter the database name, and enter the destination path where you want to restore the snapshot.
-
Pre-restore options:
-
Overwrite the database with the same name during restore: During the restore, the original database name is preserved.
-
Retain SQL database replication settings: Keeps the replication settings for the SQL database after the restore operation.
-
Create transaction log backup before restore: Creates a transaction log backup before the restore operation.
-
Quit restore if transaction log backup before restore fails: Stops the restore operation if the transaction log backup fails.
-
Prescript: Enter the full path for a script that should be run before the restore operation, any arguments that the script takes, and how long to wait for the script to complete.
-
-
Post-restore options:
-
Operational: Brings the database online after transaction log backups are applied. You cannot restore additional transaction logs.
-
Non-operational: Keeps the database unavailable so that you can restore additional transaction logs.
-
Read-only mode: Restores the database in read-only mode and lets you restore additional transaction logs.
-
Postscript: Enter the full path for a script that should be run after the restore operation and any arguments that the script takes.
-
-
-
Select Restore.
Restore to specific point in time
NetApp Backup and Recovery uses logs and the most recent snapshots to create a point-in-time restore of your data.
-
Continuing from the Restore options page, select Restore to specific point in time.
-
Select Next.
-
In the Restore to a specific point in time page, enter the following information:
-
Date and time for data restoration: Enter the exact date and time of the data that you want to restore. This date and time is from the Microsoft SQL Server database host.
-
-
Select Search.
-
Select the snapshot that you want to restore.
-
Select Next.
-
In the Destination details page, enter the following information:
-
Destination settings: Choose whether you want to restore the data to its original location or to an alternate location. For an alternate location, select the host name and instance, enter the database name, and enter the destination path.
-
Pre-restore options:
-
Preserve original database name: During the restore, the original database name is preserved.
-
Retain SQL database replication settings: Keeps the replication settings for the SQL database after the restore operation.
-
Prescript: Enter the full path for a script that should be run before the restore operation, any arguments that the script takes, and how long to wait for the script to complete.
-
-
Post-restore options:
-
Operational: Brings the database online after transaction log backups are applied. You cannot restore additional transaction logs.
-
Non-operational: Keeps the database unavailable so that you can restore additional transaction logs.
-
Read-only mode: Restores the database in read-only mode and lets you restore additional transaction logs.
-
Postscript: Enter the full path for a script that should be run after the restore operation and any arguments that the script takes.
-
-
-
Select Restore.
Restore to the latest backup
This option uses the latest full and log backups to restore data to the last good state. NetApp Backup and Recovery scans logs from the last snapshot to the present to restore the most recent available version of the data.
-
Continuing from the Restore options page, select Restore to the latest backup.
NetApp Backup and Recovery shows you the snapshots that are available for the restore operation.
-
On the Restore to the latest state page, select a snapshot location: local storage, secondary storage, or object storage.
-
Select Next.
-
In the Destination details page, enter the following information:
-
Destination settings: Choose whether you want to restore the data to its original location or to an alternate location. For an alternate location, select the host name and instance, enter the database name, and enter the destination path.
-
Pre-restore options:
-
Overwrite the database with the same name during restore: During the restore, the original database name is preserved.
-
Retain SQL database replication settings: Keeps the replication settings for the SQL database after the restore operation.
-
Create transaction log backup before restore: Creates a transaction log backup before the restore operation.
-
Quit restore if transaction log backup before restore fails: Stops the restore operation if the transaction log backup fails.
-
Prescript: Enter the full path for a script that should be run before the restore operation, any arguments that the script takes, and how long to wait for the script to complete.
-
-
Post-restore options:
-
Operational: Brings the database online after transaction log backups are applied. You cannot restore additional transaction logs.
-
Non-operational: Keeps the database unavailable so that you can restore additional transaction logs.
-
Read-only mode: Restores the database in read-only mode and lets you restore additional transaction logs.
-
Postscript: Enter the full path for a script that should be run after the restore operation and any arguments that the script takes.
-
-
-
Select Restore.
Restore workload data from the Inventory page
Use the Inventory page to restore database workloads. You can restore databases, but not instances, from this page.
-
From the NetApp Backup and Recovery menu, select Inventory.
-
Choose the host where the resource that you want to restore is located.
-
Select the Actions
 icon, and select View details.
 -
On the Microsoft SQL Server page, select the Databases tab.
-
In the Databases menu, select a database with "Protected" status.
-
Select the Actions
icon, and select Restore.The same three options appear as when you restore from the Restore page:
-
Restore from snapshots
-
Restore to a specific point in time
-
Restore to the latest backup
-
-
Complete the steps for the selected restore option from the Restore page.