

Create a custom classification in NetApp Data Classification
 Suggest changes
NetApp Data Classification enables you to create custom categories or personal identifiers to identify data specific to your organization's regulatory and compliance requirements.
Data Classification supports two types of custom classifiers: categories and personal identifiers. Custom categories are created based on a set of files you upload from which Data Classification creates an AI model to identify similar data in your organization (for example, a health research firm might create a clinical analysis category). Custom personal identifiers are created using keyword lists or a regular expression (regex) to identify information specific to your organization that can pose a compliance risk.
All custom classifications are available in the Custom classification dashboard.
Create a custom personal identifier
Data Classification enables you to create a custom personal identifier using either contextual keywords or a regular expression to identify data unique to your organization.
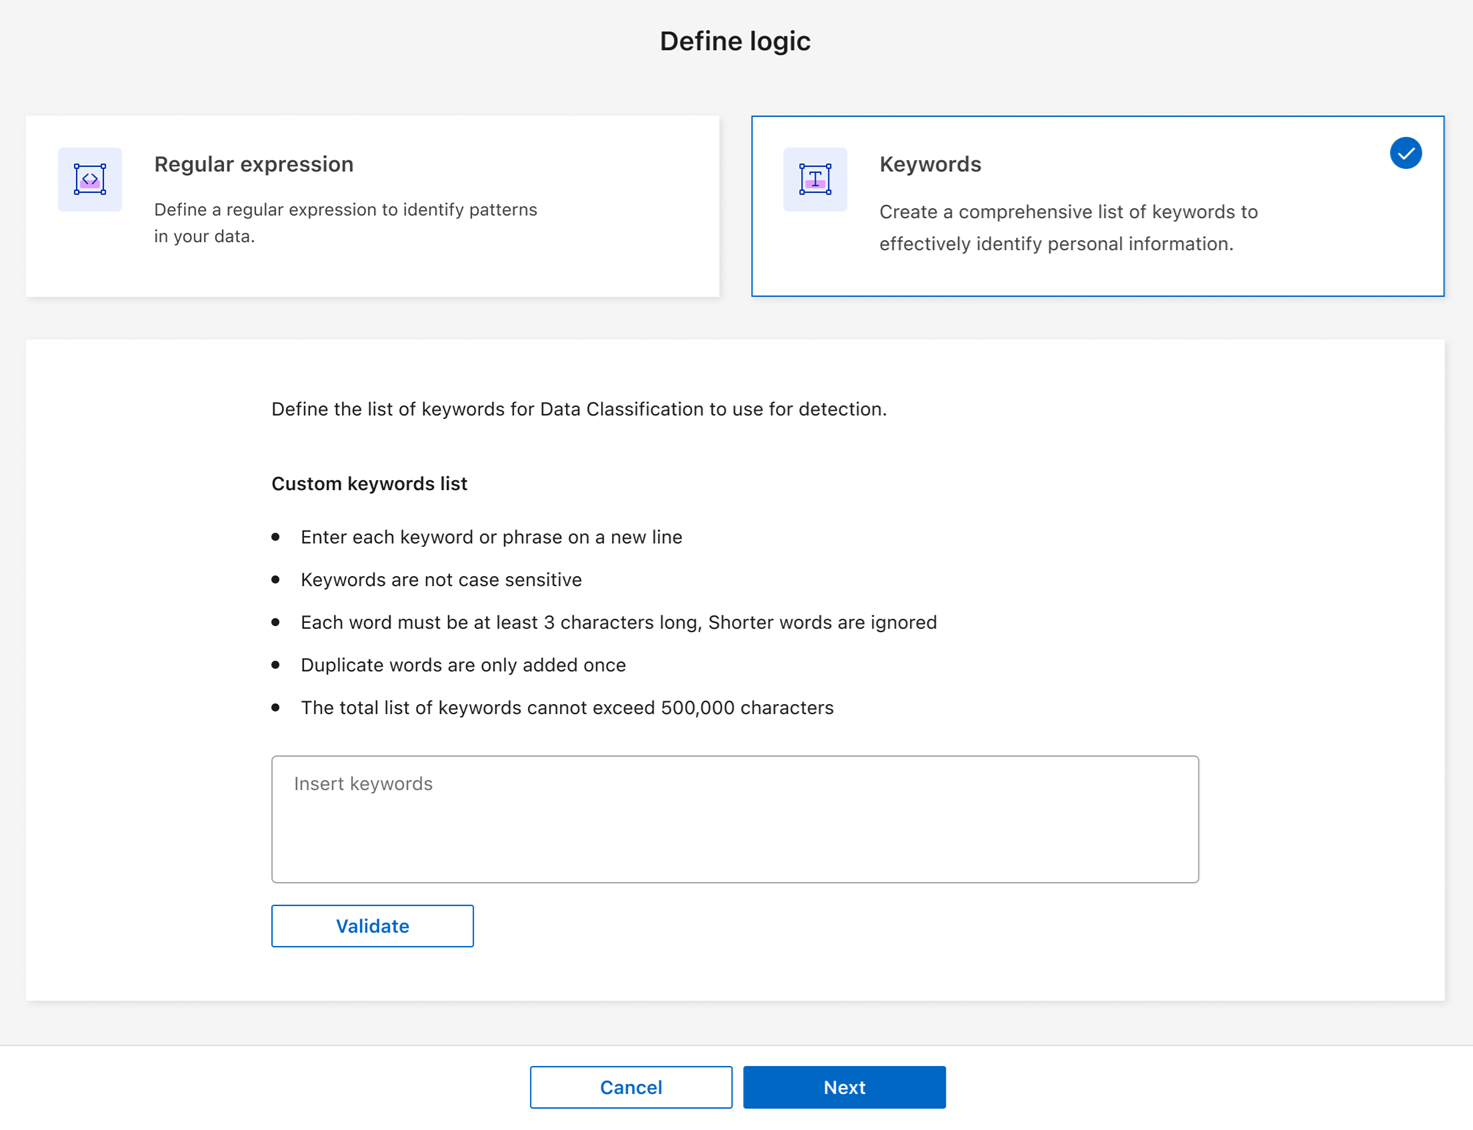
If you're creating your personal identifier with a keyword list, the list must meet the following requirements:
-
Keyword entries are case insensitive.
-
Keywords must be at least three characters. Any words shorter than three characters are ignored.
-
Duplicate words are only added once.
-
The total list of keywords can't exceed 500,000 characters. The list must include at least one keyword.
-
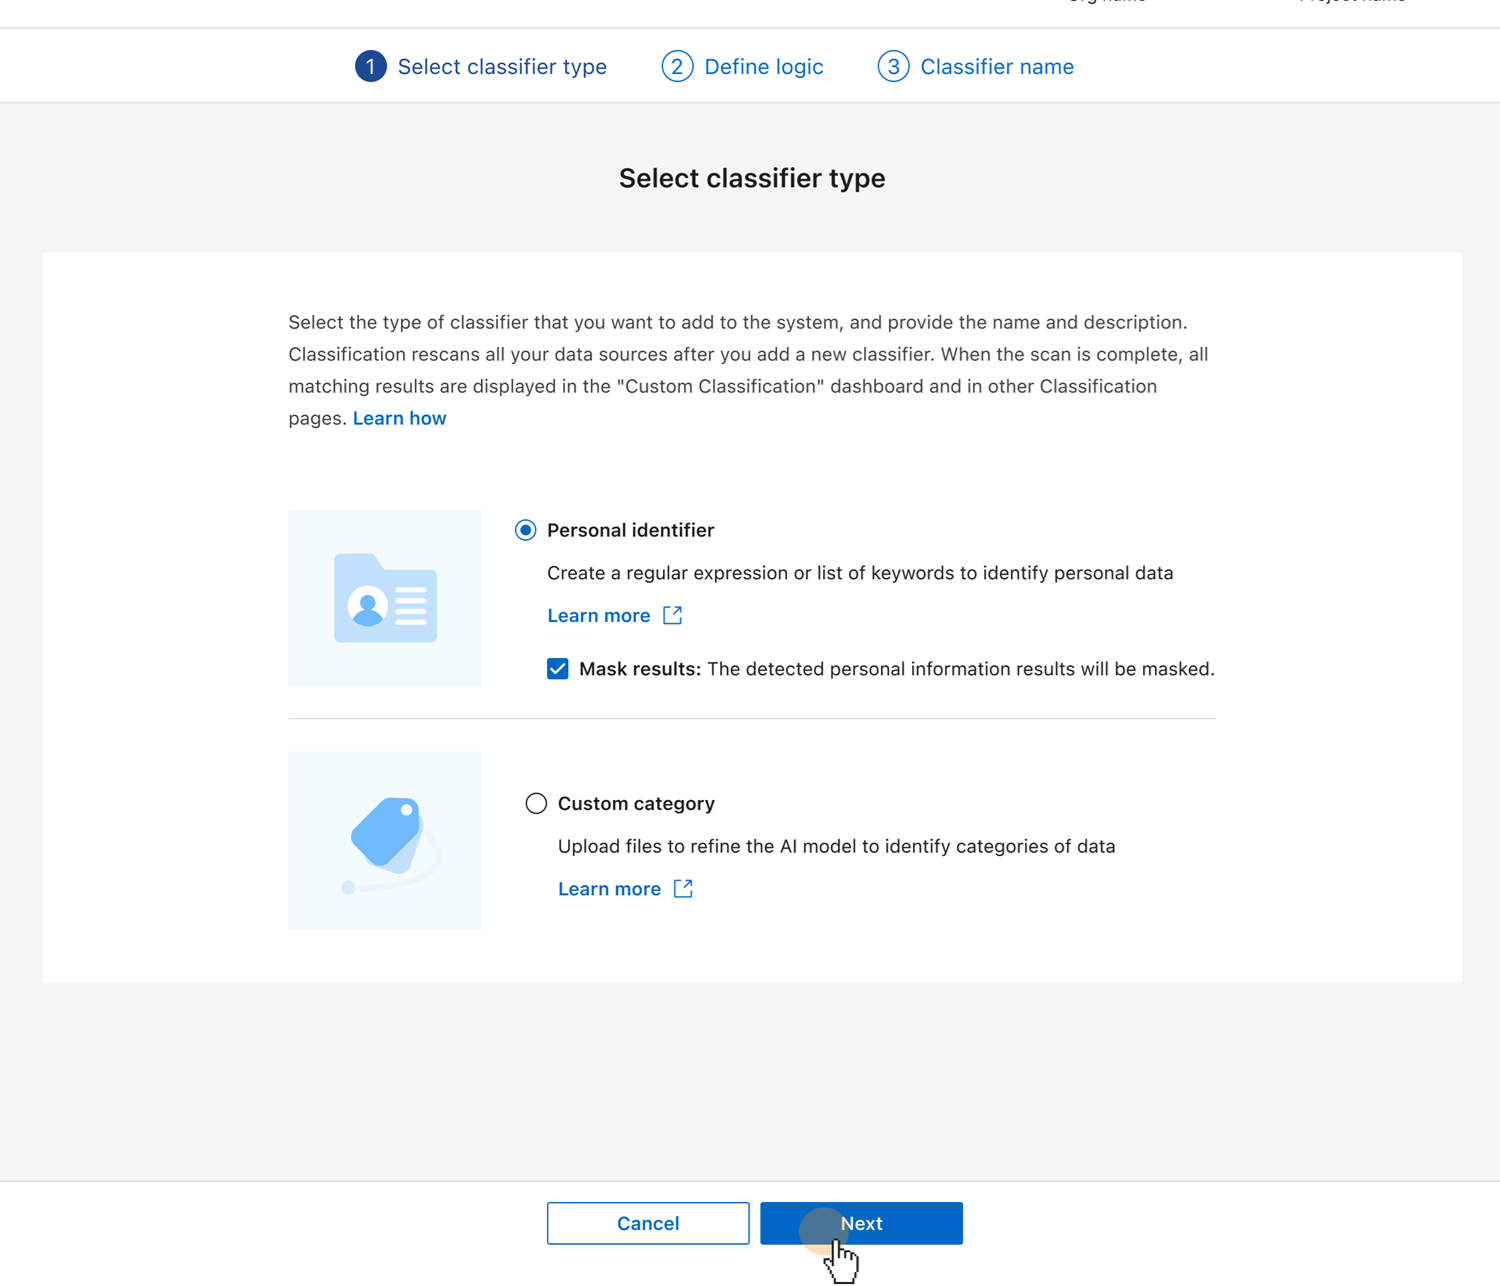
Select the Custom classification tab.
-
Select + New Classifier to create the custom classifier.
-
Select Personal identifier. Optionally, select Mask results to mask detected personal data.
-
Select Next.
-
To add the classifier with keywords, select Keywords. Enter a list of keywords, with each entry on a separate line. Ensure the keywords adhere to the requirements.
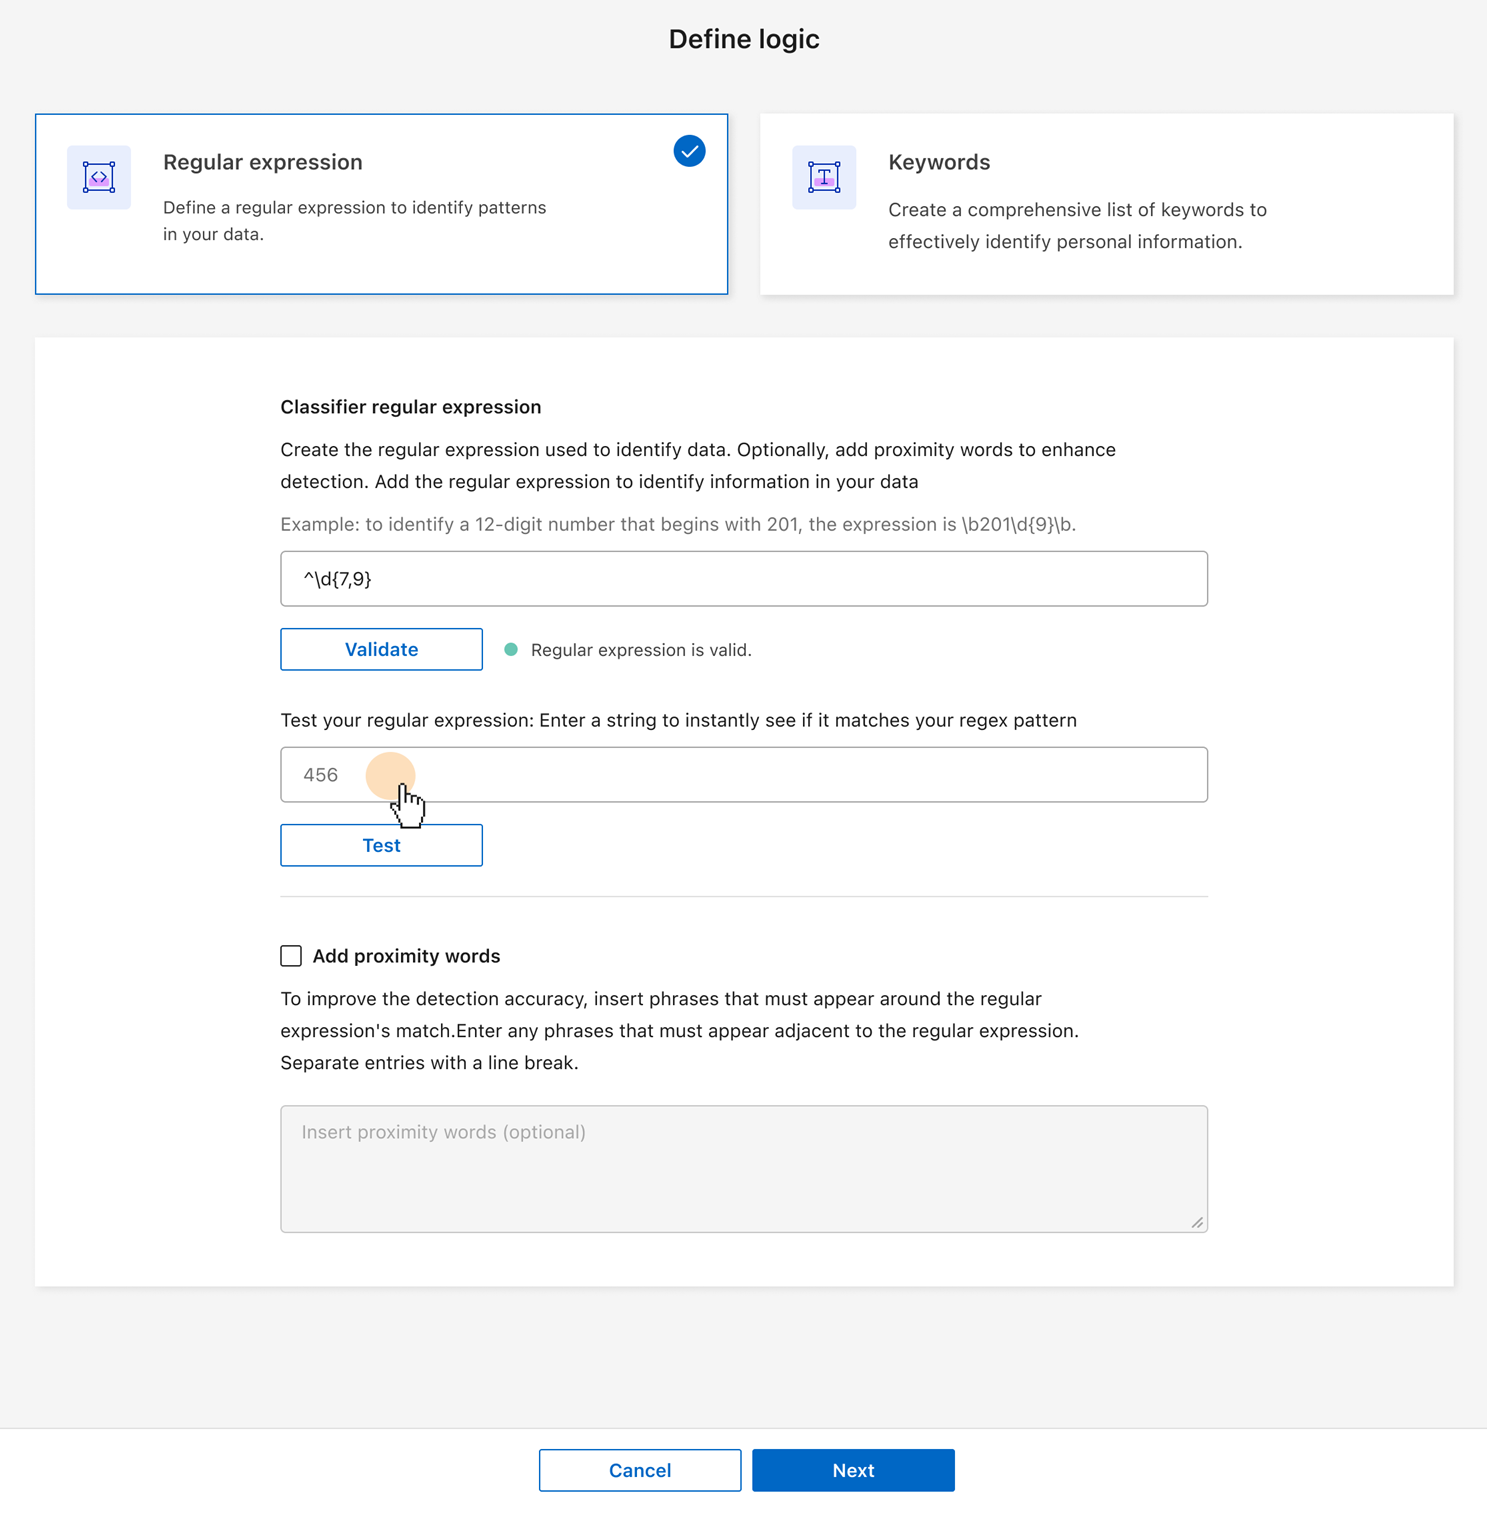
To add the classifier as a regular expression, select Regular expression then add a pattern to detect the specific information of your data. Select Validate to confirm the syntax of your entry.
-
Optionally, enter a sample string that should match your regex pattern then select Test to check it.
-
Optionally, add proximity words. If you add proximity words, Data Classification only flags the regex pattern if the proximity words are adjacent to the matching string.
-
-
Select Next.
-
Enter a Classifier name and a Description to identify the custom category in your dashboard.
-
Select Save to create the custom personal identifier.
After you create a custom personal identifier, its results are captured in the next scheduled scan. To capture results sooner, perform an on-demand scan. To view results, see Generate compliance reports.
Create a custom category
With custom categories, you can categorize data specific to your organization. Custom categories are created based on text files that you upload from which Data Classification creates an AI model to identify similar information in other files.
-
The training dataset must contain a minimum of 25 files. The maximum file count is 1,000.
-
All files must be located directly in the file path that you provide.
-
All files must be larger than 100 bytes.
-
Data Classification training data must be one of the following file types: CSV, DOCX, DOC, GZ, JSON, PDF, PPTX, TXT, RTT, XLS, or XLSX. You can upload a combination of all the supported file types.
-
In NetApp Data Classification, select Custom classification.
-
Select + New classifier.
-
Choose Custom category as your classifier type then Next.
-
Define the logic for your custom category with a collection of text-based files. Provide the IP address of the Working address then select the Volume from the dropdown menu.
Enter the Directory path for the directory that contains the training data.
-
Select Load files for Data Classification to perform a check of the files. You can review the summary of the files, which lists the file name, size, type, and notes if the file was deemed acceptable for training.
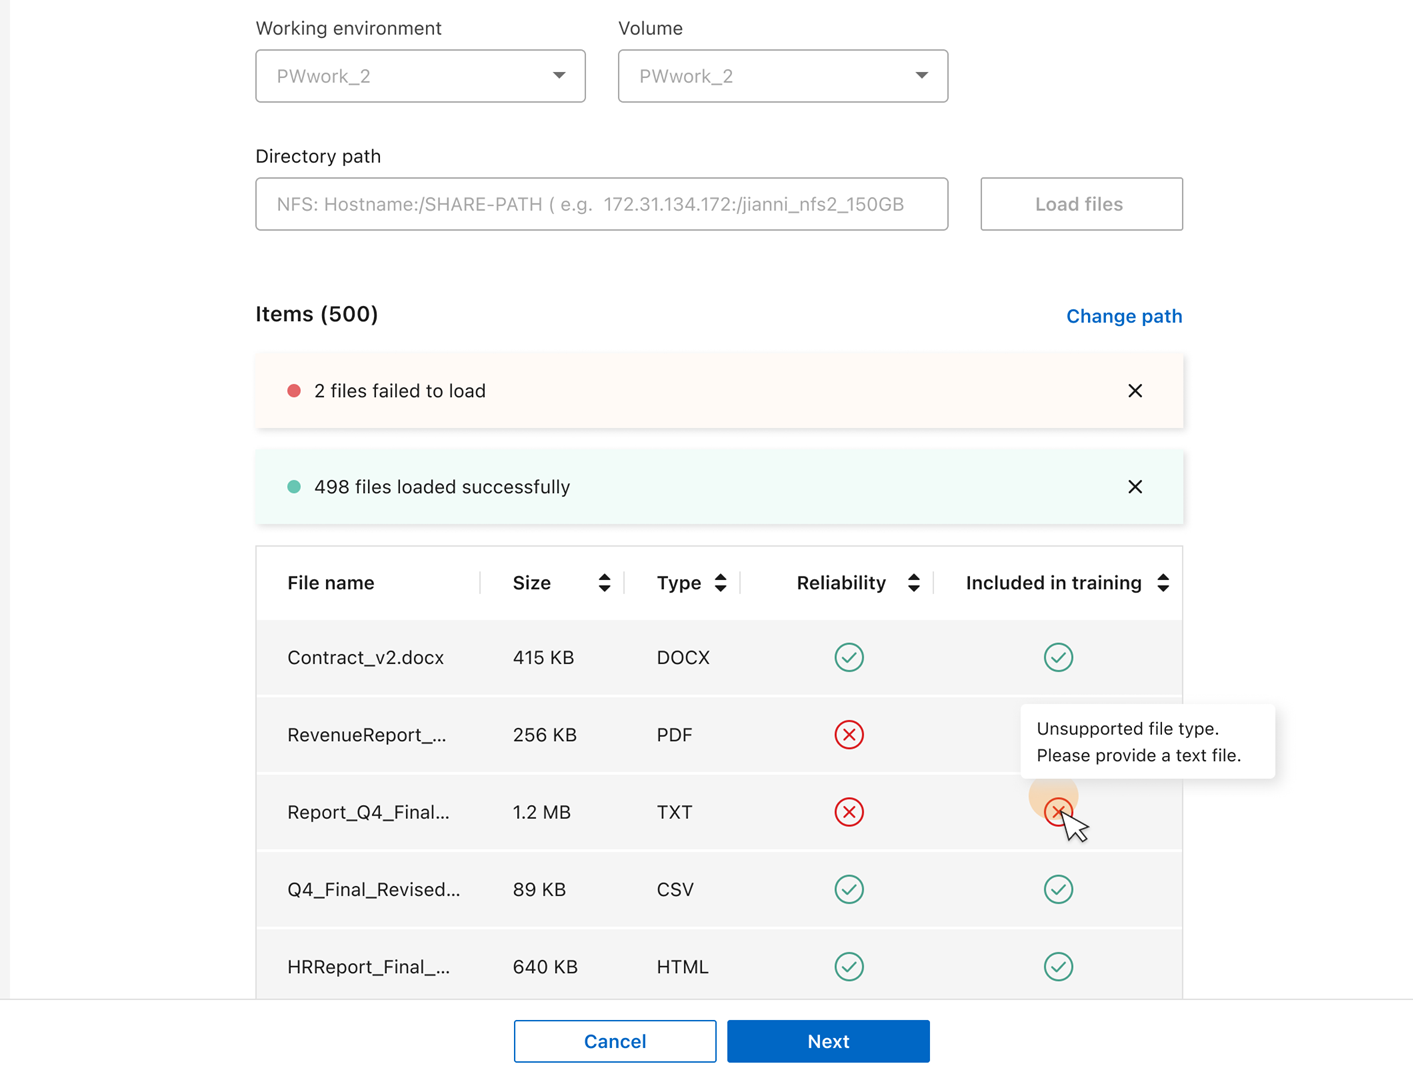
Data Classification displays the estimated completion time for data training. .. To change the file path or re-upload files, select Change path then enter the data and load the files again.
-
When you're satisfied with the files uploaded, select Next.
-
Enter a Classifier name and a Description to identify the custom category in your dashboard.
-
Select Save to create the custom category.
After you create a custom category, its results are captured in the next scheduled scan. To capture results sooner, manually initiate the scan.
Edit a custom classifier
You can modify the logic of a personal identifier after you create it. You can't change the type of the personal identifier or the logic type; for example, you can't change a custom category to a custom personal identifier. You also can't change a keyword-based custom identifier to a regex-based custom identifier.
-
In NetApp Data Classification, select Custom classification.
-
Identify the classifier you want to delete, then select the action menu
…at the end of its row. -
Select Edit logic.
-
If you're modifying keywords, add, delete, or edit the appropriate keywords. If you're modifying a regular expression, enter the new regular expression and validate it. Optionally, add proximity keywords.
-
Select Save to apply the changes.
Delete a custom classifier
-
In NetApp Data Classification, select Custom classification.
-
Identify the classifier you want to delete then select the action menu
…at the end of its row. -
Select Delete classifier.