

Fail over applications to a remote site with NetApp Disaster Recovery
 Suggest changes
In case of a disaster, fail over your primary on-premises VMware site to another on-premises VMware site or VMware Cloud on AWS. You can test the failover process to ensure success when you need it.
Required NetApp Console role
The Super admin, Disaster recovery admin, or Disaster recovery failover admin role is required to perform this task. Learn about user roles and permissions in NetApp Disaster Recovery. Learn about NetApp Console access roles for all services.
About this task
During a failover, Disaster Recovery by default uses the most recent SnapMirror snapshot copy, though you can select a specific snapshot from a point-in-time snapshot (per the retention policy of SnapMirror). Use the point-in-time option if the most recent replicas are compromised, such as during a ransomware attack.
This process differs depending on whether the production site is healthy and you are performing a failover to the disaster recovery site for reasons other than a critical infrastructure failure:
-
Critical production site failure where the source vCenter or ONTAP cluster is not accessible: NetApp Disaster Recovery lets you select any available snapshot from which to restore.
-
Production environment is healthy: You can either "Take a snapshot now" or select a previously created snapshot.
This procedure breaks the replication relationship, places the vCenter source VMs offline, registers the volumes as datastores in the disaster recovery vCenter, restarts the protected VMs using the failover rules in the plan, and enables read/write on the target site.
Test the failover process
Before conducting a live failover, you can perform a test to check your readiness. Workloads remain online during the test process.
During a failover test, Disaster Recovery temporarily creates VMs. Disaster Recovery maps a temporary datastore backing the FlexClone volume to the ESXi hosts.
This process doesn't consume additional physical capacity on on-premises ONTAP storage or FSx for NetApp ONTAP storage in AWS. The original source volume is not modified and replica jobs can continue even during disaster recovery.
When you finish the test, you should reset the VMs with the Clean up test option. While this is recommended, it is not required.
A test failover operation does not impact production workloads, the SnapMirror relationship used on the test site, and protected workloads that must continue to operate normally.
For a test failover, Disaster Recovery performs the following operations:
-
Perform prechecks on the destination cluster and the SnapMirror relationship.
-
Create a new FlexClone volume from the selected snapshot for each protected ONTAP volume on the target site ONTAP cluster.
-
If any datastores are VMFS, create and map an iGroup to each LUN.
-
Register the target VMs within vCenter as new datastores.
-
Power on the target VMs based on the boot order captured in the Resource groups page.
-
Unquiesce any supported database applications in VMs indicated as "application consistent."
-
If the source vCenter and ONTAP clusters are still active, create a reverse direction SnapMirror relationship to replicate any changes while in failover state back to the original source site.
-
Log in to the NetApp Console.
-
From the NetApp Console left navigation, select Protection > Disaster recovery.
-
From the NetApp Disaster Recovery menu, select Replication plans.
-
Select the replication plan.
-
On the right, select the Actions option
 and select Test failover.
 -
In the Test failover page, choose the snapshot for the test failover: select Take snapshot now or Select to choose an existing snapshot. If you choose Select, choose the existing snapshot.
Then enter “Test failover” and select Test fail over.
-
After the test is complete, clean up the test environment.
Clean up the test environment after a failover test
After the failover test finishes, you should clean up the test environment. This process removes the temporary VMs from the test location, the FlexClones, and the temporary datastores.
-
From the NetApp Disaster Recovery menu, select Replication plans.
-
Select the replication plan.
-
On the right, select the Actions option
then Clean up failover test. -
In the Test failover page, enter "Clean up failover" then select Clean up failover test.
Fail over the source site to a disaster recovery site
In case of a disaster, fail over your primary on-premises VMware site on demand to another on-premises VMware site or VMware Cloud on AWS with FSx for NetApp ONTAP.
The failover process involves in the following operations:
-
Disaster Recovery performs prechecks on the destination cluster and SnapMirror relationship.
-
If you selected the latest snapshot, the SnapMirror update is performed to replicate the latest changes.
-
The source VMs are powered down.
-
The SnapMirror relationship is broken and the target volume is made read/write.
-
Based on the selection of the snapshot, the active file system is restored to the specified snapshot (latest or selected).
-
Datastores are created and mounted to the VMware or VMC cluster or host based on the information captured in the replication plan. If any datastores are VMFS, create and map an iGroup to each LUN.
-
The target VMs are registered within vCenter as new datastores.
-
The target VMs are powered on based on the boot order captured in the Resource groups page.
-
If the source vCenter is still active, power off all source side VMs that are being failed over.
-
Unquiesce any supported database applications in VMs indicated as "application consistent."
-
If source vCenter and ONTAP clusters are still active, create a reverse direction SnapMirror relationship to replicate any changes while in failover state back to the original source site. The SnapMirror relationship is reversed from target to source virtual machine.

|
After the failover starts, you can see the recovered VMs in the vCenter of the disaster recovery site (VMs, networks, and datastores). By default, the VMs are recovered to the Workload folder. |
For datastore-based replication plans, if you've added and discovered any VMs but not provided mapping details, those VMs are included in the failover. The failover will fail with a notification in the jobs. You must provide the mapping details to complete the failover successfully.
-
From the NetApp Disaster Recovery menu, select Replication plans.
-
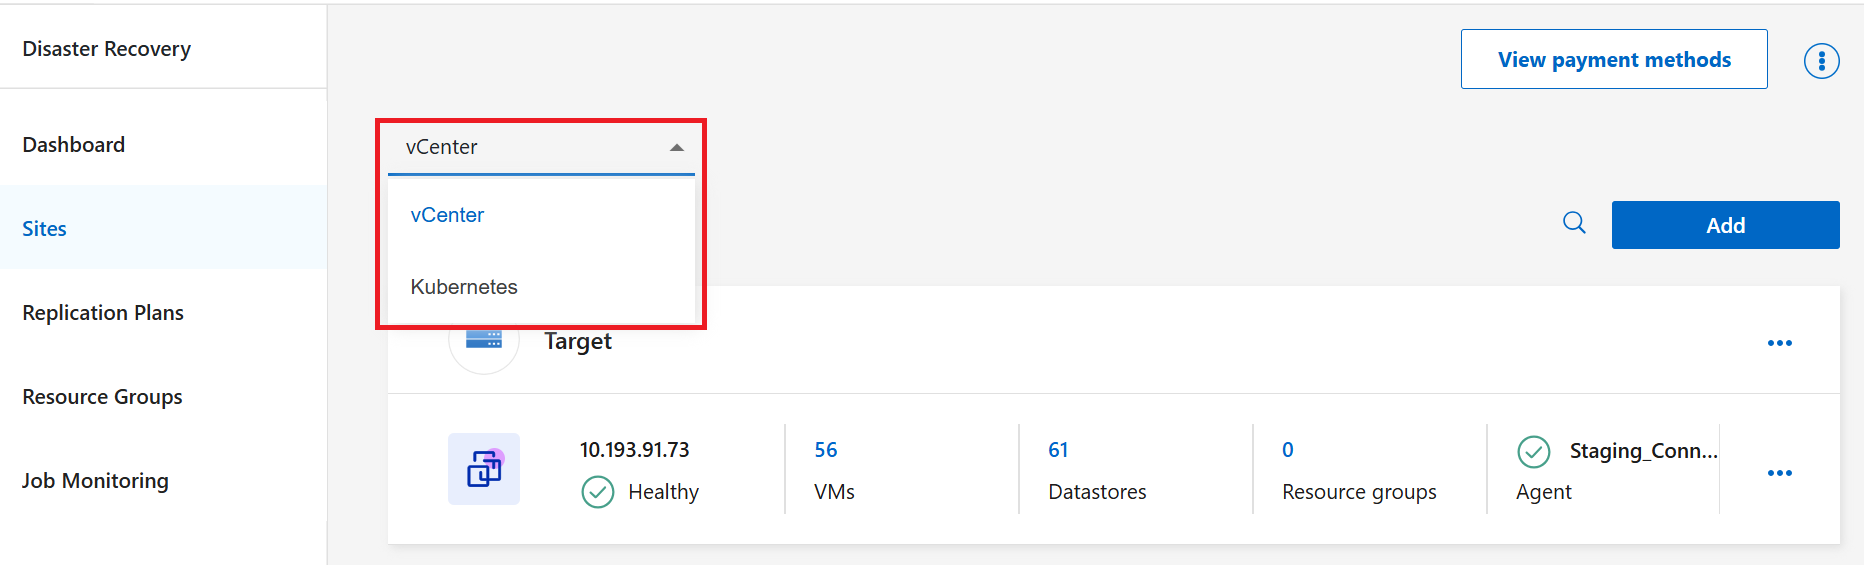
In the dropdown menu, filter to vCenter replication plans.
-
Select the replication plan.
-
On the right, select the Actions option
, hover over Recover then select Fail over.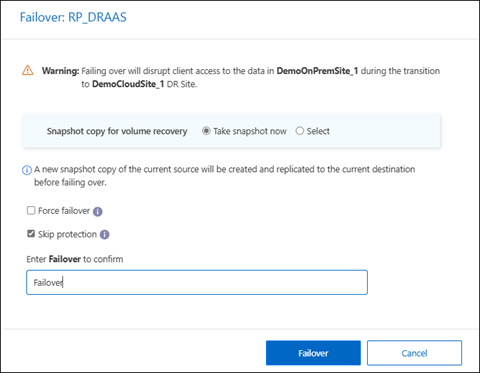
-
In the Fail over page, either create a new snapshot now or choose an existing snapshot for the datastore to use as the basis for recovery. The default is the latest.
A snapshot of the current source will be taken and replicated to the current destination before the fail over occurs.
-
Select Force failover if you want the failover to occur even if an error is detected that would normally prevent the failover from occurring.
-
Select Skip protection if you want the service to not automatically create a reverse SnapMirror protection relationship after a replication plan failover. This is useful if you want to perform additional operations on the restored site before you bring it back online within NetApp Disaster Recovery.
You can establish reverse protection by selecting Protect resources from the Replication plan Actions menu. This attempts to create a reverse replication relationship for each volume in the plan. You can run this job repeatedly until protection is restored. When protection is restored, you can initiate a failback in the usual way. -
Type "failover" in the box.
-
Select Fail over.
-
To check the progress, in the menu, select Job monitoring.
-
From the NetApp Disaster Recovery menu, select Replication plans.
-
In the dropdown menu, filter to Kubernetes replication plans.
-
Select the replication plan.
-
On the right, select the Actions option
, hover over Recover then select Fail over. -
Choose the snapshot copy you want to use for failover. You can Take snapshot now to create a brand new snapshot that will be copied to the destination cluster or Use latest snapshot to use the most recent snapshot available on the destination cluster.
-
Select Skip protection if you want the service to not automatically create a reverse SnapMirror protection relationship after a replication plan failover. This is useful if you want to perform additional operations on the restored site before you bring it back online within NetApp Disaster Recovery.
-
Enter "Failover" to confirm the action then select Failover.
You can monitor the status of the job in Job monitoring or Replication plans.