

Connect NetApp Ransomware Resilience to a SIEM for threat analysis and detection
 Suggest changes
A security information and event management (SIEM) system centralizes log and event data to provide insights into security events and compliance. NetApp Ransomware Resilience supports automatically sending data to your SIEM for streamlined threat analysis and detection.
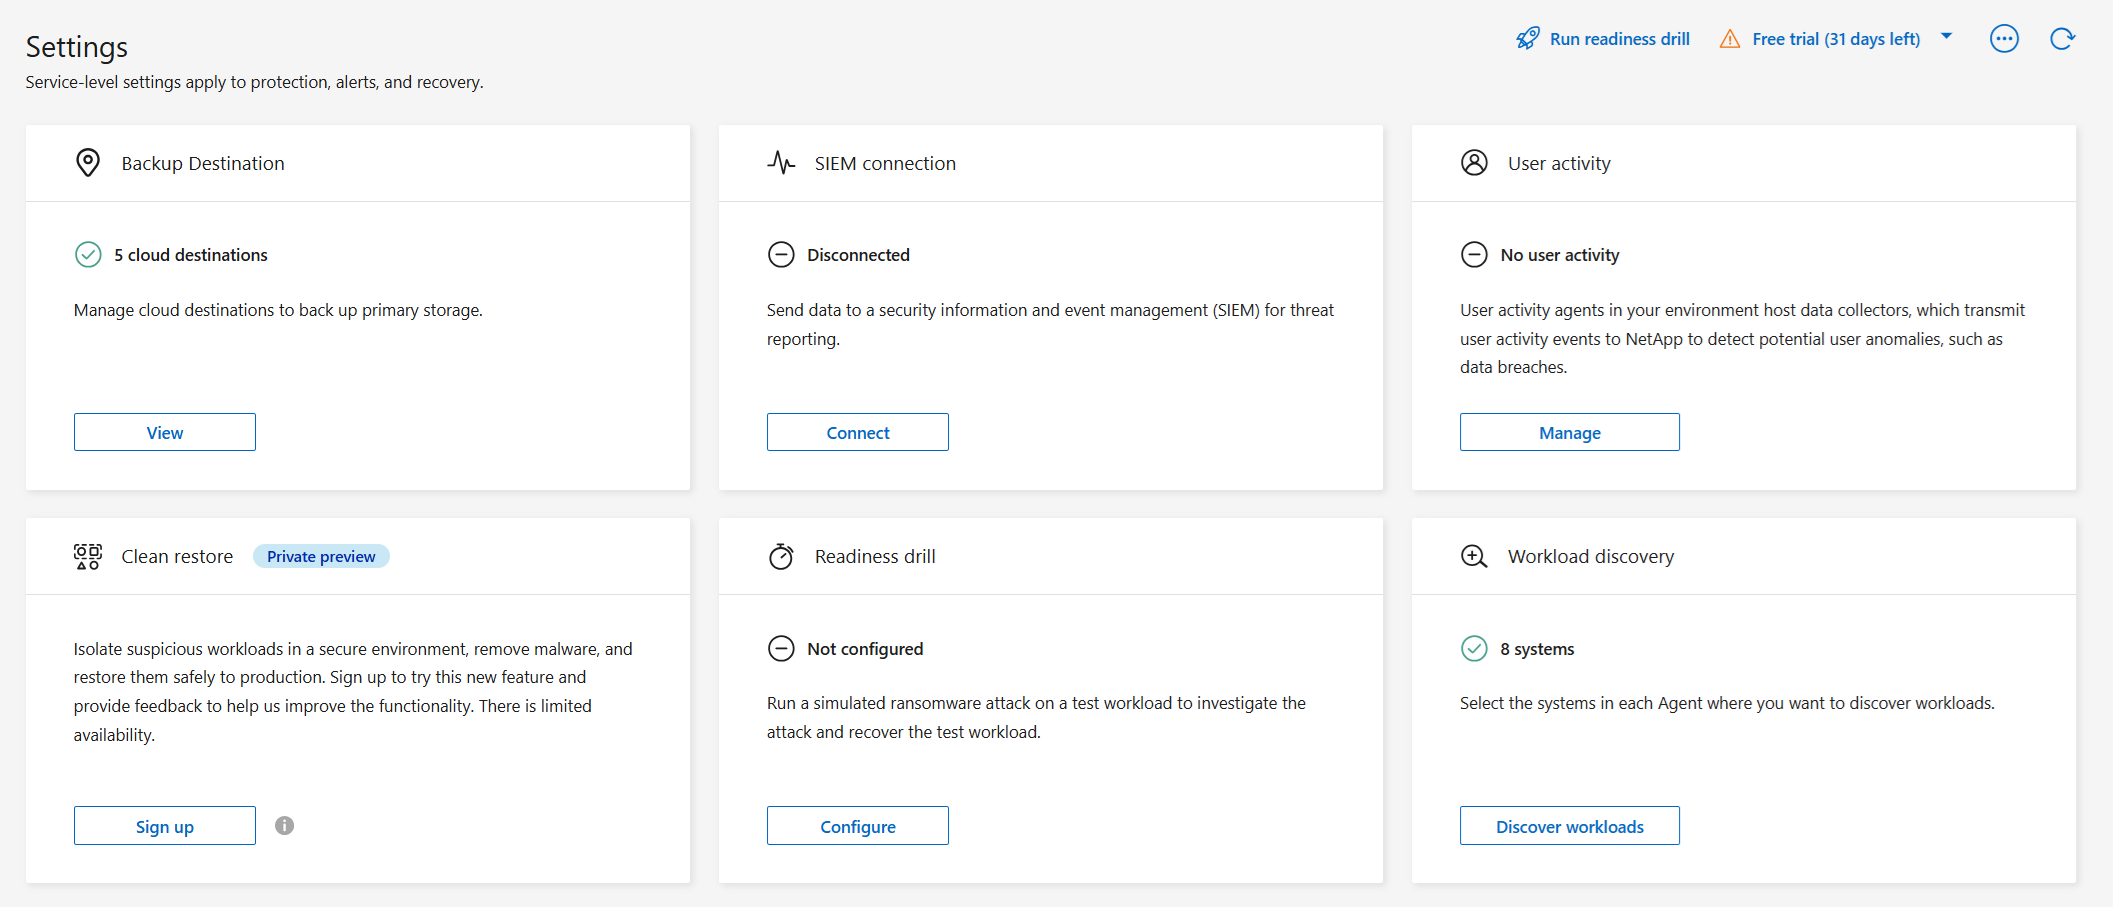
Ransomware Resilience supports configuring any SIEM system with webhooks. Additionally, Ransomware Resilience offers native support for the following SIEM systems:
-
AWS Security Hub
-
Google SecOps
-
Microsoft Sentinel*
-
Splunk Cloud
-
Splunk Enterprise
* Ransomware Resilience also provides an Azure Resource Manager (ARM) template for Microsoft Sentinel.

|
Ransomware Resilience also provides security orchestration, automation, and response (SOAR) playbooks. |
Event data sent to a SIEM
Ransomware Resilience can send the following event data to your SIEM system:
-
context:
-
os: This is a constant with the value of ONTAP.
-
os_version: The version of ONTAP running on the system.
-
connector_id: The ID of the Console agent managing the system.
-
cluster_id: The cluster ID reported by ONTAP for the system.
-
svm_name: The name of the SVM where the alert was found.
-
volume_name: The name of the volume on which the alert is found.
-
volume_id: The ID of the volume reported by ONTAP for the system.
-
incident:
-
incident_id: The incident ID generated by Ransomware Resilience for the volume under attack in Ransomware Resilience.
-
alert_id: The ID generated by Ransomware Resilience for the workload.
-
severity: The severity of the alert levels: "CRITICAL", "HIGH", "MEDIUM", "LOW".
-
description: Details about the alert that was detected, for example, "A potential ransomware attack detected on workload arp_learning_mode_test_2630"
-
title: The display name of the detected alert.
-
criticality: An assessment of the criticality of the volume in your environment: "CRITICAL", "IMPORTANT", "STANDARD".
-
incident_status: The active status of the incident, which can be: "NEW", "RESOLVED", "DISMISSED", "AUTO_RESOLVED".
-
first_detected: The timestamp indicating when the incident was first detected by Ransomware Resilience.
-
is_readiness_drill: A boolean value indicating whether the alert is a drill or an actual incident.
-
protocol: The protocol used by the volume. Possible values are "iSCSI", "NFS", and "SMB".
-
alert_type: The type of threat detected. Possible values are "Encryption", "Data destruction", "Data breach", and "Suspicious user behavior".
-
user_name: The username of the suspicious user associated with the alert.
-
user_id: The user ID of the suspicious user associated with the alert.
-
client_ips: A list of client IP addresses associated with the suspicious activity, applicable only for NFS alerts.

|
The user_name and user_id fields are only pertinent if you've configured user behavior detection. |
Configure AWS Security Hub for threat detection
Before you enable AWS Security Hub in Ransomware Resilience, you need to perform security configurations in AWS Security Hub:
-
Set up permissions in AWS Security Hub.
-
Set up the access key and secret key in AWS Security Hub for authentication. (These steps are not provided here.)
-
Go to AWS IAM console.
-
Select Policies.
-
Create a policy using the following code in JSON format:
{
  "Version": "2012-10-17",
  "Statement": [
    {
      "Sid": "NetAppSecurityHubFindings",
      "Effect": "Allow",
      "Action": [
        "securityhub:BatchImportFindings",
        "securityhub:BatchUpdateFindings"
      ],
      "Resource": [
        "arn:aws:securityhub:*:*:product/*/default",
        "arn:aws:securityhub:*:*:hub/default"
      ]
    }
  ]
}
-
In Ransomware Resilience, select Settings in the sidebar.
-
In the Settings page, select Connect in the SIEM connection tile then choose AWS Security Hub in the dropdown menu.
-
Review the Permissions sections.
-
Expand the Authentication section.
-
Enter the AWS Account then select the account's AWS Region.
-
Enter the Access key and Secret key from AWS Security Hub.
-
-
Select Connect to begin sending SIEM data.
Configure Google SecOps for threat detection
Before you enable Google SecOps in Ransomware Resilience, you need to register the log type and webhook in Google SecOps to enable a connection between services.
-
Go to Google SecOps.
-
Navigate to Settings > SIEM Settings > Available Log Types.
It's recommended that you use the NETAPP_RANSOMWARE_RESILIENCE log type. If you don't want to use this, create a custom log type.
-
If you use the NETAPP_RANSOMWARE_RESILIENCE log type, it includes a prebuilt parser, and no further action is necessary.
If you use a custom log type, you must create a parser. Go to SIEM Settings > Parsers > Create Parser to create the parser.
-
Navigate to Google SecOps.
-
Navigate to Settings > SIEM settings > Feeds.
-
Select Add new feed.
-
Select the log type you used in the Create a log type workflow.
-
Set the Source type to Webhook then save the feed.
-
Open the Details tab. Copy the Webhook endpoint URL to use when you authenticate in Ransomware Resilience.
-
Open the Secret key tab. Generate the secret key or copy it if you've already created one. Save the key to use when you authenticate in Ransomware Resilience.
-
Create an API key using your organization's Google API key process.
-
In Ransomware Resilience, select Settings in the sidebar.
-
In the Settings page, select Connect in the SIEM connection tile then choose Google SecOps from the dropdown menu.
-
Review the Prerequisites and Webhook feed sections.
-
Expand the Authentication section.
-
Enter the Webhook URL you copied from Google SecOps' webhook endpoint URL.
-
Enter the Secret key and API key from Google SecOps.
-
-
Select Connect to begin sending SIEM data.
Configure Microsoft Sentinel for threat detection
Before you enable Microsoft Sentinel in Ransomware Resilience, you need to do the following high-level steps in Microsoft Sentinel:
-
Prerequisites
-
Enable Microsoft Sentinel.
-
Create a custom role in Microsoft Sentinel.
-
Registration
-
Register Ransomware Resilience to receive events from Microsoft Sentinel.
-
Create a secret for the registration.
-
Permissions: Assign permissions to the application.
-
Authentication: Enter authentication credentials for the application.
-
Go to Microsoft Sentinel.
-
Create a Log Analytics workspace.
-
Enable Microsoft Sentinel to use the Log Analytics workspace you just created.
-
Go to Microsoft Sentinel.
-
Select Subscription > Access control (IAM).
-
Enter a Custom role name. Use the name Ransomware Resilience Sentinel Configurator.
-
Copy the following JSON and paste it into the JSON tab.
{ "roleName": "Ransomware Resilience Sentinel Configurator", "description": "", "assignableScopes":["/subscriptions/{subscription_id}"], "permissions": [ ] } -
Review and save your settings.
-
Go to Microsoft Sentinel.
-
Select Entra ID > Applications > App registrations.
-
For the Display name for the application, enter "Ransomware Resilience".
-
In the Supported account type field, select Accounts in this organizational directory only.
-
Select a Default Index where events will be pushed.
-
Select Review.
-
Select Register to save your settings.
After registration, the Microsoft Entra admin center displays the application Overview pane.
-
Go to Microsoft Sentinel.
-
Select Certificates & secrets > Client secrets > New client secret.
-
Add a description for your application secret.
-
Select an Expiration for the secret or specify a custom lifetime.
A client secret lifetime is limited to two years (24 months) or less. Microsoft recommends that you set an expiration value of less than 12 months. -
Select Add to create your secret.
-
Record the secret to use in the Authentication step. The secret is never displayed again after you leave this page.
-
Go to Microsoft Sentinel.
-
Select Subscription > Access control (IAM).
-
Select Add > Add role assignment.
-
For the Privileged administrator roles field, select Ransomware Resilience Sentinel Configurator.
This is the custom role that you created earlier. -
Select Next.
-
In the Assign access to field, select User, group, or service principal.
-
Select Select Members. Then, select Ransomware Resilience Sentinel Configurator.
-
Select Next.
-
In the What user can do field, select Allow user to assign all roles except privileged administrator roles Owner, UAA, RBAC (Recommended).
-
Select Next.
-
Select Review and assign to assign the permissions.
-
Go to Microsoft Sentinel.
-
Enter the credentials:
-
Enter the tenant ID, the client application ID, and the client application secret.
-
Select Authenticate.
After the authentication is successful, an "Authenticated" message appears.
-
-
Enter the Log Analytics workspace details for the application.
-
Select the subscription ID, the resource group, and the Log Analytics workspace.
-
-
In Ransomware Resilience, select Settings in the sidebar.
-
In the Settings page, select Connect in the SIEM connection tile then choose Microsoft Sentinel from the dropdown menu.
-
Review the Prerequisites, Registration, and Permissions sections to ensure you've successfully completed each step.
-
Expand the Authentication section.
-
Enter the Directory (tenant) ID, Application (tenant) ID, and Client secret. Select Authenticate then wait until the UI confirms the credentials have been authenticated.
-
In the dropdown menus, choose the Subscription ID, Resource group, and Log analytics workspace you want to send SIEM data to.
-
-
Select Connect to begin sending SIEM data.
Configure Splunk Cloud and Splunk Enterprise for threat detection
Ransomware Resilience supports threat detection with Splunk Cloud and Splunk Enterprise. Before enabling the Splunk connection in Ransomware Resilience, you need to:
-
Enable an HTTP Event Collector in Splunk Cloud or Enterprise to receive event data via HTTP or HTTPS from the Console.
-
Create an Event Collector token in Splunk Cloud or Enterprise.
|
|
For Splunk Enterprise, you must allow inbound public internet traffic for Ransomware Resilience to be able to push events using the HTTP event collector details provided to it. |
-
Go to your chosen Splunk environment: Cloud or Enterprise.
-
Select Settings > Data Inputs.
-
Select HTTP Event Collector > Global Settings.
-
On the All Tokens toggle, select Enabled.
-
To have the Event Collector listen and communicate over HTTPS rather than HTTP, select Enable SSL.
-
Enter a port in HTTP Port Number for the HTTP Event Collector. Save the port number for the authentication process.
-
Go to Splunk Cloud or Enterprise.
-
Select Settings > Add Data.
-
Select Monitor > HTTP Event Collector.
-
Enter a Name for the token and select Next.
-
Select a Default Index where events will be pushed, then select Review.
-
Confirm that all settings for the endpoint are correct, then select Submit.
-
Copy the token and paste it in another document to have it ready for the Authentication step.
-
In Ransomware Resilience, select Settings in the sidebar.
-
In the Settings page, select Connect in the SIEM connection tile.
-
Choose Splunk as the SIEM provider.
-
Review the Event collector and Token sections to confirm you have the correct information.
-
Expand the Authentication section.
-
Select the Protocol for the HTTP Event Collector. It's recommended that you use HTTPS, but if SSL isn't enabled for the HTTP Event Collector, select HTTP.
-
Enter the Host and Port for the Splunk Cloud instance that runs the HTTP Event Collector. The port should match what you entered in the HTTP event collector process.
-
Enter the event collector token you created in Splunk.
-
-
Select Connect to begin sending SIEM data.
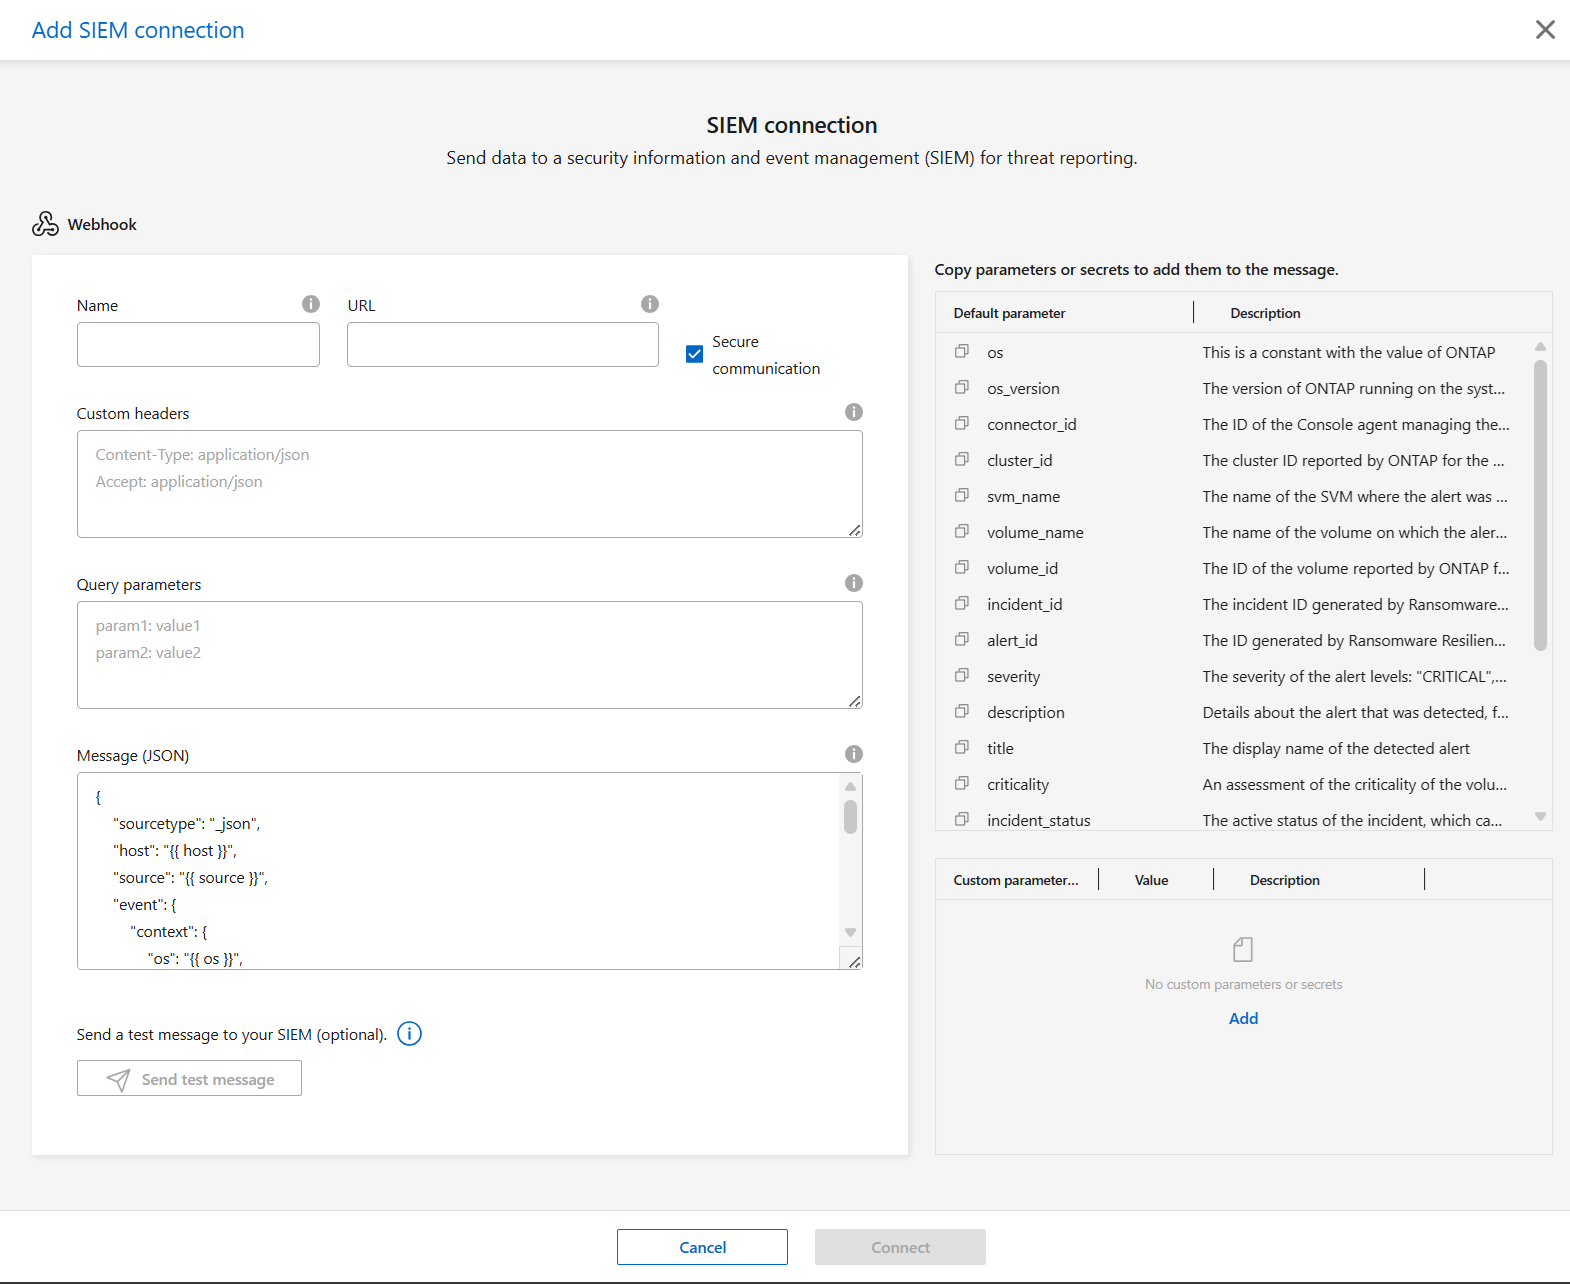
Configure a SIEM with webhooks
Before creating the SIEM connection with Ransomware Resilience, you must have configured the SIEM on its own platform. Follow these steps to configure communication with Ransomware Resilience.
-
In Ransomware Resilience, select Settings.
-
In the SIEM tile, select Connect then Webhooks if this is your first time configuring a SIEM. Otherwise, select Manage. On the overview page, select + Connect then Webhook.
-
Provide the Name of the SIEM product and URL for the connection. The URL can't be encoded.
-
Enter the Custom headers using the format of "Key: Value". Each key-value pair must be entered on a separate line.
-
Review the Message template in JSON format.
To add additional parameters, copy them from the list next to the input fields then paste in the appropriate part of the message. You can also add custom parameters: in the custom parameters, select Add then enter the Name, Value, and Description. Copy and paste to the message section.
-
Optionally, select Send test message to test connectivity.
-
Select Connect to initiate the connection to Ransomware Resilience.
|
|
You can edit the SIEM configuration after creating it. You can edit all fields except for the name. |