Change the host protocol - 5700
 Suggest changes


For an E5700 storage array, you can convert baseboard host ports as follows:
-
Fibre Channel (FC) to iSCSI
-
iSCSI to FC
-
iSER to InfiniBand (IB)
-
SRP to IB
-
NVMe to IB
-
NVMe to RoCE
Step 1: Determine whether you have dual-protocol SFPs
Use SANtricity System Manager to determine what type of SFP transceivers you have. Because these SFPs can be used with both FC and iSCSI protocols, they are referred to as dual-protocol or unified SFPs.
If your current SFPs support data rates of 16 Gbps and 10 Gbps, you can continue to use them after converting the host port protocol.
-
From SANtricity System Manager, select Support.
-
Select the Support Center tile.
-
On the Support Resources tab, locate and select the Storage Array Profile link.
-
Type SFP in the text box, and click Find.
-
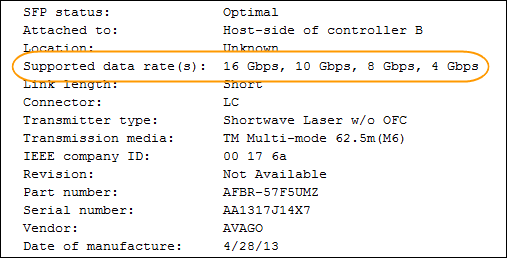
For each SFP listed in the Storage Array Profile, locate the entry for Supported data rate(s).
-
Refer to the table to determine whether you can reuse the SFPs, as follows:
Supported data rate(s) SFP type Supported protocol 16 Gbps, 10 Gbps, 4 Gbps
Dual-protocol
-
FC: 16 Gbps, 4 Gbps
-
iSCSI:10 Gbps
10 Gbps
10 Gbps
iSCSI only
16 Gbps, 8 Gbps, 4 Gbps
16 Gbps
FC only
-
If you have dual-protocol SFPs, you can continue using them after you convert the protocol.
The dual-protocol SFPs do not support 1 Gb iSCSI. If you are converting host ports to iSCSI, be aware that the dual-protocol SFPs support only a 10 Gb link to the connected port. -
If you have 16 Gbps SFPs, and you are converting host ports to iSCSI, you must remove the SFPs and replace them with dual-protocol or 10 Gbps SFPs after converting the protocol. As needed, you can also use 10 Gbps iSCSI copper by using a special Twin-Ax cable with SFPs.
8Gbps FC SFPs are NOT supported in the E28xx or E57xx controllers. ONLY 16Gbps and 32 Gbps FC SFPs are supported. -
If you have 10 Gbps SFPs, and you are converting host ports to FC, you must remove the SFPs from these ports and replace them with dual-protocol or 16 Gbps SFPs after converting the protocol.
-
Step 2: Obtain the feature pack
To obtain the feature pack, you need the serial number from the controller shelf, a Feature Activation Code, and the Feature Enable Identifier for the storage array.
-
Locate the serial number.
-
From SANtricity System Manager, select .
-
With the Support Resources tab selected, scroll to the View top storage array properties section.
-
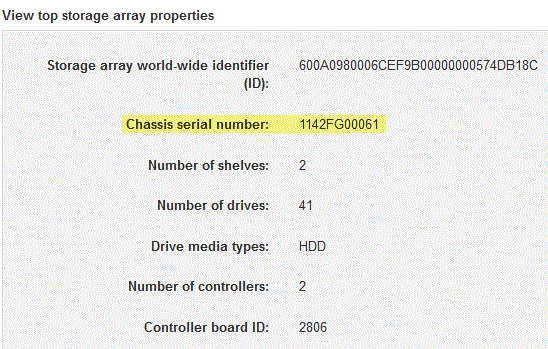
Locate the Chassis Serial Number, and copy this value to a text file.
-
-
Locate the feature pack submodel ID.
-
From the SANtricity System Manager, select Support.
-
Select the Support Center tile.
-
On the Support Resources tab, locate and select the Storage Array Profile link.
-
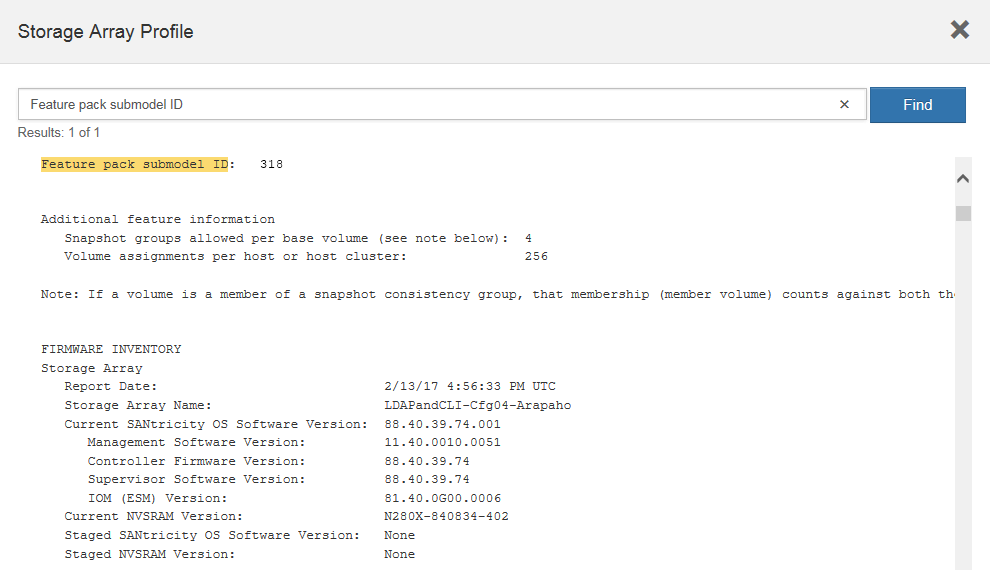
Type feature pack submodel ID in the text box, and click Find.
"Submodel" may also be written as "sub-model." -
Locate the feature pack submodel ID for the starting configuration.
-
-
Using the feature pack submodel ID, locate the corresponding Controller submodel ID for the starting configuration and find the Feature Activation Code for the desired ending configuration within the table below. Then, copy that Feature Activation Code to a text file.
Baseboard ports are disabled when running an NVMe protocol on the HIC. If you are not using the IB HIC, you can ignore the HIC Ports column in the following tables: Encryption Capable Feature Activation Codes (Baseboard Port Only Conversions) Starting Configuration
Ending Configuration
Controller submodel ID
Ports to Convert
Controller Submodel ID
Ports Converted To
Feature Activation Code
360
FC baseboard ports
362
iSCSI baseboard ports
SGL-2SB-ZEX13
362
iSCSI baseboard ports
360
FC baseboard ports
5GI-4TB-ZW3HL
Encryption Capable Feature Activation Codes Starting configuration
Ending configuration
Controller Submodel ID
Baseboard Ports
HIC Ports
Controller Submodel ID
Baseboard Ports
HIC Ports
Feature Activation Code
360
FC
iSER
361
FC
SRP
UGG-XSB-ZCZKU
362
iSCSI
iSER
SGL-2SB-ZEX13
363
iSCSI
SRP
VGN-LTB-ZGFCT
382
Not Available
NVMe/IB
KGI-ISB-ZDHQF
403
Not Available
NVMe/RoCE or NVMe/FC
YGH-BHK-Z8EKB
361
FC
SRP
360
FC
iSER
JGS-0TB-ZID1V
362
iSCSI
iSER
UGX-RTB-ZLBPV
363
iSCSI
SRP
2G1-BTB-ZMRYN
382
Not Available
NVMe/IB
TGV-8TB-ZKTH6
403
Not Available
NVMe/RoCE or NVMe/FC
JGM-EIK-ZAC6Q
362
iSCSI
iSER
360
FC
iSER
5GI-4TB-ZW3HL
361
FC
SRP
EGL-NTB-ZXKQ4
363
iSCSI
SRP
HGP-QUB-Z1ICJ
383
Not Available
NVMe/IB
BGS-AUB-Z2YNG
403
Not Available
NVMe/RoCE or NVMe/FC
1GW-LIK-ZG9HN
363
iSCSI
SRP
360
FC
iSER
SGU-TUB-Z3G2U
361
FC
SRP
FGX-DUB-Z5WF7
362
iSCSI
SRP
LG3-GUB-Z7V17
383
Not Available
NVMe/IB
NG5-ZUB-Z8C8J
403
Not Available
NVMe/RoCE or NVMe/FC
WG2-0IK-ZI75U
382
Not Available
NVMe/IB
360
FC
iSER
QG6-ETB-ZPPPT
361
FC
SRP
XG8-XTB-ZQ7XS
362
iSCSI
iSER
SGB-HTB-ZS0AH
363
iSCSI
SRP
TGD-1TB-ZT5TL
403
Not Available
NVMe/RoCE or NVMe/FC
IGR-IIK-ZDBRB
383
Not Available
NVMe/IB
360
FC
iSER
LG8-JUB-ZATLD
361
FC
SRP
LGA-3UB-ZBAX1
362
iSCSI
iSER
NGF-7UB-ZE8KX
363
iSCSI
SRP
3GI-QUB-ZFP1Y
403
Not Available
NVMe/RoCE or NVMe/FC
5G7-RIK-ZL5PE
403
Not Available
NVMe/RoCE or NVMe/FC
360
FC
iSER
BGC-UIK-Z03GR
361
FC
SRP
LGF-EIK-ZPJRX
362
iSCSI
iSER
PGJ-HIK-ZSIDZ
363
iSCSI
SRP
1GM-1JK-ZTYQX
382
Not Available
NVMe/IB
JGH-XIK-ZQ142
Non-Encryption Feature Activation Codes (Baseboard Port Only Conversions) Starting configuration
Ending Configuration
Controller submodel ID
Ports to Convert
Controller Submodel ID
Ports Converted To
Feature Activation Code
365
FC baseboard ports
367
iSCSI baseboard ports
BGU-GVB-ZM3KW
367
iSCSI baseboard ports
366
FC baseboard ports
9GU-2WB-Z503D
Non-Encryption Feature Activation Codes Starting configuration
Ending configuration
Controller submodel ID
Baseboard ports
HIC ports
Controller submodel ID
Baseboard ports
HIC ports
Feature Activation Code
365
FC
iSER
366
FC
SRP
BGP-DVB-ZJ4YC
367
iSCSI
iSER
BGU-GVB-ZM3KW
368
iSCSI
SRP
4GX-ZVB-ZNJVD
384
Not Available
NVMe/IB
TGS-WVB-ZKL9T
405
Not Available
NVMe/RoCE or NVMe/FC
WGC-GJK-Z7PU2
366
FC
SRP
365
FC
iSER
WG2-3VB-ZQHLF
367
iSCSI
iSER
QG7-6VB-ZSF8M
368
iSCSI
SRP
PGA-PVB-ZUWMX
384
Not Available
NVMe/IB
CG5-MVB-ZRYW1
405
Not Available
NVMe/RoCE or NVMe/FC
3GH-JJK-ZANJQ
367
iSCSI
iSER
365
FC
iSER
PGR-IWB-Z48PC
366
FC
SRP
9GU-2WB-Z503D
368
iSCSI
SRP
SGJ-IWB-ZJFE4
385
Not Available
NVMe/IB
UGM-2XB-ZKV0B
405
Not Available
NVMe/RoCE or NVMe/FC
8GR-QKK-ZFJTP
368
iSCSI
SRP
365
FC
iSER
YG0-LXB-ZLD26
366
FC
SRP
SGR-5XB-ZNTFB
367
iSCSI
SRP
PGZ-5WB-Z8M0N
385
Not Available
NVMe/IB
KG2-0WB-Z9477
405
Not Available
NVMe/RoCE or NVMe/FC
2GV-TKK-ZIHI6
384
Not Available
NVMe/IB
365
FC
iSER
SGF-SVB-ZWU9M
366
FC
SRP
7GH-CVB-ZYBGV
367
iSCSI
iSER
6GK-VVB-ZZSRN
368
iSCSI
SRP
RGM-FWB-Z195H
405
Not Available
NVMe/RoCE or NVMe/FC
VGM-NKK-ZDLDK
385
Not Available
NVMe/IB
365
FC
iSER
GG5-8WB-ZBKEM
366
FC
SRP
KG7-RWB-ZC2RZ
367
iSCSI
iSER
NGC-VWB-ZFZEN
368
iSCSI
SRP
4GE-FWB-ZGGQJ
405
Not Available
NVMe/RoCE or NVMe/FC
NG1-WKK-ZLFAI
405
Not Available
NVMe/RoCE or NVMe/FC
365
FC
iSER
MG6-ZKK-ZNDVC
366
FC
SRP
WG9-JKK-ZPUAR
367
iSCSI
iSER
NGE-MKK-ZRSW9
368
iSCSI
SRP
TGG-6KK-ZT9BU
384
Not Available
NVMe/IB
AGB-3KK-ZQBLR
If your controller submodel ID is not listed, contact NetApp Support. -
In System Manager, locate the Feature Enable Identifier.
-
Go to .
-
Scroll down to Add-ons.
-
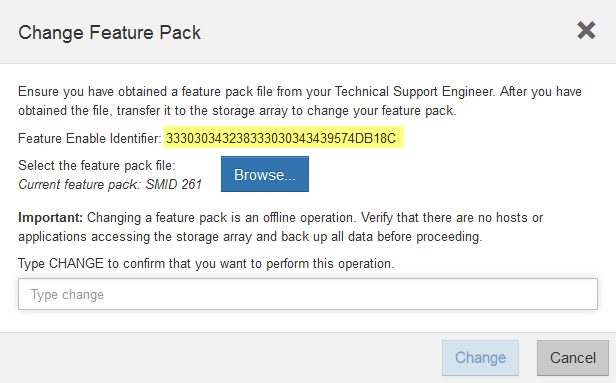
Under Change Feature Pack, locate the Feature Enable Identifier.
-
Copy and paste this 32-digit number to a text file.
-
-
Go to NetApp License Activation: Storage Array Premium Feature Activation, and enter the information required to obtain the feature pack.
-
Chassis serial number
-
Feature Activation Code
-
Feature Enable Identifier
The Premium Feature Activation web site includes a link to “Premium Feature Activation Instructions.” Do not attempt to use those instructions for this procedure.
-
-
Choose whether to receive the key file for the feature pack in an email or download it directly from the site.
Step 3: Stop host I/O
Stop all I/O operations from the host before converting the protocol of the host ports. You cannot access data on the storage array until you successfully complete the conversion.
This task applies only if you are converting a storage array that has already been in use.
-
Ensure that no I/O operations are occurring between the storage array and all connected hosts. For example, you can perform these steps:
-
Stop all processes that involve the LUNs mapped from the storage to the hosts.
-
Ensure that no applications are writing data to any LUNs mapped from the storage to the hosts.
-
Unmount all file systems associated with volumes on the array.
The exact steps to stop host I/O operations depend on the host operating system and the configuration, which are beyond the scope of these instructions. If you are not sure how to stop host I/O operations in your environment, consider shutting down the host. Possible data loss — If you continue this procedure while I/O operations are occurring, the host application might lose data because the storage array will not be accessible.
-
-
If the storage array participates in a mirroring relationship, stop all host I/O operations on the secondary storage array.
-
Wait for any data in cache memory to be written to the drives.
The green Cache Active LED (1) on the back of each controller is on when cached data needs to be written to the drives. You must wait for this LED to turn off.

-
From the Home page of SANtricity System Manager, select View Operations in Progress.
-
Wait for all operations to complete before continuing with the next step.
Step 4: Change the feature pack
Change the feature pack to convert the host protocol of the baseboard host ports, the IB HIC ports, or both types of ports.
-
From SANtricity System Manager, select .
-
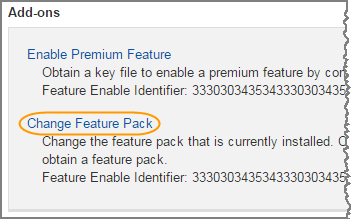
Under Add-ons, select Change Feature Pack.
-
Click Browse, and then select the feature pack you want to apply.
-
Type CHANGE in the field.
-
Click Change.
The feature pack migration begins. Both controllers automatically reboot twice to allow the new feature pack to take effect. The storage array returns to a responsive state after the reboot is complete.
-
Confirm the host ports have the protocol you expect.
-
From SANtricity System Manager, select Hardware.
-
Click Show back of shelf.
-
Select the graphic for either Controller A or Controller B.
-
Select View settings from the context menu.
-
Select the Host Interfaces tab.
-
Click Show more settings.
-
Review the details shown for the baseboard ports and the HIC ports (labeled “slot 1”), and confirm that each type of port has the protocol you expect.
-


