Remove E-Series controllers
 Suggest changes


After preparing for the upgrade, you can remove the controllers, and if necessary, remove the battery.
Step 1: Remove controller
Remove the controller canister so you can upgrade it with a new one. You must disconnect all cables and remove any SFP transceivers. Then, you can slide the controller canister out of the controller shelf.
Make sure you have the following:
-
An ESD wristband or take other antistatic precautions.
-
Labels to identify each cable that is connected to the controller canister.
Perform the following steps for each controller in the controller-drive tray.
If you are upgrading controllers in a duplex controller-drive tray, repeat all steps to remove the second controller canister.
-
Put on an ESD wristband or take other antistatic precautions.
-
Label each cable that is attached to the old controller canister. Depending on the HIC configuration, you might be able to reconnect some cables after you replace the controller canister.
-
Disconnect all of the interface and Ethernet cables from the old controller canister.
If fiber-optic cables are present, you can use the two release levers to partially remove the controller canister. Opening these release levers makes it easier to press down the fiber-optic cable release tab.
To prevent degraded performance, do not twist, fold, pinch, or step on the cables. -
If the old controller canister contains a Fibre Channel HIC or an InfiniBand HIC, remove the small form-factor pluggable (SFP+) transceivers (for Fibre Channel) or quad SFP (QSFP+) transceivers (for InfiniBand) from the HIC, and save them for possible reuse.
-
Remove controller A.
-
Unlock and rotate the release handles out to release the controller canister.
-
Using the release handles and your hands, pull the controller canister out of the controller-drive tray.
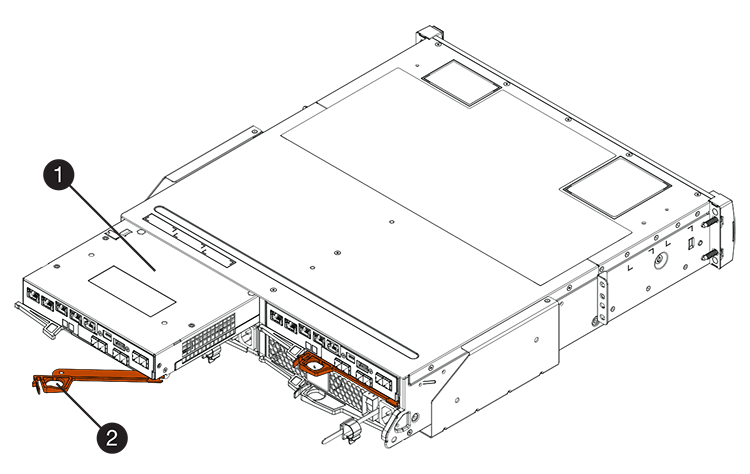
The following figure is an example of the general location for the release handles on controller models. Controller shelves and controller-drive trays have a similar configuration for the release handles.

(1) Controller canister
(2) Cam handle
-
-
Set the old controller canister on a flat, static-free surface near the controller-drive tray with the release levers up. Position the controller canister so that you can access the top cover.
-
(Conditional) If you are upgrading controllers in a duplex controller-drive tray, repeat all steps to remove the second controller canister.
If you intend to use the battery from the old controller in the new controller, go to the next part of the section; otherwise go to Install new controllers.
Step 2: Remove battery
Remove the battery only if you intend to use the battery from the old controller canister in the new controller canister.
-
Press down on both of the top cover latch buttons on the old controller canister, and slide the top cover to the rear of the canister.
-
On your model of controller-drive tray, release the tab that secures the battery to the controller canister to release the old battery.
-
Remove the battery by sliding it towards the rear of the old controller canister.
Go to Install new controllers.


