Suggest changes

 PDFs
PDFs
SnapCenter Configuration
This chapter describes how to set up SnapCenter for SAP HANA backup:
-
Adding the NetApp ASA Storage Clusters to SnapCenter
-
Creating of SAP HANA Backup policies
-
Creating a database user for SnapCenter
-
Registering SAP HANA host at SnapCenter
-
Configuring of SAP HANA Instance at SnapCenter
Add Storage Clusters to SnapCenter
Add the NetApp ASA Storage Clusters to SnapCenter.

|
Management and monitoring of SnapMirror active sync requires REST API access. Therefore, SnapCenter must be configured to use REST APIs for storage communications. The parameter "IsRestEnabledForStorageConnection" in the configuration file C:\Program Files\NetApp\SMCore\SMCoreServiceHost.dll.config must be set to true: <add key="IsRestEnabledForStorageConnection" value="true"> |
-
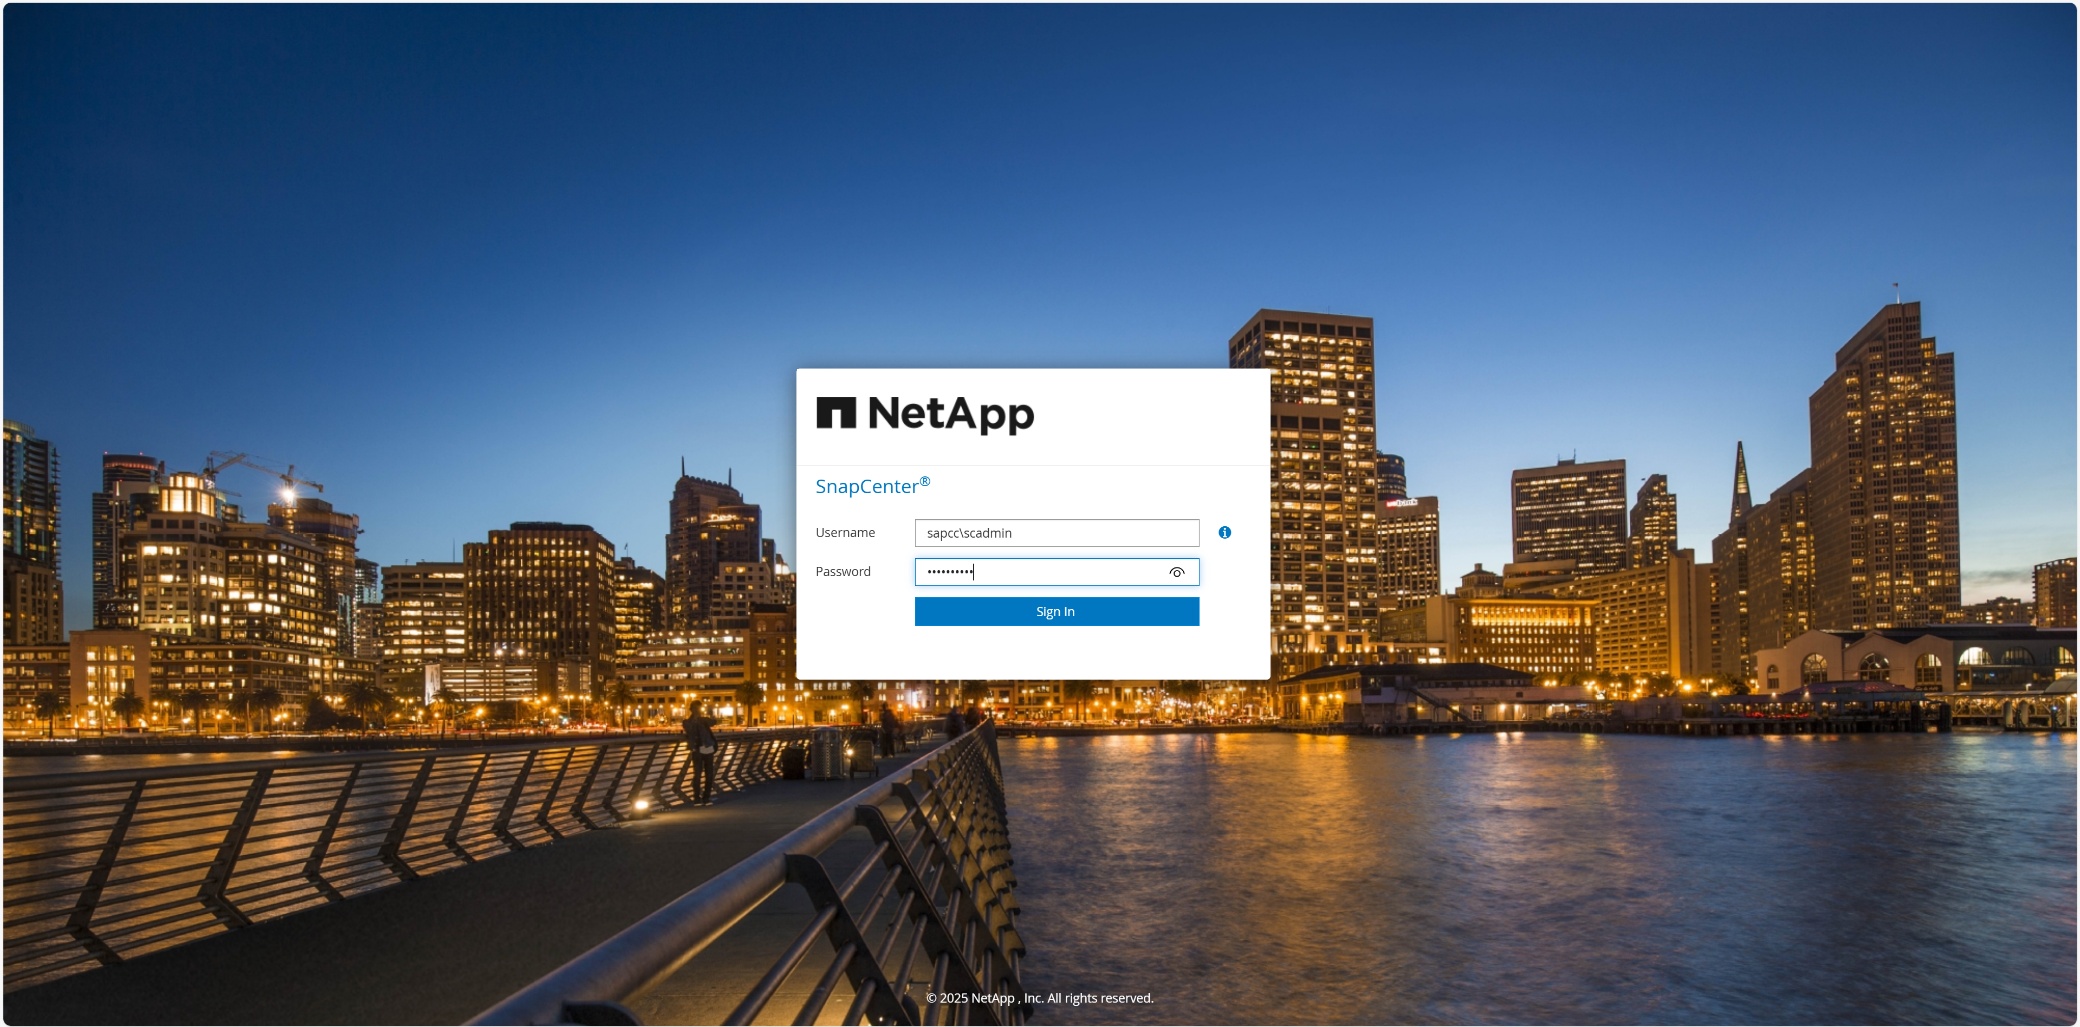
Logon to the SnapCenter GUI.
-
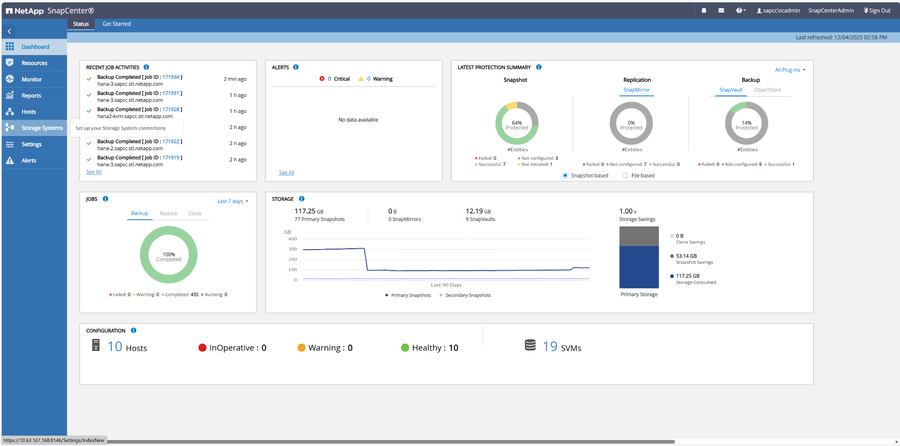
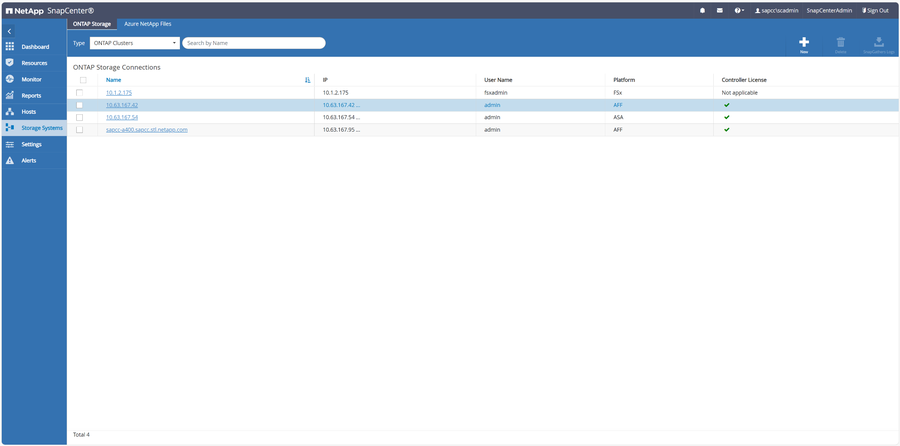
Navigate the “Storage Systems” at left menu.
-
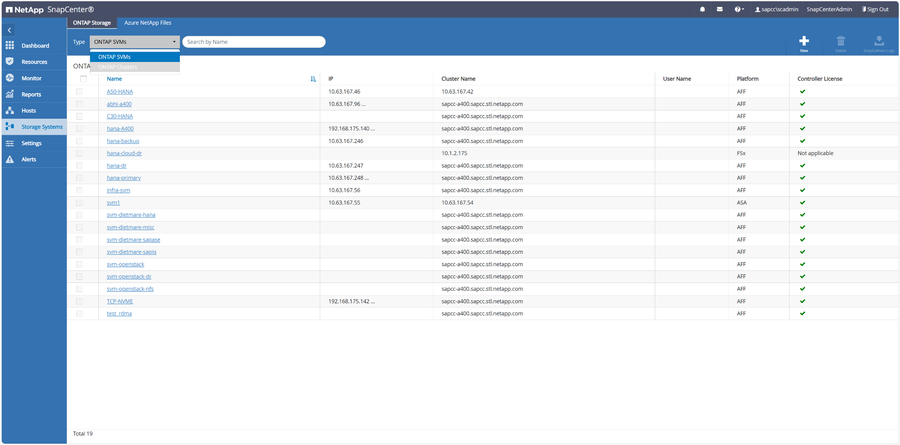
Choose “ONTAP Clusters” as type
-
Press “New” to add your storage system
-
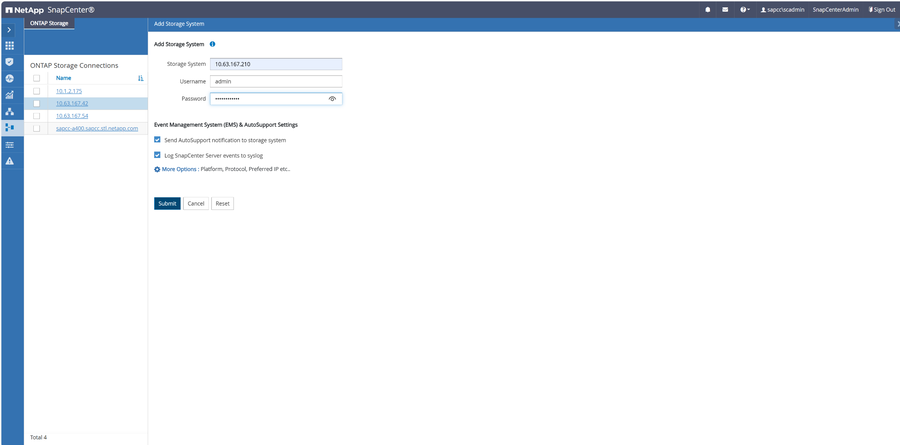
Provide the connection details of your system and press “Submit”.
-
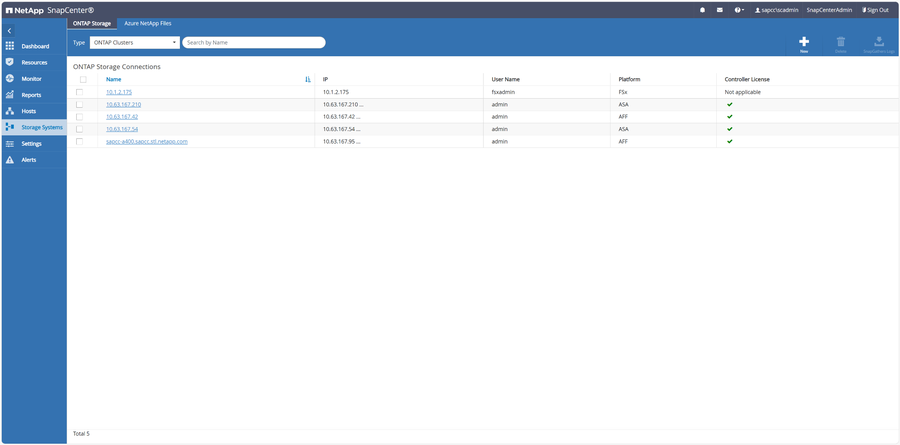
The storage system has been added successfully.
|
|
Even if the cluster has been added as whole all SVMs being management need a management IP address assigned. Otherwise, the different workflows will fail. |
Add VMware Plugin to SnapCenter
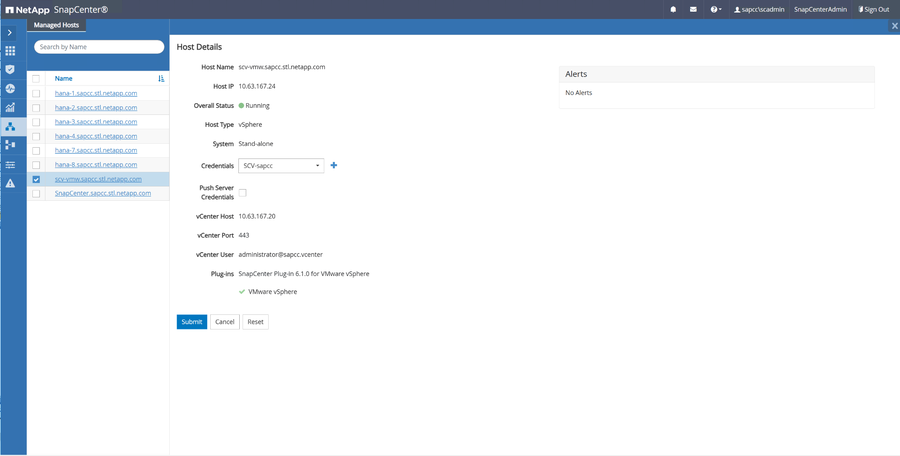
Before the host can be added in SnapCenter the SnapCenter plugin for VMware vSphere must be deployed within the VMware environment. See also Deploy SnapCenter Plug-in for VMware vSphere.
Note: Credentials must be set during host add workflow, where vSphere can be selected as a host type.
Create SAP HANA Backup policies
This chapter describes how to define backup policies for SAP HANA using SMas for synchronously replication and SnapVault/SnapMirror for Backup purposes.
-
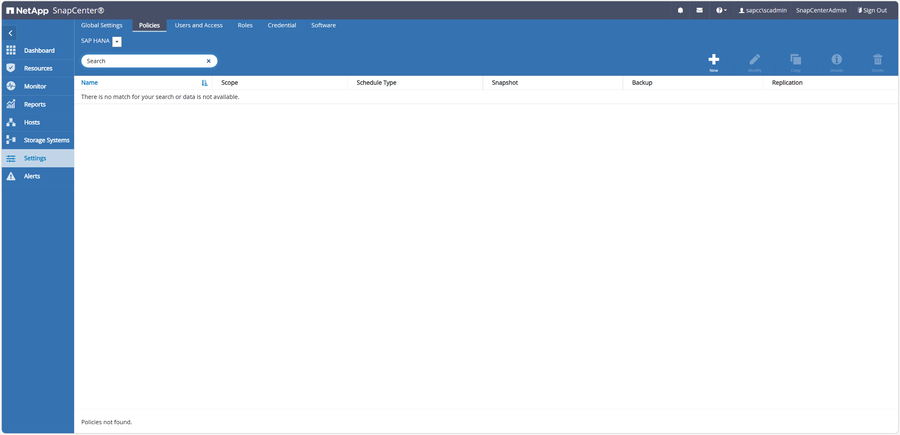
Navigate to “Settings” at the left menu and choose the “Policies” tab. Click the “plus sign” to add new policy
-
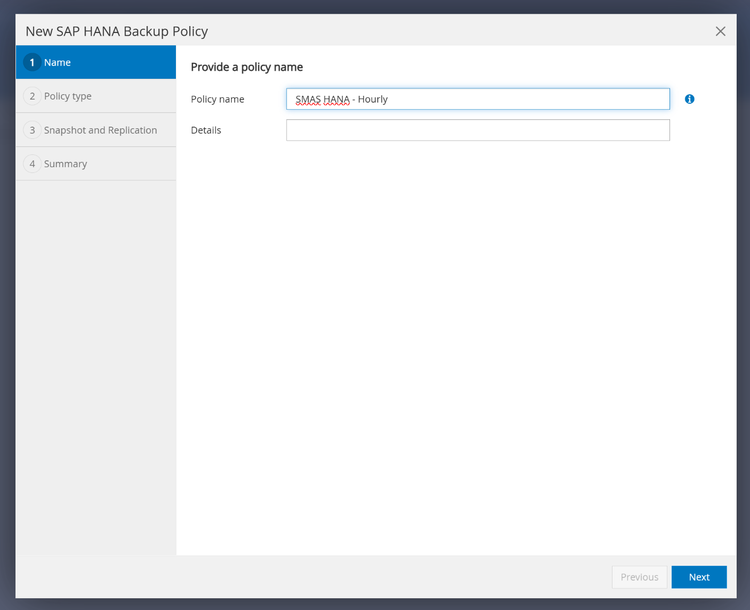
Provide a name for the new policy, e.g. SMAS HANA – Hourly and details if desired. Press “Next” to continue.
-
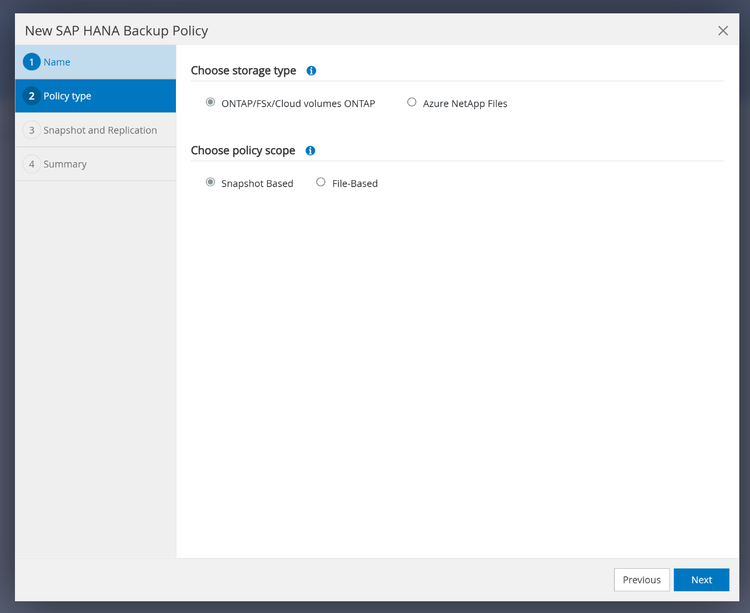
Keep to default settings and press “Next” to continue.
-
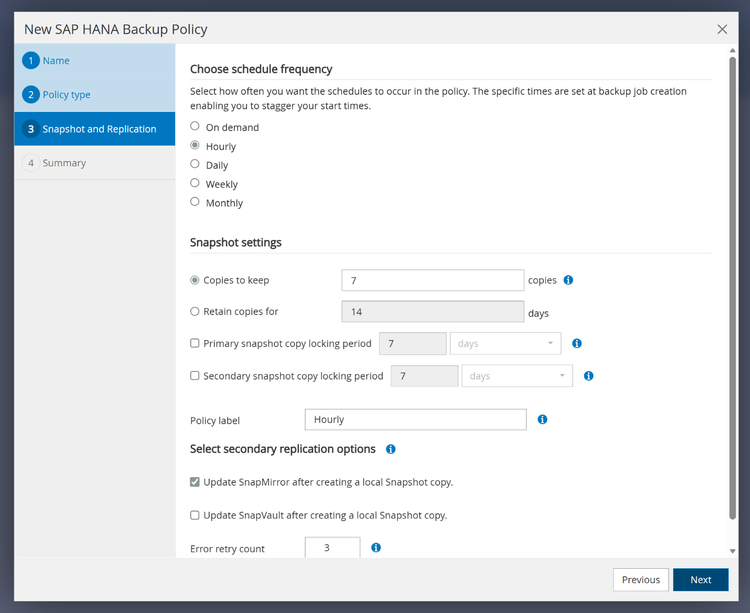
Choose “Hourly” as schedule frequency, set the amount or time of Snapshots to keep and select “Update SnapMirror after creating a local Snapshot copy” as this enables SnapCenter discover the Snapshots at the SMaS destination as well. Press “Next”.
-
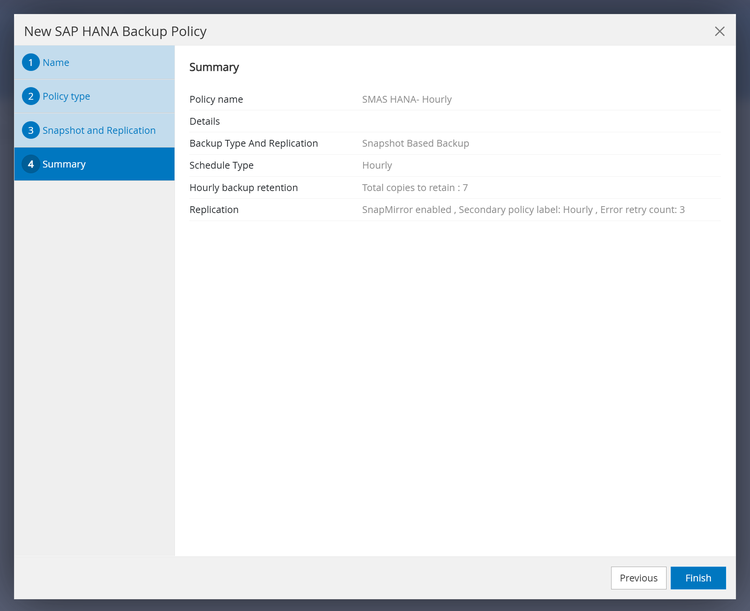
Check the Summary and press finish to create the new policy.
-
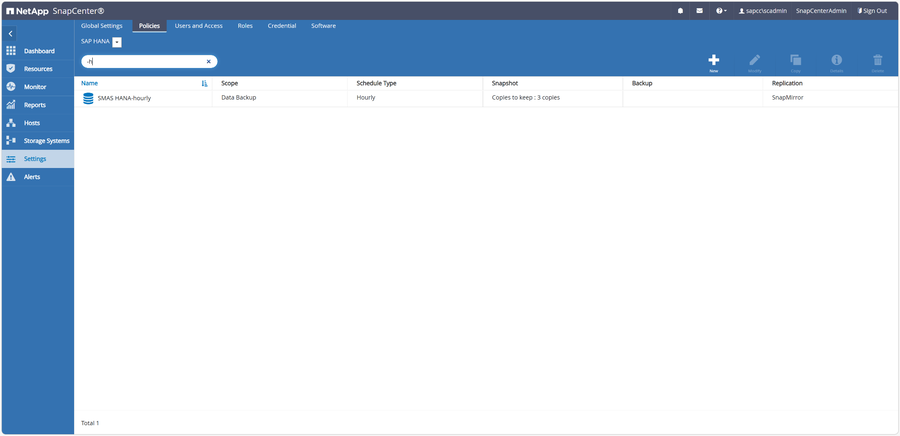
After the Hourly policy for the SnapMirror Active Sync replication has been created, create an additional daily policy for backup replication using SnapVault.
-
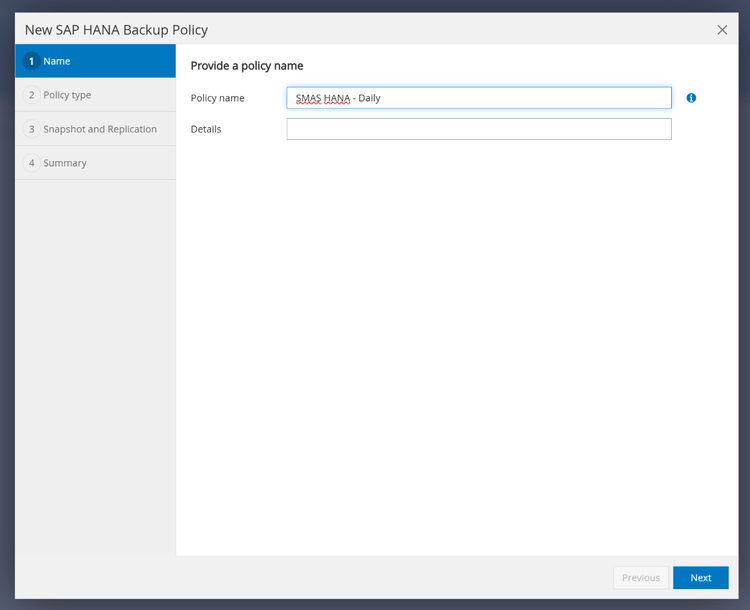
Provide a name for the new policy, e.g. SMAS HANA – Daily and details if desired. Press “Next” to continue.
-
Keep to default settings and press “Next” to continue.
-
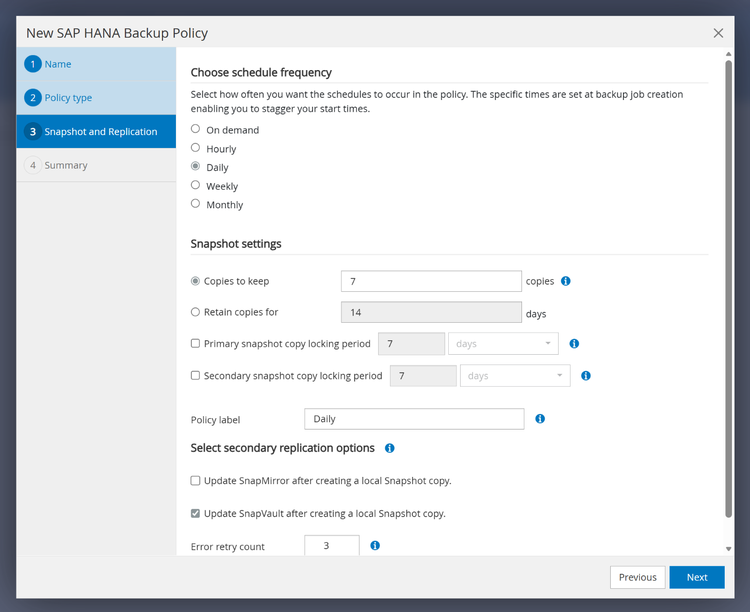
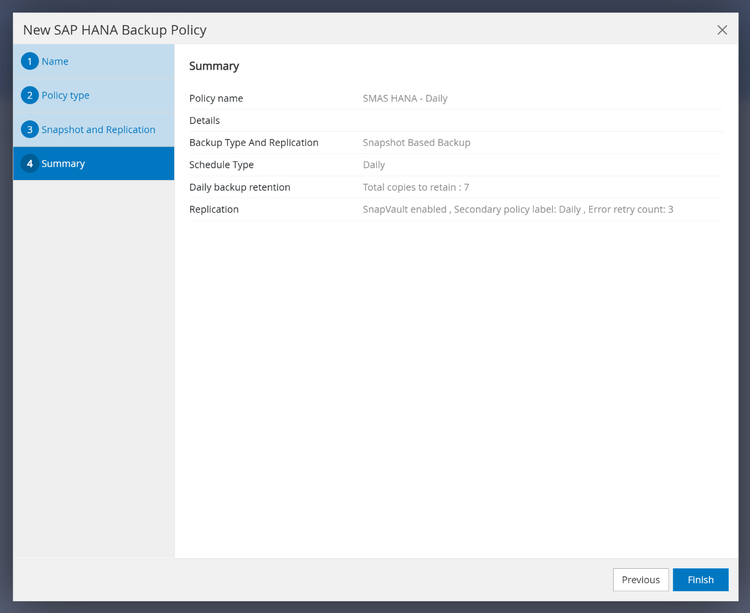
Choose “Daily” as schedule frequency and define the amount or time to keep the snapshots. Choose “Update SnapVault after creating a local Snapshot copy”. Press “Next” to continue.
-
Check the Summary and press finish
-
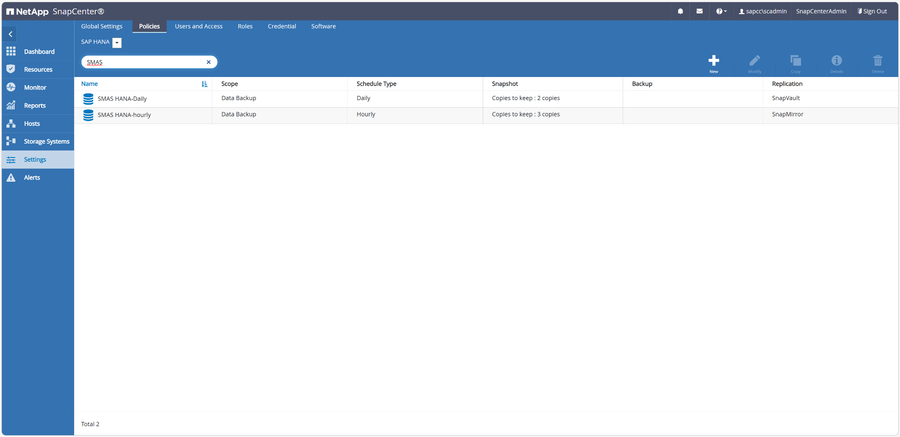
A daily and hourly backup policy has been defined. If desired create additional policies with different schedule types.
Create SnapCenter user at SAP HANA Instance
SnapCenter needs to communicate with the SAP HANA Instance to be able to create consistent backups. Therefore, a user needs to be created at the database for SnapCenter:
-
Logon to your servers shell and switch to user SIDadm.
and connect to the systemdb of your SAP HANA system:
hdbsql -i <instance_number> -d SYSTEMDB -u SYSTEM -
Create the user and assign the privileges BACKUP ADMIN, CATALOG READ, DATABASE BACKUPADMIN, and DATABASE RECOVERY OPERATOR:
CREATE USER SNAPCENTER PASSWORD "<InitialPassword>"
NO FORCE_FIRST_PASSWORD_CHANGE;
ALTER USER SNAPCENTER2 DISABLE PASSWORD LIFETIME;
GRANT BACKUP ADMIN TO SNAPCENTER;
GRANT CATALOG READ TO SNAPCENTER;
GRANT DATABASE BACKUP ADMIN TO SNAPCENTER;
GRANT DATABASE RECOVERY OPERATOR TO SNAPCENTER; -
The user for SnapCenter has been created successfully.
-
Create hdbuserstore key
Logon to your servers shell and switch to user SIDadm.
Execute the following command to create the key used by SnapCenter later on:
hdbuserstore set <SIDKEY> <hana-server>:3<instance-number>13 <USER> <password>
Register SAP HANA Instance at SnapCenter
Once the database user has been created for SnapCenter, the SAP HANA Instance will be added to SnapCenter.
-
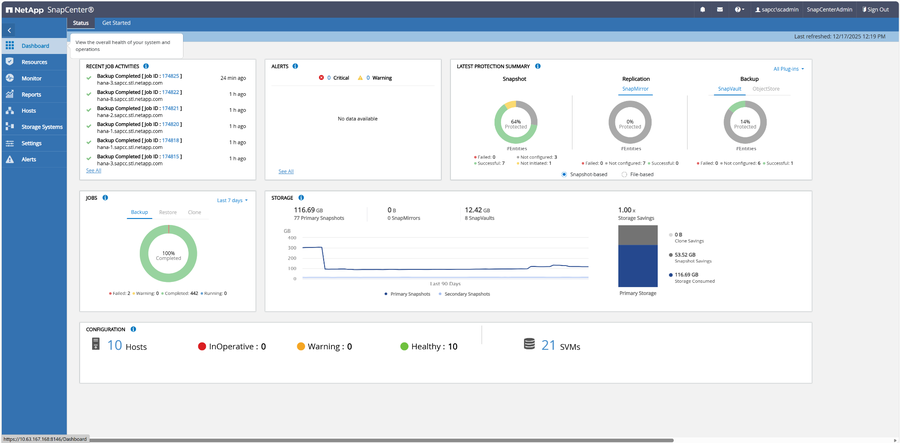
Logon at the SnapCenter GUI
-
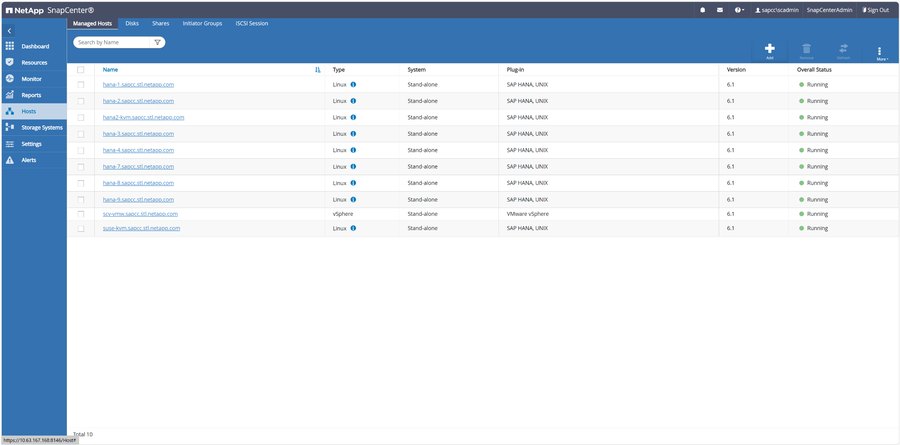
Choose “Hosts” at the side menu and click on the “Add” button (plus sign).
-
Choose “Linux” as “Host Type”, provide the hostname or IP address of your host and the SID of your SAP HANA system. Choose already available Credentials or create new one by clicking on the plus sign next to “Credentials”. Select “SAP HANA” as Plug-in to be installed.
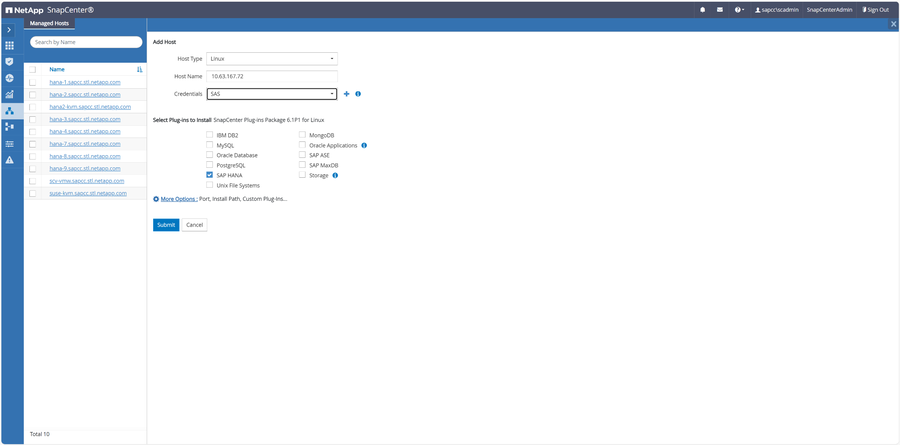
-
If you want to create new credentials provide the required information and press “Ok”.
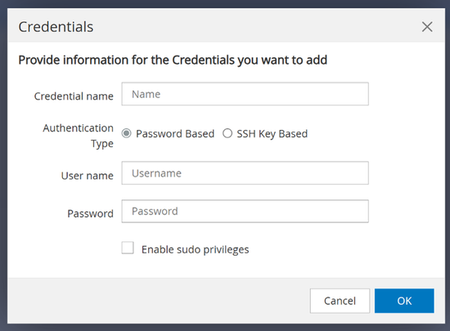
-
Once the credential have been chosen press “Submit”.
-
-
Check the fingerprint and press the “Confirm and Submit” button afterwards.
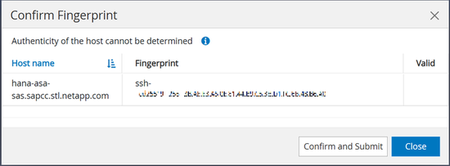
-
The host has been successfully added to SnapCenter.
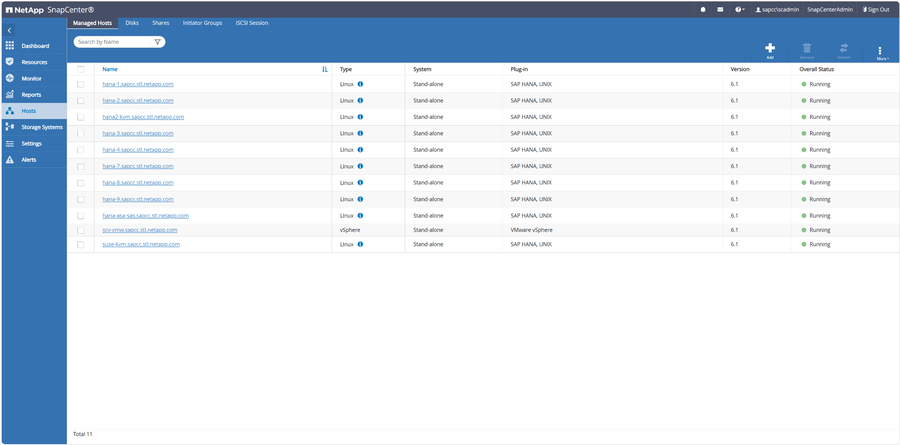
Configuring of SAP HANA Instance at SnapCenter
Once the database host has been added to SnapCenter, the backup for the SAP HANA Instance can be configured.
-
Choose resources on the left menu and SAP HANA as Resource
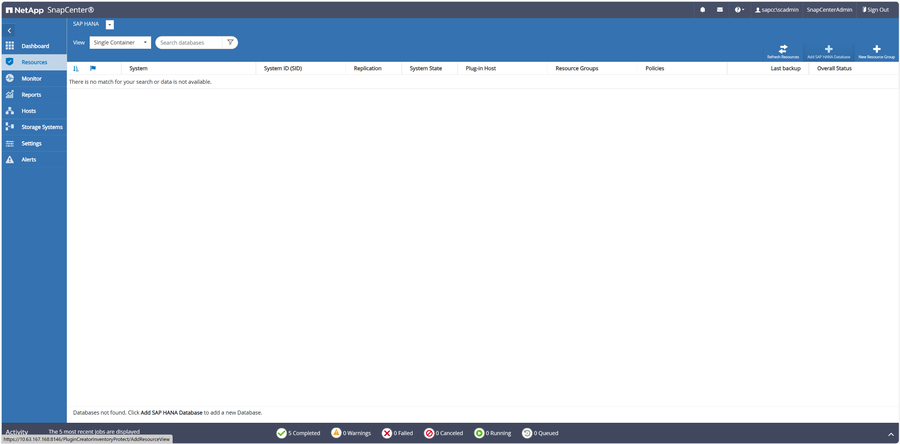
-
Change the view to the type of your system, e.g. “Multitenant Database Container” and click on the line of your database
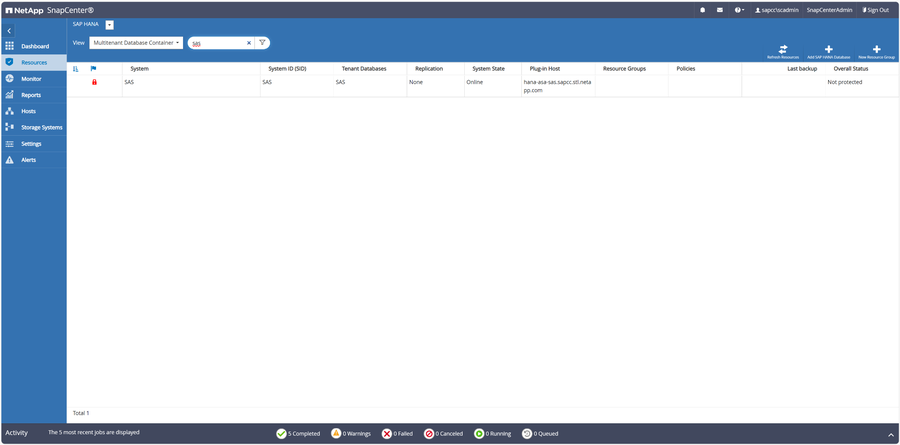
-
Provide the previously created HDB Secure User Store key and press “OK”.
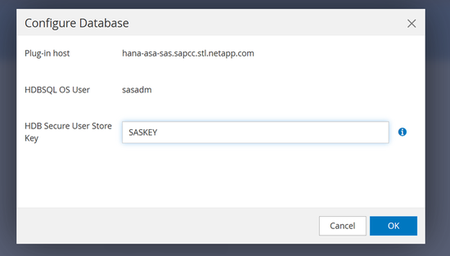
-
Define your desired snapshot name and press next.
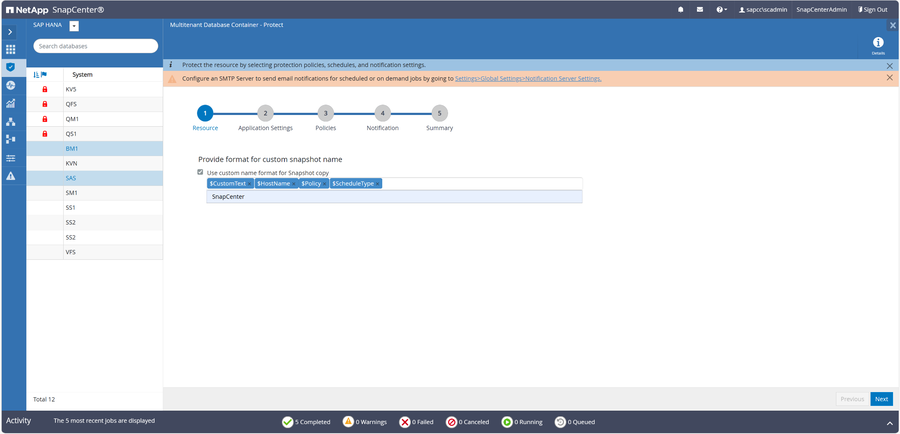
-
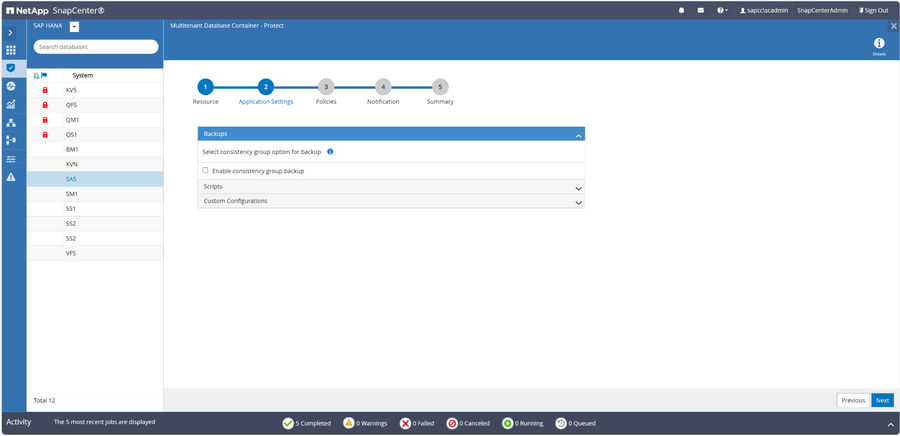
Press ”Next” as for auto discovered system usually nothings needs to be set
-
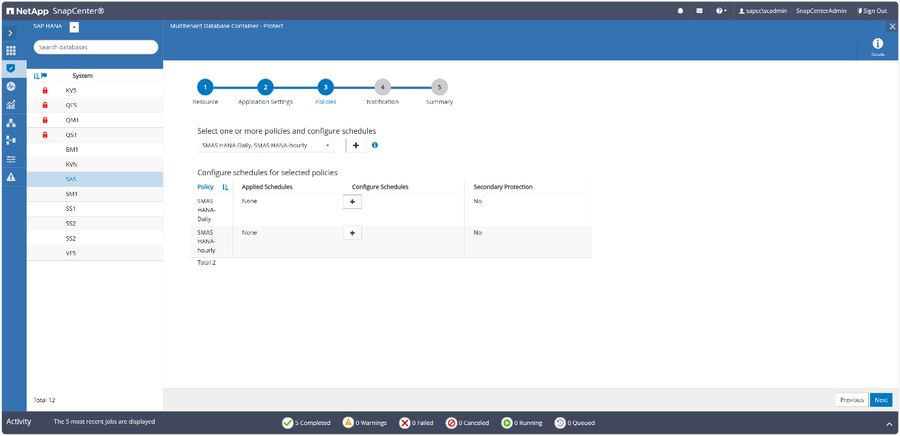
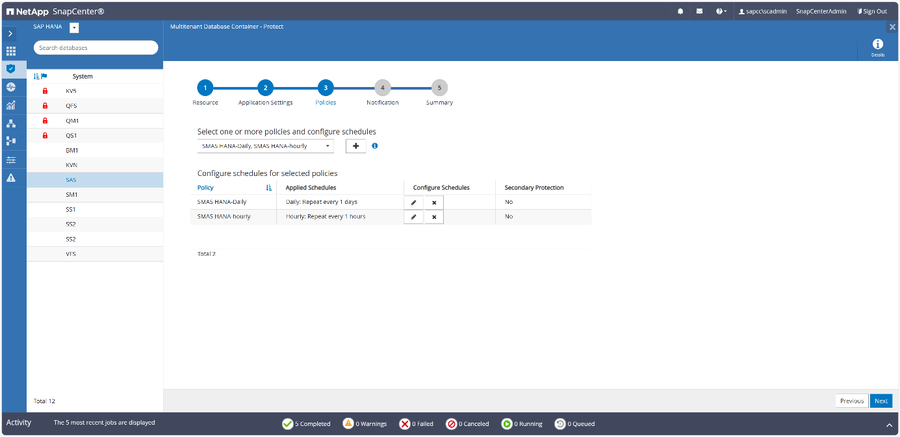
Choose or create and choose your desired policies, e.g. one daily and one hourly policy. Press the plus sign to configure the schedules
-
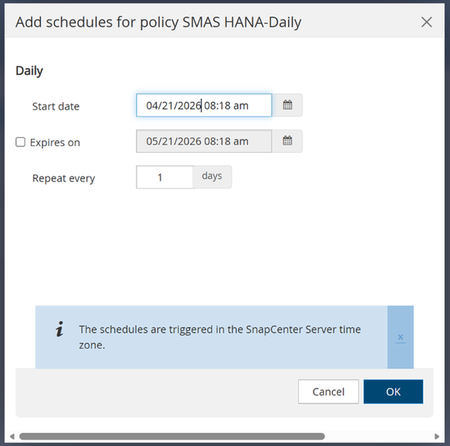
Set the start data and time and an expire date (optional) for the daily policy and press ok.
-
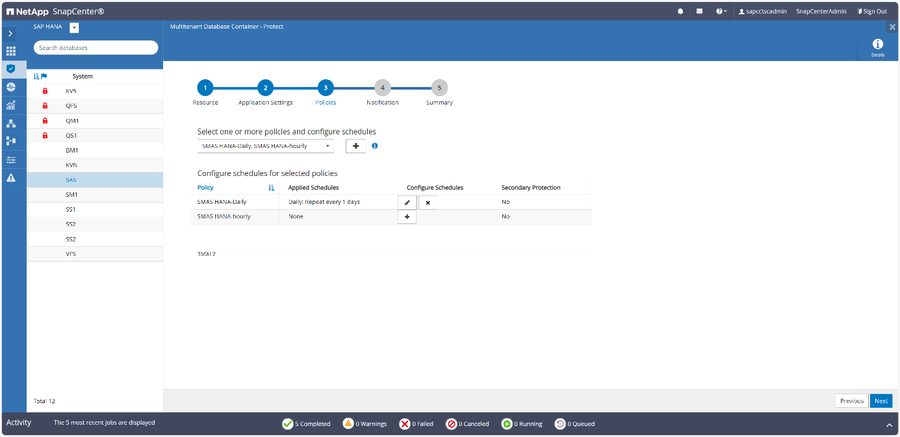
Click on the plus sign to configure the hourly policy.
-
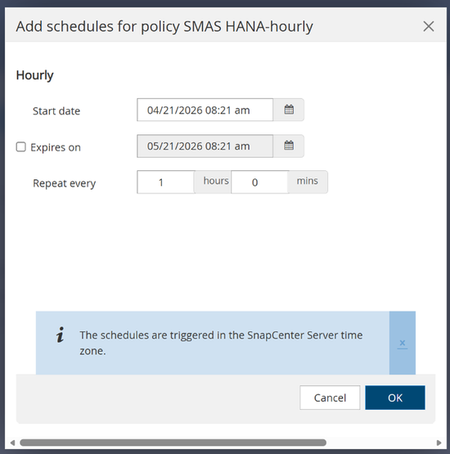
Set the start data and time and an expire date (optional) for the hourly policy and press ok
-
Press “Next” to continue
-
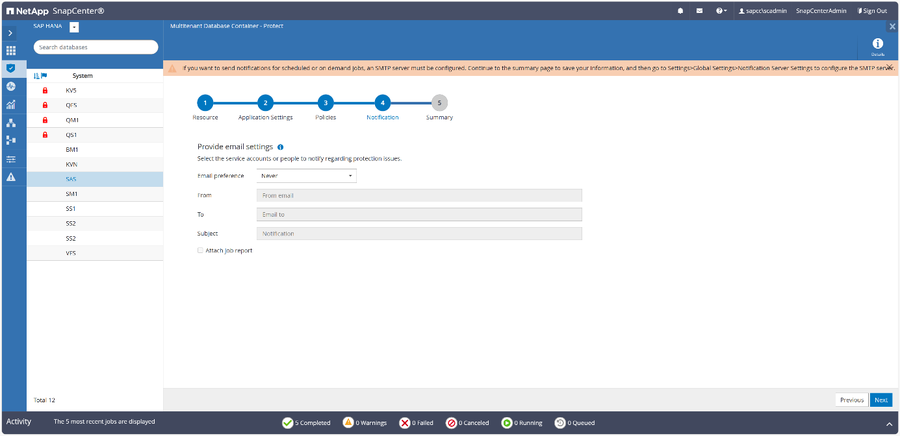
Setup the notification as desired and press “Next”,
-
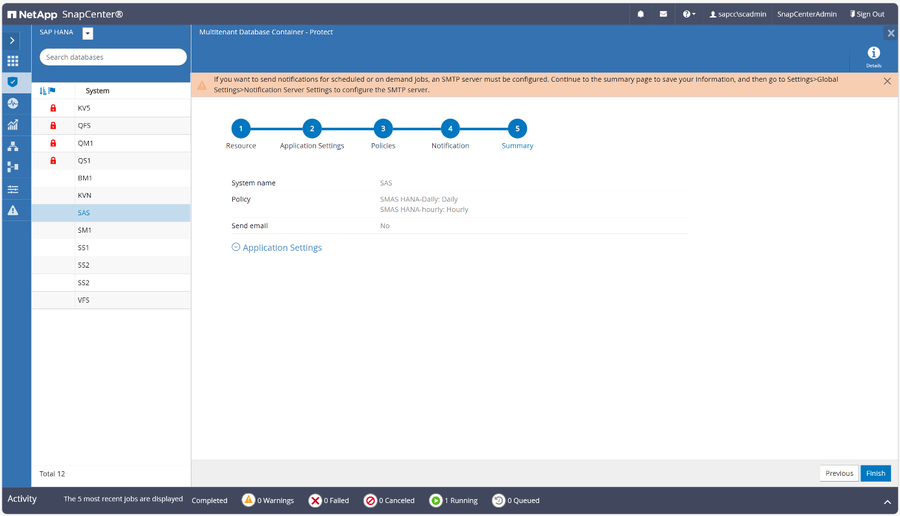
Check the summary of your settings and press “Finish”.
-
Once the backups have been run successfully you will see on overview of the existing backups.