

Configure NFS storage for Proxmox VE
 Suggest changes
Configure NFS storage for Proxmox Virtual Environment (VE) using NetApp ONTAP. Use session trunking with NFS v4.1 or later for fault tolerance and performance enhancements with multiple network connections to the storage system.
ONTAP supports all NFS versions supported by Proxmox VE. Use session trunking for fault tolerance and performance enhancements. Session trunking requires NFS v4.1 or later.
If you are new to ONTAP, use System Manager Interface to complete these tasks.
Storage administrator tasks
Complete these tasks to provision NFS storage on ONTAP for use with Proxmox VE.
-
Enable the SVM for NFS. Refer to ONTAP 9 documentation.
-
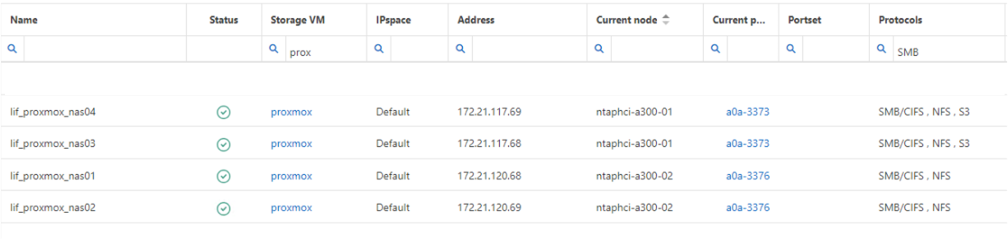
Create at least two LIFs per controller. Follow the steps from the documentation. For reference, here is a screenshot of LIFs used in the lab.
Show example
-
Create or update an NFS export policy to provide access to Proxmox VE host IP addresses or subnets. Refer to Export policy creation and Add rule to an export policy.
-
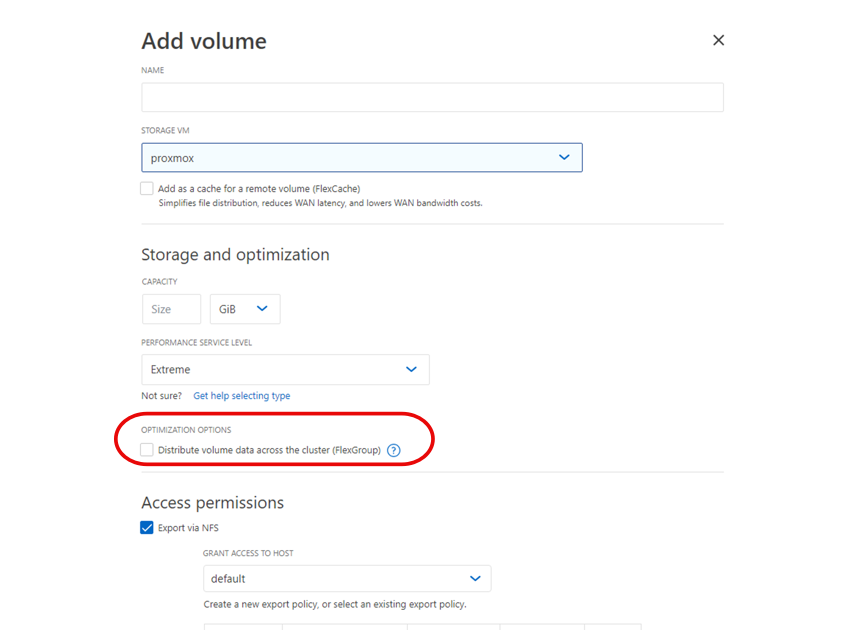
Create a volume. For large capacity needs (>100TB), check the option to distribute data across the cluster to use FlexGroup. If using FlexGroup, consider enabling pNFS on the SVM for better performance by following Enable pNFS on SVM. When using pNFS, ensure the Proxmox VE hosts has data access to all controllers (data LIFs). Ensure Anti-Ransomware protection is enabled on the volume.
Show example
-
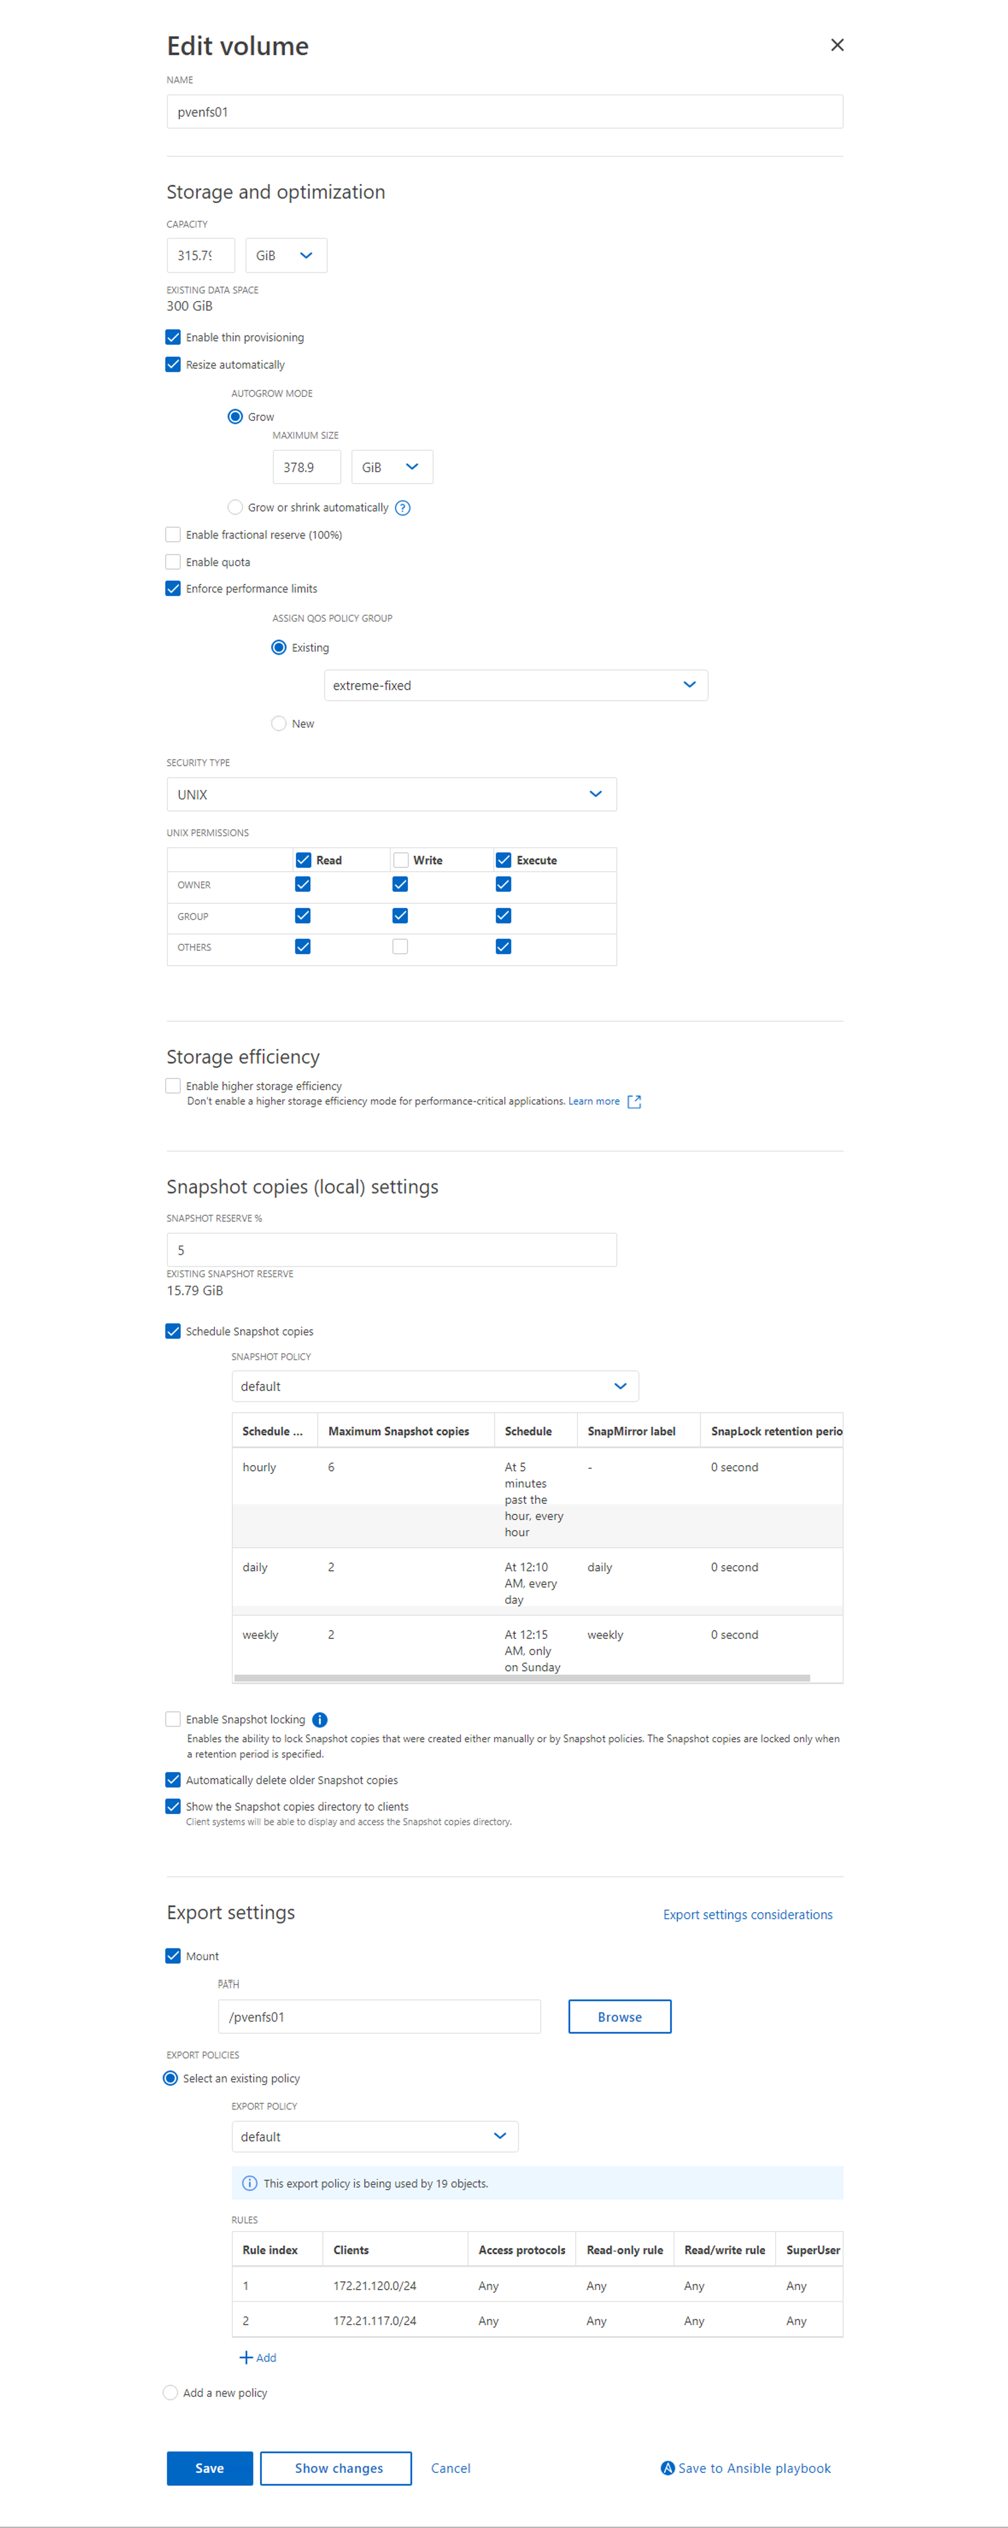
Assign the export policy to the volume.
Show example
-
Notify the virtualization administrator that the NFS volume is ready.
Virtualization administrator tasks
Complete these tasks to add the NFS volume as storage in Proxmox VE and configure nConnect or session trunking for improved performance.
-
Ensure at least two interfaces are configured in different VLANs for fault tolerance. Use NIC bonding.
-
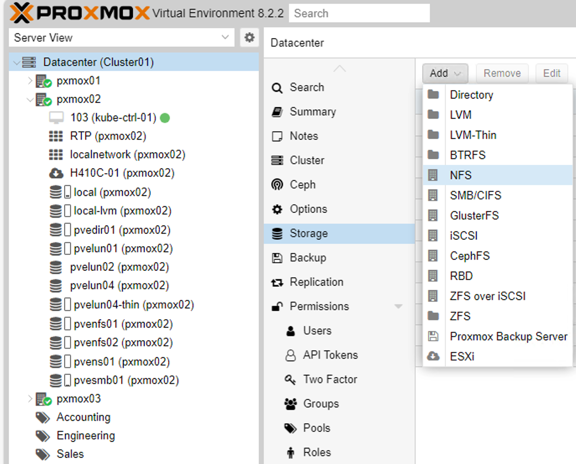
Using the Management UI at
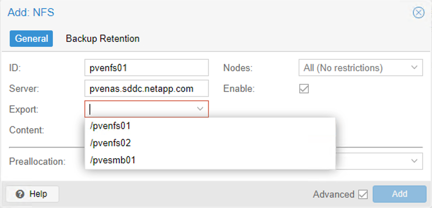
https:<proxmox-node>:8006, click Datacenter, select Storage, click Add, and select NFS.Show example
-
Enter the details. After providing the server information, the NFS exports should populate. Select from the list and choose the content options.
Show example
-
To enable the nConnect option, open a shell on any cluster node and run the following command, where
<storage id>is the storage ID created in the previous step:pvesm set <storage id> --options nconnect=4To use session trunking, ensure NFS v4.1 is used and set the trunkdiscovery and max_connect options:
pvesm set <storage id> --options vers=4.1,trunkdiscovery,max_connect=16 -
The following shows the content in /etc/pve/storage.cfg for the configured storage:
Show example

-
To verify the nConnect option is set, run
ss -an | grep :2049on any Proxmox VE host and check for multiple connections to the NFS server IP. To verify pNFS is enabled, runnfsstat -cand check the layout-related metrics. Based on data traffic, multiple connections to data LIFs should be visible.

|
In session trunking, the nconnect option is set on only one of the trunk interfaces. With pNFS, the nconnect option is set on metadata and data interfaces. For production environments, use either nConnect or session trunking, not both. |