


Hot-swap an LED USB module in a FAS9500 system


 Suggest changes

 PDFs
PDFs
The LED USB module in your FAS9500 system provides connectivity to console ports and system status. Replacing it does not require tools and does not interrupt service.
Step 1: Replace the LED USB module
-
Remove the old LED USB module:
Animation - Remove/install LED-USB module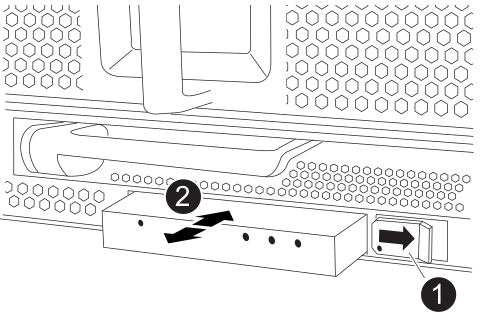

Locking button

USB LED module
-
With the bezel removed, locate the LED USB module at the front of the chassis, on the bottom left side.
-
Slide the latch to partially eject the module.
-
Pull the module out of the bay to disconnect it from the midplane. Do not leave the slot empty.
-
-
Install the new LED USB module:
-
Align the module to the bay with the notch in the corner of the module positioned near the slider latch on the chassis. The bay prevents you from installing the module upside down.
-
Push the module into the bay until it is fully seated flush with the chassis.
The module clicks audibly when it is secure and connected to the midplane.
-
Step 2: Return the failed component
-
Return the failed part to NetApp, as described in the RMA instructions shipped with the kit. See the Part Return and Replacements page for further information.