


Integrate Cloud Volumes ONTAP systems with Microsoft OneLake for AI and analytics


 Suggest changes

 PDFs
PDFs
You can integrate Cloud Volumes ONTAP with Microsoft Fabric using Microsoft OneLake to make existing Cloud Volumes ONTAP NAS data available to Microsoft analytics and AI services such as Power BI, Azure AI Search, OpenAI, and Microsoft Copilot. The integration requires no data movement or duplication. The integration uses ONTAP S3 multi-protocol access to connect Cloud Volumes ONTAP to an existing Microsoft Fabric lakehouse.
Create a root CA certificate for the ONTAP S3 server
A certificate is required to secure HTTPS connections between Microsoft OneLake and the ONTAP S3 server. In this procedure, you create a root CA certificate on Cloud Volumes ONTAP and generate a signed certificate for the ONTAP S3 server.
For more information about creating and installing a CA certificate, refer to Create and install a CA certificate on an ONTAP S3-enabled SVM.
Verify that you have a running Cloud Volumes ONTAP system before starting the integration process.
-
Connect to the Cloud Volumes ONTAP system using SSH from a VM in your virtual network (vNet) or through Azure Bastion.
-
Create a root CA certificate.
security certificate create -vserver <svm_cvo> -type root-ca -common-name <svm_cvo_ca>For example,
security certificate create -vserver svm_cvopsa2 -type root-ca -common-name svm_cvo_ca The certificate's generated name for reference: svm_cvo_ca_159D1587CE21E9D4_svm_cvo_ca -
Generate a certificate signing request (CSR) and private key.

Choose a fully qualified domain name (FQDN) for the ONTAP S3 endpoint (S3 server name), for example, s3.cvo.com, and specify it as the value for both the-common-nameand-dns-nameparameters. Note this value because you need it later when you configure the ONTAP S3 server.security certificate generate-csr -common-name s3.cvo.com -dns-name s3.cvo.com -
The command generates a CSR and a private key. Copy and save both the values. You need the CSR in the next step and the private key later when you configure the ONTAP S3 service. Copy the CSR and the private key from the output.
-
Sign the certificate request using the root CA certificate. When prompted, paste the CSR generated in the previous step.
-
ca_cert_name- name of the root CA certificate -
ca_cert_serial_number- the CA serial numbersecurity certificate sign -vserver svm_name -ca <ca_cert_name> -ca-serial <ca_cert_serial_number>
-
-
The command returns a signed certificate. Copy and save the certificate content. You use this certificate and the private key generated in the previous step when you configure the ONTAP S3 server.
Configure Cloud Volumes ONTAP S3
Configure ONTAP S3 multi-protocol access to allow OneLake to read data stored in your Cloud Volumes ONTAP volumes.
-
Configure ONTAP S3 for the Cloud Volumes ONTAP system.
-
On NetApp Console, from the left navigation menu, select Storage > Management.
-
Select a Console agent. Then select the Cloud Volumes ONTAP system, and then, from the right menu options, select System Manager.
-
Enable S3 protocol access on the SVM. Refer to the ONTAP documentation: Enable S3 client access to NAS data for information.
During configuration, use the signed certificate and private key created in the previous section. 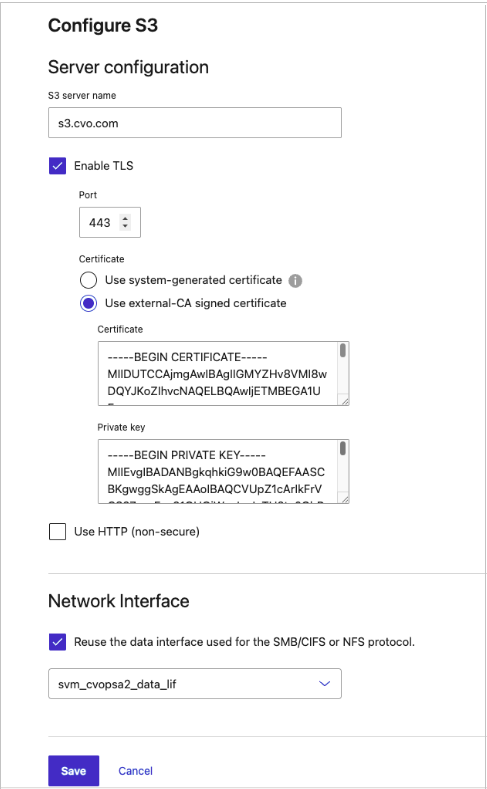
-
Select Reuse the data interface used for the SMB/CIFS or NFS protocol. to reuse the existing LIF or configure a new data LIF.
-
-
Copy and save the access key and secret access key. You need to use these credentials when creating the OneLake shortcut.
-
Create a read-only group to access the S3 buckets from OneLake.
-
After enabling the S3 server, configure the S3 server and add a new group. Select Groups and select Add.
-
Add a new group with the S3 user that was automatically created in the previous step, and assign it the
ReadOnlyAccesspolicy.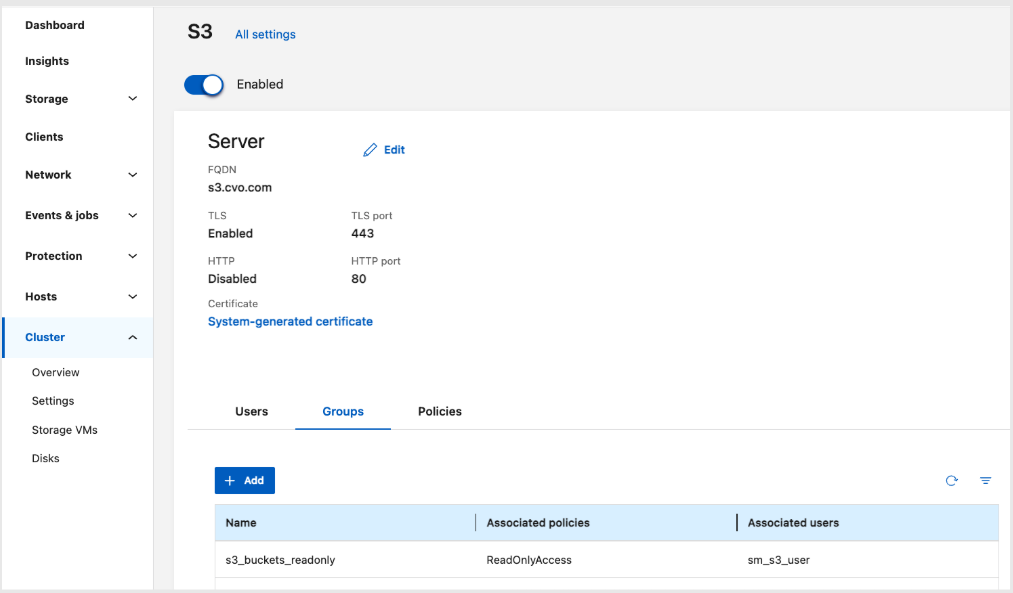
-
Create an S3 NAS bucket
Create an S3 NAS bucket. Refer to the ONTAP documentation: Create an S3 NAS bucket for information.
|
|
When creating the bucket, select the NAS volume that contains the data you want to make available through OneLake. |
Install and configure Microsoft on-premises data gateway
Install and configure a Microsoft on-premises data gateway on a VM in the same virtual network (vNet) as your Cloud Volumes ONTAP system. Install the Cloud Volumes ONTAP root CA certificate on the VM to establish trust for HTTPS connections to the ONTAP S3 server.
-
Ensure that there is network connectivity between the VM and the ONTAP S3 server you created in the previous section.
-
Ensure that the ONTAP S3 server name configured earlier resolves to the IP address of the data interface (LIF) assigned to the ONTAP S3 server, and that the VM can successfully resolve this name.
-
Install the CA certificate of Cloud Volumes ONTAP.
-
Open a browser on the VM and navigate to your S3 server:
https://<CVO-S3-SERVER-URL> -
Select the lock icon on the address bar, and then select Certificate details.
-
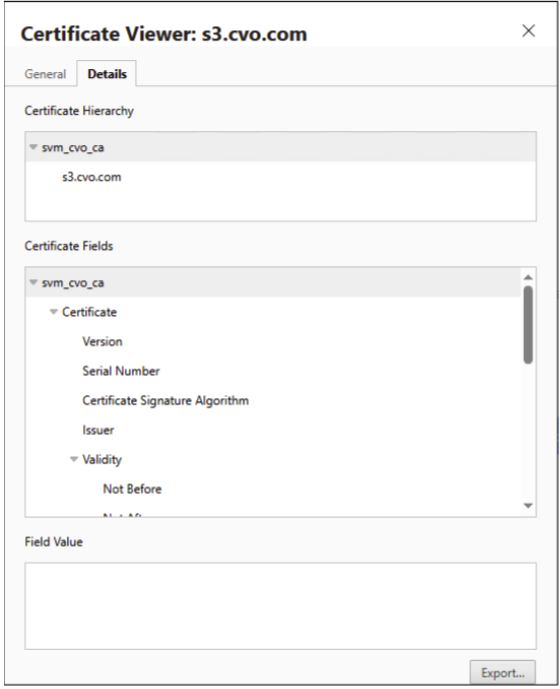
On the Certificate Viewer window, select the Details tab, and then select the first row of the root CA in the certificate list.
-
Select Export… and save the file locally in
DERformat.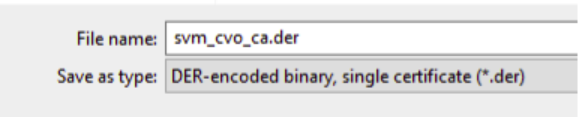
-
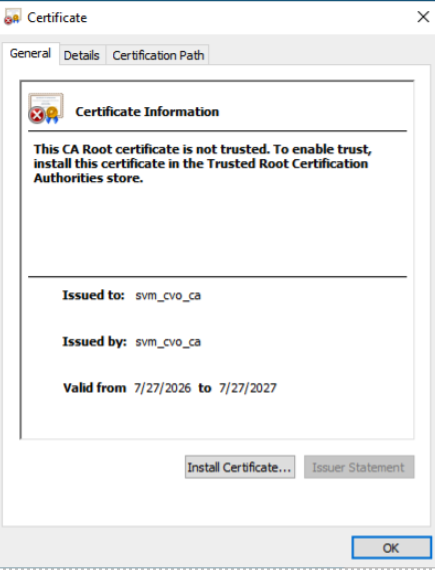
Open the certificate file you saved, and select Install Certificate….
-
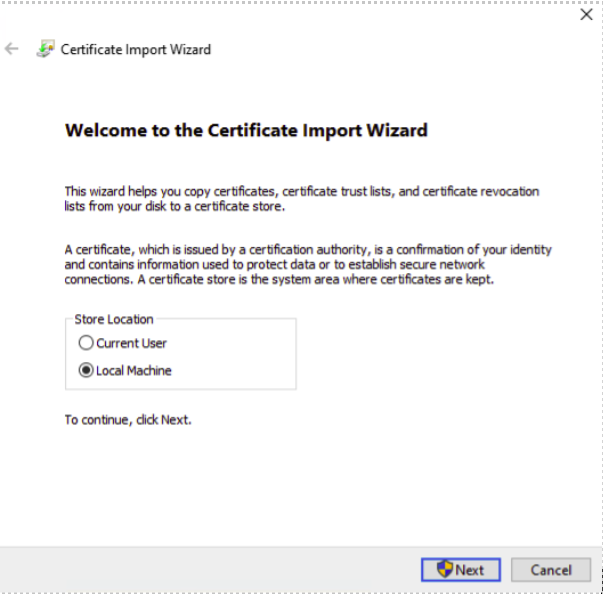
In the Certificate Import Wizard, select Local Machine, and place the certificate in Trusted Root Certification Authorities store.
-
Follow the prompts to complete the certificate installation.
-
Verify the certificate installation by opening a new browser window and navigating to
https://<CVO-S3-SERVER-URL>. The ONTAP S3 server should return an XML access denied response, indicating that HTTPS communication is working correctly.
-
-
Download and install the Microsoft on-premises data gateway on the VM in standard mode. Refer to Microsoft documentation: Install an on-premises data gateway for installation steps.
Connect to OneLake
Create an Amazon S3-compatible shortcut in your Microsoft Fabric lakehouse to access data stored in your Cloud Volumes ONTAP S3 bucket.
-
An existing Microsoft Fabric lakehouse in your workspace.
-
In your environment, go to Settings > Manage connections and gateways and verify that your on-premises data gateway is listed and connected.
-
The Cloud Volumes ONTAP root CA certificate is installed on the gateway VM.
-
You have the following values from the previous steps:
-
ONTAP S3 server name (FQDN)
-
Access key
-
Secret access key
-
-
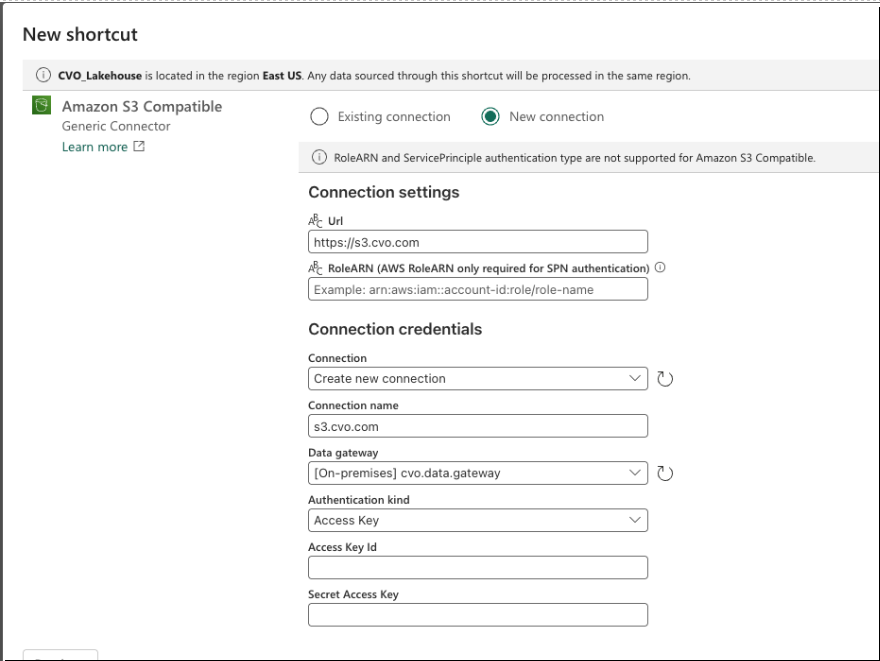
In your lakehouse, create an Amazon S3-compatible shortcut to your Cloud Volumes ONTAP S3 bucket by using the following details. For the steps to create the shortcut, refer to Microsoft documentation: Create an Amazon S3-compatible shortcut.
-
URL: The ONTAP S3 server in the format
https://<S3-SERVER-FQDN> -
Data gateway: The on-premises data gateway you configured earlier
-
Access key ID
-
Secret access key
-
-
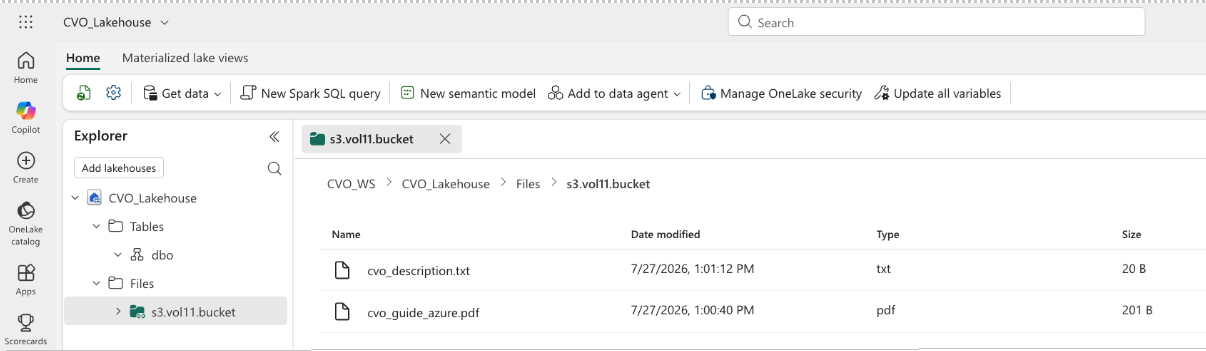
After the shortcut is created, verify that it appears under Explorer > Files in the lakehouse and that you can browse the files stored in the Cloud Volumes ONTAP volume through the shortcut.
Enable Azure AI Search
After creating the OneLake shortcut, you can configure Azure AI Search to index the data stored in your Cloud Volumes ONTAP volumes through OneLake. Azure AI Search indexing enables the data to be used by AI applications such as Microsoft Copilot and Azure OpenAI.
For more information, refer to the Microsoft documentation: How to index OneLake files.