

Replace the SG6000-CN controller cover
 Suggest changes
Remove the appliance cover to access internal components for maintenance, and replace the cover when you are finished.
Remove SG6000-CN controller cover
Remove the controller cover to access internal components for maintenance.
Remove the controller from the cabinet or rack to access the top cover.
-
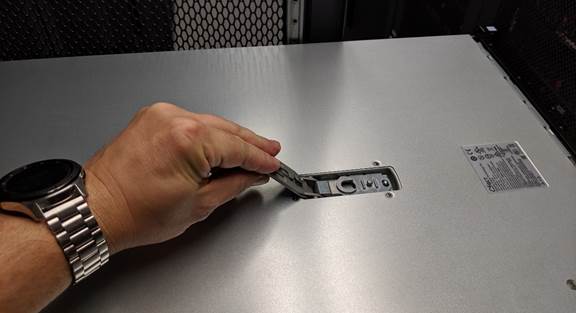
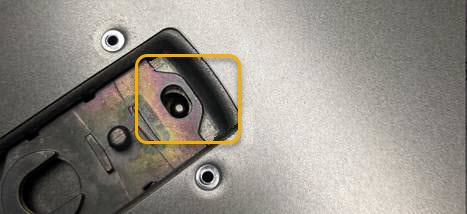
Make sure that the SG6000-CN controller cover latch is not locked. If necessary, turn the blue plastic latch lock one-quarter turn in the unlock direction, as shown on the latch lock.
-
Rotate the latch up and back toward the rear of the SG6000-CN controller chassis until it stops; then, carefully lift the cover from the chassis and set it aside.

Wrap the strap end of an ESD wristband around your wrist and secure the clip end to a metal ground to prevent static discharge when working inside the SG6000-CN controller.
After replacing the part, return the failed part to NetApp, as described in the RMA instructions shipped with the kit. See the Parts Return & Replacements page for further information.
Reinstall SG6000-CN controller cover
Reinstall the controller cover when internal hardware maintenance is complete.
You have completed all maintenance procedures inside the controller.
-
With the cover latch open, hold the cover above the chassis and align the hole in the top cover latch with the pin in the chassis. When the cover is aligned, lower it onto the chassis.
-
Rotate the cover latch forward and down until it stops and the cover fully seats into the chassis. Verify that there are no gaps along the front edge of the cover.
If the cover is not fully seated, you might not be able to slide the SG6000-CN controller into the rack.
-
Optional: Turn the blue plastic latch lock one-quarter turn in the lock direction, as shown on the latch lock, to lock it.