

TR-4998: Pacemaker クラスタリングと FSx ONTAPを使用した AWS EC2 での Oracle HA
 変更を提案
変更を提案
アレン・カオ、ニヤズ・モハメド、NetApp
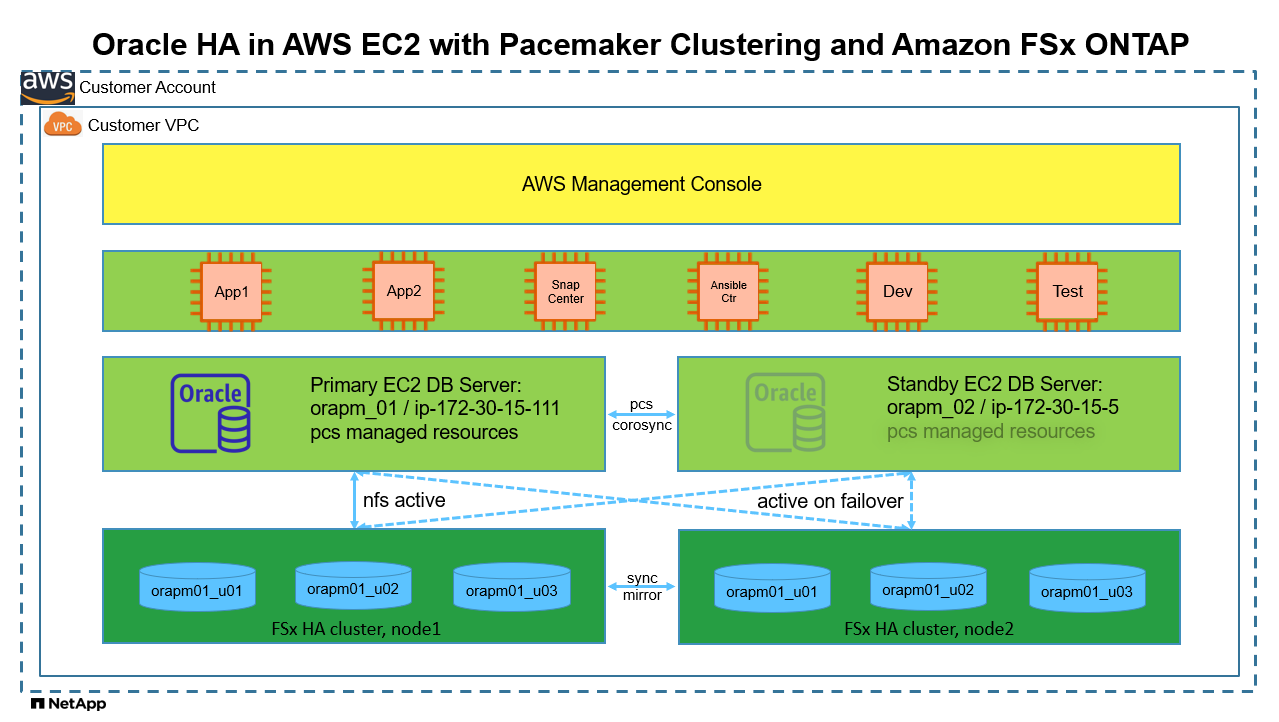
このソリューションでは、NFS プロトコルを介してデータベースストレージ HA 用の Redhat Enterprise Linux (RHEL) およびAmazon FSx ONTAP上の Pacemaker クラスタリングを使用して、AWS EC2 で Oracle 高可用性 (HA) を有効にするための概要と詳細を示します。
目的
パブリック クラウドで Oracle を自己管理して実行しようとする多くの顧客は、いくつかの課題を克服する必要があります。こうした課題の 1 つは、Oracle データベースの高可用性を実現することです。従来、Oracle の顧客は、複数のクラスタ ノードでのアクティブ/アクティブ トランザクションのサポートに、「Real Application Cluster」または RAC と呼ばれる Oracle データベース機能に依存しています。 1 つのノードに障害が発生しても、アプリケーションの処理が停止することはありません。残念ながら、Oracle RAC 実装は、AWS EC2 などの多くの一般的なパブリッククラウドではすぐには利用できず、サポートもされていません。 RHEL とAmazon FSx ONTAPに組み込まれている Pacemaker クラスタリング (PCS) を活用することで、お客様は、Oracle RAC ライセンスコストをかけずに、コンピューティングとストレージの両方でアクティブ/パッシブクラスタリングのための実行可能な代替手段を実現し、AWS クラウドでミッションクリティカルな Oracle データベースワークロードをサポートできます。
このドキュメントでは、RHEL での Pacemaker クラスタリングの設定、NFS プロトコルを使用した EC2 およびAmazon FSx ONTAPへの Oracle データベースのデプロイ、HA 用の Pacemaker での Oracle リソースの構成、最も頻繁に発生する HA シナリオでの検証によるデモのまとめの詳細を示します。このソリューションでは、 NetApp SnapCenter UI ツールを使用した Oracle データベースの高速バックアップ、リストア、クローン作成に関する情報も提供します。
このソリューションは、次のユースケースに対応します。
-
RHEL での Pacemaker HA クラスタリングのセットアップと構成。
-
AWS EC2 およびAmazon FSx ONTAPでの Oracle データベース HA デプロイメント。
観客
このソリューションは次の人々を対象としています。
-
AWS EC2 およびAmazon FSx ONTAPに Oracle をデプロイしたい DBA。
-
AWS EC2 およびAmazon FSx ONTAPで Oracle ワークロードをテストしたいデータベースソリューションアーキテクト。
-
AWS EC2 およびAmazon FSx ONTAPで Oracle データベースをデプロイおよび管理したいストレージ管理者。
-
AWS EC2 とAmazon FSx ONTAPで Oracle データベースを立ち上げたいアプリケーション所有者。
ソリューションのテストおよび検証環境
このソリューションのテストと検証は、最終的な展開環境と一致しない可能性のあるラボ設定で実行されました。セクションを参照[導入検討の重要な要素]詳細についてはこちらをご覧ください。
アーキテクチャ
ハードウェアおよびソフトウェアコンポーネント
ハードウェア |
||
Amazon FSx ONTAPストレージ |
AWSが提供する現在のバージョン |
us-east-1 のシングル AZ、1024 GiB の容量、128 MB/秒のスループット |
DBサーバー用のEC2インスタンス |
t2.xlarge/4vCPU/16G |
2 つの EC2 T2 xlarge EC2 インスタンス (1 つはプライマリ DB サーバー、もう 1 つはスタンバイ DB サーバー) |
Ansible コントローラー用の VM |
4 つの vCPU、16 GiB RAM |
自動化された AWS EC2/FSx プロビジョニングと NFS 上の Oracle デプロイメントを実行する 1 つの Linux VM |
ソフトウェア |
||
レッドハットリナックス |
RHEL Linux 8.6 (LVM) - x64 Gen2 |
テスト用にRedHatサブスクリプションを導入 |
Oracle Database |
バージョン19.18 |
RUパッチp34765931_190000_Linux-x86-64.zipを適用しました |
Oracle OPatch |
バージョン 12.2.0.1.36 |
最新パッチ p6880880_190000_Linux-x86-64.zip |
ペースメーカー |
バージョン0.10.18 |
RedHat による RHEL 8.0 向け高可用性アドオン |
NFS |
バージョン3.0 |
Oracle dNFS 対応 |
Ansible |
コア 2.16.2 |
Python 3.6.8 |
AWS EC2/FSx ラボ環境での Oracle データベースのアクティブ/パッシブ構成
サーバ |
データベース |
DBストレージ |
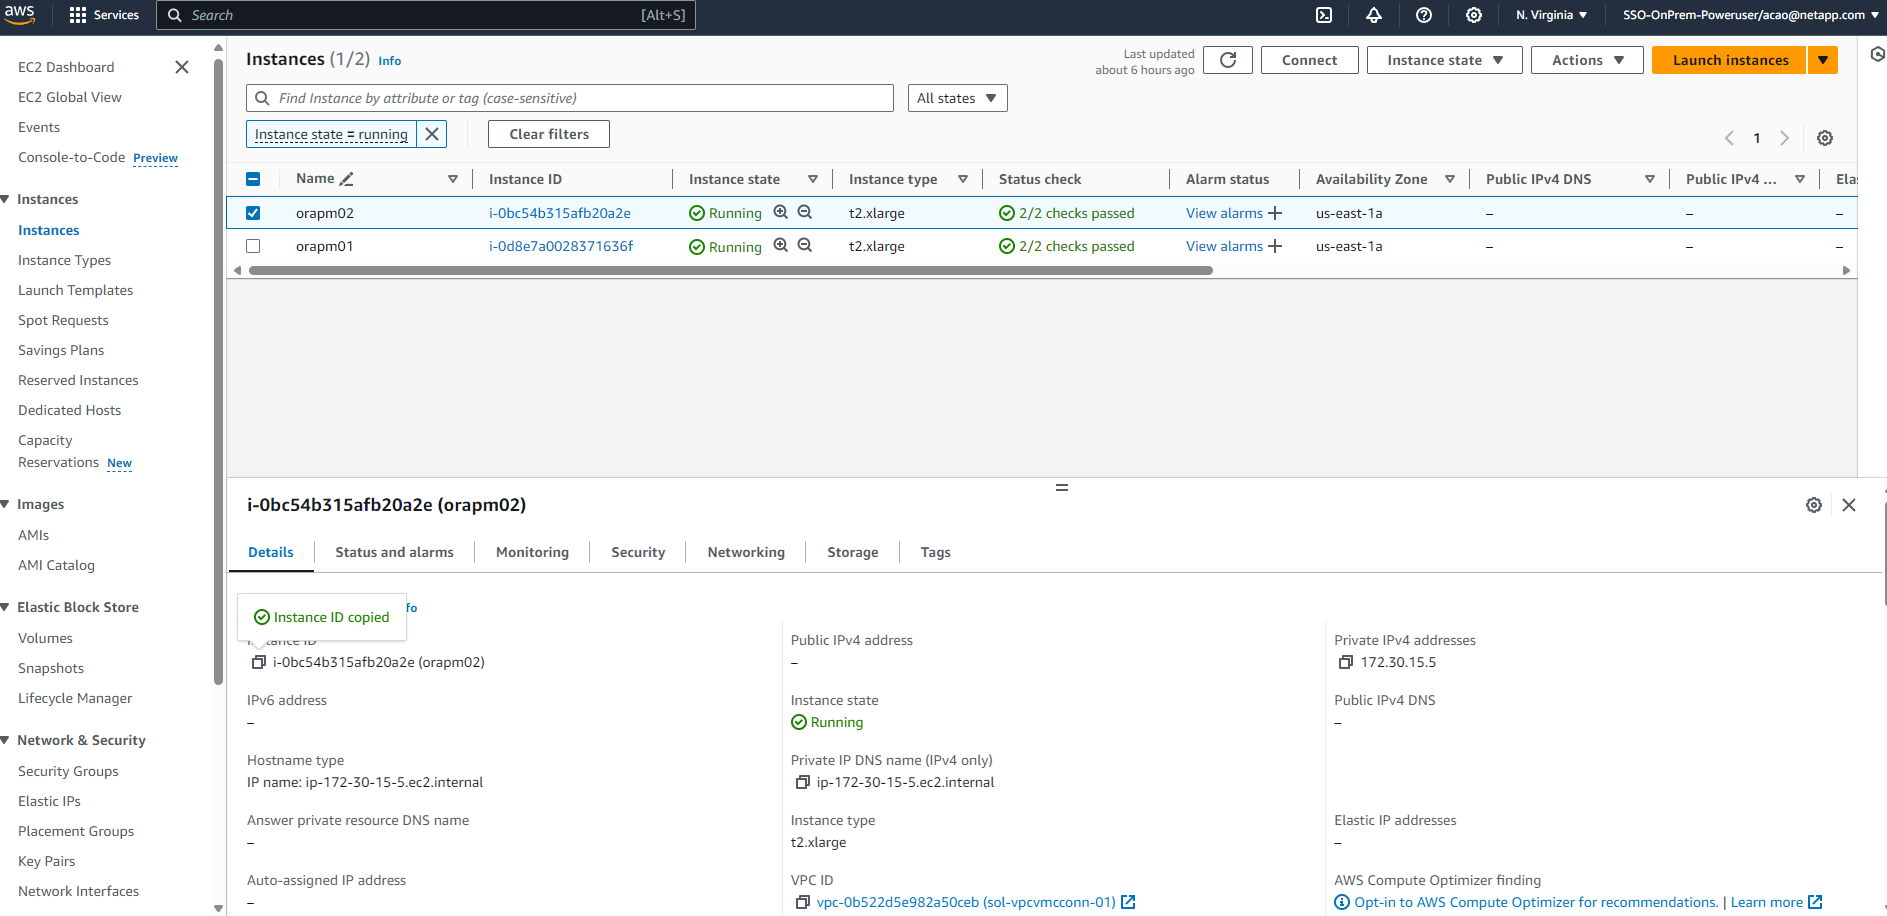
プライマリノード: orapm01/ip-172.30.15.111 |
NTAP(NTAP_PDB1,NTAP_PDB2,NTAP_PDB3) |
/u01、/u02、/u03 NFS はAmazon FSx ONTAPボリュームにマウントされます |
スタンバイノード: orapm02/ip-172.30.15.5 |
フェイルオーバー時のNTAP(NTAP_PDB1、NTAP_PDB2、NTAP_PDB3) |
/u01、/u02、/u03 フェイルオーバー時にNFSマウント |
導入検討の重要な要素
-
* Amazon FSx ONTAP HA。* Amazon FSx ONTAPは、デフォルトで、単一または複数のアベイラビリティーゾーン内のストレージ コントローラーの HA ペアにプロビジョニングされます。ミッションクリティカルなデータベース ワークロードに対して、アクティブ/パッシブ方式でストレージ冗長性を提供します。ストレージのフェイルオーバーはエンド ユーザーに対して透過的です。ストレージのフェイルオーバーが発生した場合、ユーザーの介入は必要ありません。
-
*PCS リソース グループとリソースの順序。*リソース グループを使用すると、依存関係を持つ複数のリソースを同じクラスター ノードで実行できます。リソース順序は、リソースの起動順序とシャットダウン順序を逆に強制します。
-
優先ノード Pacemaker クラスタは、アクティブ/パッシブ クラスタリング (Pacemaker の要件ではありません) で意図的に展開され、FSx ONTAPクラスタリングと同期されています。アクティブな EC2 インスタンスは、場所の制約で利用可能な場合、Oracle リソースの優先ノードとして設定されます。
-
スタンバイ ノードでのフェンス遅延。 2 ノードの PCS クラスターでは、クォーラムは人工的に 1 に設定されます。クラスター ノード間で通信の問題が発生した場合、いずれかのノードが他のノードをフェンスしようとする可能性があり、データの破損が発生する可能性があります。スタンバイ ノードに遅延を設定すると、問題が軽減され、スタンバイ ノードがフェンスされている間もプライマリ ノードが引き続きサービスを提供できるようになります。
-
*マルチ AZ 展開の考慮事項。*ソリューションは単一の可用性ゾーンに展開され、検証されます。マルチ AZ デプロイメントの場合、アベイラビリティーゾーン間で PCS フローティング IP を移動するために追加の AWS ネットワークリソースが必要です。
-
*Oracle データベースのストレージ レイアウト。*このソリューションのデモンストレーションでは、Oracle バイナリ、データ、およびログをホストするために、テスト データベース NTAP に 3 つのデータベース ボリュームをプロビジョニングします。ボリュームは、NFS 経由で Oracle DB サーバーに /u01 - バイナリ、/u02 - データ、/u03 - ログとしてマウントされます。冗長性のために、/u02 および /u03 マウント ポイントにデュアル制御ファイルが構成されています。
-
dNFS 構成。 dNFS (Oracle 11g 以降で利用可能) を使用すると、DB VM 上で実行される Oracle データベースは、ネイティブ NFS クライアントよりも大幅に多くの I/O を駆動できます。自動化された Oracle デプロイメントでは、デフォルトで NFSv3 上に dNFS が構成されます。
-
データベースのバックアップ。 NetApp は、ユーザーフレンドリーな UI インターフェイスを備えたデータベースのバックアップ、リストア、クローン作成用のSnapCenter softwareスイートを提供しています。 NetApp、高速 (1 分未満) スナップショット バックアップ、迅速な (数分) データベース リストア、およびデータベース クローンを実現するために、このような管理ツールを実装することを推奨しています。
ソリューションの展開
次のセクションでは、データベースストレージ保護のために Pacemaker クラスタリングとAmazon FSx ONTAPを使用して AWS EC2 に Oracle データベース HA を展開および構成するための手順を段階的に説明します。
展開の前提条件
Details
展開には次の前提条件が必要です。
-
AWS アカウントが設定され、必要な VPC とネットワークセグメントが AWS アカウント内に作成されています。
-
最新バージョンの Ansible と Git がインストールされた Linux VM を Ansible コントローラー ノードとしてプロビジョニングします。詳細については、次のリンクを参照してください。"NetAppソリューション自動化入門"セクション-
Setup the Ansible Control Node for CLI deployments on RHEL / CentOS`または。
`Setup the Ansible Control Node for CLI deployments on Ubuntu / DebianAnsible コントローラーと EC2 インスタンス DB VM 間の ssh 公開/秘密キー認証を有効にします。
EC2インスタンスとAmazon FSx ONTAPストレージクラスターのプロビジョニング
Details
EC2 インスタンスとAmazon FSx ONTAP はAWS コンソールから手動でプロビジョニングできますが、EC2 インスタンスと FSx ONTAPストレージ クラスターのプロビジョニングを自動化するには、 NetApp Terraform ベースの自動化ツールキットを使用することをお勧めします。詳細な手順は以下のとおりです。
-
AWS CloudShell または Ansible コントローラー VM から、EC2 および FSx ONTAP用の自動化ツールキットのコピーをクローンします。
git clone https://bitbucket.ngage.netapp.com/scm/ns-bb/na_aws_fsx_ec2_deploy.git
ツールキットが AWS CloudShell から実行されない場合は、AWS ユーザーアカウントのアクセス/シークレットキーのペアを使用して、AWS アカウントで AWS CLI 認証を行う必要があります。 -
ツールキットに含まれている READme.md ファイルを確認します。必要な AWS リソースに合わせて、main.tf および関連するパラメータ ファイルを修正します。
An example of main.tf: resource "aws_instance" "orapm01" { ami = var.ami instance_type = var.instance_type subnet_id = var.subnet_id key_name = var.ssh_key_name root_block_device { volume_type = "gp3" volume_size = var.root_volume_size } tags = { Name = var.ec2_tag1 } } resource "aws_instance" "orapm02" { ami = var.ami instance_type = var.instance_type subnet_id = var.subnet_id key_name = var.ssh_key_name root_block_device { volume_type = "gp3" volume_size = var.root_volume_size } tags = { Name = var.ec2_tag2 } } resource "aws_fsx_ontap_file_system" "fsx_01" { storage_capacity = var.fs_capacity subnet_ids = var.subnet_ids preferred_subnet_id = var.preferred_subnet_id throughput_capacity = var.fs_throughput fsx_admin_password = var.fsxadmin_password deployment_type = var.deployment_type disk_iops_configuration { iops = var.iops mode = var.iops_mode } tags = { Name = var.fsx_tag } } resource "aws_fsx_ontap_storage_virtual_machine" "svm_01" { file_system_id = aws_fsx_ontap_file_system.fsx_01.id name = var.svm_name svm_admin_password = var.vsadmin_password } -
Terraform プランを検証して実行します。実行が成功すると、ターゲット AWS アカウントに 2 つの EC2 インスタンスと 1 つの FSx ONTAPストレージ クラスターが作成されます。自動化出力には、EC2 インスタンスの IP アドレスと FSx ONTAPクラスターのエンドポイントが表示されます。
terraform plan -out=main.planterraform apply main.plan
これで、Oracle 用の EC2 インスタンスと FSx ONTAP のプロビジョニングが完了します。
Pacemaker クラスターのセットアップ
Details
RHEL の High Availability Add-On は、Oracle データベース サービスなどの重要な本番サービスに信頼性、スケーラビリティ、可用性を提供するクラスター システムです。このユースケースのデモンストレーションでは、アクティブ/パッシブ クラスタリング シナリオで Oracle データベースの高可用性をサポートするために、2 ノードの Pacemaker クラスタがセットアップおよび構成されます。
EC2インスタンスにec2-userとしてログインし、以下のタスクを完了します。 both EC2 インスタンス:
-
AWS Red Hat Update Infrastructure (RHUI) クライアントを削除します。
sudo -i yum -y remove rh-amazon-rhui-client* -
EC2 インスタンス VM を Red Hat に登録します。
sudo subscription-manager register --username xxxxxxxx --password 'xxxxxxxx' --auto-attach -
RHEL 高可用性 RPM を有効にします。
sudo subscription-manager config --rhsm.manage_repos=1sudo subscription-manager repos --enable=rhel-8-for-x86_64-highavailability-rpms -
ペースメーカーとフェンスアガントを設置します。
sudo yum update -ysudo yum install pcs pacemaker fence-agents-aws -
すべてのクラスター ノードで hacluster ユーザーのパスワードを作成します。すべてのノードに同じパスワードを使用します。
sudo passwd hacluster -
pcs サービスを起動し、起動時に起動するように有効にします。
sudo systemctl start pcsd.servicesudo systemctl enable pcsd.service -
pcsd サービスを検証します。
sudo systemctl status pcsd[ec2-user@ip-172-30-15-5 ~]$ sudo systemctl status pcsd ● pcsd.service - PCS GUI and remote configuration interface Loaded: loaded (/usr/lib/systemd/system/pcsd.service; enabled; vendor preset: disabled) Active: active (running) since Tue 2024-09-10 18:50:22 UTC; 33s ago Docs: man:pcsd(8) man:pcs(8) Main PID: 65302 (pcsd) Tasks: 1 (limit: 100849) Memory: 24.0M CGroup: /system.slice/pcsd.service └─65302 /usr/libexec/platform-python -Es /usr/sbin/pcsd Sep 10 18:50:21 ip-172-30-15-5.ec2.internal systemd[1]: Starting PCS GUI and remote configuration interface... Sep 10 18:50:22 ip-172-30-15-5.ec2.internal systemd[1]: Started PCS GUI and remote configuration interface. -
ホスト ファイルにクラスター ノードを追加します。
sudo vi /etc/hosts[ec2-user@ip-172-30-15-5 ~]$ cat /etc/hosts 127.0.0.1 localhost localhost.localdomain localhost4 localhost4.localdomain4 ::1 localhost localhost.localdomain localhost6 localhost6.localdomain6 # cluster nodes 172.30.15.111 ip-172-30-15-111.ec2.internal 172.30.15.5 ip-172-30-15-5.ec2.internal
-
AWS アカウントに接続するために awscli をインストールして構成します。
sudo yum install awsclisudo aws configure[ec2-user@ip-172-30-15-111 ]# sudo aws configure AWS Access Key ID [None]: XXXXXXXXXXXXXXXXX AWS Secret Access Key [None]: XXXXXXXXXXXXXXXX Default region name [None]: us-east-1 Default output format [None]: json
-
まだインストールされていない場合は、resource-agents パッケージをインストールします。
sudo yum install resource-agents
の上 `only one`クラスター ノードで、次のタスクを完了して pcs クラスターを作成します。
-
pcs ユーザー hacluster を認証します。
sudo pcs host auth ip-172-30-15-5.ec2.internal ip-172-30-15-111.ec2.internal[ec2-user@ip-172-30-15-111 ~]$ sudo pcs host auth ip-172-30-15-5.ec2.internal ip-172-30-15-111.ec2.internal Username: hacluster Password: ip-172-30-15-111.ec2.internal: Authorized ip-172-30-15-5.ec2.internal: Authorized
-
pcs クラスターを作成します。
sudo pcs cluster setup ora_ec2nfsx ip-172-30-15-5.ec2.internal ip-172-30-15-111.ec2.internal[ec2-user@ip-172-30-15-111 ~]$ sudo pcs cluster setup ora_ec2nfsx ip-172-30-15-5.ec2.internal ip-172-30-15-111.ec2.internal No addresses specified for host 'ip-172-30-15-5.ec2.internal', using 'ip-172-30-15-5.ec2.internal' No addresses specified for host 'ip-172-30-15-111.ec2.internal', using 'ip-172-30-15-111.ec2.internal' Destroying cluster on hosts: 'ip-172-30-15-111.ec2.internal', 'ip-172-30-15-5.ec2.internal'... ip-172-30-15-5.ec2.internal: Successfully destroyed cluster ip-172-30-15-111.ec2.internal: Successfully destroyed cluster Requesting remove 'pcsd settings' from 'ip-172-30-15-111.ec2.internal', 'ip-172-30-15-5.ec2.internal' ip-172-30-15-111.ec2.internal: successful removal of the file 'pcsd settings' ip-172-30-15-5.ec2.internal: successful removal of the file 'pcsd settings' Sending 'corosync authkey', 'pacemaker authkey' to 'ip-172-30-15-111.ec2.internal', 'ip-172-30-15-5.ec2.internal' ip-172-30-15-111.ec2.internal: successful distribution of the file 'corosync authkey' ip-172-30-15-111.ec2.internal: successful distribution of the file 'pacemaker authkey' ip-172-30-15-5.ec2.internal: successful distribution of the file 'corosync authkey' ip-172-30-15-5.ec2.internal: successful distribution of the file 'pacemaker authkey' Sending 'corosync.conf' to 'ip-172-30-15-111.ec2.internal', 'ip-172-30-15-5.ec2.internal' ip-172-30-15-111.ec2.internal: successful distribution of the file 'corosync.conf' ip-172-30-15-5.ec2.internal: successful distribution of the file 'corosync.conf' Cluster has been successfully set up.
-
クラスターを有効にします。
sudo pcs cluster enable --all[ec2-user@ip-172-30-15-111 ~]$ sudo pcs cluster enable --all ip-172-30-15-5.ec2.internal: Cluster Enabled ip-172-30-15-111.ec2.internal: Cluster Enabled
-
クラスターを起動して検証します。
sudo pcs cluster start --allsudo pcs status[ec2-user@ip-172-30-15-111 ~]$ sudo pcs status Cluster name: ora_ec2nfsx WARNINGS: No stonith devices and stonith-enabled is not false Cluster Summary: * Stack: corosync (Pacemaker is running) * Current DC: ip-172-30-15-111.ec2.internal (version 2.1.7-5.1.el8_10-0f7f88312) - partition with quorum * Last updated: Wed Sep 11 15:43:23 2024 on ip-172-30-15-111.ec2.internal * Last change: Wed Sep 11 15:43:06 2024 by hacluster via hacluster on ip-172-30-15-111.ec2.internal * 2 nodes configured * 0 resource instances configured Node List: * Online: [ ip-172-30-15-5.ec2.internal ip-172-30-15-111.ec2.internal ] Full List of Resources: * No resources Daemon Status: corosync: active/enabled pacemaker: active/enabled pcsd: active/enabled
これで、Pacemaker クラスターのセットアップと初期構成が完了します。
Pacemaker クラスタフェンシング構成
Details
Pacemaker フェンシング構成は、本番クラスターでは必須です。これにより、AWS EC2 クラスター上の機能不全のノードが自動的に分離され、ノードがクラスターのリソースを消費したり、クラスターの機能を損なったり、共有データを破損したりすることが防止されます。このセクションでは、fence_aws フェンス エージェントを使用したクラスター フェンスの構成について説明します。
-
ルートユーザーとして、次の AWS メタデータクエリを入力して、各 EC2 インスタンスノードのインスタンス ID を取得します。
echo $(curl -s http://169.254.169.254/latest/meta-data/instance-id)[root@ip-172-30-15-111 ec2-user]# echo $(curl -s http://169.254.169.254/latest/meta-data/instance-id) i-0d8e7a0028371636f or just get instance-id from AWS EC2 console
-
フェンスデバイスを構成するには、次のコマンドを入力します。 pcmk_host_map コマンドを使用して、RHEL ホスト名をインスタンス ID にマップします。以前 AWS 認証に使用した AWS ユーザーアカウントの AWS アクセスキーと AWS シークレットアクセスキーを使用します。
sudo pcs stonith \ create clusterfence fence_aws access_key=XXXXXXXXXXXXXXXXX secret_key=XXXXXXXXXXXXXXXXXX \ region=us-east-1 pcmk_host_map="ip-172-30-15-111.ec2.internal:i-0d8e7a0028371636f;ip-172-30-15-5.ec2.internal:i-0bc54b315afb20a2e" \ power_timeout=240 pcmk_reboot_timeout=480 pcmk_reboot_retries=4 -
フェンシング構成を検証します。
pcs status[root@ip-172-30-15-111 ec2-user]# pcs status Cluster name: ora_ec2nfsx Cluster Summary: * Stack: corosync (Pacemaker is running) * Current DC: ip-172-30-15-111.ec2.internal (version 2.1.7-5.1.el8_10-0f7f88312) - partition with quorum * Last updated: Wed Sep 11 21:17:18 2024 on ip-172-30-15-111.ec2.internal * Last change: Wed Sep 11 21:16:40 2024 by root via root on ip-172-30-15-111.ec2.internal * 2 nodes configured * 1 resource instance configured Node List: * Online: [ ip-172-30-15-5.ec2.internal ip-172-30-15-111.ec2.internal ] Full List of Resources: * clusterfence (stonith:fence_aws): Started ip-172-30-15-111.ec2.internal Daemon Status: corosync: active/enabled pacemaker: active/enabled pcsd: active/enabled
-
クラスター レベルで再起動する代わりに、stonith-action をオフに設定します。
pcs property set stonith-action=off[root@ip-172-30-15-111 ec2-user]# pcs property config Cluster Properties: cluster-infrastructure: corosync cluster-name: ora_ec2nfsx dc-version: 2.1.7-5.1.el8_10-0f7f88312 have-watchdog: false last-lrm-refresh: 1726257586 stonith-action: off
stonith-action をオフに設定すると、フェンスされたクラスター ノードは最初にシャットダウンされます。 stonith power_timeout で定義された期間 (240 秒) が経過すると、フェンスされたノードは再起動され、クラスターに再度参加します。 -
スタンバイ ノードのフェンス遅延を 10 秒に設定します。
pcs stonith update clusterfence pcmk_delay_base="ip-172-30-15-111.ec2.internal:0;ip-172-30-15-5.ec2.internal:10s"[root@ip-172-30-15-111 ec2-user]# pcs stonith config Resource: clusterfence (class=stonith type=fence_aws) Attributes: clusterfence-instance_attributes access_key=XXXXXXXXXXXXXXXX pcmk_delay_base=ip-172-30-15-111.ec2.internal:0;ip-172-30-15-5.ec2.internal:10s pcmk_host_map=ip-172-30-15-111.ec2.internal:i-0d8e7a0028371636f;ip-172-30-15-5.ec2.internal:i-0bc54b315afb20a2e pcmk_reboot_retries=4 pcmk_reboot_timeout=480 power_timeout=240 region=us-east-1 secret_key=XXXXXXXXXXXXXXXX Operations: monitor: clusterfence-monitor-interval-60s interval=60s
|
|
実行する `pcs stonith refresh`停止した stonith フェンス エージェントを更新したり、失敗した stonith リソース アクションをクリアしたりするコマンド。 |
PCSクラスタにOracleデータベースを導入する
Details
PCS クラスタ上で事前定義されたパラメータを使用してデータベースのインストールおよび構成タスクを実行するには、 NetAppが提供する Ansible プレイブックを活用することをお勧めします。この自動化された Oracle デプロイメントでは、プレイブックの実行前に 3 つのユーザー定義パラメータ ファイルにユーザー入力が必要です。
-
ホスト - 自動化プレイブックが実行されるターゲットを定義します。
-
vars/vars.yml - すべてのターゲットに適用される変数を定義するグローバル変数ファイル。
-
host_vars/host_name.yml - 名前付きターゲットにのみ適用される変数を定義するローカル変数ファイル。私たちのユースケースでは、これらは Oracle DB サーバーです。
これらのユーザー定義変数ファイルに加えて、必要がない限り変更する必要のないデフォルト パラメータを含むデフォルト変数ファイルがいくつかあります。以下は、PCS クラスタリング構成における AWS EC2 および FSx ONTAPでの自動 Oracle デプロイメントの詳細を示しています。
-
Ansible コントローラ管理者ユーザーのホーム ディレクトリから、NFS 用のNetApp Oracle デプロイメント自動化ツールキットのコピーをクローンします。
git clone https://bitbucket.ngage.netapp.com/scm/ns-bb/na_oracle_deploy_nfs.git
Ansible コントローラーは、データベース EC2 インスタンスと同じ VPC 内に配置することも、両者の間にネットワーク接続がある限りオンプレミスに配置することも可能です。 -
ホスト パラメータ ファイルにユーザー定義のパラメータを入力します。以下は一般的なホスト ファイル構成の例です。
[admin@ansiblectl na_oracle_deploy_nfs]$ cat hosts
#Oracle hosts
[oracle]
orapm01 ansible_host=172.30.15.111 ansible_ssh_private_key_file=ec2-user.pem
orapm02 ansible_host=172.30.15.5 ansible_ssh_private_key_file=ec2-user.pem
-
vars/vars.yml パラメータ ファイルにユーザー定義のパラメータを入力します。以下は、一般的な vars.yml ファイルの構成例です。
[admin@ansiblectl na_oracle_deploy_nfs]$ cat vars/vars.yml
######################################################################
###### Oracle 19c deployment user configuration variables       ######
###### Consolidate all variables from ONTAP, linux and oracle   ######
######################################################################

###########################################
### ONTAP env specific config variables ###
###########################################

# Prerequisite to create three volumes in NetApp ONTAP storage from System Manager or cloud dashboard with following naming convention:
# db_hostname_u01 - Oracle binary
# db_hostname_u02 - Oracle data
# db_hostname_u03 - Oracle redo
# It is important to strictly follow the name convention or the automation will fail.


###########################################
### Linux env specific config variables ###
###########################################

redhat_sub_username: xxxxxxxx
redhat_sub_password: "xxxxxxxx"


####################################################
### DB env specific install and config variables ###
####################################################

# Database domain name
db_domain: ec2.internal

# Set initial password for all required Oracle passwords. Change them after installation.
initial_pwd_all: "xxxxxxxx"
-
host_vars/host_name.yml パラメータ ファイルにユーザー定義パラメータを入力します。以下は、一般的な host_vars/host_name.yml ファイルの構成例です。
[admin@ansiblectl na_oracle_deploy_nfs]$ cat host_vars/orapm01.yml
# User configurable Oracle host specific parameters

# Database SID. By default, a container DB is created with 3 PDBs within the CDB
oracle_sid: NTAP

# CDB is created with SGA at 75% of memory_limit, MB. Consider how many databases to be hosted on the node and
# how much ram to be allocated to each DB. The grand total of SGA should not exceed 75% available RAM on node.
memory_limit: 8192

# Local NFS lif ip address to access database volumes
nfs_lif: 172.30.15.95
nfs_lif アドレスは、前のセクションの自動化された EC2 および FSx ONTAPデプロイメントからの FSx ONTAPクラスター エンドポイント出力から取得できます。 -
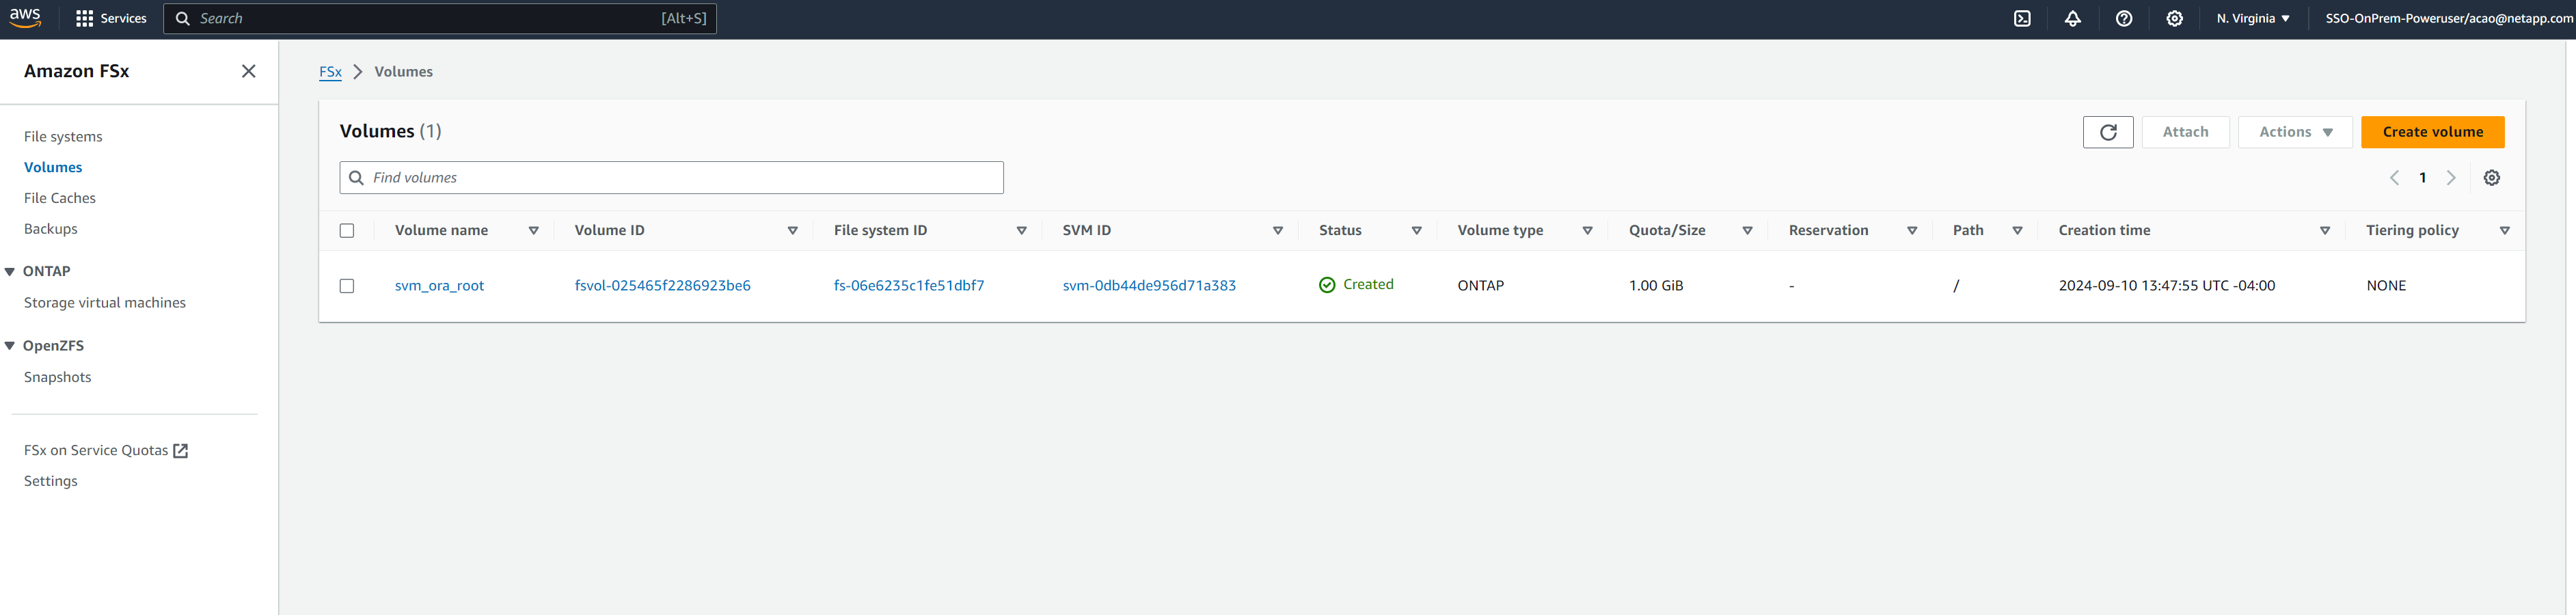
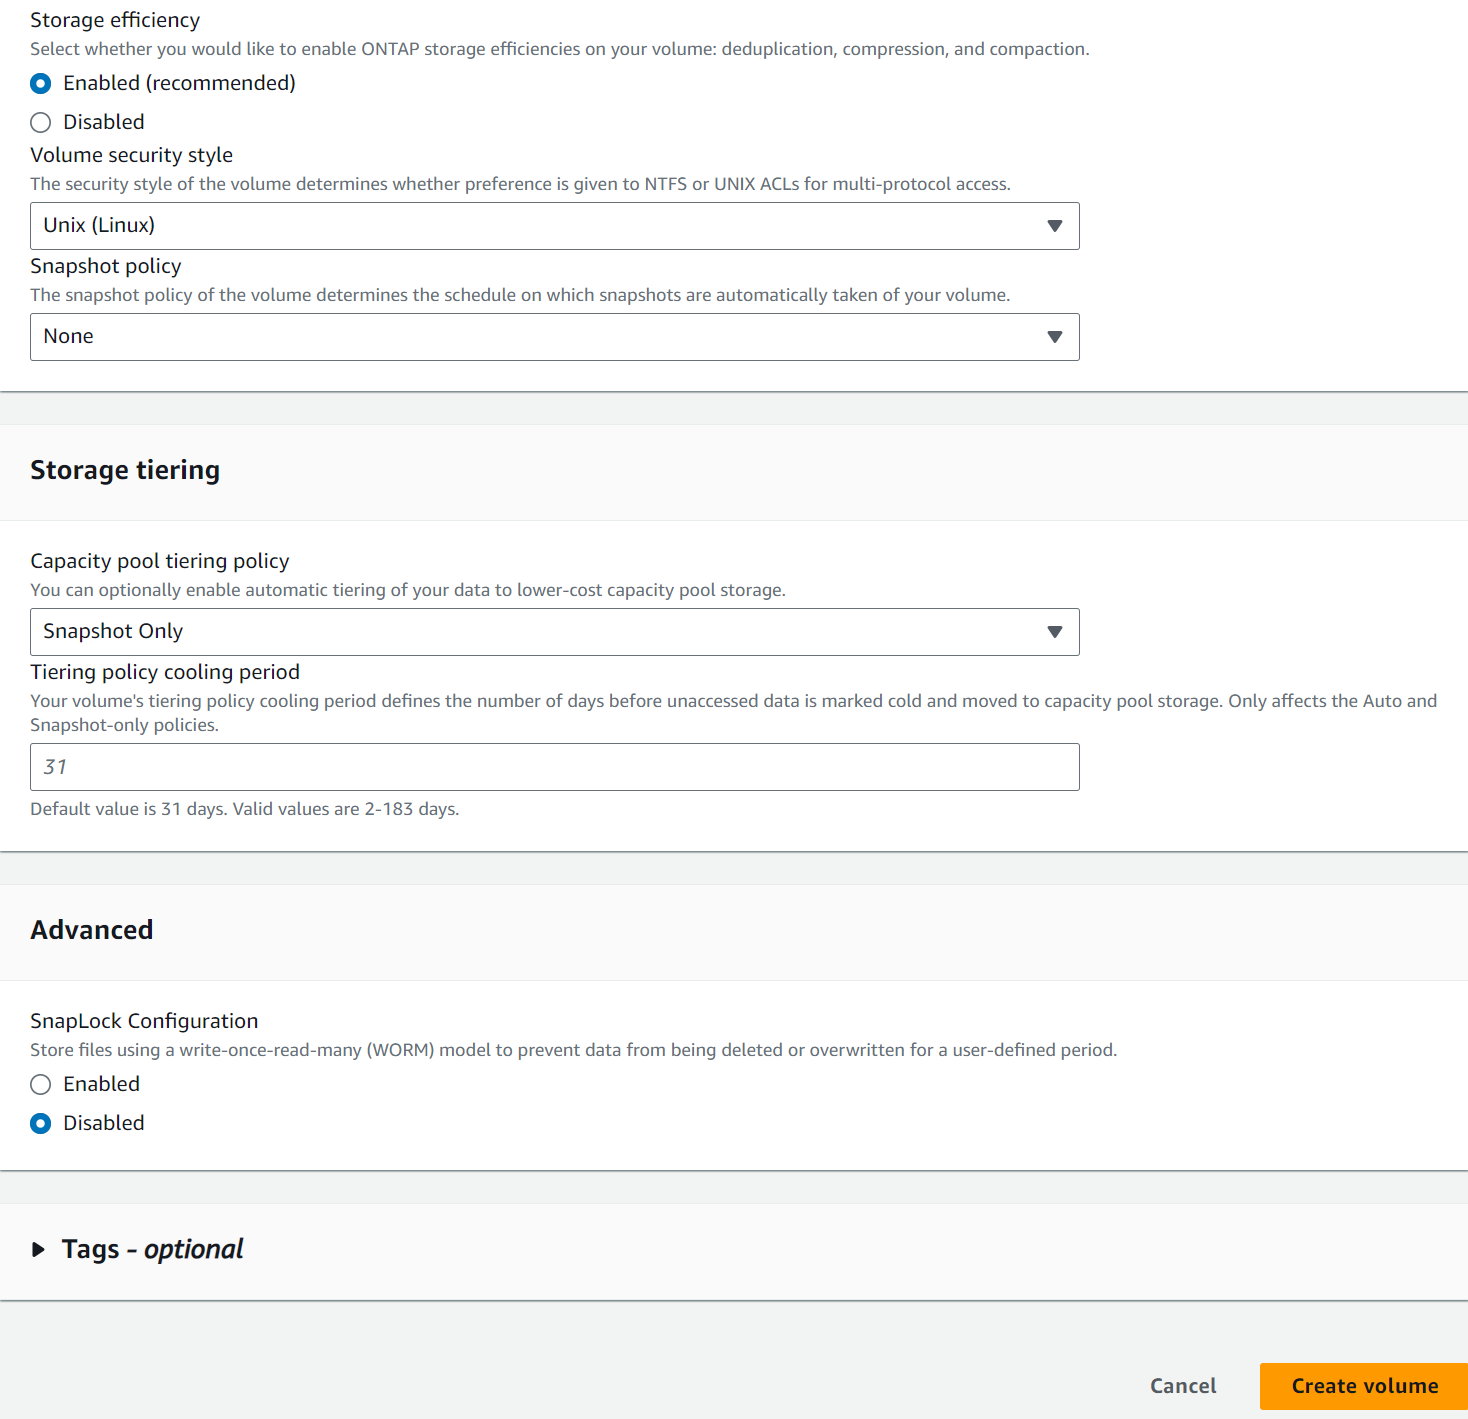
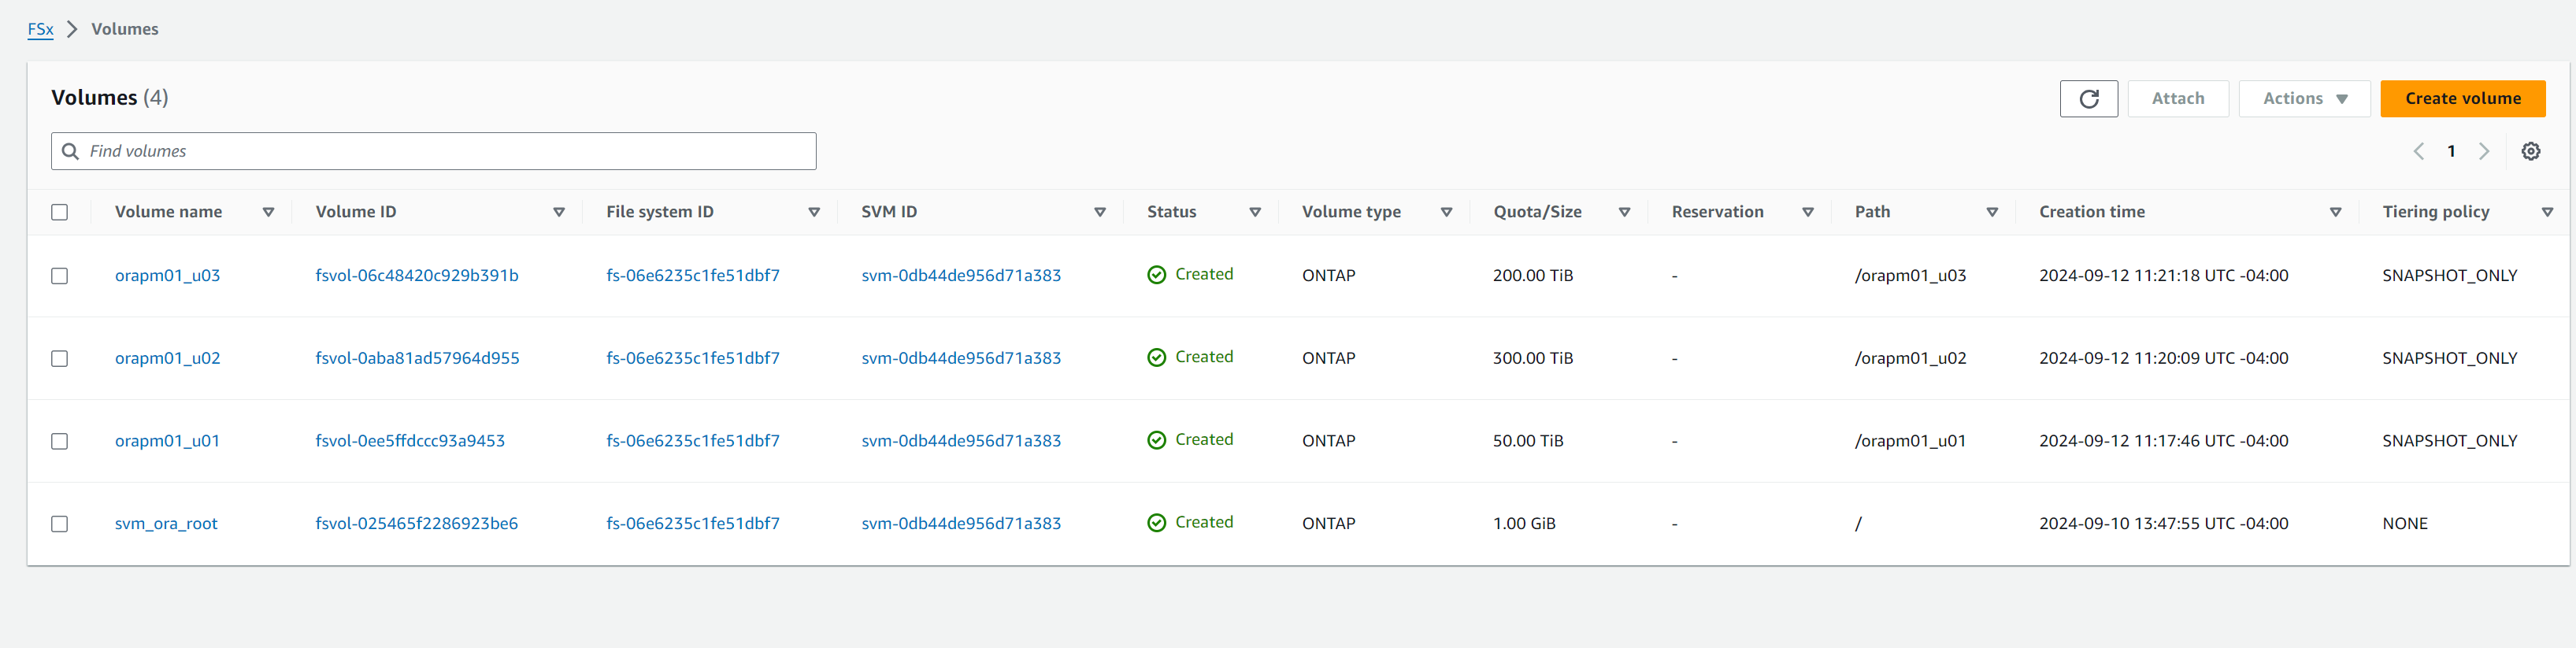
AWS FSx コンソールからデータベースボリュームを作成します。以下に示すように、ボリュームのプレフィックスとして PCS プライマリ ノードのホスト名 (orapm01) を使用するようにしてください。

-
PCS プライマリ ノード EC2 インスタンス ip-172-30-15-111.ec2.internal /tmp/archive ディレクトリに、777 権限で Oracle 19c インストール ファイルをステージングします。
installer_archives:
  - "LINUX.X64_193000_db_home.zip"
  - "p34765931_190000_Linux-x86-64.zip"
  - "p6880880_190000_Linux-x86-64.zip"
-
Linux構成のプレイブックを実行する
all nodes。ansible-playbook -i hosts 2-linux_config.yml -u ec2-user -e @vars/vars.yml[admin@ansiblectl na_oracle_deploy_nfs]$ ansible-playbook -i hosts 2-linux_config.yml -u ec2-user -e @vars/vars.yml PLAY [Linux Setup and Storage Config for Oracle] **************************************************************************************************************************************************************************************************************************************************************************** TASK [Gathering Facts] ****************************************************************************************************************************************************************************************************************************************************************************************************** ok: [orapm01] ok: [orapm02] TASK [linux : Configure RedHat 7 for Oracle DB installation] **************************************************************************************************************************************************************************************************************************************************************** skipping: [orapm01] skipping: [orapm02] TASK [linux : Configure RedHat 8 for Oracle DB installation] **************************************************************************************************************************************************************************************************************************************************************** included: /home/admin/na_oracle_deploy_nfs/roles/linux/tasks/rhel8_config.yml for orapm01, orapm02 TASK [linux : Register subscriptions for RedHat Server] ********************************************************************************************************************************************************************************************************************************************************************* ok: [orapm01] ok: [orapm02] . . .
-
Oracle 構成のプレイブックを実行する
only on primary node(ホスト ファイル内のスタンバイ ノードをコメント アウトします)。ansible-playbook -i hosts 4-oracle_config.yml -u ec2-user -e @vars/vars.yml --skip-tags "enable_db_start_shut"[admin@ansiblectl na_oracle_deploy_nfs]$ ansible-playbook -i hosts 4-oracle_config.yml -u ec2-user -e @vars/vars.yml --skip-tags "enable_db_start_shut" PLAY [Oracle installation and configuration] ******************************************************************************************************************************************************************************************************************************************************************************** TASK [Gathering Facts] ****************************************************************************************************************************************************************************************************************************************************************************************************** ok: [orapm01] TASK [oracle : Oracle software only install] ******************************************************************************************************************************************************************************************************************************************************************************** included: /home/admin/na_oracle_deploy_nfs/roles/oracle/tasks/oracle_install.yml for orapm01 TASK [oracle : Create mount points for NFS file systems / Mount NFS file systems on Oracle hosts] *************************************************************************************************************************************************************************************************************************** included: /home/admin/na_oracle_deploy_nfs/roles/oracle/tasks/oracle_mount_points.yml for orapm01 TASK [oracle : Create mount points for NFS file systems] ******************************************************************************************************************************************************************************************************************************************************************** changed: [orapm01] => (item=/u01) changed: [orapm01] => (item=/u02) changed: [orapm01] => (item=/u03) . . .
-
データベースがデプロイされた後、マウント ポイントは PCS によってのみ管理されるため、プライマリ ノードの /etc/fstab で /u01、/u02、/u03 マウントをコメント アウトします。
sudo vi /etc/fstab[root@ip-172-30-15-111 ec2-user]# cat /etc/fstab UUID=eaa1f38e-de0f-4ed5-a5b5-2fa9db43bb38 / xfs defaults 0 0 /mnt/swapfile swap swap defaults 0 0 #172.30.15.95:/orapm01_u01 /u01 nfs rw,bg,hard,vers=3,proto=tcp,timeo=600,rsize=65536,wsize=65536 0 0 #172.30.15.95:/orapm01_u02 /u02 nfs rw,bg,hard,vers=3,proto=tcp,timeo=600,rsize=65536,wsize=65536 0 0 #172.30.15.95:/orapm01_u03 /u03 nfs rw,bg,hard,vers=3,proto=tcp,timeo=600,rsize=65536,wsize=65536 0 0
-
/etc/oratab、/etc/oraInst.loc、/home/oracle/.bash_profile をスタンバイ ノードにコピーします。適切なファイルの所有権と権限を維持するようにしてください。
-
データベース、リスナーをシャットダウンし、プライマリ ノードで /u01、/u02、/u03 をアンマウントします。
[root@ip-172-30-15-111 ec2-user]# su - oracle
Last login: Wed Sep 18 16:51:02 UTC 2024
[oracle@ip-172-30-15-111 ~]$ sqlplus / as sysdba

SQL*Plus: Release 19.0.0.0.0 - Production on Wed Sep 18 16:51:16 2024
Version 19.18.0.0.0

Copyright (c) 1982, 2022, Oracle.  All rights reserved.


Connected to:
Oracle Database 19c Enterprise Edition Release 19.0.0.0.0 - Production
Version 19.18.0.0.0

SQL> shutdown immediate;

SQL> exit
Disconnected from Oracle Database 19c Enterprise Edition Release 19.0.0.0.0 - Production
Version 19.18.0.0.0
[oracle@ip-172-30-15-111 ~]$ lsnrctl stop listener.ntap

[oracle@ip-172-30-15-111 ~]$ exit
logout
[root@ip-172-30-15-111 ec2-user]# umount /u01
[root@ip-172-30-15-111 ec2-user]# umount /u02
[root@ip-172-30-15-111 ec2-user]# umount /u03
-
スタンバイ ノード ip-172-30-15-5 にマウント ポイントを作成します。
mkdir /u01 mkdir /u02 mkdir /u03 -
スタンバイ ノード ip-172-30-15-5 に FSx ONTAPデータベース ボリュームをマウントします。
mount -t nfs 172.30.15.95:/orapm01_u01 /u01 -o rw,bg,hard,vers=3,proto=tcp,timeo=600,rsize=65536,wsize=65536mount -t nfs 172.30.15.95:/orapm01_u02 /u02 -o rw,bg,hard,vers=3,proto=tcp,timeo=600,rsize=65536,wsize=65536mount -t nfs 172.30.15.95:/orapm01_u03 /u03 -o rw,bg,hard,vers=3,proto=tcp,timeo=600,rsize=65536,wsize=65536[root@ip-172-30-15-5 ec2-user]# df -h Filesystem Size Used Avail Use% Mounted on devtmpfs 7.7G 0 7.7G 0% /dev tmpfs 7.7G 33M 7.7G 1% /dev/shm tmpfs 7.7G 17M 7.7G 1% /run tmpfs 7.7G 0 7.7G 0% /sys/fs/cgroup /dev/xvda2 50G 21G 30G 41% / tmpfs 1.6G 0 1.6G 0% /run/user/1000 172.30.15.95:/orapm01_u01 48T 47T 844G 99% /u01 172.30.15.95:/orapm01_u02 285T 285T 844G 100% /u02 172.30.15.95:/orapm01_u03 190T 190T 844G 100% /u03
-
Oracle ユーザーに変更し、バイナリを再リンクします。
[root@ip-172-30-15-5 ec2-user]# su - oracle
Last login: Thu Sep 12 18:09:03 UTC 2024 on pts/0
[oracle@ip-172-30-15-5 ~]$ env | grep ORA
ORACLE_SID=NTAP
ORACLE_HOME=/u01/app/oracle/product/19.0.0/NTAP
[oracle@ip-172-30-15-5 ~]$ cd $ORACLE_HOME/bin
[oracle@ip-172-30-15-5 bin]$ ./relink
writing relink log to: /u01/app/oracle/product/19.0.0/NTAP/install/relinkActions2024-09-12_06-21-40PM.log
-
dnfs lib を odm フォルダーにコピーします。再リンクすると、dfns ライブラリ ファイルが失われる可能性があります。
[oracle@ip-172-30-15-5 odm]$ cd /u01/app/oracle/product/19.0.0/NTAP/rdbms/lib/odm
[oracle@ip-172-30-15-5 odm]$ cp ../../../lib/libnfsodm19.so .
-
スタンバイ ノード ip-172-30-15-5 で検証するためにデータベースを起動します。
[oracle@ip-172-30-15-5 odm]$ sqlplus / as sysdba SQL*Plus: Release 19.0.0.0.0 - Production on Thu Sep 12 18:30:04 2024 Version 19.18.0.0.0 Copyright (c) 1982, 2022, Oracle. All rights reserved. Connected to an idle instance. SQL> startup; ORACLE instance started. Total System Global Area 6442449688 bytes Fixed Size 9177880 bytes Variable Size 1090519040 bytes Database Buffers 5335154688 bytes Redo Buffers 7598080 bytes Database mounted. Database opened. SQL> select name, open_mode from v$database; NAME OPEN_MODE --------- -------------------- NTAP READ WRITE SQL> show pdbs CON_ID CON_NAME OPEN MODE RESTRICTED ---------- ------------------------------ ---------- ---------- 2 PDB$SEED READ ONLY NO 3 NTAP_PDB1 READ WRITE NO 4 NTAP_PDB2 READ WRITE NO 5 NTAP_PDB3 READ WRITE NO -
データベースをシャットダウンし、データベースをプライマリ ノード ip-172-30-15-111 にフェールバックします。
SQL> shutdown immediate;
Database closed.
Database dismounted.
ORACLE instance shut down.
SQL> exit

[root@ip-172-30-15-5 ec2-user]# df -h
Filesystem                 Size  Used Avail Use% Mounted on
devtmpfs                   7.7G     0  7.7G   0% /dev
tmpfs                      7.7G   33M  7.7G   1% /dev/shm
tmpfs                      7.7G   17M  7.7G   1% /run
tmpfs                      7.7G     0  7.7G   0% /sys/fs/cgroup
/dev/xvda2                  50G   21G   30G  41% /
tmpfs                      1.6G     0  1.6G   0% /run/user/1000
172.30.15.95:/orapm01_u01   48T   47T  844G  99% /u01
172.30.15.95:/orapm01_u02  285T  285T  844G 100% /u02
172.30.15.95:/orapm01_u03  190T  190T  844G 100% /u03

[root@ip-172-30-15-5 ec2-user]# umount /u01
[root@ip-172-30-15-5 ec2-user]# umount /u02
[root@ip-172-30-15-5 ec2-user]# umount /u03

[root@ip-172-30-15-111 ec2-user]# mount -t nfs 172.30.15.95:/orapm01_u01 /u01 -o rw,bg,hard,vers=3,proto=tcp,timeo=600,rsize=65536,wsize=65536
mount: (hint) your fstab has been modified, but systemd still uses
       the old version; use 'systemctl daemon-reload' to reload.
[root@ip-172-30-15-111 ec2-user]# mount -t nfs 172.30.15.95:/orapm01_u02 /u02 -o rw,bg,hard,vers=3,proto=tcp,timeo=600,rsize=65536,wsize=65536
mount: (hint) your fstab has been modified, but systemd still uses
       the old version; use 'systemctl daemon-reload' to reload.
[root@ip-172-30-15-111 ec2-user]# mount -t nfs 172.30.15.95:/orapm01_u03 /u03 -o rw,bg,hard,vers=3,proto=tcp,timeo=600,rsize=65536,wsize=65536
mount: (hint) your fstab has been modified, but systemd still uses
       the old version; use 'systemctl daemon-reload' to reload.
[root@ip-172-30-15-111 ec2-user]# df -h
Filesystem                 Size  Used Avail Use% Mounted on
devtmpfs                   7.7G     0  7.7G   0% /dev
tmpfs                      7.8G   48M  7.7G   1% /dev/shm
tmpfs                      7.8G   33M  7.7G   1% /run
tmpfs                      7.8G     0  7.8G   0% /sys/fs/cgroup
/dev/xvda2                  50G   29G   22G  58% /
tmpfs                      1.6G     0  1.6G   0% /run/user/1000
172.30.15.95:/orapm01_u01   48T   47T  844G  99% /u01
172.30.15.95:/orapm01_u02  285T  285T  844G 100% /u02
172.30.15.95:/orapm01_u03  190T  190T  844G 100% /u03
[root@ip-172-30-15-111 ec2-user]# su - oracle
Last login: Thu Sep 12 18:13:34 UTC 2024 on pts/1
[oracle@ip-172-30-15-111 ~]$ sqlplus / as sysdba

SQL*Plus: Release 19.0.0.0.0 - Production on Thu Sep 12 18:38:46 2024
Version 19.18.0.0.0

Copyright (c) 1982, 2022, Oracle.  All rights reserved.

Connected to an idle instance.

SQL> startup;
ORACLE instance started.

Total System Global Area 6442449688 bytes
Fixed Size                  9177880 bytes
Variable Size            1090519040 bytes
Database Buffers         5335154688 bytes
Redo Buffers                7598080 bytes
Database mounted.
Database opened.
SQL> exit
Disconnected from Oracle Database 19c Enterprise Edition Release 19.0.0.0.0 - Production
Version 19.18.0.0.0
[oracle@ip-172-30-15-111 ~]$ lsnrctl start listener.ntap

LSNRCTL for Linux: Version 19.0.0.0.0 - Production on 12-SEP-2024 18:39:17

Copyright (c) 1991, 2022, Oracle.  All rights reserved.

Starting /u01/app/oracle/product/19.0.0/NTAP/bin/tnslsnr: please wait...

TNSLSNR for Linux: Version 19.0.0.0.0 - Production
System parameter file is /u01/app/oracle/product/19.0.0/NTAP/network/admin/listener.ora
Log messages written to /u01/app/oracle/diag/tnslsnr/ip-172-30-15-111/listener.ntap/alert/log.xml
Listening on: (DESCRIPTION=(ADDRESS=(PROTOCOL=tcp)(HOST=ip-172-30-15-111.ec2.internal)(PORT=1521)))
Listening on: (DESCRIPTION=(ADDRESS=(PROTOCOL=ipc)(KEY=EXTPROC1521)))

Connecting to (DESCRIPTION=(ADDRESS=(PROTOCOL=TCP)(HOST=ip-172-30-15-111.ec2.internal)(PORT=1521)))
STATUS of the LISTENER
------------------------
Alias                     listener.ntap
Version                   TNSLSNR for Linux: Version 19.0.0.0.0 - Production
Start Date                12-SEP-2024 18:39:17
Uptime                    0 days 0 hr. 0 min. 0 sec
Trace Level               off
Security                  ON: Local OS Authentication
SNMP                      OFF
Listener Parameter File   /u01/app/oracle/product/19.0.0/NTAP/network/admin/listener.ora
Listener Log File         /u01/app/oracle/diag/tnslsnr/ip-172-30-15-111/listener.ntap/alert/log.xml
Listening Endpoints Summary...
  (DESCRIPTION=(ADDRESS=(PROTOCOL=tcp)(HOST=ip-172-30-15-111.ec2.internal)(PORT=1521)))
  (DESCRIPTION=(ADDRESS=(PROTOCOL=ipc)(KEY=EXTPROC1521)))
The listener supports no services
The command completed successfully
PCS管理用のOracleリソースを構成する
Details
Pacemaker クラスタリングを構成する目的は、障害発生時にユーザーの介入を最小限に抑えながら、AWS EC2 および FSx ONTAP環境で Oracle を実行するためのアクティブ/パッシブの高可用性ソリューションをセットアップすることです。以下は、PCS 管理のための Oracle リソース構成を示しています。
-
プライマリ EC2 インスタンス ip-172-30-15-111 のルート ユーザーとして、VPC CIDR ブロック内の未使用のプライベート IP アドレスをフローティング IP として指定して、セカンダリ プライベート IP アドレスを作成します。このプロセスでは、セカンダリ プライベート IP アドレスが属する Oracle リソース グループを作成します。
pcs resource create privip ocf:heartbeat:awsvip secondary_private_ip=172.30.15.33 --group oracle[root@ip-172-30-15-111 ec2-user]# pcs status Cluster name: ora_ec2nfsx Cluster Summary: * Stack: corosync (Pacemaker is running) * Current DC: ip-172-30-15-111.ec2.internal (version 2.1.7-5.1.el8_10-0f7f88312) - partition with quorum * Last updated: Fri Sep 13 16:25:35 2024 on ip-172-30-15-111.ec2.internal * Last change: Fri Sep 13 16:25:23 2024 by root via root on ip-172-30-15-111.ec2.internal * 2 nodes configured * 2 resource instances configured Node List: * Online: [ ip-172-30-15-5.ec2.internal ip-172-30-15-111.ec2.internal ] Full List of Resources: * clusterfence (stonith:fence_aws): Started ip-172-30-15-111.ec2.internal * Resource Group: oracle: * privip (ocf::heartbeat:awsvip): Started ip-172-30-15-5.ec2.internal Daemon Status: corosync: active/enabled pacemaker: active/enabled pcsd: active/enabled
特権がスタンバイ クラスター ノードに作成された場合は、以下に示すようにプライマリ ノードに移動します。 -
クラスター ノード間でリソースを移動します。
pcs resource move privip ip-172-30-15-111.ec2.internal[root@ip-172-30-15-111 ec2-user]# pcs resource move privip ip-172-30-15-111.ec2.internal Warning: A move constraint has been created and the resource 'privip' may or may not move depending on other configuration [root@ip-172-30-15-111 ec2-user]# pcs status Cluster name: ora_ec2nfsx WARNINGS: Following resources have been moved and their move constraints are still in place: 'privip' Run 'pcs constraint location' or 'pcs resource clear <resource id>' to view or remove the constraints, respectively Cluster Summary: * Stack: corosync (Pacemaker is running) * Current DC: ip-172-30-15-111.ec2.internal (version 2.1.7-5.1.el8_10-0f7f88312) - partition with quorum * Last updated: Fri Sep 13 16:26:38 2024 on ip-172-30-15-111.ec2.internal * Last change: Fri Sep 13 16:26:27 2024 by root via root on ip-172-30-15-111.ec2.internal * 2 nodes configured * 2 resource instances configured Node List: * Online: [ ip-172-30-15-5.ec2.internal ip-172-30-15-111.ec2.internal ] Full List of Resources: * clusterfence (stonith:fence_aws): Started ip-172-30-15-111.ec2.internal * Resource Group: oracle: * privip (ocf::heartbeat:awsvip): Started ip-172-30-15-111.ec2.internal (Monitoring) Daemon Status: corosync: active/enabled pacemaker: active/enabled pcsd: active/enabled -
Oracle の仮想 IP (vip) を作成します。仮想 IP は、必要に応じてプライマリ ノードとスタンバイ ノード間で切り替わります。
pcs resource create vip ocf:heartbeat:IPaddr2 ip=172.30.15.33 cidr_netmask=25 nic=eth0 op monitor interval=10s --group oracle[root@ip-172-30-15-111 ec2-user]# pcs resource create vip ocf:heartbeat:IPaddr2 ip=172.30.15.33 cidr_netmask=25 nic=eth0 op monitor interval=10s --group oracle [root@ip-172-30-15-111 ec2-user]# pcs status Cluster name: ora_ec2nfsx WARNINGS: Following resources have been moved and their move constraints are still in place: 'privip' Run 'pcs constraint location' or 'pcs resource clear <resource id>' to view or remove the constraints, respectively Cluster Summary: * Stack: corosync (Pacemaker is running) * Current DC: ip-172-30-15-111.ec2.internal (version 2.1.7-5.1.el8_10-0f7f88312) - partition with quorum * Last updated: Fri Sep 13 16:27:34 2024 on ip-172-30-15-111.ec2.internal * Last change: Fri Sep 13 16:27:24 2024 by root via root on ip-172-30-15-111.ec2.internal * 2 nodes configured * 3 resource instances configured Node List: * Online: [ ip-172-30-15-5.ec2.internal ip-172-30-15-111.ec2.internal ] Full List of Resources: * clusterfence (stonith:fence_aws): Started ip-172-30-15-111.ec2.internal * Resource Group: oracle: * privip (ocf::heartbeat:awsvip): Started ip-172-30-15-111.ec2.internal * vip (ocf::heartbeat:IPaddr2): Started ip-172-30-15-111.ec2.internal Daemon Status: corosync: active/enabled pacemaker: active/enabled pcsd: active/enabled -
Oracle ユーザーとして、listener.ora および tnsnames.ora ファイルを更新して VIP アドレスを指すようにします。リスナーを再起動します。 DB をリスナーに登録する必要がある場合は、データベースをバウンスします。
vi $ORACLE_HOME/network/admin/listener.oravi $ORACLE_HOME/network/admin/tnsnames.ora[oracle@ip-172-30-15-111 admin]$ cat listener.ora # listener.ora Network Configuration File: /u01/app/oracle/product/19.0.0/NTAP/network/admin/listener.ora # Generated by Oracle configuration tools. LISTENER.NTAP = (DESCRIPTION_LIST = (DESCRIPTION = (ADDRESS = (PROTOCOL = TCP)(HOST = 172.30.15.33)(PORT = 1521)) (ADDRESS = (PROTOCOL = IPC)(KEY = EXTPROC1521)) ) ) [oracle@ip-172-30-15-111 admin]$ cat tnsnames.ora # tnsnames.ora Network Configuration File: /u01/app/oracle/product/19.0.0/NTAP/network/admin/tnsnames.ora # Generated by Oracle configuration tools. NTAP = (DESCRIPTION = (ADDRESS = (PROTOCOL = TCP)(HOST = 172.30.15.33)(PORT = 1521)) (CONNECT_DATA = (SERVER = DEDICATED) (SERVICE_NAME = NTAP.ec2.internal) ) ) LISTENER_NTAP = (ADDRESS = (PROTOCOL = TCP)(HOST = 172.30.15.33)(PORT = 1521)) [oracle@ip-172-30-15-111 admin]$ lsnrctl status listener.ntap LSNRCTL for Linux: Version 19.0.0.0.0 - Production on 13-SEP-2024 18:28:17 Copyright (c) 1991, 2022, Oracle. All rights reserved. Connecting to (DESCRIPTION=(ADDRESS=(PROTOCOL=TCP)(HOST=172.30.15.33)(PORT=1521))) STATUS of the LISTENER ------------------------ Alias listener.ntap Version TNSLSNR for Linux: Version 19.0.0.0.0 - Production Start Date 13-SEP-2024 18:15:51 Uptime 0 days 0 hr. 12 min. 25 sec Trace Level off Security ON: Local OS Authentication SNMP OFF Listener Parameter File /u01/app/oracle/product/19.0.0/NTAP/network/admin/listener.ora Listener Log File /u01/app/oracle/diag/tnslsnr/ip-172-30-15-111/listener.ntap/alert/log.xml Listening Endpoints Summary... (DESCRIPTION=(ADDRESS=(PROTOCOL=tcp)(HOST=172.30.15.33)(PORT=1521))) (DESCRIPTION=(ADDRESS=(PROTOCOL=ipc)(KEY=EXTPROC1521))) (DESCRIPTION=(ADDRESS=(PROTOCOL=tcps)(HOST=ip-172-30-15-111.ec2.internal)(PORT=5500))(Security=(my_wallet_directory=/u01/app/oracle/product/19.0.0/NTAP/admin/NTAP/xdb_wallet))(Presentation=HTTP)(Session=RAW)) Services Summary... Service "21f0b5cc1fa290e2e0636f0f1eacfd43.ec2.internal" has 1 instance(s). Instance "NTAP", status READY, has 1 handler(s) for this service... Service "21f0b74445329119e0636f0f1eacec03.ec2.internal" has 1 instance(s). Instance "NTAP", status READY, has 1 handler(s) for this service... Service "21f0b83929709164e0636f0f1eacacc3.ec2.internal" has 1 instance(s). Instance "NTAP", status READY, has 1 handler(s) for this service... Service "NTAP.ec2.internal" has 1 instance(s). Instance "NTAP", status READY, has 1 handler(s) for this service... Service "NTAPXDB.ec2.internal" has 1 instance(s). Instance "NTAP", status READY, has 1 handler(s) for this service... Service "ntap_pdb1.ec2.internal" has 1 instance(s). Instance "NTAP", status READY, has 1 handler(s) for this service... Service "ntap_pdb2.ec2.internal" has 1 instance(s). Instance "NTAP", status READY, has 1 handler(s) for this service... Service "ntap_pdb3.ec2.internal" has 1 instance(s). Instance "NTAP", status READY, has 1 handler(s) for this service... The command completed successfully **Oracle listener now listens on vip for database connection** -
/u01、/u02、/u03 マウント ポイントを Oracle リソース グループに追加します。
pcs resource create u01 ocf:heartbeat:Filesystem device='172.30.15.95:/orapm01_u01' directory='/u01' fstype='nfs' options='rw,bg,hard,vers=3,proto=tcp,timeo=600,rsize=65536,wsize=65536' --group oraclepcs resource create u02 ocf:heartbeat:Filesystem device='172.30.15.95:/orapm01_u02' directory='/u02' fstype='nfs' options='rw,bg,hard,vers=3,proto=tcp,timeo=600,rsize=65536,wsize=65536' --group oraclepcs resource create u03 ocf:heartbeat:Filesystem device='172.30.15.95:/orapm01_u03' directory='/u03' fstype='nfs' options='rw,bg,hard,vers=3,proto=tcp,timeo=600,rsize=65536,wsize=65536' --group oracle -
Oracle DB に PCS モニター ユーザー ID を作成します。
[root@ip-172-30-15-111 ec2-user]# su - oracle
Last login: Fri Sep 13 18:12:24 UTC 2024 on pts/0
[oracle@ip-172-30-15-111 ~]$ sqlplus / as sysdba

SQL*Plus: Release 19.0.0.0.0 - Production on Fri Sep 13 19:08:41 2024
Version 19.18.0.0.0

Copyright (c) 1982, 2022, Oracle.  All rights reserved.


Connected to:
Oracle Database 19c Enterprise Edition Release 19.0.0.0.0 - Production
Version 19.18.0.0.0

SQL> CREATE USER c##ocfmon IDENTIFIED BY "XXXXXXXX";

User created.

SQL> grant connect to c##ocfmon;

Grant succeeded.

SQL> exit
Disconnected from Oracle Database 19c Enterprise Edition Release 19.0.0.0.0 - Production
Version 19.18.0.0.0
-
データベースを Oracle リソース グループに追加します。
pcs resource create ntap ocf:heartbeat:oracle sid='NTAP' home='/u01/app/oracle/product/19.0.0/NTAP' user='oracle' monuser='C##OCFMON' monpassword='XXXXXXXX' monprofile='DEFAULT' --group oracle -
データベース リスナーを Oracle リソース グループに追加します。
pcs resource create listener ocf:heartbeat:oralsnr sid='NTAP' listener='listener.ntap' --group=oracle -
Oracle リソース グループ内のすべてのリソースの場所の制約を、優先ノードとしてプライマリ ノードに更新します。
pcs constraint location privip prefers ip-172-30-15-111.ec2.internal
pcs constraint location vip prefers ip-172-30-15-111.ec2.internal
pcs constraint location u01 prefers ip-172-30-15-111.ec2.internal
pcs constraint location u02 prefers ip-172-30-15-111.ec2.internal
pcs constraint location u03 prefers ip-172-30-15-111.ec2.internal
pcs constraint location ntap prefers ip-172-30-15-111.ec2.internal
pcs constraint location listener prefers ip-172-30-15-111.ec2.internal
[root@ip-172-30-15-111 ec2-user]# pcs constraint config Location Constraints: Resource: listener Enabled on: Node: ip-172-30-15-111.ec2.internal (score:INFINITY) Resource: ntap Enabled on: Node: ip-172-30-15-111.ec2.internal (score:INFINITY) Resource: privip Enabled on: Node: ip-172-30-15-111.ec2.internal (score:INFINITY) Resource: u01 Enabled on: Node: ip-172-30-15-111.ec2.internal (score:INFINITY) Resource: u02 Enabled on: Node: ip-172-30-15-111.ec2.internal (score:INFINITY) Resource: u03 Enabled on: Node: ip-172-30-15-111.ec2.internal (score:INFINITY) Resource: vip Enabled on: Node: ip-172-30-15-111.ec2.internal (score:INFINITY) Ordering Constraints: Colocation Constraints: Ticket Constraints: -
Oracle リソースの構成を検証します。
pcs status[root@ip-172-30-15-111 ec2-user]# pcs status Cluster name: ora_ec2nfsx Cluster Summary: * Stack: corosync (Pacemaker is running) * Current DC: ip-172-30-15-111.ec2.internal (version 2.1.7-5.1.el8_10-0f7f88312) - partition with quorum * Last updated: Fri Sep 13 19:25:32 2024 on ip-172-30-15-111.ec2.internal * Last change: Fri Sep 13 19:23:40 2024 by root via root on ip-172-30-15-111.ec2.internal * 2 nodes configured * 8 resource instances configured Node List: * Online: [ ip-172-30-15-5.ec2.internal ip-172-30-15-111.ec2.internal ] Full List of Resources: * clusterfence (stonith:fence_aws): Started ip-172-30-15-111.ec2.internal * Resource Group: oracle: * privip (ocf::heartbeat:awsvip): Started ip-172-30-15-111.ec2.internal * vip (ocf::heartbeat:IPaddr2): Started ip-172-30-15-111.ec2.internal * u01 (ocf::heartbeat:Filesystem): Started ip-172-30-15-111.ec2.internal * u02 (ocf::heartbeat:Filesystem): Started ip-172-30-15-111.ec2.internal * u03 (ocf::heartbeat:Filesystem): Started ip-172-30-15-111.ec2.internal * ntap (ocf::heartbeat:oracle): Started ip-172-30-15-111.ec2.internal * listener (ocf::heartbeat:oralsnr): Started ip-172-30-15-111.ec2.internal Daemon Status: corosync: active/enabled pacemaker: active/enabled pcsd: active/enabled
導入後のHA検証
Details
展開後は、PCS Oracle データベース フェールオーバー クラスターが正しく構成され、期待どおりに機能することを確認するために、いくつかのテストと検証を実行することが重要です。テスト検証には、管理されたフェイルオーバーと、クラスター保護メカニズムによる予期しないリソース障害と回復のシミュレーションが含まれます。
-
スタンバイ ノードのフェンシングを手動でトリガーしてノード フェンシングを検証し、スタンバイ ノードがオフラインになり、タイムアウト後に再起動されたことを確認します。
pcs stonith fence <standbynodename>[root@ip-172-30-15-111 ec2-user]# pcs stonith fence ip-172-30-15-5.ec2.internal Node: ip-172-30-15-5.ec2.internal fenced [root@ip-172-30-15-111 ec2-user]# pcs status Cluster name: ora_ec2nfsx Cluster Summary: * Stack: corosync (Pacemaker is running) * Current DC: ip-172-30-15-111.ec2.internal (version 2.1.7-5.1.el8_10-0f7f88312) - partition with quorum * Last updated: Fri Sep 13 21:58:45 2024 on ip-172-30-15-111.ec2.internal * Last change: Fri Sep 13 21:55:12 2024 by root via root on ip-172-30-15-111.ec2.internal * 2 nodes configured * 8 resource instances configured Node List: * Online: [ ip-172-30-15-111.ec2.internal ] * OFFLINE: [ ip-172-30-15-5.ec2.internal ] Full List of Resources: * clusterfence (stonith:fence_aws): Started ip-172-30-15-111.ec2.internal * Resource Group: oracle: * privip (ocf::heartbeat:awsvip): Started ip-172-30-15-111.ec2.internal * vip (ocf::heartbeat:IPaddr2): Started ip-172-30-15-111.ec2.internal * u01 (ocf::heartbeat:Filesystem): Started ip-172-30-15-111.ec2.internal * u02 (ocf::heartbeat:Filesystem): Started ip-172-30-15-111.ec2.internal * u03 (ocf::heartbeat:Filesystem): Started ip-172-30-15-111.ec2.internal * ntap (ocf::heartbeat:oracle): Started ip-172-30-15-111.ec2.internal * listener (ocf::heartbeat:oralsnr): Started ip-172-30-15-111.ec2.internal Daemon Status: corosync: active/enabled pacemaker: active/enabled pcsd: active/enabled -
リスナー プロセスを強制終了してデータベース リスナーの障害をシミュレートし、PCS がリスナーの障害を監視し、数秒以内に再起動することを確認します。
[root@ip-172-30-15-111 ec2-user]# ps -ef | grep lsnr
oracle    154895       1  0 18:15 ?        00:00:00 /u01/app/oracle/product/19.0.0/NTAP/bin/tnslsnr listener.ntap -inherit
root      217779  120186  0 19:36 pts/0    00:00:00 grep --color=auto lsnr
[root@ip-172-30-15-111 ec2-user]# kill -9 154895

[root@ip-172-30-15-111 ec2-user]# su - oracle
Last login: Thu Sep 19 14:58:54 UTC 2024
[oracle@ip-172-30-15-111 ~]$ lsnrctl status listener.ntap

LSNRCTL for Linux: Version 19.0.0.0.0 - Production on 13-SEP-2024 19:36:51

Copyright (c) 1991, 2022, Oracle.  All rights reserved.

Connecting to (DESCRIPTION=(ADDRESS=(PROTOCOL=TCP)(HOST=172.30.15.33)(PORT=1521)))
TNS-12541: TNS:no listener
 TNS-12560: TNS:protocol adapter error
  TNS-00511: No listener
   Linux Error: 111: Connection refused
Connecting to (DESCRIPTION=(ADDRESS=(PROTOCOL=IPC)(KEY=EXTPROC1521)))
TNS-12541: TNS:no listener
 TNS-12560: TNS:protocol adapter error
  TNS-00511: No listener
   Linux Error: 111: Connection refused

[oracle@ip-172-30-15-111 ~]$ lsnrctl status listener.ntap

LSNRCTL for Linux: Version 19.0.0.0.0 - Production on 19-SEP-2024 15:00:10

Copyright (c) 1991, 2022, Oracle.  All rights reserved.

Connecting to (DESCRIPTION=(ADDRESS=(PROTOCOL=TCP)(HOST=172.30.15.33)(PORT=1521)))
STATUS of the LISTENER
------------------------
Alias                     listener.ntap
Version                   TNSLSNR for Linux: Version 19.0.0.0.0 - Production
Start Date                16-SEP-2024 14:00:14
Uptime                    3 days 0 hr. 59 min. 56 sec
Trace Level               off
Security                  ON: Local OS Authentication
SNMP                      OFF
Listener Parameter File   /u01/app/oracle/product/19.0.0/NTAP/network/admin/listener.ora
Listener Log File         /u01/app/oracle/diag/tnslsnr/ip-172-30-15-111/listener.ntap/alert/log.xml
Listening Endpoints Summary...
  (DESCRIPTION=(ADDRESS=(PROTOCOL=tcp)(HOST=172.30.15.33)(PORT=1521)))
  (DESCRIPTION=(ADDRESS=(PROTOCOL=ipc)(KEY=EXTPROC1521)))
  (DESCRIPTION=(ADDRESS=(PROTOCOL=tcps)(HOST=ip-172-30-15-111.ec2.internal)(PORT=5500))(Security=(my_wallet_directory=/u01/app/oracle/product/19.0.0/NTAP/admin/NTAP/xdb_wallet))(Presentation=HTTP)(Session=RAW))
Services Summary...
Service "21f0b5cc1fa290e2e0636f0f1eacfd43.ec2.internal" has 1 instance(s).
  Instance "NTAP", status READY, has 1 handler(s) for this service...
Service "21f0b74445329119e0636f0f1eacec03.ec2.internal" has 1 instance(s).
  Instance "NTAP", status READY, has 1 handler(s) for this service...
Service "21f0b83929709164e0636f0f1eacacc3.ec2.internal" has 1 instance(s).
  Instance "NTAP", status READY, has 1 handler(s) for this service...
Service "NTAP.ec2.internal" has 1 instance(s).
  Instance "NTAP", status READY, has 1 handler(s) for this service...
Service "NTAPXDB.ec2.internal" has 1 instance(s).
  Instance "NTAP", status READY, has 1 handler(s) for this service...
Service "ntap_pdb1.ec2.internal" has 1 instance(s).
  Instance "NTAP", status READY, has 1 handler(s) for this service...
Service "ntap_pdb2.ec2.internal" has 1 instance(s).
  Instance "NTAP", status READY, has 1 handler(s) for this service...
Service "ntap_pdb3.ec2.internal" has 1 instance(s).
  Instance "NTAP", status READY, has 1 handler(s) for this service...
The command completed successfully
-
pmon プロセスを強制終了してデータベース障害をシミュレートし、PCS がデータベース障害を監視し、数秒以内に再起動することを確認します。
**Make a remote connection to ntap database**

[oracle@ora_01 ~]$ sqlplus system@//172.30.15.33:1521/NTAP.ec2.internal

SQL*Plus: Release 19.0.0.0.0 - Production on Fri Sep 13 15:42:42 2024
Version 19.18.0.0.0

Copyright (c) 1982, 2022, Oracle.  All rights reserved.

Enter password:
Last Successful login time: Thu Sep 12 2024 13:37:28 -04:00

Connected to:
Oracle Database 19c Enterprise Edition Release 19.0.0.0.0 - Production
Version 19.18.0.0.0

SQL> select instance_name, host_name from v$instance;

INSTANCE_NAME
----------------
HOST_NAME
----------------------------------------------------------------
NTAP
ip-172-30-15-111.ec2.internal


SQL>

**Kill ntap pmon process to simulate a failure**

[root@ip-172-30-15-111 ec2-user]# ps -ef | grep pmon
oracle    159247       1  0 18:27 ?        00:00:00 ora_pmon_NTAP
root      230595  120186  0 19:44 pts/0    00:00:00 grep --color=auto pmon
[root@ip-172-30-15-111 ec2-user]# kill -9 159247

**Observe the DB failure**

SQL> /
select instance_name, host_name from v$instance
*
ERROR at line 1:
ORA-03113: end-of-file on communication channel
Process ID: 227424
Session ID: 396 Serial number: 4913


SQL> exit
Disconnected from Oracle Database 19c Enterprise Edition Release 19.0.0.0.0 - Production
Version 19.18.0.0.0

**Reconnect to DB after reboot**

[oracle@ora_01 ~]$ sqlplus system@//172.30.15.33:1521/NTAP.ec2.internal

SQL*Plus: Release 19.0.0.0.0 - Production on Fri Sep 13 15:47:24 2024
Version 19.18.0.0.0

Copyright (c) 1982, 2022, Oracle.  All rights reserved.

Enter password:
Last Successful login time: Fri Sep 13 2024 15:42:47 -04:00

Connected to:
Oracle Database 19c Enterprise Edition Release 19.0.0.0.0 - Production
Version 19.18.0.0.0

SQL> select instance_name, host_name from v$instance;

INSTANCE_NAME
----------------
HOST_NAME
----------------------------------------------------------------
NTAP
ip-172-30-15-111.ec2.internal


SQL>
-
プライマリ ノードをスタンバイ モードにして Oracle リソースをスタンバイ ノードにフェイルオーバーすることにより、プライマリからスタンバイへの管理対象データベースのフェイルオーバーを検証します。
pcs node standby <nodename>**Stopping Oracle resources on primary node in reverse order** [root@ip-172-30-15-111 ec2-user]# pcs node standby ip-172-30-15-111.ec2.internal [root@ip-172-30-15-111 ec2-user]# pcs status Cluster name: ora_ec2nfsx Cluster Summary: * Stack: corosync (Pacemaker is running) * Current DC: ip-172-30-15-111.ec2.internal (version 2.1.7-5.1.el8_10-0f7f88312) - partition with quorum * Last updated: Fri Sep 13 20:01:16 2024 on ip-172-30-15-111.ec2.internal * Last change: Fri Sep 13 20:01:08 2024 by root via root on ip-172-30-15-111.ec2.internal * 2 nodes configured * 8 resource instances configured Node List: * Node ip-172-30-15-111.ec2.internal: standby (with active resources) * Online: [ ip-172-30-15-5.ec2.internal ] Full List of Resources: * clusterfence (stonith:fence_aws): Started ip-172-30-15-5.ec2.internal * Resource Group: oracle: * privip (ocf::heartbeat:awsvip): Started ip-172-30-15-111.ec2.internal * vip (ocf::heartbeat:IPaddr2): Started ip-172-30-15-111.ec2.internal * u01 (ocf::heartbeat:Filesystem): Stopping ip-172-30-15-111.ec2.internal * u02 (ocf::heartbeat:Filesystem): Stopped * u03 (ocf::heartbeat:Filesystem): Stopped * ntap (ocf::heartbeat:oracle): Stopped * listener (ocf::heartbeat:oralsnr): Stopped Daemon Status: corosync: active/enabled pacemaker: active/enabled pcsd: active/enabled **Starting Oracle resources on standby node in sequencial order** [root@ip-172-30-15-111 ec2-user]# pcs status Cluster name: ora_ec2nfsx Cluster Summary: * Stack: corosync (Pacemaker is running) * Current DC: ip-172-30-15-111.ec2.internal (version 2.1.7-5.1.el8_10-0f7f88312) - partition with quorum * Last updated: Fri Sep 13 20:01:34 2024 on ip-172-30-15-111.ec2.internal * Last change: Fri Sep 13 20:01:08 2024 by root via root on ip-172-30-15-111.ec2.internal * 2 nodes configured * 8 resource instances configured Node List: * Node ip-172-30-15-111.ec2.internal: standby * Online: [ ip-172-30-15-5.ec2.internal ] Full List of Resources: * clusterfence (stonith:fence_aws): Started ip-172-30-15-5.ec2.internal * Resource Group: oracle: * privip (ocf::heartbeat:awsvip): Started ip-172-30-15-5.ec2.internal * vip (ocf::heartbeat:IPaddr2): Started ip-172-30-15-5.ec2.internal * u01 (ocf::heartbeat:Filesystem): Started ip-172-30-15-5.ec2.internal * u02 (ocf::heartbeat:Filesystem): Started ip-172-30-15-5.ec2.internal * u03 (ocf::heartbeat:Filesystem): Started ip-172-30-15-5.ec2.internal * ntap (ocf::heartbeat:oracle): Starting ip-172-30-15-5.ec2.internal * listener (ocf::heartbeat:oralsnr): Stopped Daemon Status: corosync: active/enabled pacemaker: active/enabled pcsd: active/enabled **NFS mount points mounted on standby node** [root@ip-172-30-15-5 ec2-user]# df -h Filesystem Size Used Avail Use% Mounted on devtmpfs 7.7G 0 7.7G 0% /dev tmpfs 7.7G 33M 7.7G 1% /dev/shm tmpfs 7.7G 17M 7.7G 1% /run tmpfs 7.7G 0 7.7G 0% /sys/fs/cgroup /dev/xvda2 50G 21G 30G 41% / tmpfs 1.6G 0 1.6G 0% /run/user/1000 172.30.15.95:/orapm01_u01 48T 47T 840G 99% /u01 172.30.15.95:/orapm01_u02 285T 285T 840G 100% /u02 172.30.15.95:/orapm01_u03 190T 190T 840G 100% /u03 tmpfs 1.6G 0 1.6G 0% /run/user/54321 **Database opened on standby node** [oracle@ora_01 ~]$ sqlplus system@//172.30.15.33:1521/NTAP.ec2.internal SQL*Plus: Release 19.0.0.0.0 - Production on Fri Sep 13 16:34:08 2024 Version 19.18.0.0.0 Copyright (c) 1982, 2022, Oracle. All rights reserved. Enter password: Last Successful login time: Fri Sep 13 2024 15:47:28 -04:00 Connected to: Oracle Database 19c Enterprise Edition Release 19.0.0.0.0 - Production Version 19.18.0.0.0 SQL> select name, open_mode from v$database; NAME OPEN_MODE --------- -------------------- NTAP READ WRITE SQL> select instance_name, host_name from v$instance; INSTANCE_NAME ---------------- HOST_NAME ---------------------------------------------------------------- NTAP ip-172-30-15-5.ec2.internal SQL> -
スタンバイ解除プライマリ ノードによるスタンバイからプライマリへの管理対象データベースのフェイルバックを検証し、優先ノード設定により Oracle リソースが自動的にフェイルバックすることを確認します。
pcs node unstandby <nodename>**Stopping Oracle resources on standby node for failback to primary** [root@ip-172-30-15-111 ec2-user]# pcs node unstandby ip-172-30-15-111.ec2.internal [root@ip-172-30-15-111 ec2-user]# pcs status Cluster name: ora_ec2nfsx Cluster Summary: * Stack: corosync (Pacemaker is running) * Current DC: ip-172-30-15-111.ec2.internal (version 2.1.7-5.1.el8_10-0f7f88312) - partition with quorum * Last updated: Fri Sep 13 20:41:30 2024 on ip-172-30-15-111.ec2.internal * Last change: Fri Sep 13 20:41:18 2024 by root via root on ip-172-30-15-111.ec2.internal * 2 nodes configured * 8 resource instances configured Node List: * Online: [ ip-172-30-15-5.ec2.internal ip-172-30-15-111.ec2.internal ] Full List of Resources: * clusterfence (stonith:fence_aws): Started ip-172-30-15-5.ec2.internal * Resource Group: oracle: * privip (ocf::heartbeat:awsvip): Stopping ip-172-30-15-5.ec2.internal * vip (ocf::heartbeat:IPaddr2): Stopped * u01 (ocf::heartbeat:Filesystem): Stopped * u02 (ocf::heartbeat:Filesystem): Stopped * u03 (ocf::heartbeat:Filesystem): Stopped * ntap (ocf::heartbeat:oracle): Stopped * listener (ocf::heartbeat:oralsnr): Stopped Daemon Status: corosync: active/enabled pacemaker: active/enabled pcsd: active/enabled **Starting Oracle resources on primary node for failback** [root@ip-172-30-15-111 ec2-user]# pcs status Cluster name: ora_ec2nfsx Cluster Summary: * Stack: corosync (Pacemaker is running) * Current DC: ip-172-30-15-111.ec2.internal (version 2.1.7-5.1.el8_10-0f7f88312) - partition with quorum * Last updated: Fri Sep 13 20:41:45 2024 on ip-172-30-15-111.ec2.internal * Last change: Fri Sep 13 20:41:18 2024 by root via root on ip-172-30-15-111.ec2.internal * 2 nodes configured * 8 resource instances configured Node List: * Online: [ ip-172-30-15-5.ec2.internal ip-172-30-15-111.ec2.internal ] Full List of Resources: * clusterfence (stonith:fence_aws): Started ip-172-30-15-5.ec2.internal * Resource Group: oracle: * privip (ocf::heartbeat:awsvip): Started ip-172-30-15-111.ec2.internal * vip (ocf::heartbeat:IPaddr2): Started ip-172-30-15-111.ec2.internal * u01 (ocf::heartbeat:Filesystem): Started ip-172-30-15-111.ec2.internal * u02 (ocf::heartbeat:Filesystem): Started ip-172-30-15-111.ec2.internal * u03 (ocf::heartbeat:Filesystem): Started ip-172-30-15-111.ec2.internal * ntap (ocf::heartbeat:oracle): Starting ip-172-30-15-111.ec2.internal * listener (ocf::heartbeat:oralsnr): Stopped Daemon Status: corosync: active/enabled pacemaker: active/enabled pcsd: active/enabled **Database now accepts connection on primary node** [oracle@ora_01 ~]$ sqlplus system@//172.30.15.33:1521/NTAP.ec2.internal SQL*Plus: Release 19.0.0.0.0 - Production on Fri Sep 13 16:46:07 2024 Version 19.18.0.0.0 Copyright (c) 1982, 2022, Oracle. All rights reserved. Enter password: Last Successful login time: Fri Sep 13 2024 16:34:12 -04:00 Connected to: Oracle Database 19c Enterprise Edition Release 19.0.0.0.0 - Production Version 19.18.0.0.0 SQL> select instance_name, host_name from v$instance; INSTANCE_NAME ---------------- HOST_NAME ---------------------------------------------------------------- NTAP ip-172-30-15-111.ec2.internal SQL>
これで、Pacemaker クラスタリングと、データベース ストレージ バックエンドとしてのAmazon FSx ONTAP を使用した AWS EC2 での Oracle HA 検証とソリューションのデモンストレーションが完了します。
SnapCenterによる Oracle のバックアップ、リストア、クローン作成
Details
NetApp は、AWS EC2 およびAmazon FSx ONTAPに導入された Oracle データベースを管理するためにSnapCenter UI ツールを推奨しています。 TR-4979を参照してください"ゲストマウントされた FSx ONTAPを使用した、VMware Cloud on AWS での簡素化されたセルフマネージド Oracle"セクション `Oracle backup, restore, and clone with SnapCenter`SnapCenterの設定とデータベースのバックアップ、復元、クローン作成ワークフローの実行の詳細については、こちらをご覧ください。
詳細情報の入手方法
このドキュメントに記載されている情報の詳細については、次のドキュメントや Web サイトを参照してください。