

Configure BlueXP backup and recovery settings
 Suggest changes
After you set up BlueXP, configure the backup and recovery settings, which include adding credentials for host resources, importing SnapCenter resources, configuring log directories, and configuring VMware vCenter settings. You should do this before you actively start backing up and recovering your data.
-
Add credentials for host resources for the Windows and SQL Server hosts that you imported from SnapCenter and add credentials. (Microsoft SQL Server workloads only)
-
Import and manage SnapCenter host resources. (Microsoft SQL Server workloads only)
Required BlueXP role
Backup and Recovery super admin, Backup and Recovery backup admin, Backup and Recovery restore admin. Learn about Backup and recovery roles and privileges. Learn about BlueXP access roles for all services.
Add credentials for host resources
Add credentials for the host resources that you want to import from SnapCenter. Host credentials are used to discover new workloads and apply backup policies.
If you don't already have credentials, you can create them. These credentials must have required permissions to access and manage the host workloads.
You need to configure the following types of credentials:
-
Microsoft SQL Server credentials
-
SnapCenter Windows host credentials
-
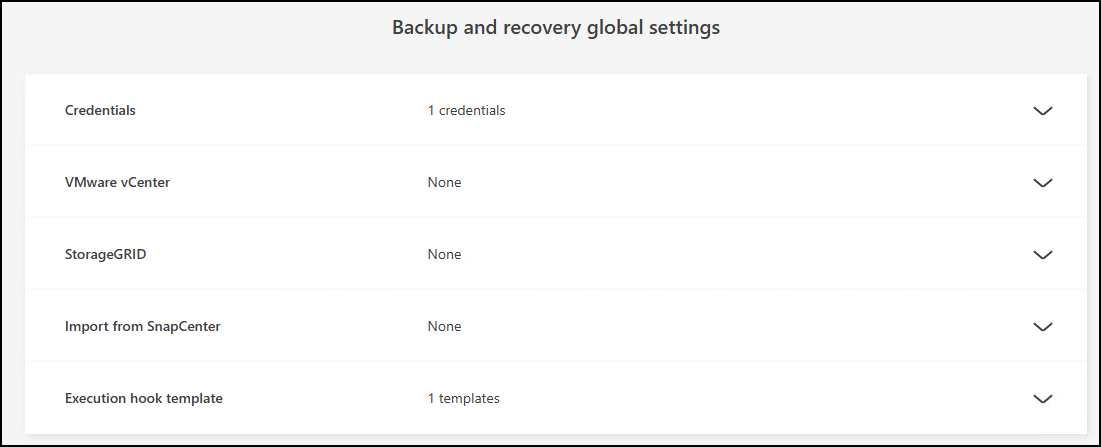
From the BlueXP backup and recovery menu, select Settings.
-
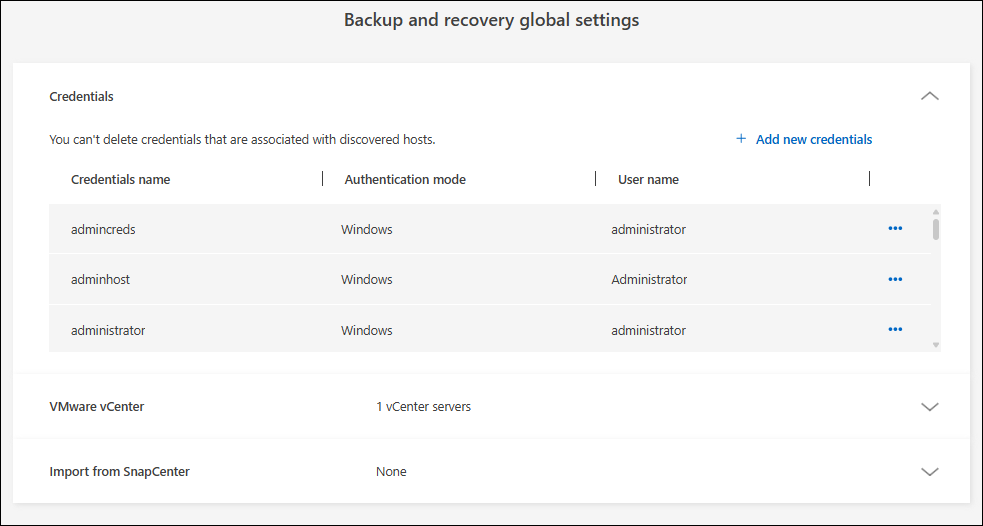
Select the down arrow for Credentials.
-
Select Add new credentials.
-
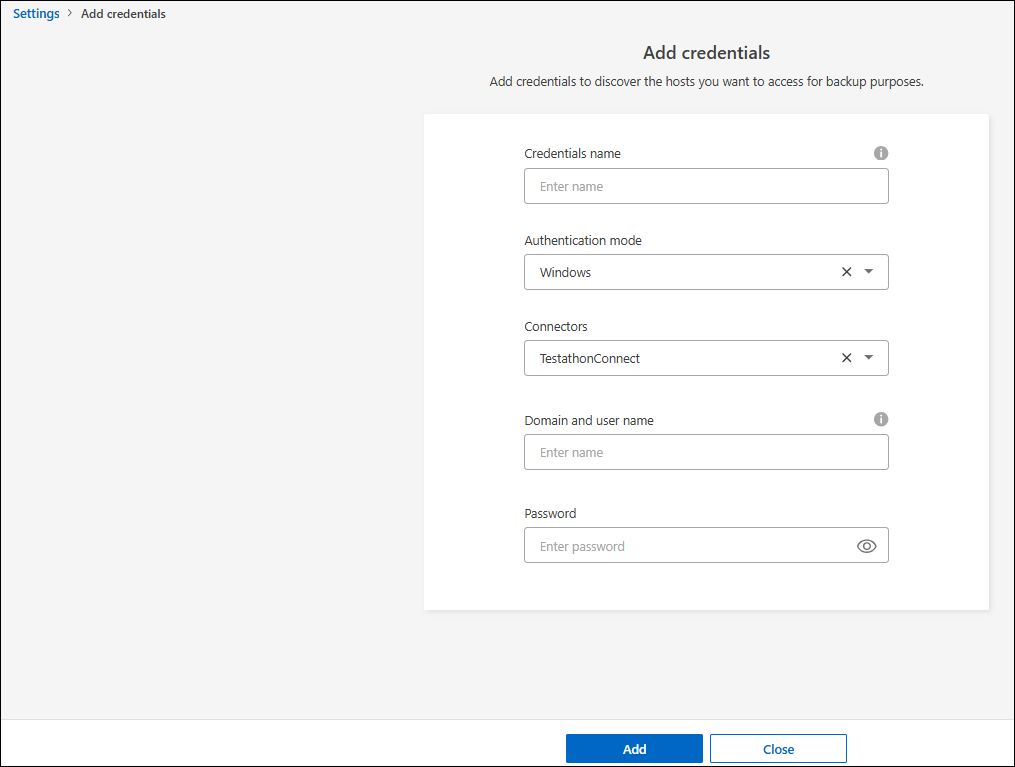
Enter information for the credentials. Different fields appear depending on the Authentication mode you select. Select the Information i for more information about the fields.
-
Credentials name: Enter a name for the credentials.
-
Authentication mode: Select Windows or Microsoft SQL.

You need to enter credentials for both Windows and Microsoft SQL Server, so you'll need to add two sets of credentials.
-
-
If you selected Windows:
-
Connector: Enter the BlueXP Connector IP address.
-
Domain and user name: Enter the NetBIOS or domain FQDN and user name for the credentials.
-
Password: Enter the password for the credentials.
-
-
If you selected Microsoft SQL:
-
Host: Select a discovered SQL Server host address.
-
SQL Server instance: Select a discovered SQL Server instance.
-
-
Select Add.
Edit credentials for host resources
You can later edit the password for the host resources that you imported from SnapCenter.
-
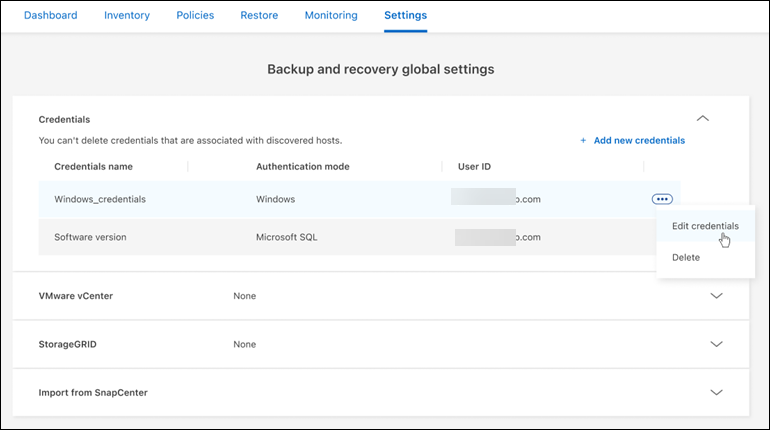
From the BlueXP backup and recovery menu, select Settings.
-
Select the down arrow to expand the Credentials section.
-
Select the Actions icon
 > Edit credentials.
-
Password: Enter the password for the credentials.
-
-
Select Save.
Maintain VMware vCenter settings
Provide the VMware vCenter credentials to discover the VMware vCenter Server workloads that you want to back up. If you don't have existing credentials, you can create them with the required permissions to access and manage the VMware vCenter Server workloads.
-
From the BlueXP backup and recovery menu, select Settings.
-
Select the down arrow to expand the VMware vCenter section.

-
Select Add vCenter.
-
Enter the VMware vCenter Server information.
-
vCenter FQDN or IP address: Enter a FQDN name or the IP address for the VMware vCenter Server.
-
Username and Password: Enter the username and password for the VMware vCenter Server.
-
Port: Enter the port number for the VMware vCenter Server.
-
Protocol: Select HTTP or HTTPS.
-
-
Select Add.
Import and manage SnapCenter host resources
If you previously used SnapCenter to back up your resources, you can import and manage those resources in BlueXP backup and recovery. With this option, you can import SnapCenter Server information to register multiple Snapcenter servers and discover the database workloads.
This is a two-part process:
-
Import SnapCenter Server application and host resources
-
Manage selected SnapCenter host resources
Import SnapCenter Server application and host resources
This first step imports host resources from SnapCenter and displays those resources in the BlueXP backup and recovery Inventory page. At that point, the resources are not yet managed by BlueXP backup and recovery.
|
|
After you import SnapCenter host resources, BlueXP backup and recovery does not take over protection management. To do so, you must explicitly select to manage these resources in BlueXP backup and recovery. |
-
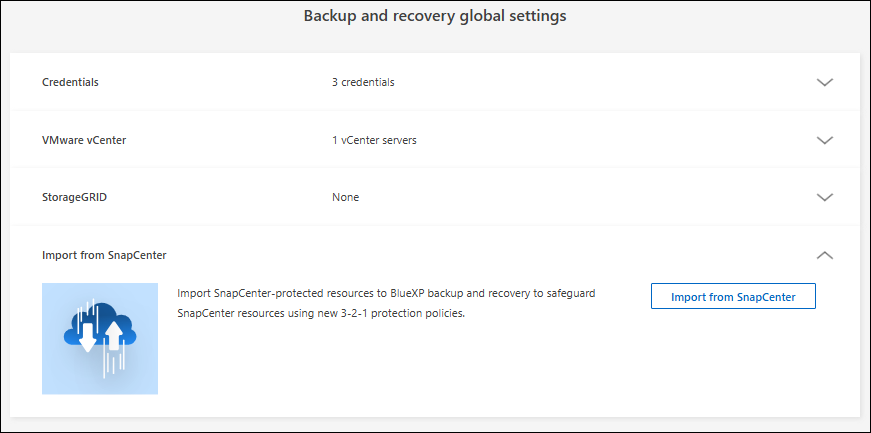
From the BlueXP backup and recovery menu, select Settings.
-
Select the down arrow to expand the Import from SnapCenter section.
-
Select Import from SnapCenter to import the SnapCenter resources.

-
Enter SnapCenter application credentials:
-
SnapCenter FQDN or IP address: Enter the FQDN or IP address of the SnapCenter application itself.
-
Port: Enter the port number for the SnapCenter Server.
-
Username and Password: Enter the username and password for the SnapCenter Server.
-
Connector: Select the BlueXP Connector for SnapCenter.
-
-
Enter SnapCenter server host credentials:
-
Existing credentials: If you select this option, you can use the existing credentials that you have already added. Enter the credentials name.
-
Add new credentials: If you don't have existing SnapCenter host credentials, you can add new credentials. Enter the credentials name, authentication mode, user name, and password.
-
-
Select Import to validate your entries and register the SnapCenter Server.

If the SnapCenter Server is already registered, you can update the existing registration details.
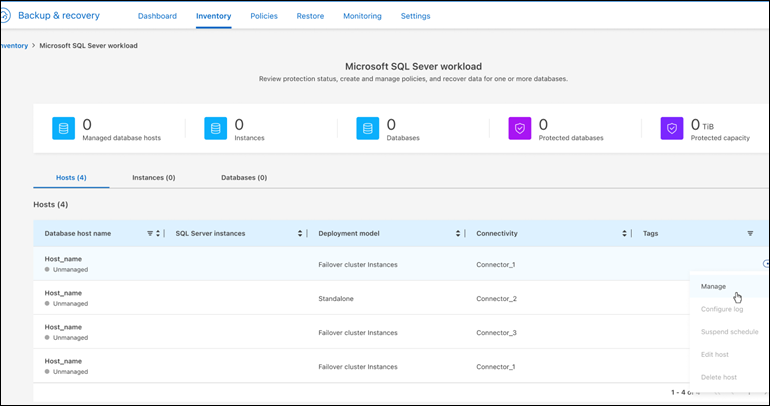
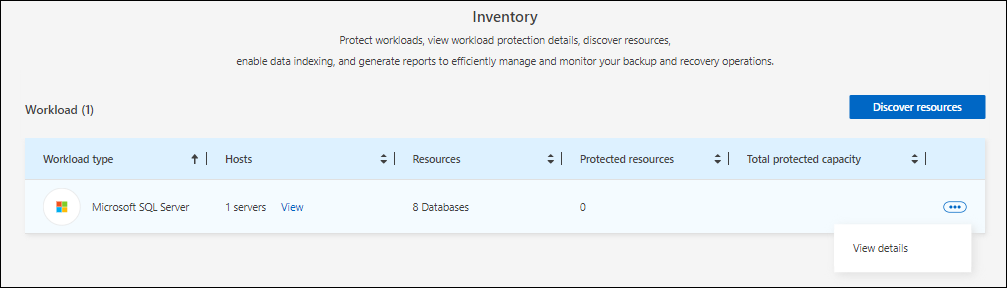
The Inventory page shows the imported SnapCenter resources.
Manage SnapCenter host resources
After you import the SnapCenter resources, manage those host resources in BlueXP backup and recovery. After you select to manage those imported resources, BlueXP backup and recovery can back up and recover the resources that you are importing from SnapCenter. You no longer need to manage those resources in SnapCenter Server.
-
After you import the SnapCenter resources, on the Inventory page that appears, select the SnapCenter resources that you imported that you want to have BlueXP backup and recovery manage from now on.
-
Select the Actions icon
> Manage to manage the resources.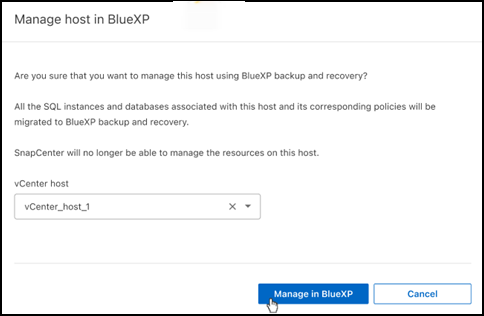
-
Select Manage in BlueXP.
The Inventory page shows Managed under the host name to indicate that the selected host resources are now managed by BlueXP backup and recovery.
Edit imported SnapCenter resources
You can later re-import SnapCenter resources our edit the imported SnapCenter resources to update the registration details.
You can change only the port and password details for the SnapCenter Server.
-
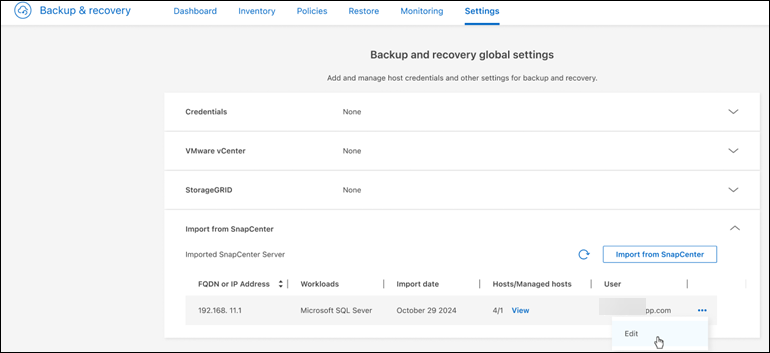
From the BlueXP backup and recovery menu, select Settings.
-
Select the down arrow for Import from SnapCenter.
The Import from SnapCenter page shows all previous imports.
-
Select the Actions icon
> Edit to update the resources. -
Update the SnapCenter password and port details, as needed.
-
Select Import.
Configure log directories in snapshots for Windows hosts
Before you create policies for Windows hosts, you should configure log directories in snapshots for Windows hosts. Log directories are used to store the logs that are generated during the backup process.
-
From the BlueXP backup and recovery menu, select Inventory.
-
From the Inventory page, select a workload and then select the Actions icon
> View details to display the workload details. -
From the Inventory details page showing Microsoft SQL Server, select the Hosts tab.

-
From the Inventory details page, select a host and select the Actions icon
> Configure log directory.
-
Either browse or enter the path for the log directory.
-
Select Save.