

Manage saved queries with NetApp Data Classification
 Suggest changes
NetaApp Data Classification supports saving your search queries. With a saved query, you can create custom filters to sort through frequent queries of your data Investigation page. Data Classification also includes predefined saved queries based on common requests.
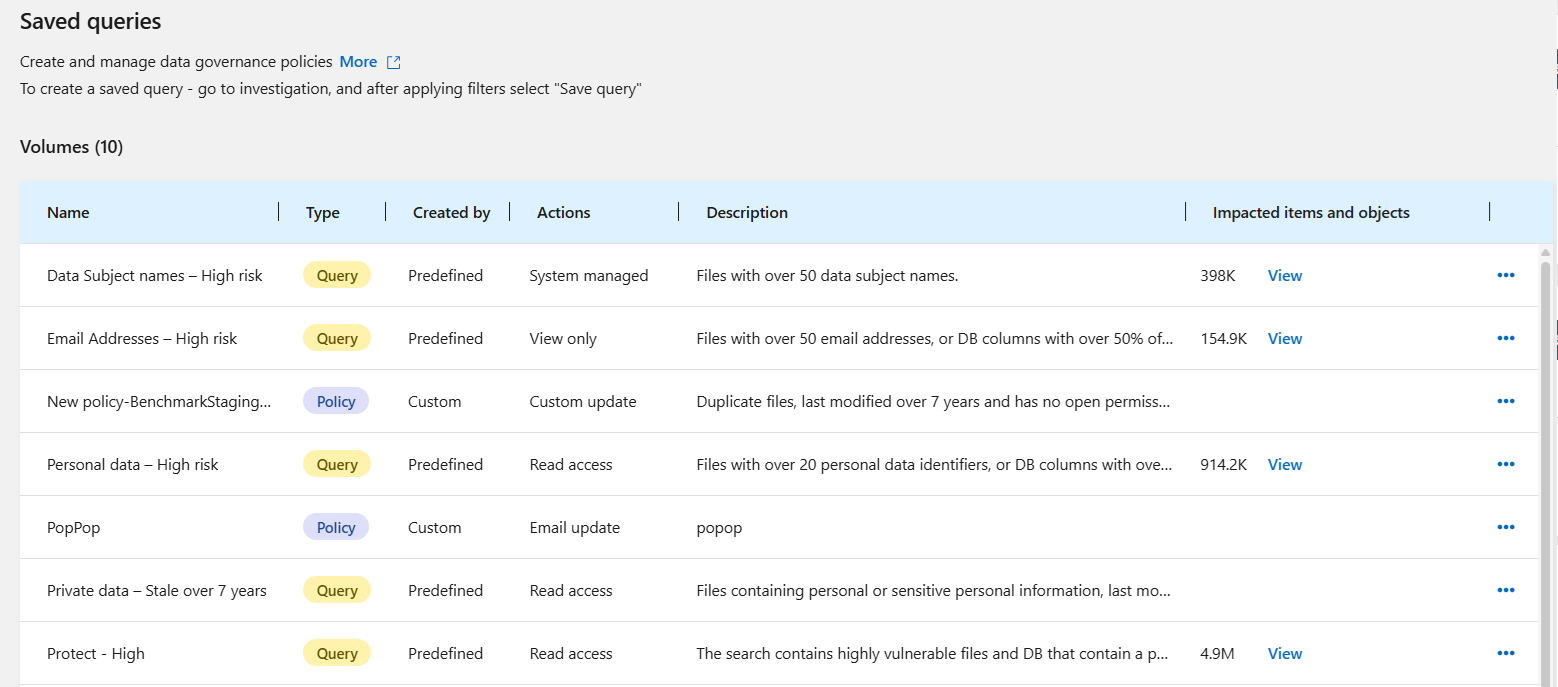
The Saved queries tab in the Compliance dashboard lists all the predefined and custom saved queries available on this instance of Data Classification.
Saved queries can also be saved as policies. Whereas queries filter data, policies allow you to act on the data. With a policy: you can delete discovered data or send email updates about the discovered data.
Saved queries also appear in the list of filters in the Investigation page.
View saved queries results in the Investigation page
To display the results for a saved query in the Investigation page, select the  button for a specific search then select Investigate Results.

Create saved queries and policies
You can create your own custom saved queries that provide results for queries specific to your organization. Results are returned for all files and directories (shares and folders) that match the search criteria.
-
In the Investigation tab, define a search by selecting the filters you want to use. See Filtering data in the Investigation page for details.
-
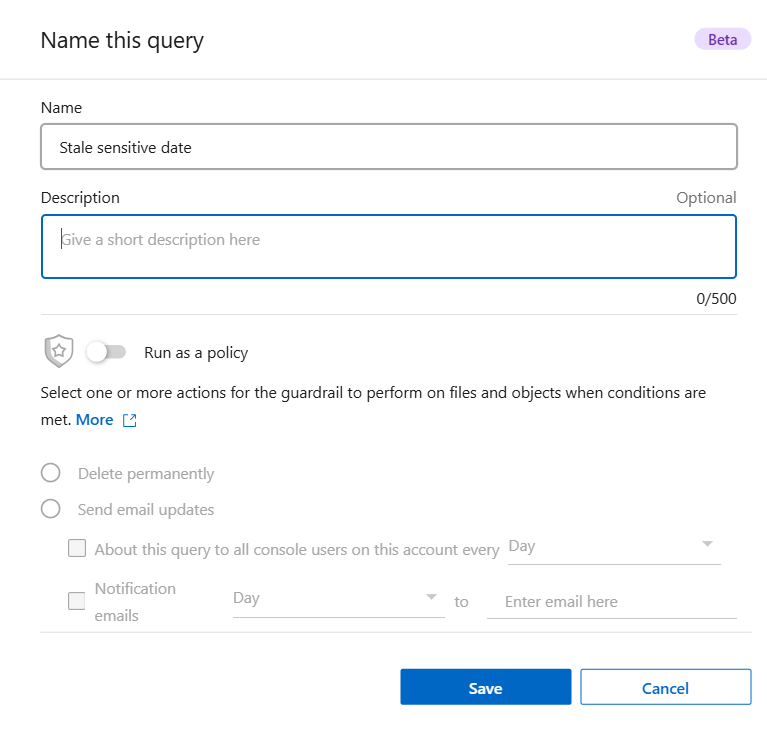
Once you have all the filter characteristics set to your liking, select Save query.

-
Name the saved query and add a description. The name must be unique.
-
You can optionally save the query as policy:
-
To save the query as a policy, switch the Run as a policy toggle.
-
Choose to Delete permanently or Send email updates. If you choose email updates, you can email the query results to all Console users at daily, weekly, or monthly. Alternately, you can send the notification to specific email address at the same frequencies.
-
-
Select Save.
Once you've created the search or policy, you can view it in the Saved queries tab.
Edit saved queries or policies
You can modify the name and description of a saved query. You can also convert a query to a policy and vice versa.
You cannot modify default saved queries. You cannot modify the filters of a saved query. You can alternately view the investigation results of a saved query, change or modify the filters, then save it as a new query or policy.
-
From the Saved queries page, select Edit Search for the search that you want to change.

-
Make the changes to the name and description fields. To only change the name and description fields.
You can optionally convert the query to a policy or convert the policy to a saved query. Switch the Run as a policy toggle as needed.
.. If you're converting the query to a policy, choose to Delete permanently or Send email updates. If you choose email updates, you can email the query results to all Console users at daily, weekly, or monthly. Alternately, you can send the notification to specific email address at the same frequencies. -
Select Save to complete the changes.
Delete saved queries
You can delete any custom saved query or policy if you no longer need it. You can't delete default saved queries.
To delete a saved query, select the button for a specific search, select Delete query, then select Delete query again in the confirmation dialog.
Default queries
Data Classification provides the following system-defined search queries:
-
Data Subject names - High risk
Files with more than 50 data subject names
-
Email Addresses - High risk
Files with more than 50 email addresses or database columns with more than 50% of their rows containing email addresses
-
Personal data - High risk
Files with more than 20 personal data identifiers or database columns with more than 50% of their rows containing personal data identifiers
-
Private data - Stale over 7 years
Files containing personal or sensitive personal information, last modified more than 7 years ago
-
Protect - High
Files or database columns that contain a password, credit card information, IBAN number, or social security number
-
Protect - Low
Files that have not been accessed for more than 3 years
-
Protect - Medium
Files that contain files or database columns with personal data identifiers including ID numbers, tax identification numbers, drivers license numbers, medicinal IDs, or passport numbers
-
Sensitive Personal data - High risk
Files with more than 20 sensitive personal data identifiers or database columns with greater than 50% of their rows containing sensitive personal data