

Set up permissions for FSx for ONTAP
 Suggest changes
To create or manage an FSx for ONTAP file system, you need to add AWS credentials in the NetApp Console by providing the ARN of an IAM role that gives the permissions needed to create an FSx for ONTAP system from the NetApp Console.
Why AWS credentials are required
AWS credentials are required to create and manage FSx for ONTAP systems from the NetApp Console. You can create new credentials or add them to an existing organization. Credentials allow you to manage AWS resources from the NetApp Console.
Credentials and permissions are managed by NetApp Workload Factory. Workload Factory is a life-cycle management platform designed to help users manage and improve VMware, EDA, and database workloads that run on Amazon FSx for NetApp ONTAP file systems. The NetApp Console and Workload Factory use the same set of AWS credentials and permissions. Storage is the storage management capability in Workload Factory and it is the only capability you need to turn on and add credentials for to create and manage your FSx for ONTAP file systems.
About this task
When adding new credentials for FSx for ONTAP from Storage in Workload Factory, you'll need to decide which permission policies you'd like to grant. To discover AWS resources like FSx for ONTAP file systems, you'll need view, planning, and analysis permissions. To deploy FSx for ONTAP file systems, you'll need file system creation and deletion permissions. You can do basic operations for FSx for ONTAP without permissions. Learn more about permissions.
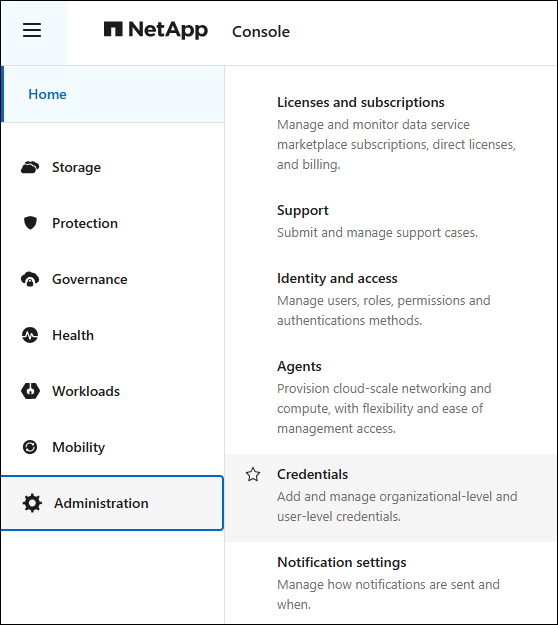
New and existing AWS credentials are viewable from the Administration menu on the Credentials page.
You can add credentials using two methods:
-
Manually: You create the IAM policy and the IAM role in your AWS account while adding credentials in Workload Factory.
-
Automatically: You capture a minimal amount of information about permissions and then use a CloudFormation stack to create the IAM policies and role for your credentials.
Add credentials to an account manually
You can manually add AWS credentials to the NetApp Console to give your account the permissions for managing workload capabilities you want to use, and an IAM role that is assigned to your account.
There are three parts to creating the credentials:
-
Select the services and permissions level that you would like to use and then create IAM policies from the AWS Management Console.
-
Create an IAM role from the AWS Management Console.
-
Enter a name and add the credentials in the NetApp Console.
To create or manage an FSx for ONTAP file system, you need to add AWS credentials in the NetApp Console by providing the ARN of an IAM role that gives Workload Factory the permissions needed to create an FSx for ONTAP file system.
You'll need to have credentials to log in to your AWS account.
-
From the NetApp Console menu, select Administration and then Credentials.
-
From the Organization credentials page, select Add credentials.
-
Select Amazon Web Services, then FSx for ONTAP, and then Next.
-
Select Add manually and then follow the steps below to fill out the three sections under Permissions configuration.
Step 1: Select the storage capability and create the IAM policy
In this section, you'll choose the storage capability to manage with these credentials, and the permissions for storage. You also have the option to select other workloads like Databases, GenAI, or VMware. Once you've made your selections, you'll need to copy the policy permissions for each selected workload from the Codebox and add them into the AWS Management Console within your AWS account to create the policies.
-
From the Create permission policies section, enable each of the workload capabilities that you want to include in these credentials. Enable Storage to create and manage file systems.
You can add additional capabilities later, so just select the workloads that you currently want to deploy and manage.
-
For those workload capabilities that offer a choice of permission policies, select the type of permissions that will be available with these credentials. Learn about the permissions.
-
Optional: Select Enable automatic permissions check to check if you have the required AWS account permissions to complete workload operations. Enabling the check adds the
iam:SimulatePrincipalPolicy permissionto your permission policies. The purpose of this permission is to confirm permissions only. You can remove the permission after adding credentials, but we suggest keeping it to stop resources from being created if some steps fail and to avoid manual cleanup. -
In the Codebox window, copy the permissions for the first IAM policy.
-
Open another browser window and log in to your AWS account in the AWS Management Console.
-
Open the IAM service, and then select Policies > Create Policy.
-
Select JSON as the file type, paste the permissions you copied in step 4, and select Next.
-
Enter the name for the policy and select Create Policy.
-
If you've selected multiple workload capabilities in step 1, repeat these steps to create a policy for each set of workload permissions.
Step 2: Create the IAM role that uses the policies
In this section you'll set up an IAM role that Workload Factory will assume that includes the permissions and policies that you just created.
-
In the AWS Management Console, select Roles > Create Role.
-
Under Trusted entity type, select AWS account.
-
Select Another AWS account and copy and paste the account ID for FSx for ONTAP workload management from the Console user interface.
-
Select Required external ID and copy and paste the external ID in the NetApp Console user interface.
-
-
Select Next.
-
In the Permissions policy section, choose all the policies that you defined previously and select Next.
-
Enter a name for the role and select Create role.
-
Copy the Role ARN.
-
Return to the Add credentials page in the NetApp Console, expand the Create role section, and paste the ARN in the Role ARN field.
Step 3: Enter a name and add the credentials
The final step is to enter a name for the credentials.
-
From the Add credentials page, expand Credentials name.
-
Enter the name that you want to use for these credentials.
-
Select Add to create the credentials.
Console creates the credentials and displays them on the Credentials page. You can use, rename, or remove credentials from the NetApp Console.
Add credentials to an account using CloudFormation
You can add AWS credentials to NetApp Workload Factory using an AWS CloudFormation stack by selecting the workload capabilities that you want to use, and then launching the AWS CloudFormation stack in your AWS account. CloudFormation will create the IAM policies and IAM role based on the workload capabilities you selected.
-
You'll need to have credentials to log in to your AWS account.
-
You'll need to have the following permissions in your AWS account when adding credentials using a CloudFormation stack:
{
  "Version": "2012-10-17",
  "Statement": [
    {
      "Effect": "Allow",
      "Action": [
        "cloudformation:CreateStack",
        "cloudformation:UpdateStack",
        "cloudformation:DeleteStack",
        "cloudformation:DescribeStacks",
        "cloudformation:DescribeStackEvents",
        "cloudformation:DescribeChangeSet",
        "cloudformation:ExecuteChangeSet",
        "cloudformation:ListStacks",
        "cloudformation:ListStackResources",
        "cloudformation:GetTemplate",
        "cloudformation:ValidateTemplate",
        "lambda:InvokeFunction",
        "iam:PassRole",
        "iam:CreateRole",
        "iam:UpdateAssumeRolePolicy",
        "iam:AttachRolePolicy",
        "iam:CreateServiceLinkedRole"
      ],
      "Resource": "*"
    }
  ]
}
-
From the NetApp Console menu, select Administration and then Credentials.
-
Select Add credentials.
-
Select Amazon Web Services, then FSx for ONTAP, and then Next.
You're now on the Add Credentials page in NetApp Workload Factory.
-
Select Add via AWS CloudFormation.
-
Under Create policies, enable each of the workload capabilities that you want to include in these credentials and choose a permission level for each workload.
You can add additional capabilities later, so just select the workloads that you currently want to deploy and manage.
-
Optional: Select Enable automatic permissions check to check if you have the required AWS account permissions to complete workload operations. Enabling the check adds the
iam:SimulatePrincipalPolicypermission to your permission policies. The purpose of this permission is to confirm permissions only. You can remove the permission after adding credentials, but we suggest keeping it to stop resources from being created if some steps fail and to avoid manual cleanup. -
Under Credentials name, enter the name that you want to use for these credentials.
-
Add the credentials from AWS CloudFormation:
-
Select Add (or select Redirect to CloudFormation) and the Redirect to CloudFormation page is displayed.
-
If you use single sign-on (SSO) with AWS, open a separate browser tab and log in to the AWS Console before you select Continue.
You should log in to the AWS account where the FSx for ONTAP file system resides.
-
Select Continue from the Redirect to CloudFormation page.
-
On the Quick create stack page, under Capabilities, select I acknowledge that AWS CloudFormation might create IAM resources.
-
Select Create stack.
-
Return to Administration > Credentials page from the main menu to verify that the new credentials are in progress, or that they have been added.
-
Console creates the credentials and displays them on the Credentials page. You can use, rename, or remove credentials from the NetApp Console.