Creating Queries
 Suggest changes


Queries enable you to search the assets on your tenant at a granular level, allowing to filter for the data you want and sort the results to your liking.
For example, you can create a query for volumes, add a filter to find particular storages associated with the selected volumes, add another filter to find a particular annotation such as "Tier 1" on the selected storages, and finally add another filter to find all storages with IOPS - Read (IO/s) greater than 25. When the results are displayed, you can then sort the columns of information associated with the query in ascending or descending order.
Note: When a new data collector is added which acquires assets, or any annotation or application assignments are made, you can query for those new assets, annotations, or applications only after the queries are indexed. Indexing occurs at a regularly scheduled interval or during certain events such as running annotation rules.
-
Navigate to Queries > *+New Query.
-
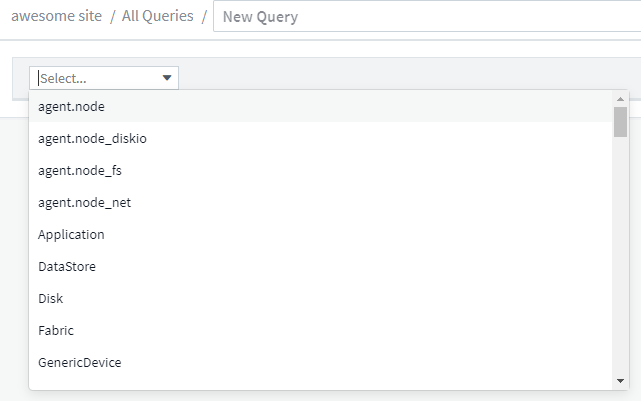
From the 'Select…' list, select the object type you want to query for. You can scroll through the list or you can start typing to more quickly find what you're searching for.

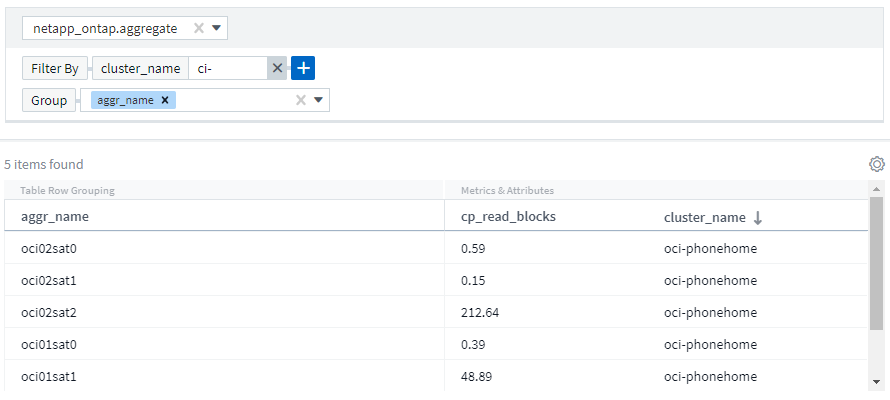
You can add filters to further narrow down your query by clicking the + button in the Filter By field.
Group rows by object or attribute. When working with integration data (Kubernetes, ONTAP Advanced Metrics, etc.), you can group by multiple attributes, if desired.
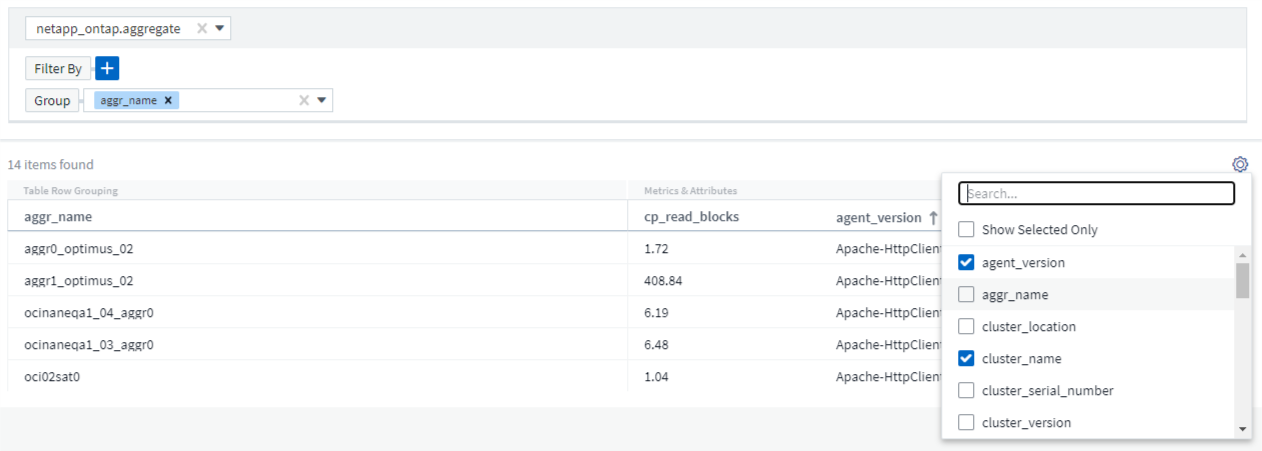
The query results list shows a number of default columns, depending on the object type searched for. To add, remove, or change the columns, click the gear icon on the right of the table. The available columns variy based on the asset/metric type.
Choosing Aggregation, Units, Conditional Formatting
Aggregation and Units
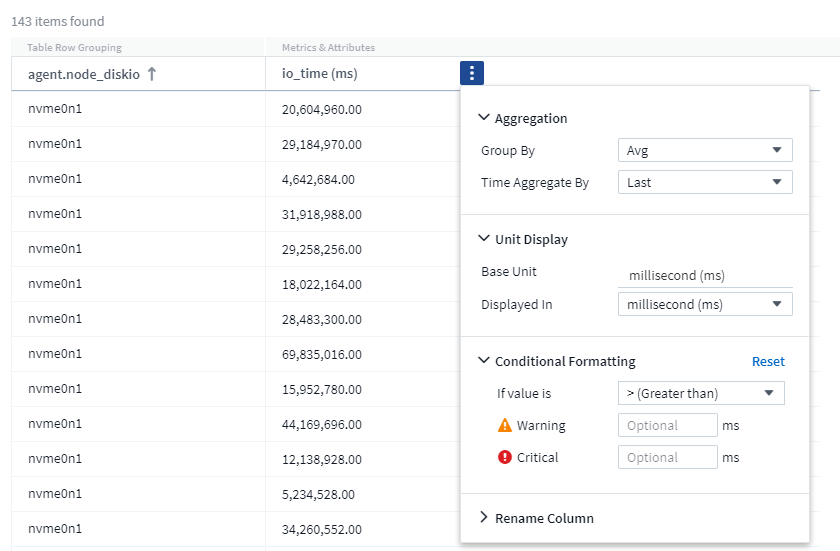
For "value" columns, you can further refine your query results by choosing how the displayed values are aggregated as well as selecting the units in which those values are displayed. These options are found by selecting the "three dots" menu at the top corner of a column.
Units
You can select the units in which to display the values. For example, if the selected column shows raw capacity and the values are shown in GiB, but you prefer to display them as TiB, simply select TiB from the Unit Display drop-down.
Aggregation
By the same token, if the values shown are aggregated from the underlying data as "Average", but you prefer to show the sum of all values, select "Sum" from either the Group by drop-down (if you want any grouped values to show the sums) or from the Time Aggregate By drop-down (if you want the row values to show sums of underlying data).
You can choose to aggregate grouped data points by Avg, Max, Min, or Sum.
You can aggregate individual row data by Average, Last data point acquired, Maximum, Minimum, or Sum.
Conditional Formatting
Conditional Formatting allows you to highlight Warning-level and Critical-level thresholds in the query results list, bringing instant visibility to outliers and exceptional data points.
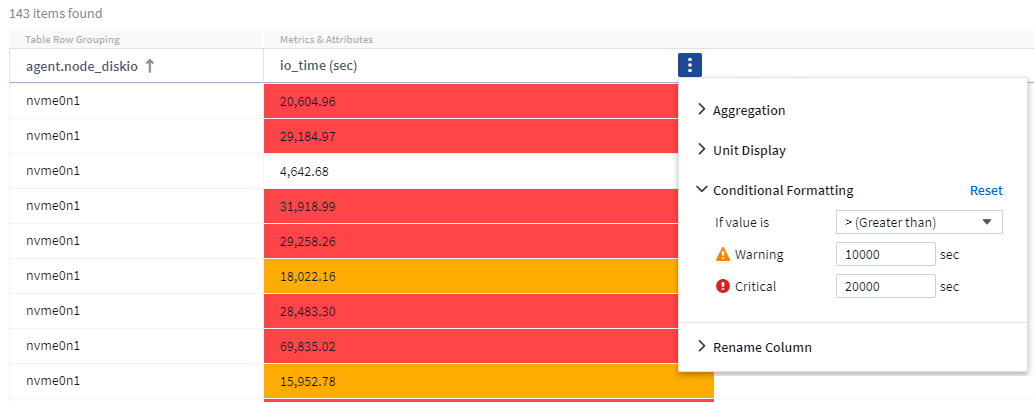
Conditional formatting is set separately for each column. For example, you can choose one set of thresholds for a capacity column, and another set for a throughput column.
Rename Column
Renaming a column changes the displayed name on the Query results list. The new column name is also shown in the resulting file if you export the query list to .CSV.
Save
After you have configured your query to show you the results you want, you can click the Save button to save the query for future use. Give it a meaningful and unique name.
More on Filtering
Wildcards and Expressions
When you are filtering for text or list values in queries or dashboard widgets, as you begin typing you are presented with the option to create a wildcard filter based on the current text. Selecting this option will return all results that match the wildcard expression. You can also create expressions using NOT or OR, or you can select the "None" option to filter for null values in the field.
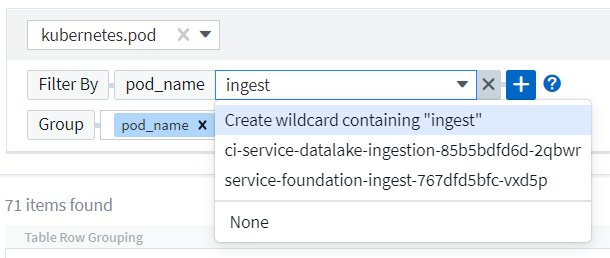
Filters based on wildcards or expressions (e.g. NOT, OR, "None", etc.) display in dark blue in the filter field. Items that you select directly from the list are displayed in light blue.
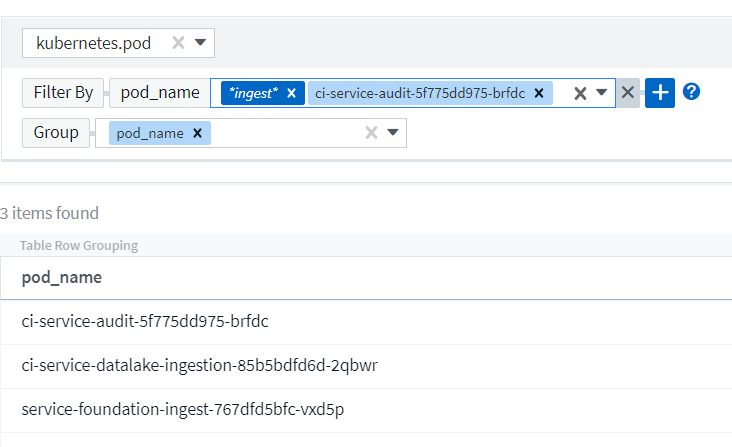
Note that Wildcard and Expression filtering works with text or lists but not with numerics, dates or booleans.
Refining Filters
You can use the following to refine your filter:
Filter |
What it does |
Example |
Result |
* (Asterisk) |
enables you to search for everything |
vol*rhel |
returns all resources that start with "vol" and end with "rhel" |
? (question mark) |
enables you to search for a specific number of characters |
BOS-PRD??-S12 |
returns BOS-PRD12-S12, BOS-PRD23-S12, and so on |
OR |
enables you to specify multiple entities |
FAS2240 OR CX600 OR FAS3270 |
returns any of FAS2440, CX600, or FAS3270 |
NOT |
allows you to exclude text from the search results |
NOT EMC* |
returns everything that does not start with "EMC" |
None |
searches for NULL values in all fields |
None |
returns results where the target field is empty |
Not * |
searches for NULL values in text-only fields |
Not * |
returns results where the target field is empty |
If you enclose a filter string in double quotes, Insight treats everything between the first and last quote as an exact match. Any special characters or operators inside the quotes will be treated as literals. For example, filtering for "*" will return results that are a literal asterisk; the asterisk will not be treated as a wildcard in this case. The operators OR and NOT will also be treated as literal strings when enclosed in double quotes.
Filtering for Boolean values
When filtering for a Boolean value, you may be presented with the following choices on which to filter:
-
Any: This will return all results, including results set to "Yes", "No", or not set at all.
-
Yes: Returns only "Yes" results. Note that DII shows "Yes" as a check mark in most tables. Values may be set to "True", "On", etc.; DII treats all of these as "Yes".
-
No: Returns only "No" results. Note that DII shows "No" as an "X" in most tables. Values may be set to "False", "Off", etc.; DII treats all of these as "No".
-
None: Returns only results where the value has not been set at all. Also referred to as "Null" values.
What do I do now that I have query results?
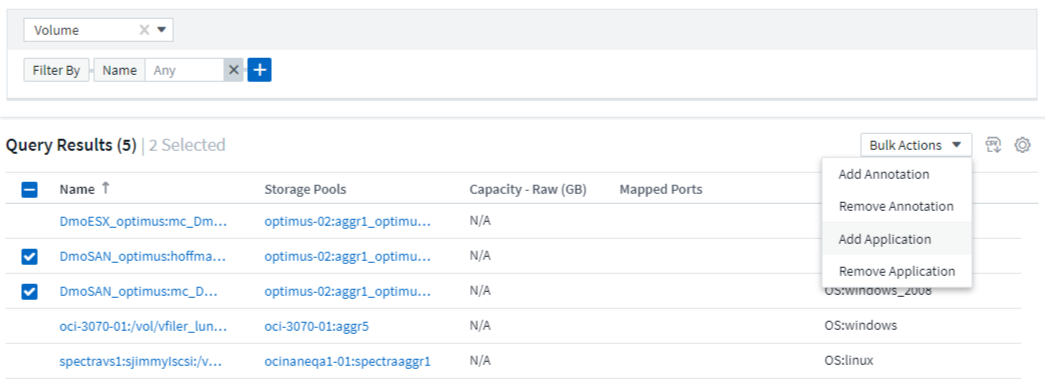
Querying provides a simple place to add annotations or assign applications to assets. Note that you can only assign applications or annotations to your inventory assets (Disk, Storage, etc.). Integration metrics cannot take on annotation or application assignments.
To assign an annotation or application to the assets resulting from your query, sinply select the asset(s) using the check box column on the left of the results table, then click the Bulk Actions button on the right. Choose the desired action to apply to the selected assets.
Annotation Rules require query
If you are configuring Annotation Rules, each rule must have an underlying query to work with. But as you've seen above, queries can be made as broad or as narrow as you need.


