

Change scan settings in NetApp Data Classification
 Suggest changes
You can manage how your data is being scanned in each of your systems and data sources. You can make the changes on a "repository" basis; meaning you can make changes for each volume, schema, user, etc. depending on the type of data source you are scanning.
Some of the things you can change are whether a repository is scanned or not, and whether NetApp Data Classification is performing a mapping scan or a mapping & classification scan. You can also pause and resume scanning, for example, if you need to stop scanning a volume for a period of time.
View the scan status for your repositories
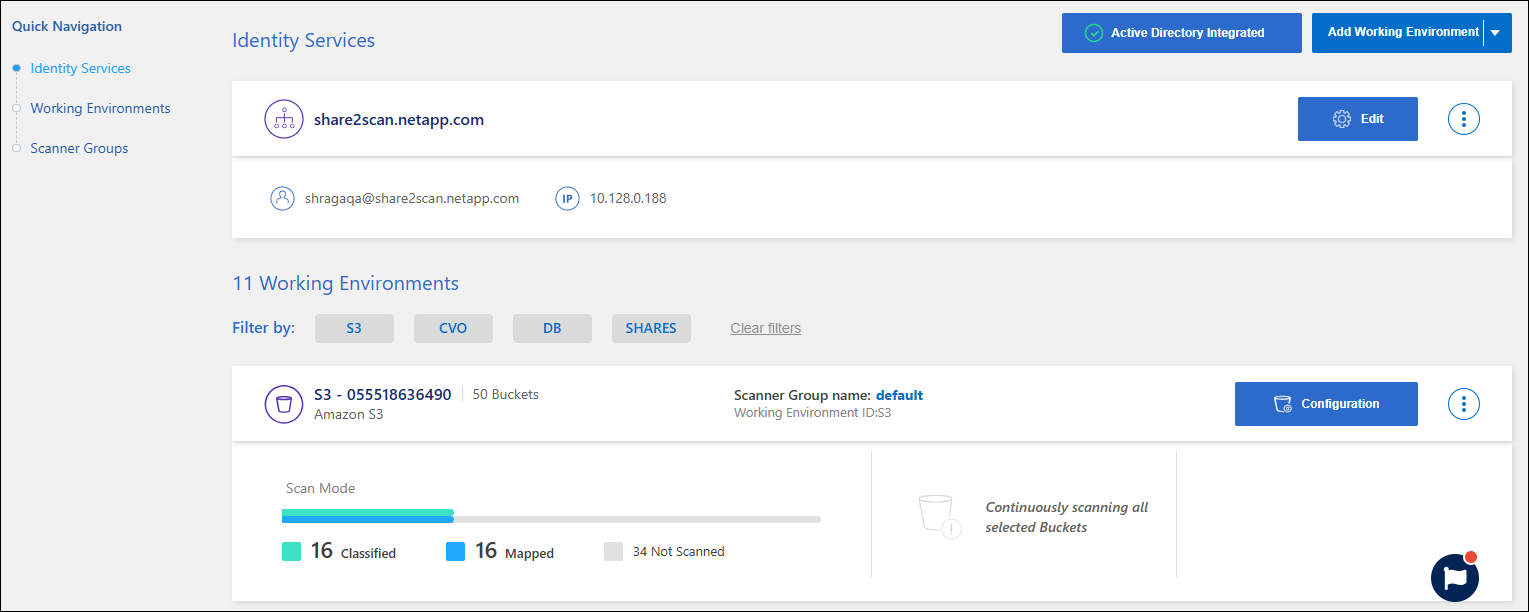
You can view the individual repositories that NetApp Data Classification is scanning (volumes, buckets, etc.) for each system and data source. You can also see how many have been "Mapped", and how many have been "Classified". Classification takes longer because the full AI identification is being performed on all data.
You can view the scanning status of each work environment on the Configuration page:
-
Initializing (light blue dot): The map or classify configuration is activated. This appears briefly before transitioning to the "pending queue" status.
-
Pending queue (orange dot): The scan task is waiting to be listed in the scanning queue.
-
Queued (orange dot): The task was successfully added to the scanning queue. The system will start mapping or classifying the volume when its turn in the queue arrives.
-
Running (green dot): The scan task, which was in the queue, is actively in progress on the selected storage repository.
-
Finished (green dot): The scan of the storage repository is complete.
-
Paused (gray dot): You paused scanning. Although the changes in the volume are not displayed in the system, the scanned insights remain available.
-
Error (red dot): The scan cannot complete because it has encountered issues. If you need to complete an action, the error appears in the tooltip under the “Required action” column. Otherwise, the system shows an “error” status and tries to recover. When it finishes, the status changes.
-
Not scanning: The volume configuration of "Off" was selected and the system is not scanning the volume.
-
From the Data Classification menu, select Configuration.
-
Identify the system whose scan settings you want to review then select Manage.
-
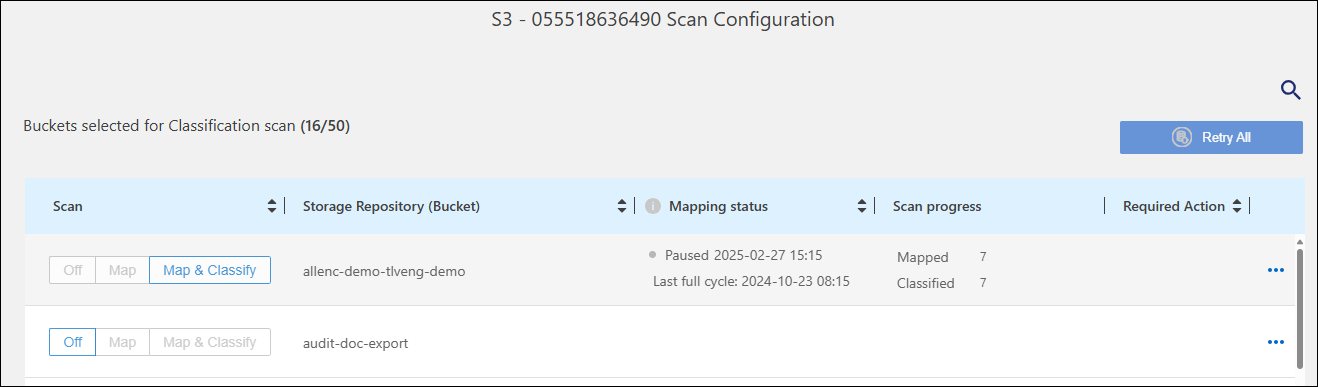
In the Scan Configuration page, view the scan settings for all repositories.
-
During a scan, hover your cursor over the progress bar in the Mapping status column to view the number of files in the queue to be mapped or classified for that repository.
Change the scan type
You can start or stop scans in a system at any time from the Configuration page. You can also change from mapping-only scans to full scans, and vice-versa.

|
Mapping-only scans aren't available for databases. When you enable database scanning, it must be a full scan. |
-
From the Data Classification menu, select Configuration.
-
To change the scan type for all assets in a system, select the action menu for that system then change to the desired scan type. For example, to change the scans for a file shares group from mapping-only to full, select Scan all shares: full scan.
To change the scan type for individual buckets, shares, or volumes, select the Manage button for the system.
In the individual system configuration, select the asset you want to modify. Select the Scan type then change to the desired scan type.
Prioritize scans
You can prioritize the most important map-only or full scans to ensure high priority scans are completed first.
By default, scans are queued based on the order in which they are initiated. With the ability to prioritize scans, you can move scans to the front of the queue. Multiple scans can be prioritized. Priority is designated in a first-in, first-out order, meaning the first scan you prioritize moves to the front of the queue; the second scan you prioritize becomes second in the queue, and so forth.
Priority is granted on a one-time basis. Automatic rescans of mapping data occur in the default order.
-
From the Data Classification menu, select Configuration.
-
Find the system that you want to modify scans for then select Manage.
-
Find the resources you want to prioritize. Select the action menu
…option then Prioritize scan.
Stop scanning for a repository
You can stop scanning a repository (for example, a volume) if you no longer need to monitor it for compliance. You do this by turning scanning "off". When scanning is turned off, all the indexing and information about that volume is removed from the system, and charging for scanning the data is stopped.
-
From the Data Classification menu, select Configuration.
-
Select the Manage button for the system.
-
In the system overview, select the scan type column. Set the scan type to Off.
Pause and resume scanning for a repository
You can pause scanning so that Data Classification won't perform any future scans for changes or additions to the repository. All current scan results remain accessible in Data Classification.
If you pause scans, it does not eliminate billing charges because the data is still on the system.
You can resume scanning at any time.
-
From the Data Classification menu, select Configuration.
-
Find the system that you want to modify scans for then select Manage.
-
Identify the resources you want to pause. For each resource, select the action menu
…option then Pause scan.If you want to resume scanning, repeat the procedure then select Resume scan.