Perform replication plan operations with NetApp Disaster Recovery

 Suggest changes

 PDFs
PDFs
After configuring the replication plan in NetApp Disaster Recovery, you can perform failovers, test failover, refresh resources, migrate, and manage snapshots and replications plans. The primary action to perform, beyond maintenance, is failover in the event of a failure.
Fail over
Failover is a manually initiated process.
-
From the NetApp Console left navigation bar, select Protection > Disaster Recovery.
-
From the NetApp Disaster Recovery menu, select Replication plans.
-
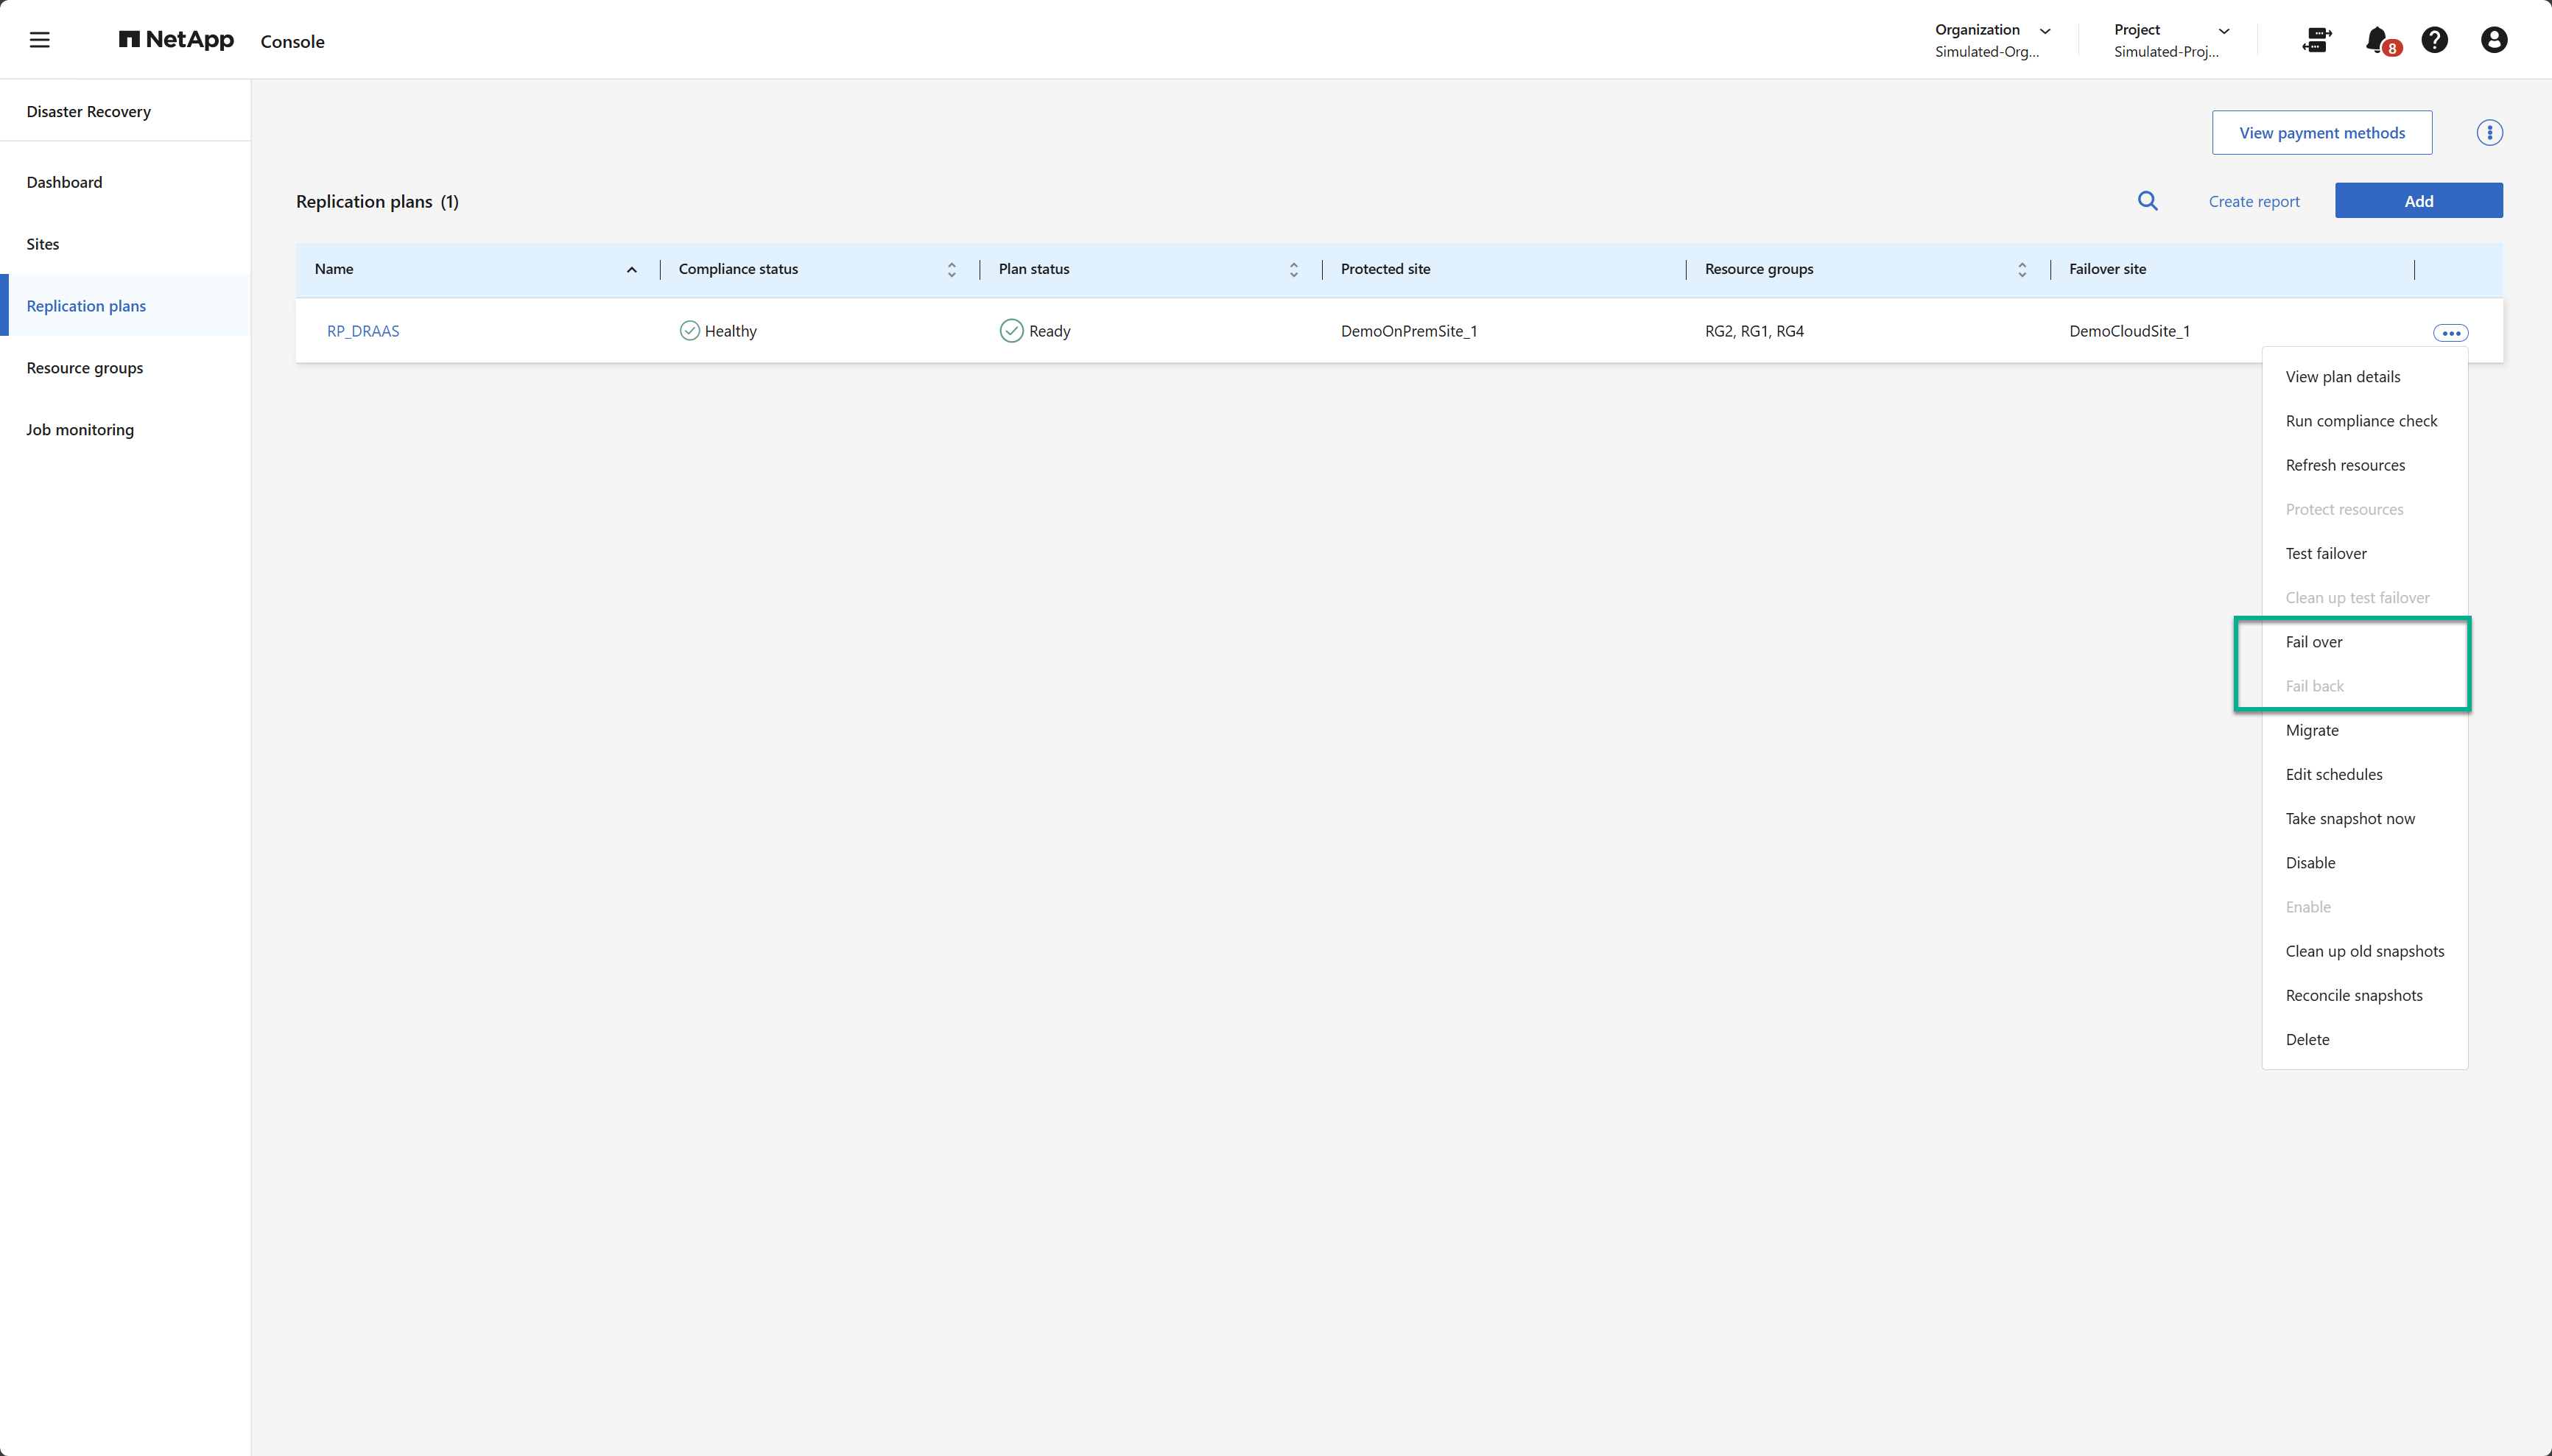
From the Replication plans page, select the replication plan's Actions option
 .
. -
Select Fail over.
-
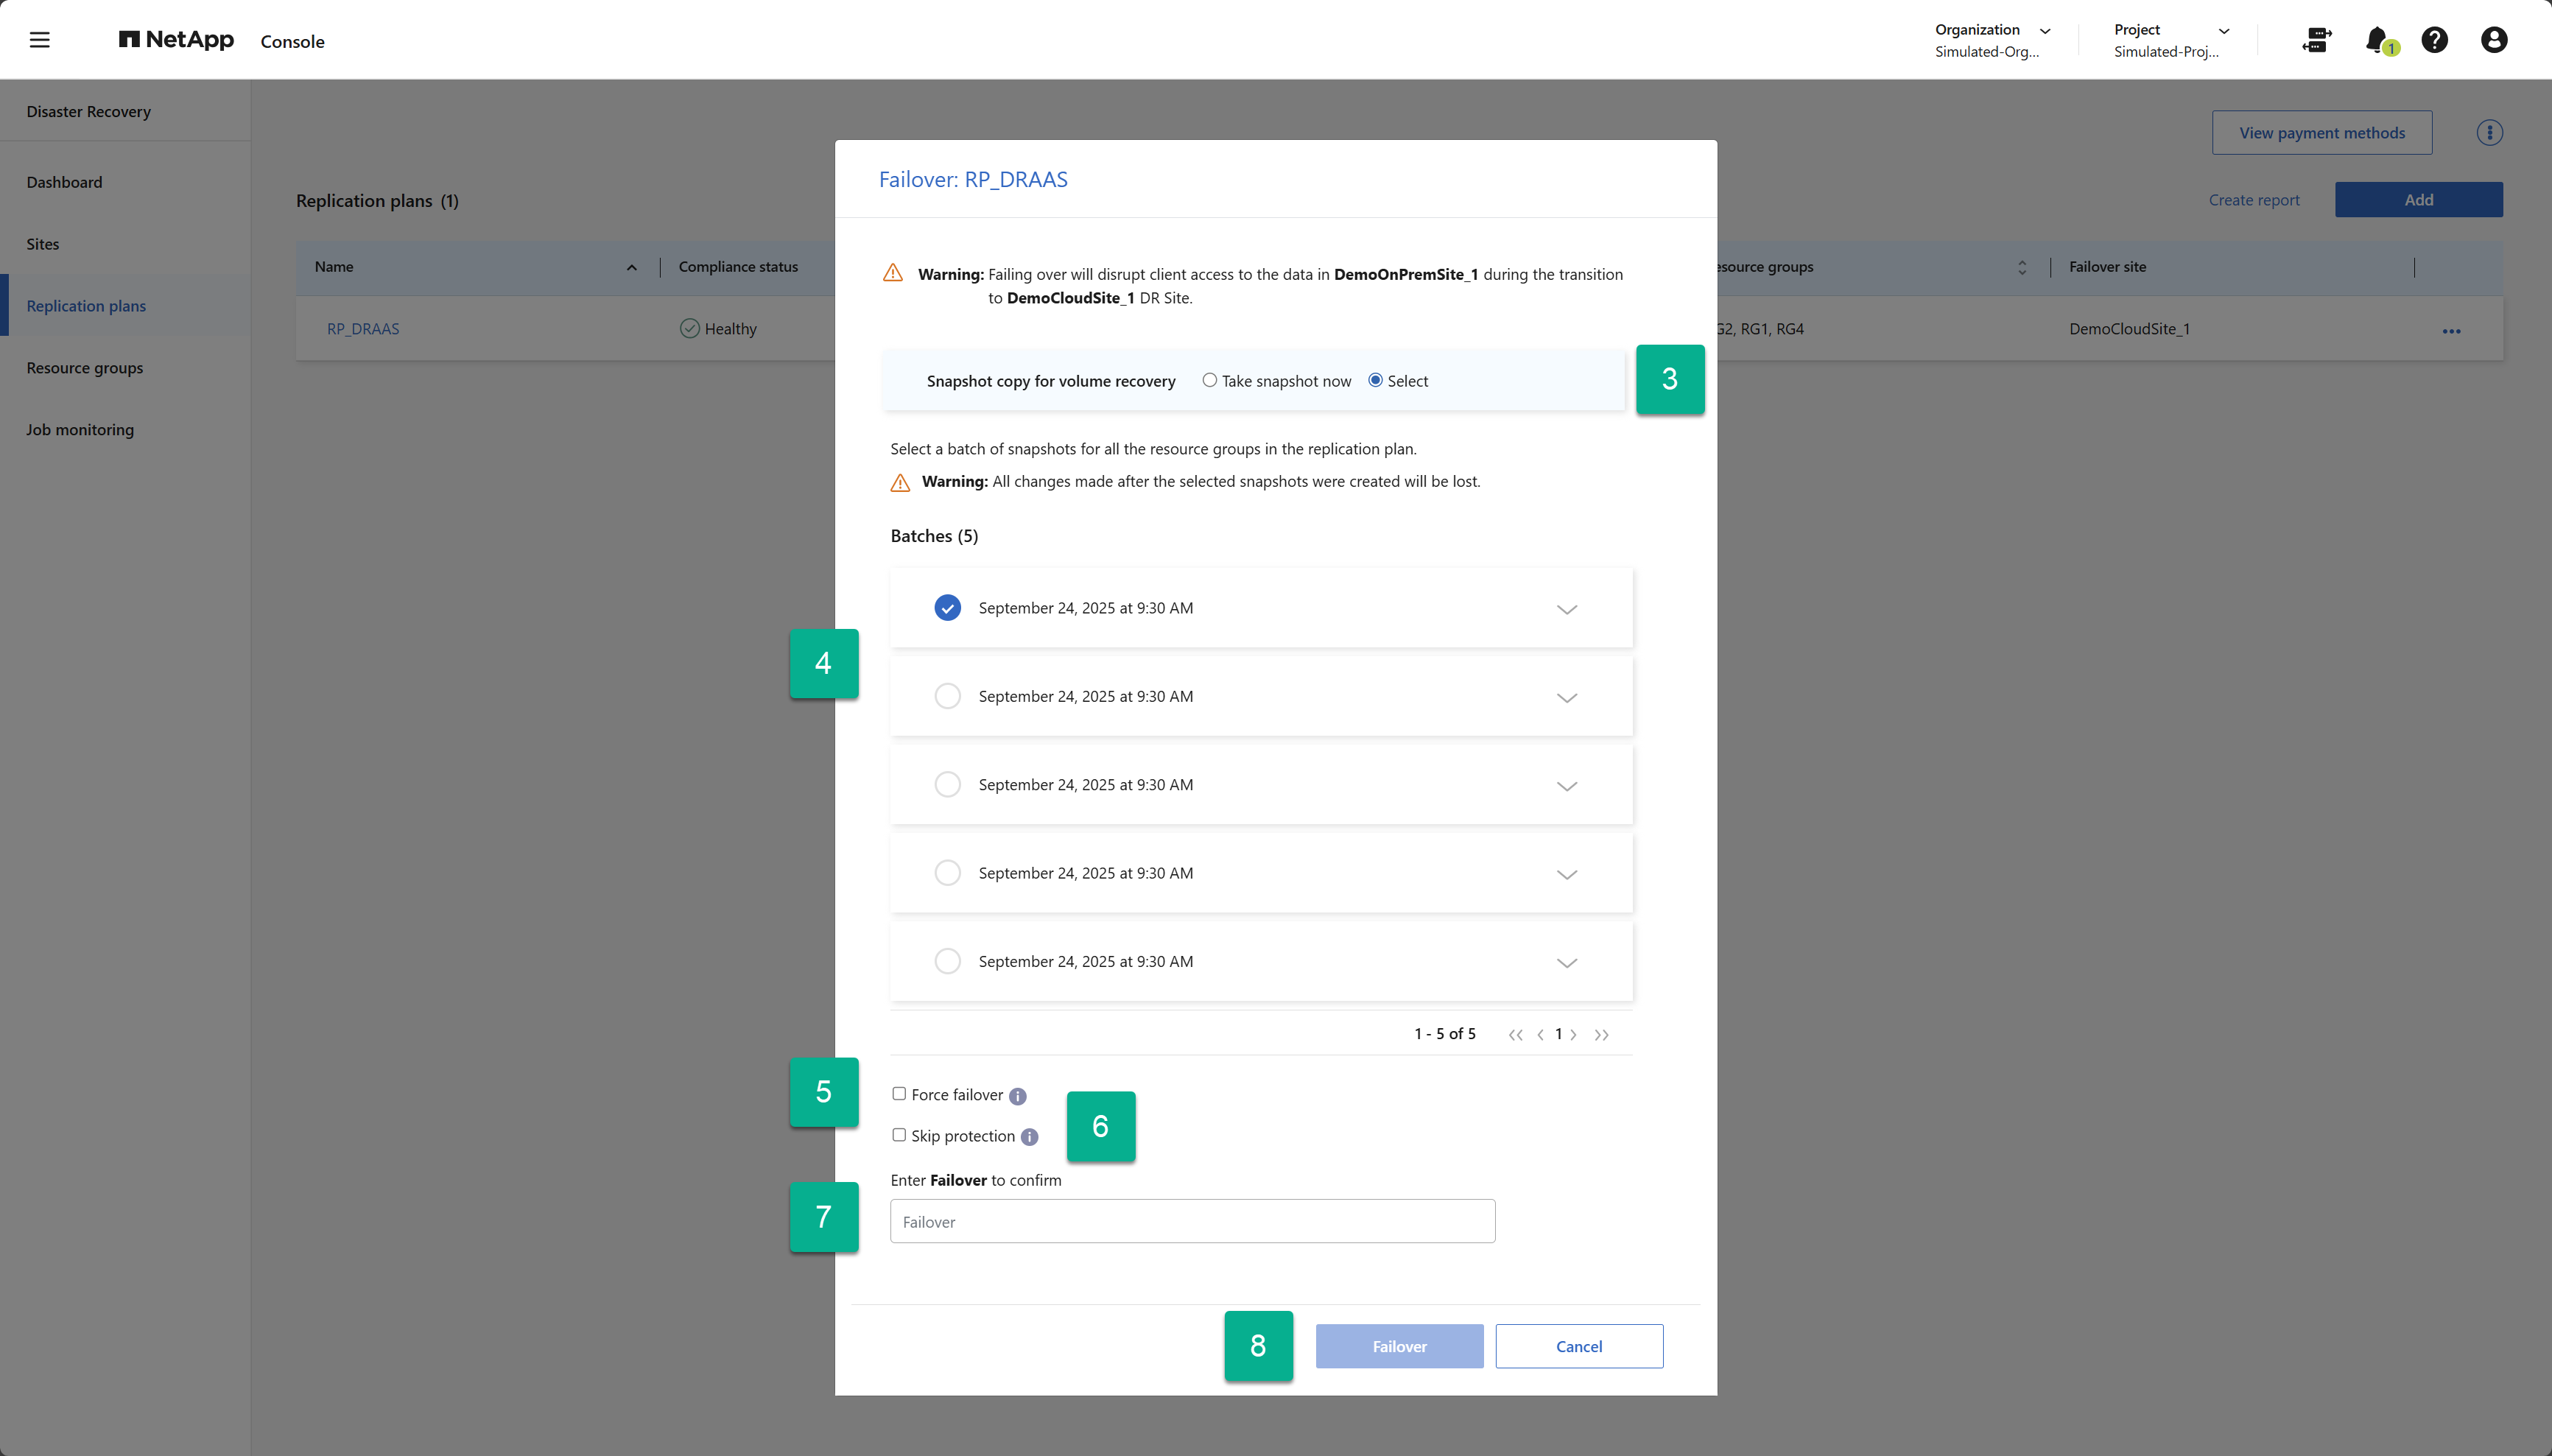
If the production (protected) site is not accessible, select a previously created snapshot as your recovery image. To do this, select Select.
-
Select the backup to be used for the recovery.
-
(Optional) Select whether you want NetApp Disaster Recovery to force the failover process regardless of the state of the replication plan. This should only be done as a last resort.
-
(Optional) Select whether you want NetApp Disaster Recovery to automatically create a reverse protection relationship after the production site has been recovered.
-
Type the word “Failover” to verify that you would like to proceed.
-
Select Failover.
Test failover
A test failover is similar to a failover except for two differences.
-
The production site is still active and all VMs are still operating as expected.
-
NetApp Disaster Recovery protection of the production VMs continues.
This is accomplished by using native ONTAP FlexClone volumes at the destination site. To learn more about test failover, see Fail over applications to a remote site | NetApp Documentation.
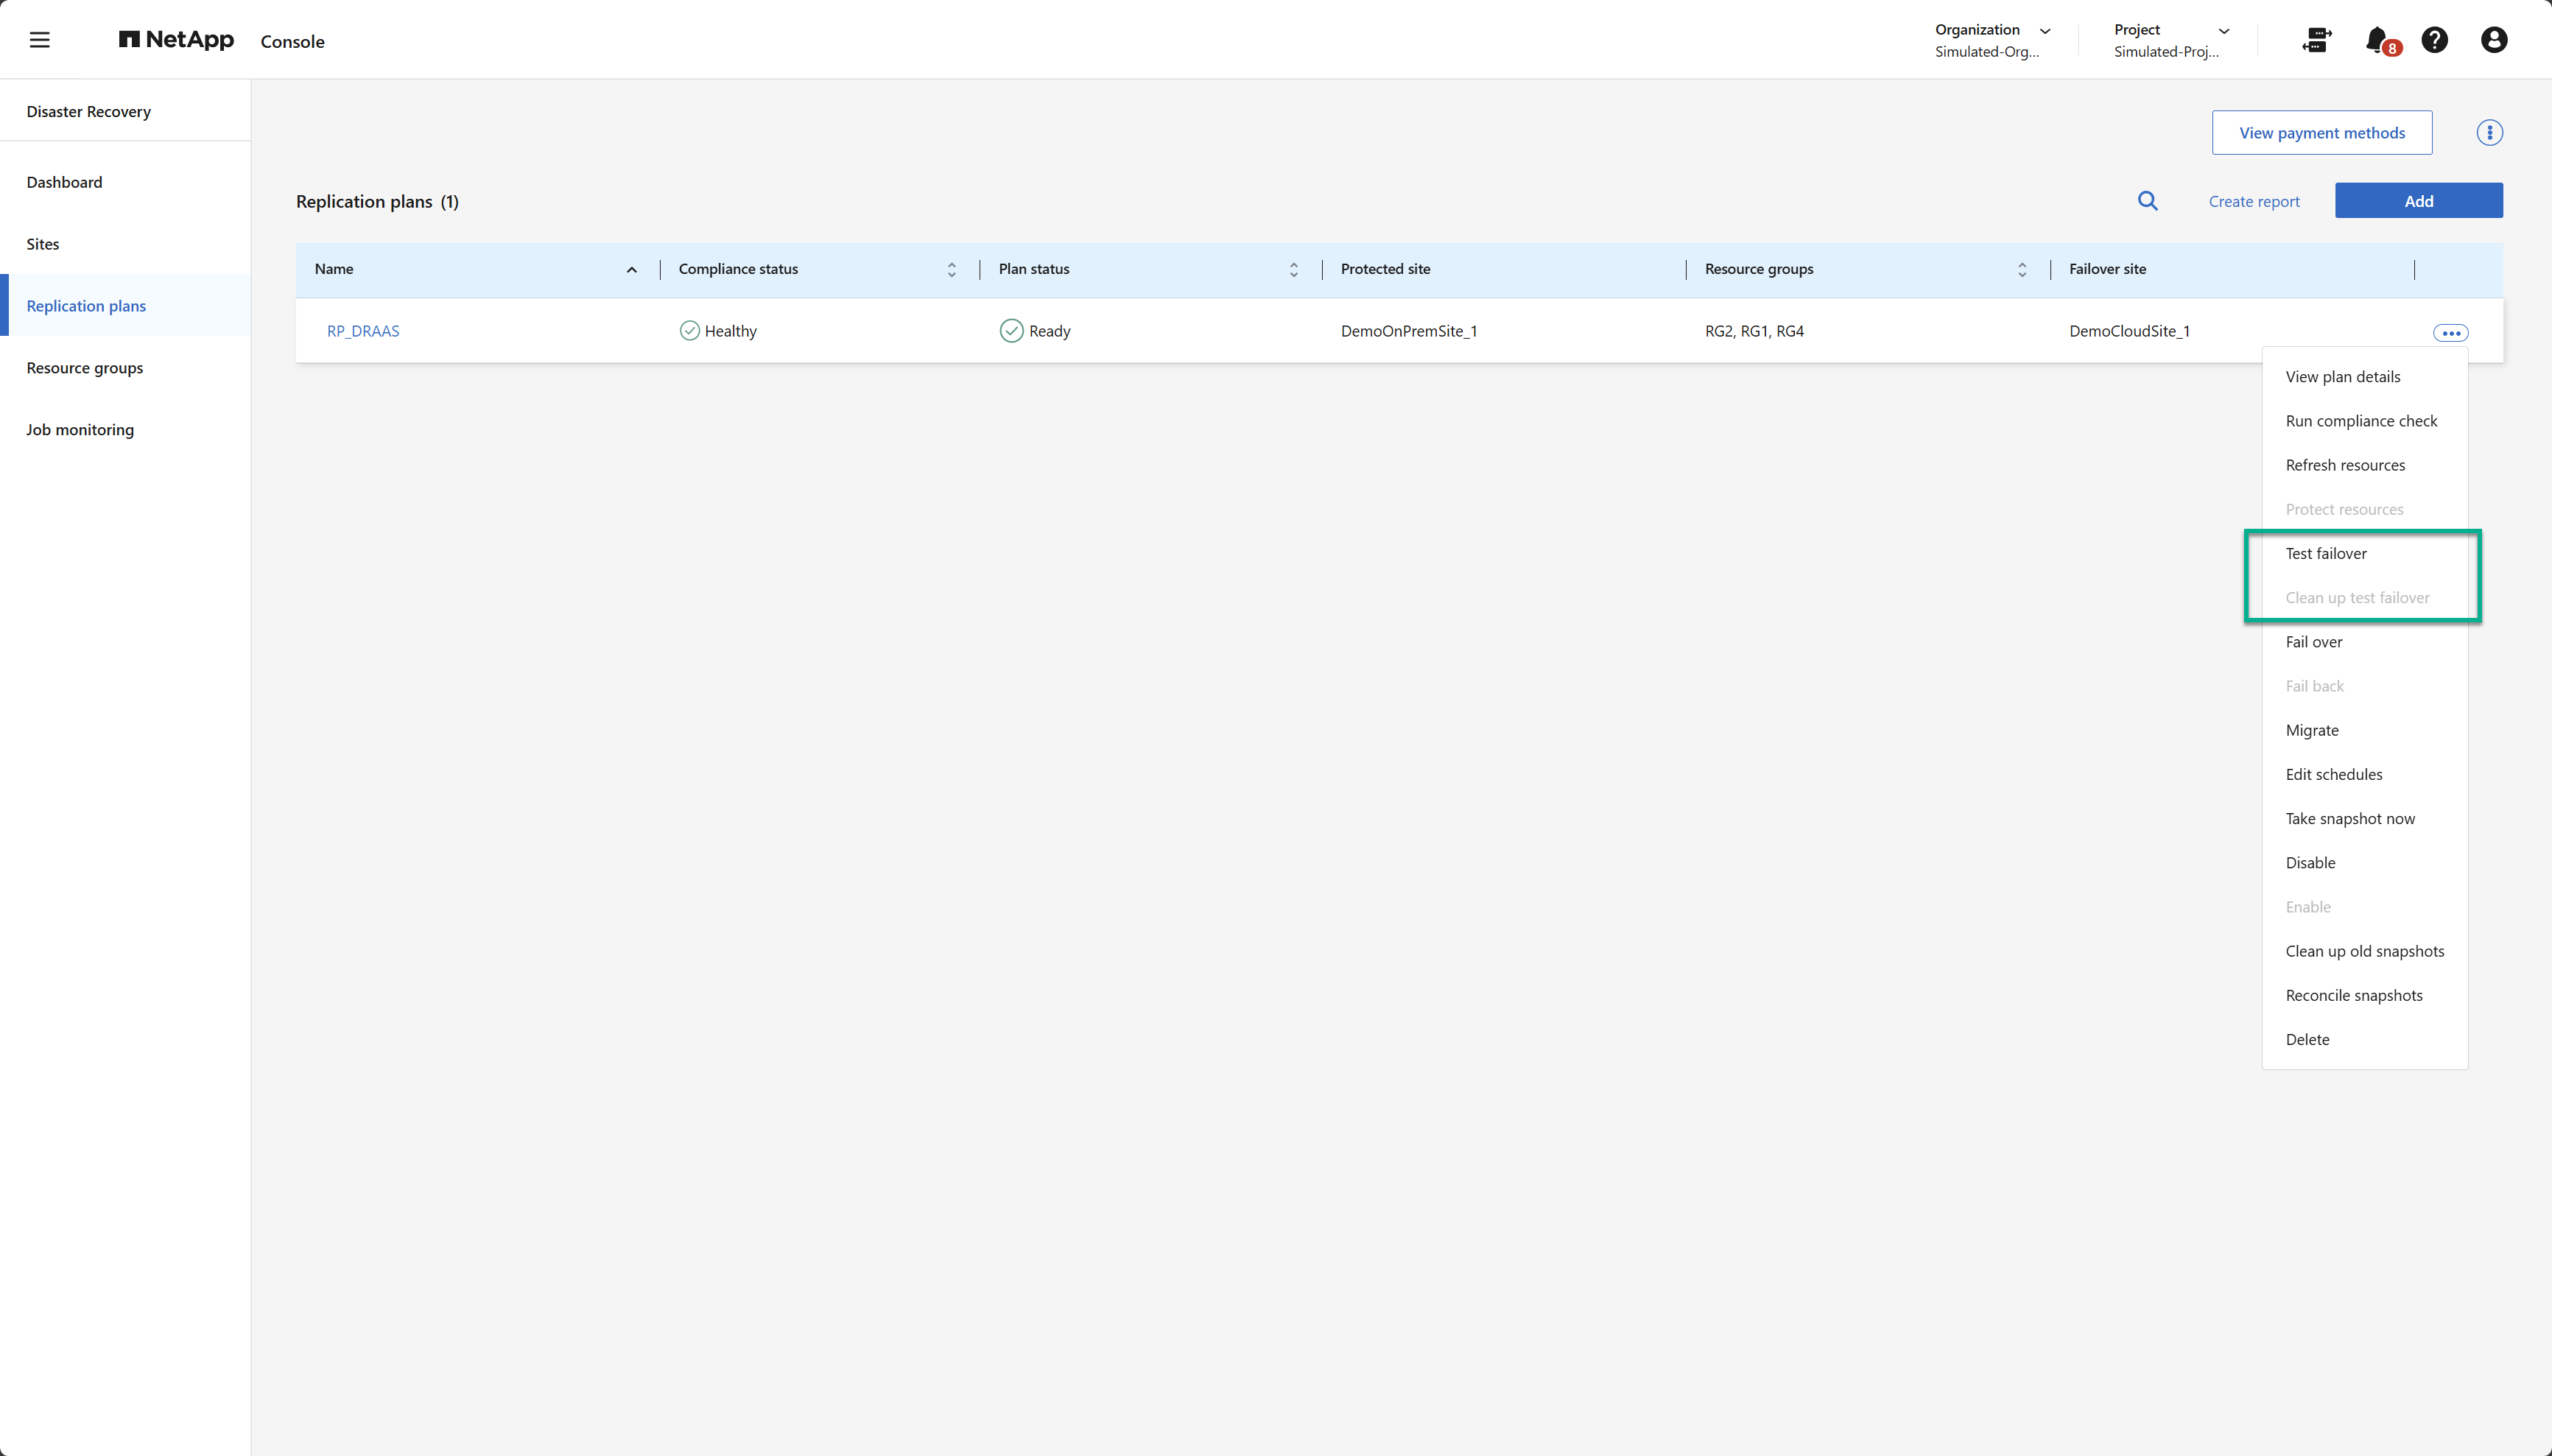
The steps for executing a test failover are identical to those used to execute a real failover except that you use the Test failover operation on the replication plan's context menu.
-
Select the replication plan's Actions option
. -
Select Test failover from the menu.
-
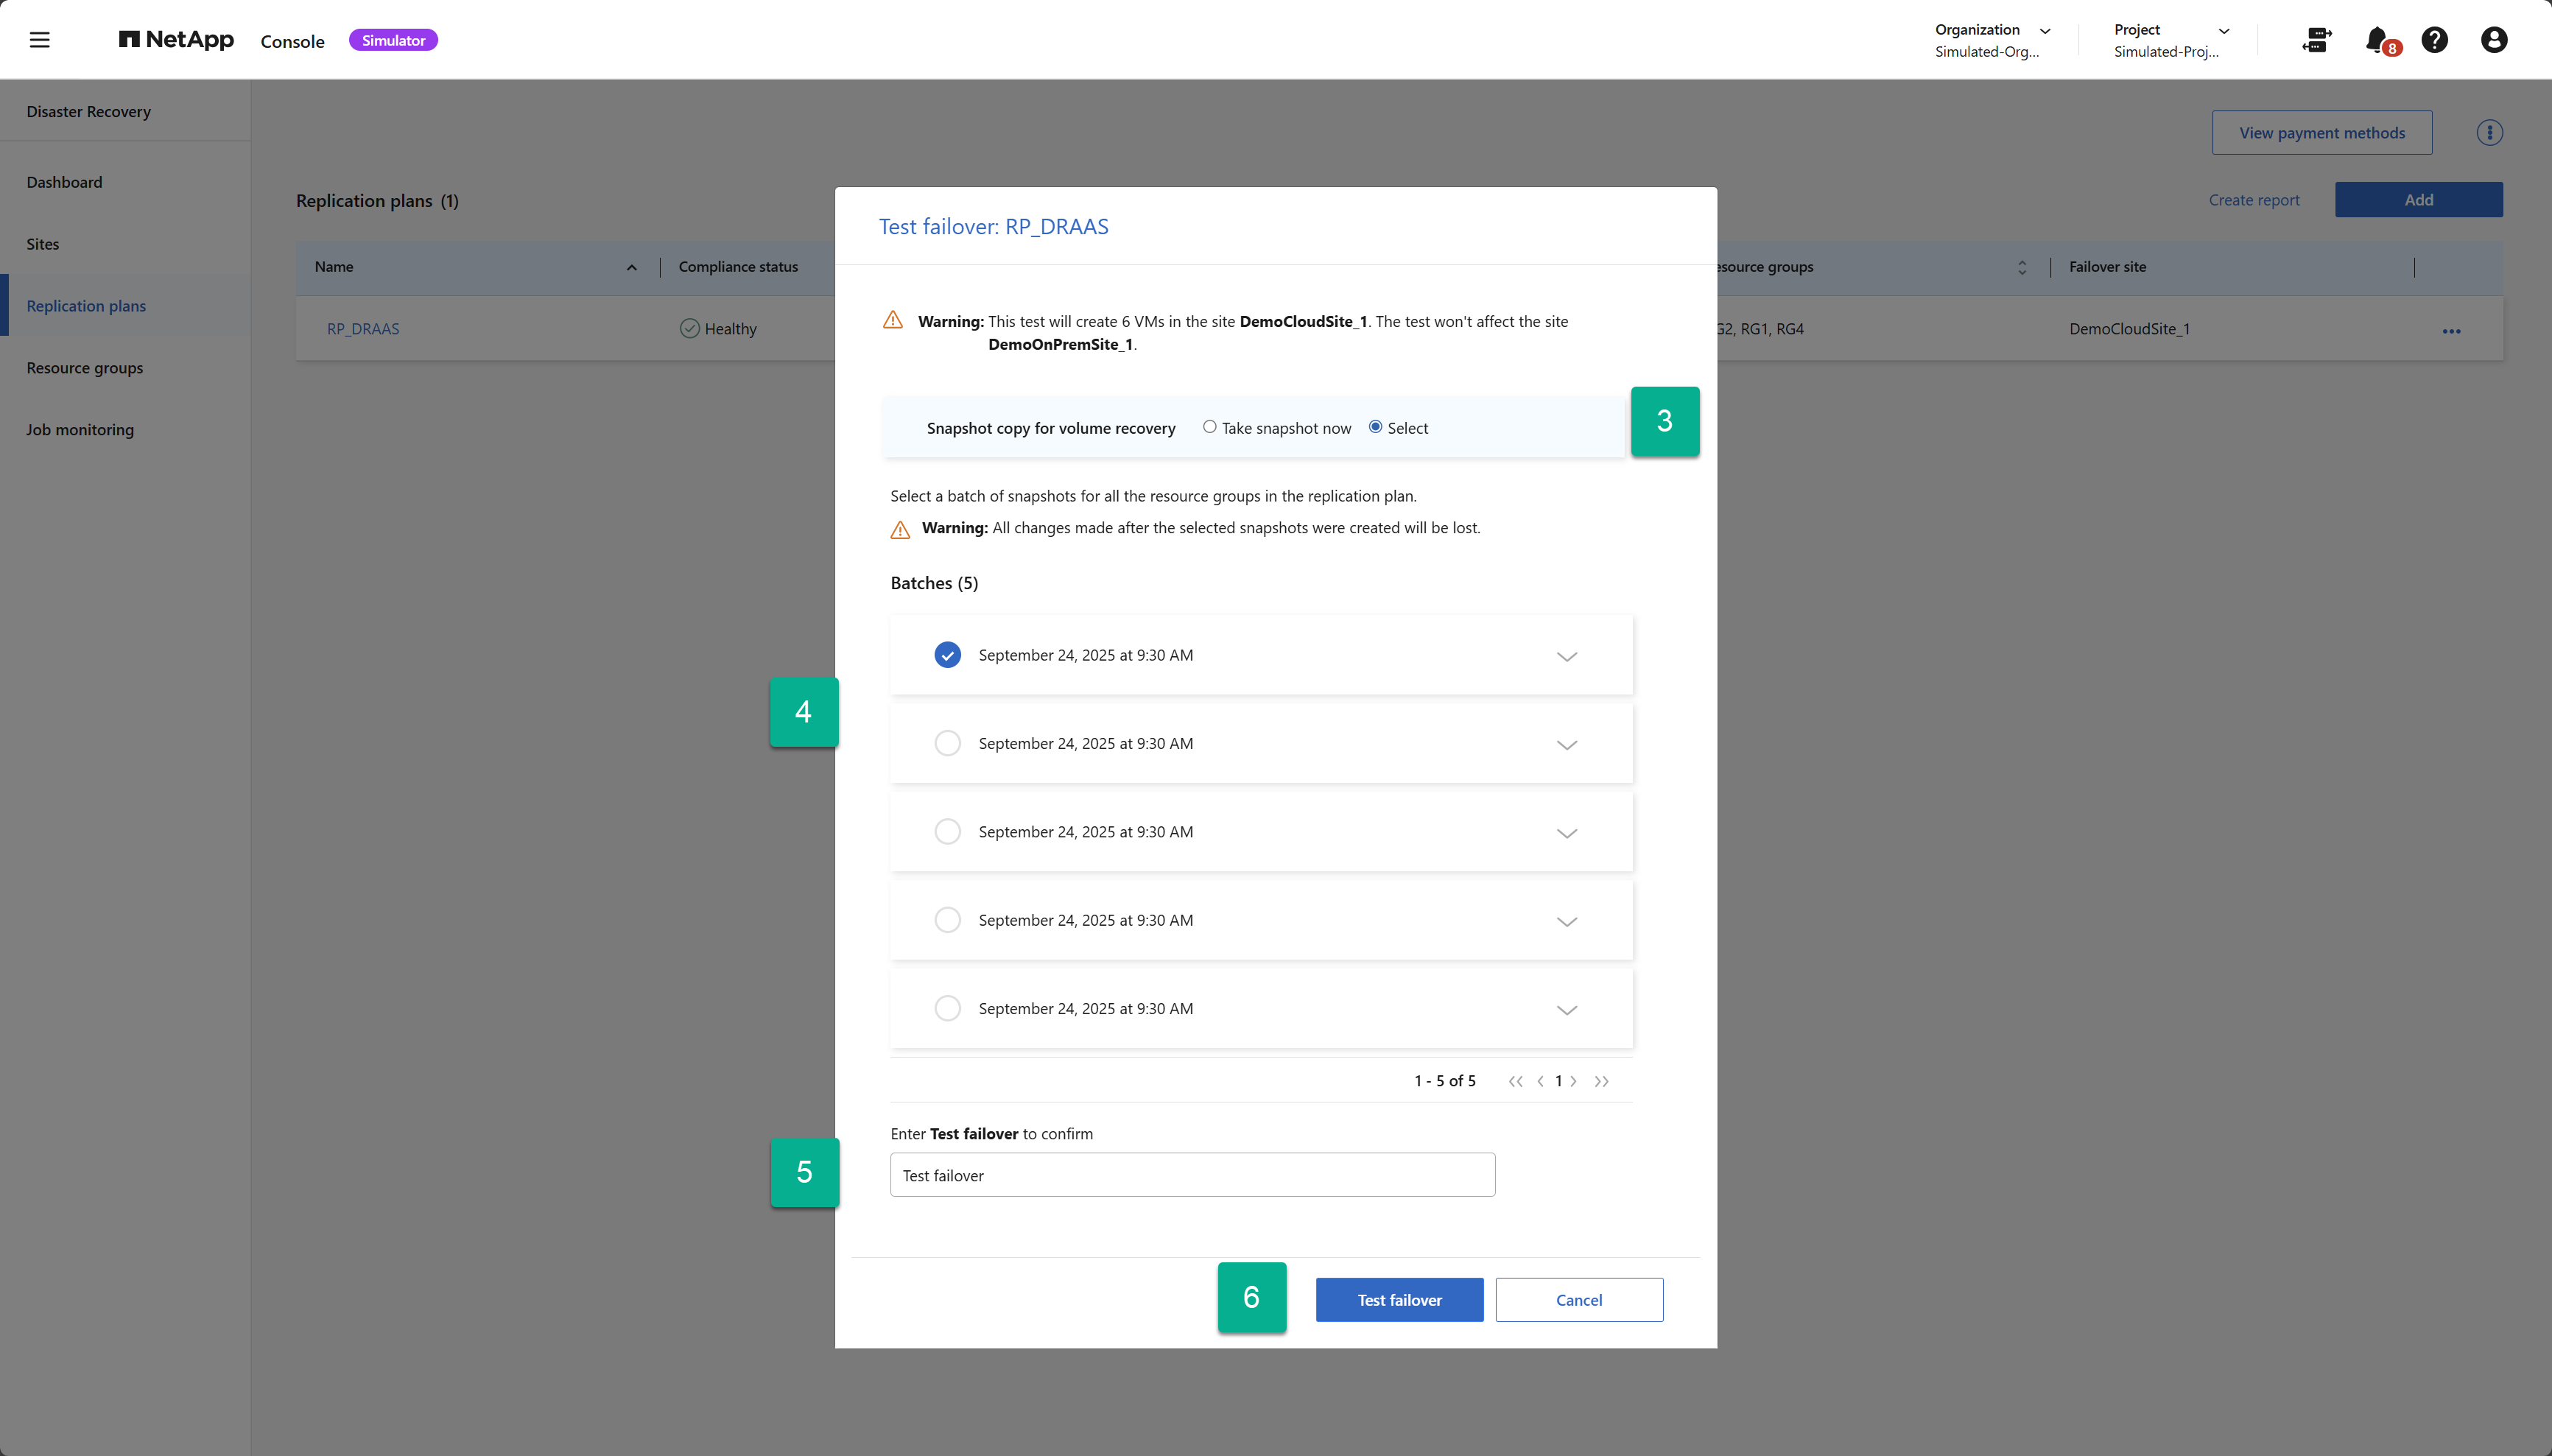
Choose which snapshot to use. To create the most up-to-date copy of the production environment, choose Take snapshot now. To use a previously captured snapshot, choose Select then pick the existing snapshot.
-
Type the word “Test failover” to verify that you would like to proceed.
-
Select Test failover.
Run a compliance check
Compliance checks are run every three hours, by default. At any time, you might want to manually run a compliance check.
-
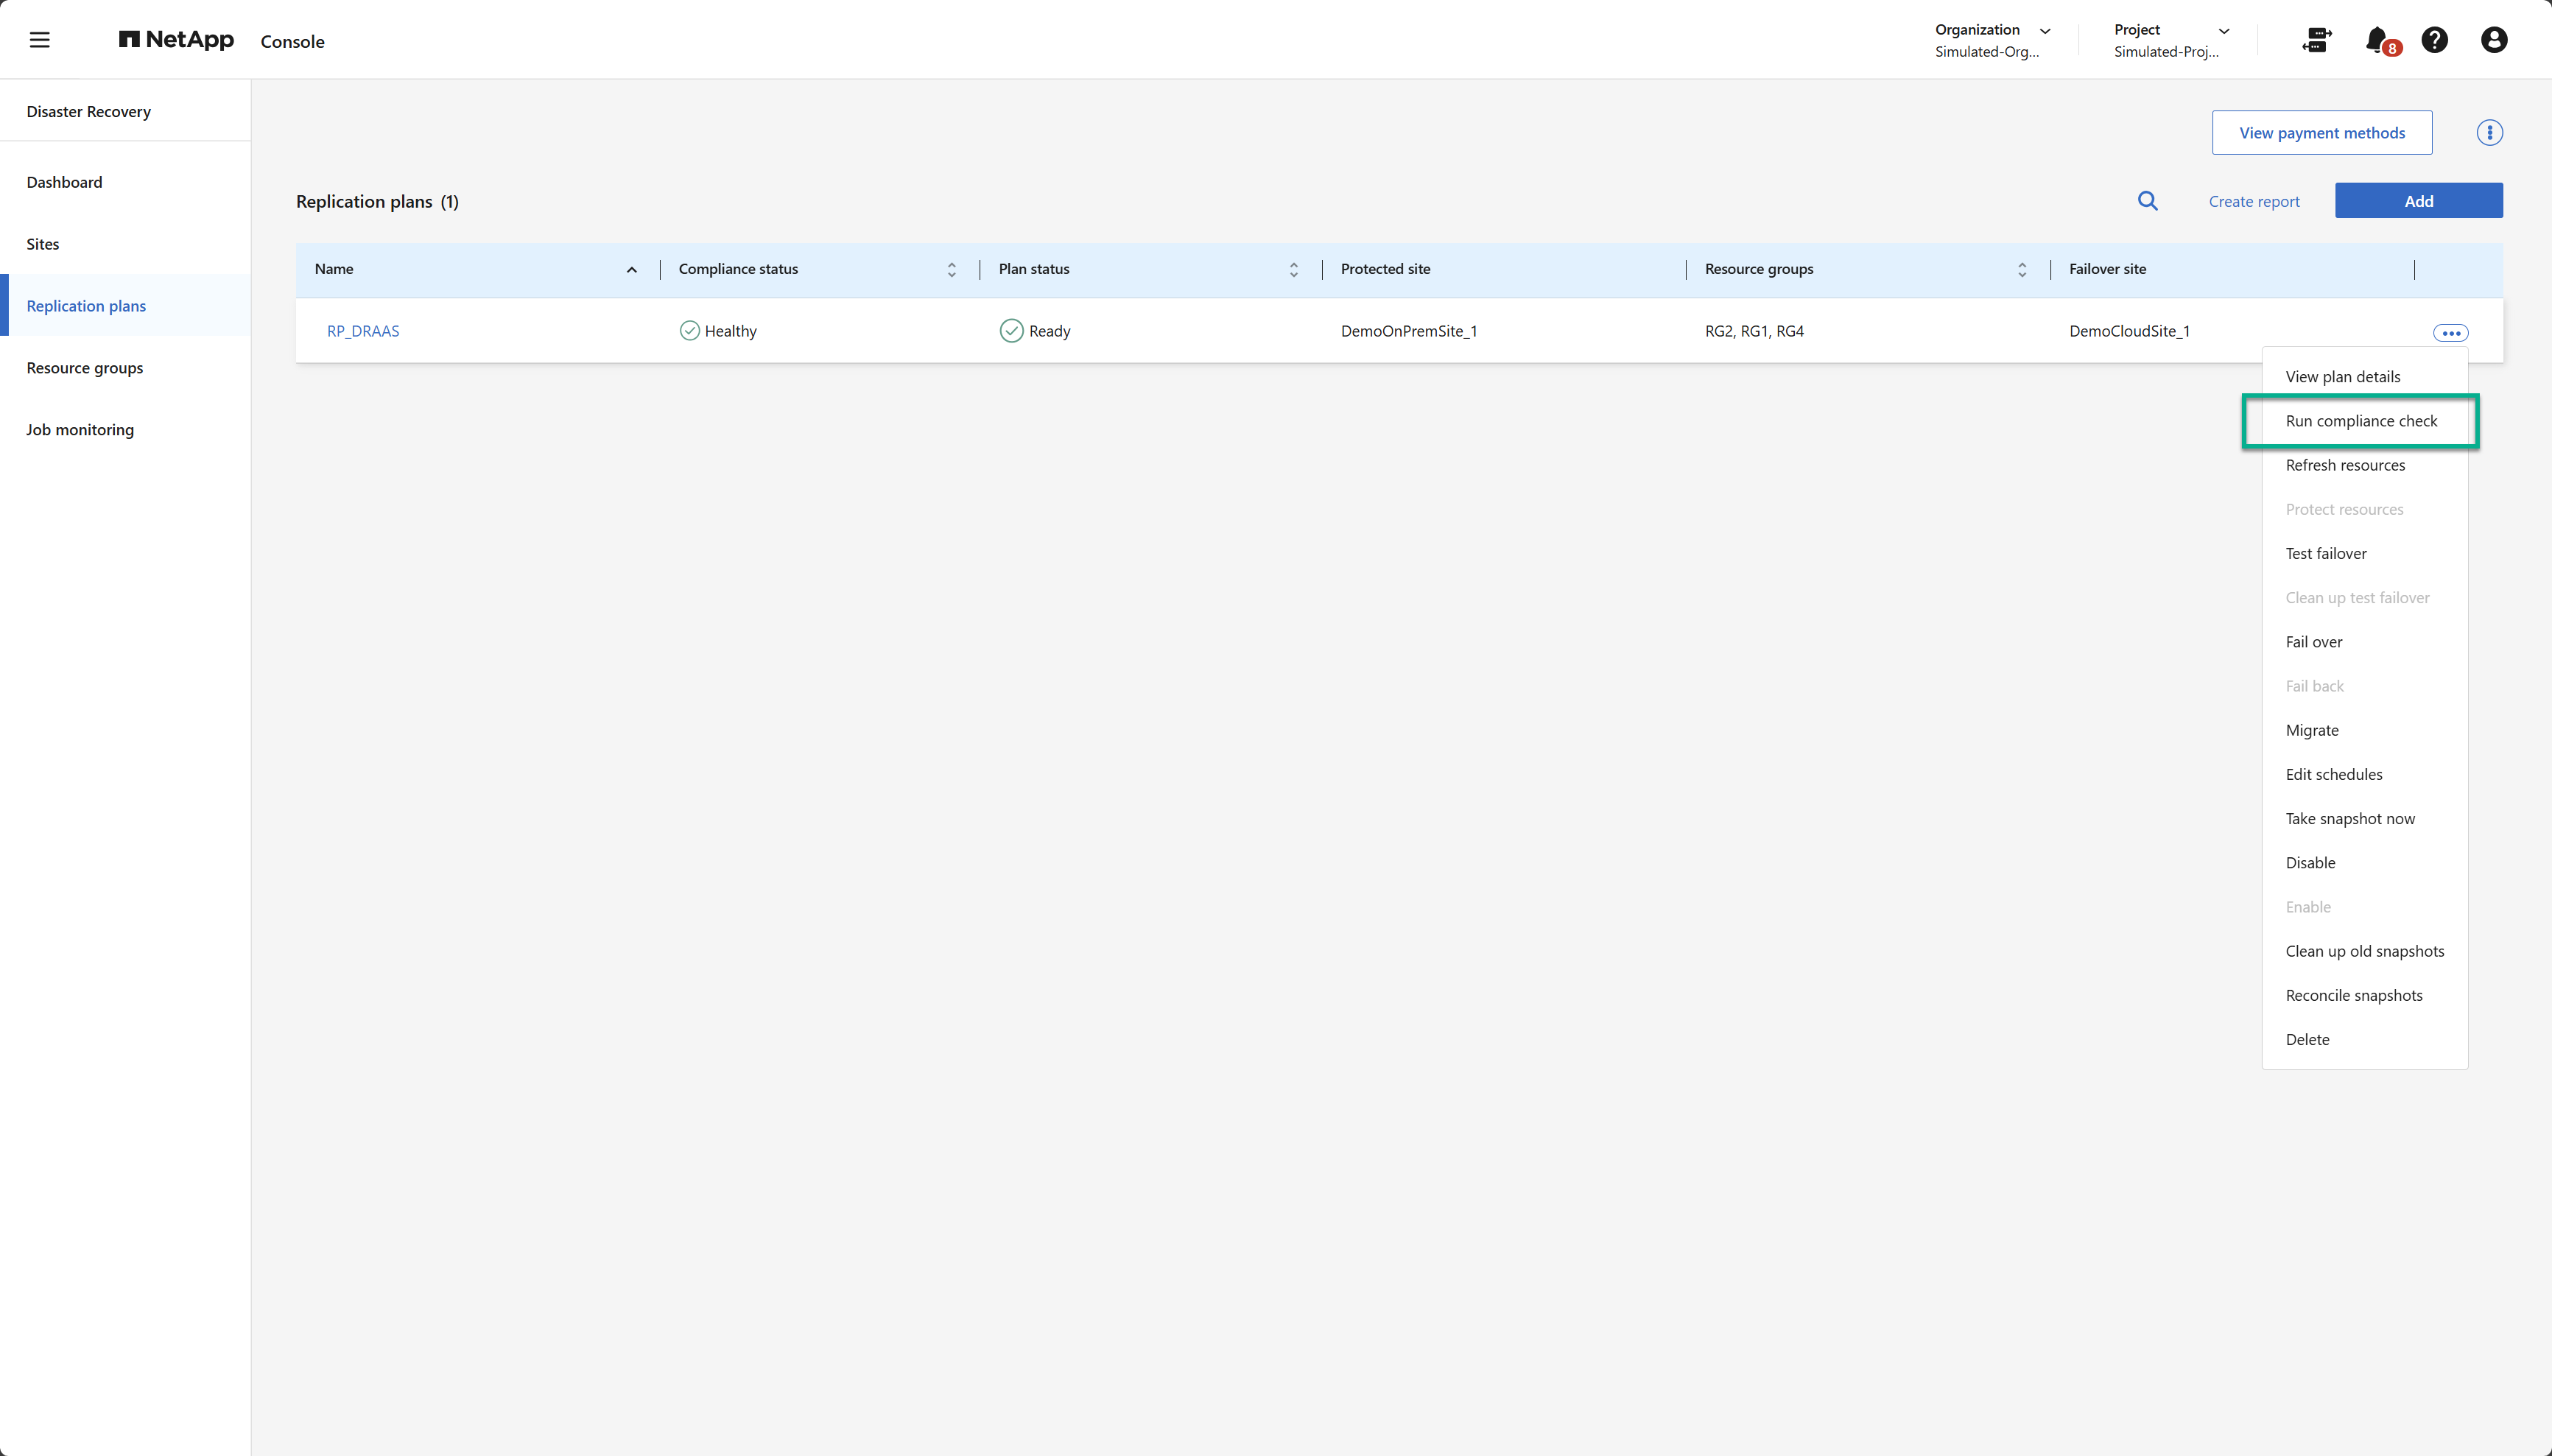
Select the Actions option
next to the replication plan. -
Select the Run compliance check option from the replication plan's Actions menu:
-
To change how often NetApp Disaster Recovery automatically runs compliance checks, select Edit schedules option from the replication plan's Actions menu.
Refresh resources
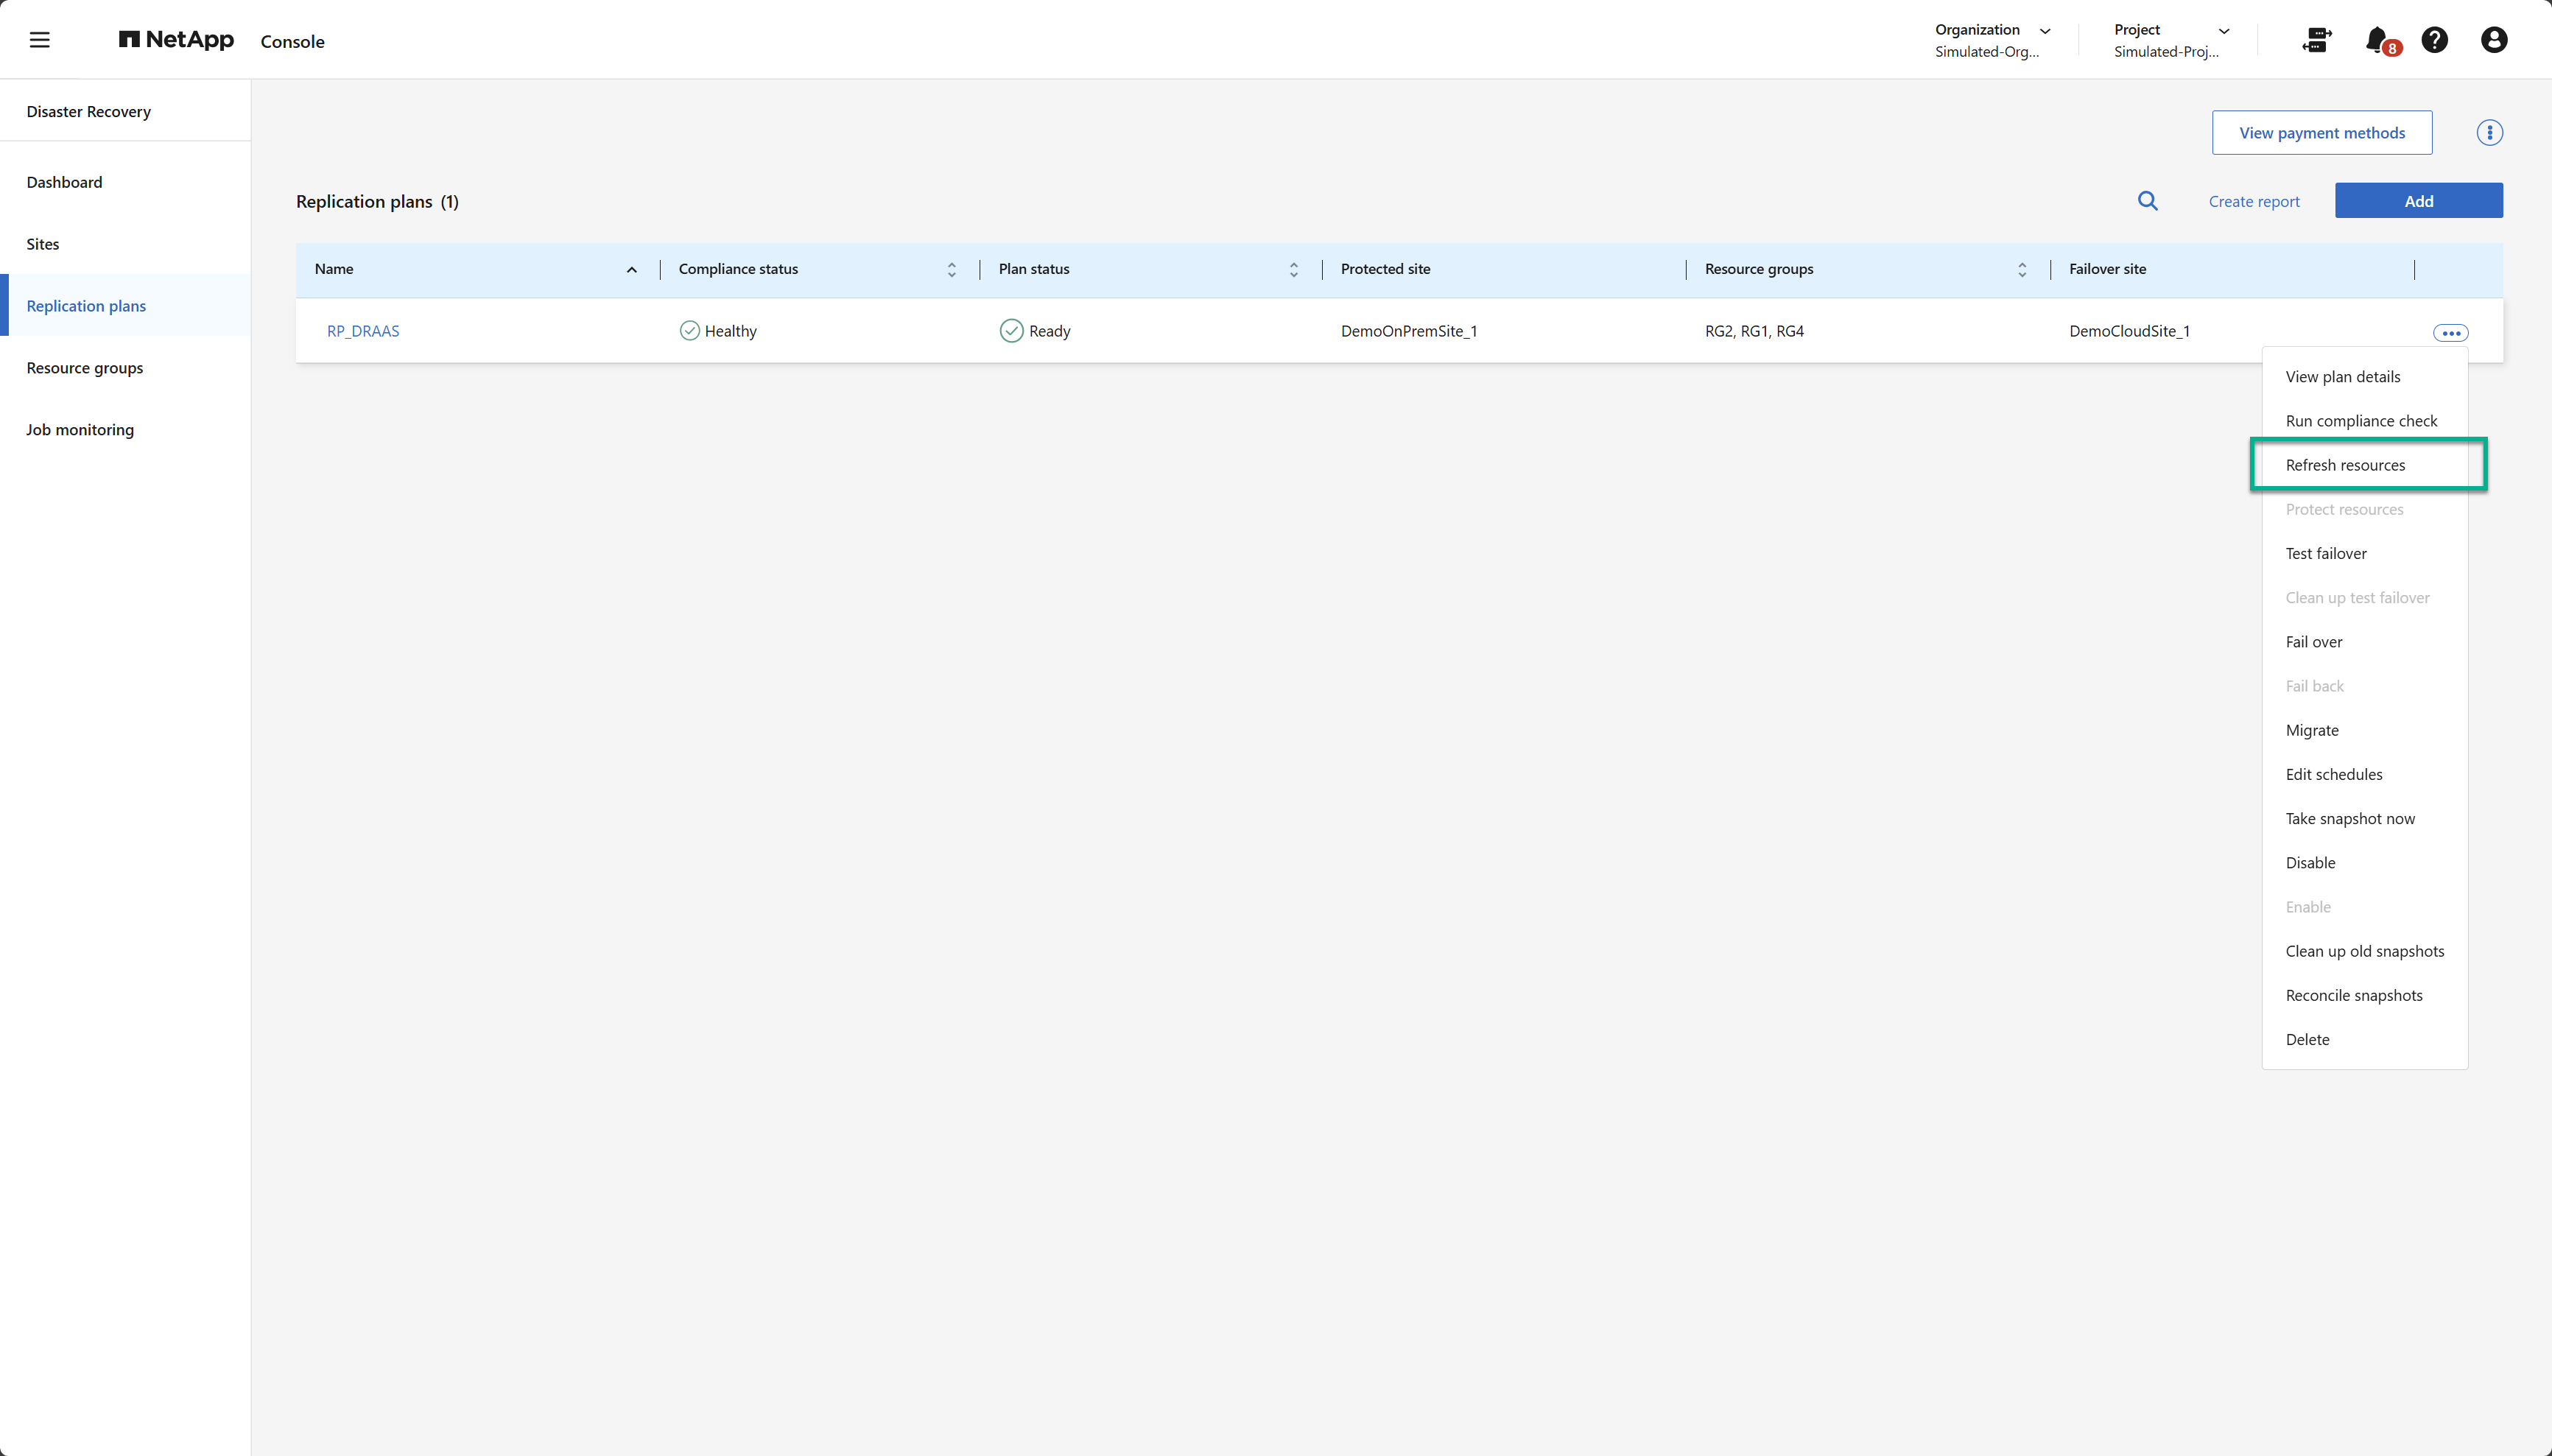
Any time you make changes to your virtual infrastructure—such as adding or deleting VMs, adding or deleting datastores, or moving VMs between datastores—you need to perform a refresh of the impacted vCenter clusters in Disaster Recovery. Disaster Recovery refreshes automatically once every 24 hours by default, but a manual refresh ensures that the latest virtual infrastructure information is available and taken into account for disaster recovery protection.
There are two instances where a refresh is necessary:
-
vCenter refresh: Perform a vCenter refresh anytime VMs are added or deleted from or moved out of a vCenter cluster:
-
Replication plan refresh: Perform a replication plan refresh anytime a VM is moved between datastores in the same source vCenter cluster.
Migrate
In addition to using NetApp Disaster Recovery to manage replication and failover in the face of disasters, it can also support one-time VM migrations from the source site to the destination site. You might perform a one-time migration as part of a move to the cloud or a disaster avoidance procedure when responding to catastrophic events such as extreme weather or political turmoil.
-
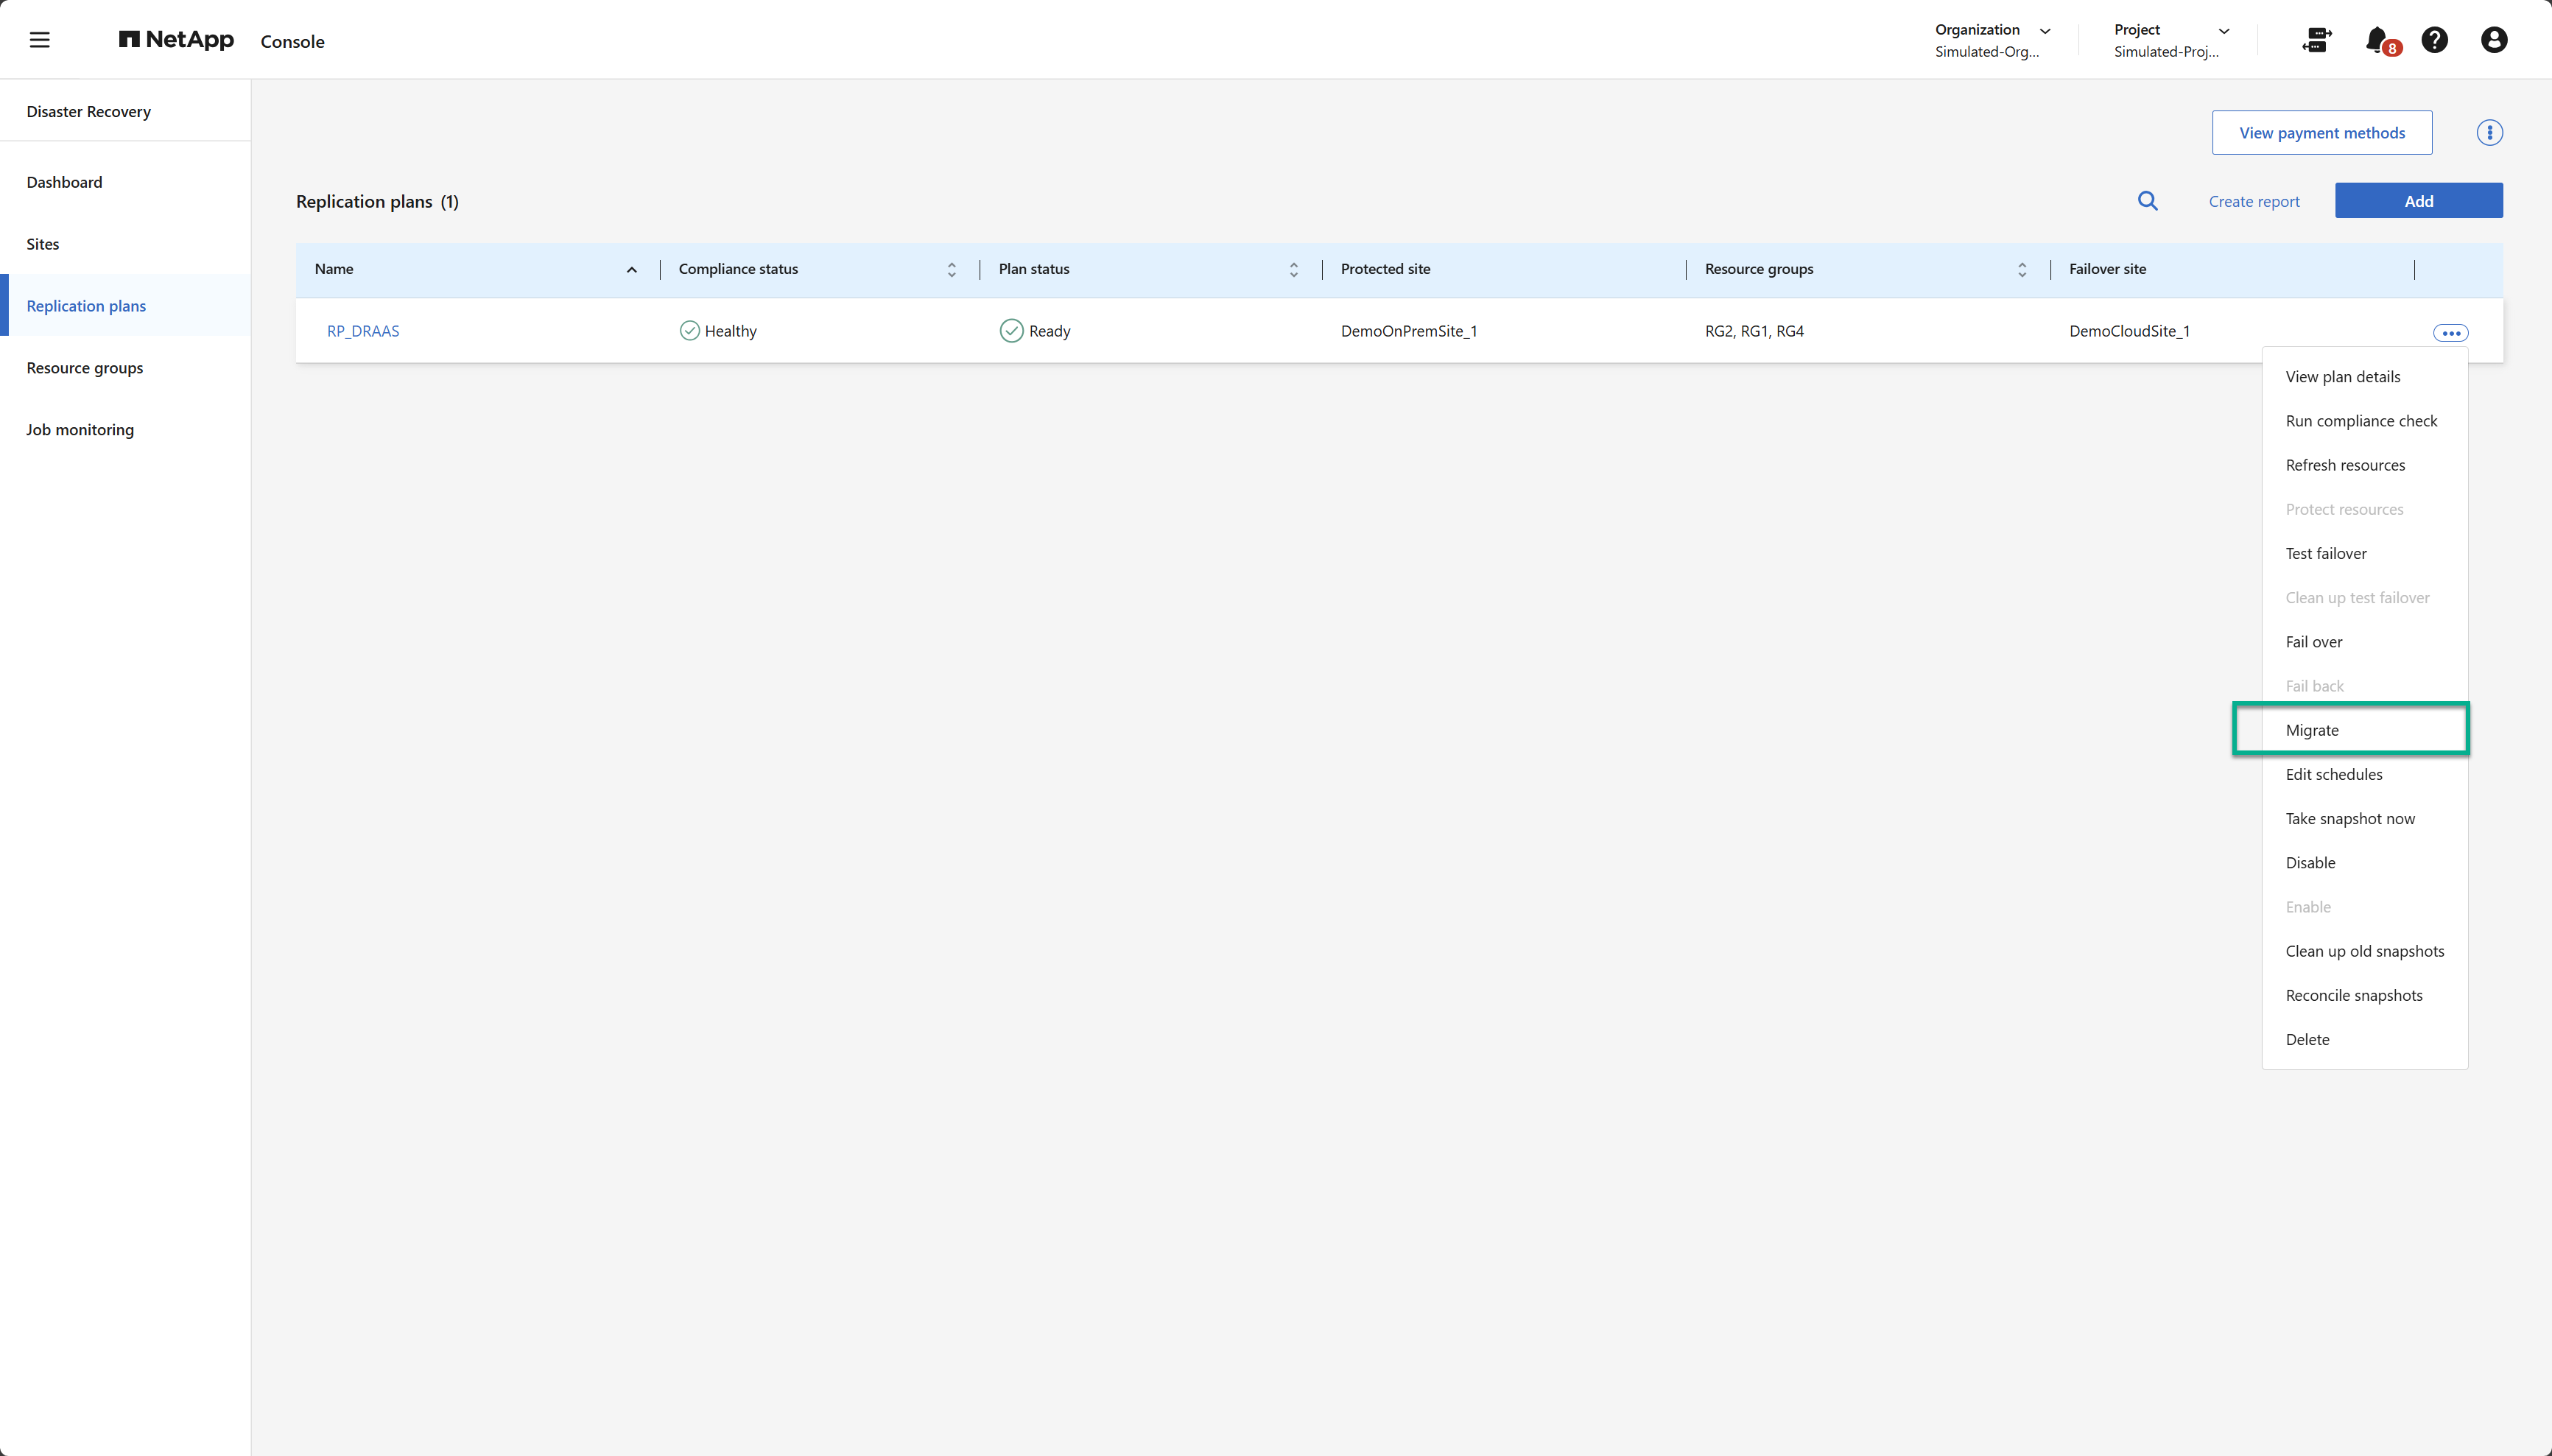
Select the Actions option
next to the replication plan. -
To move the VMs in a replication plan to the destination Amazon EVS cluster, select Migrate from the replication plan's Actions menu:
-
Enter information in the Migrate dialog box.
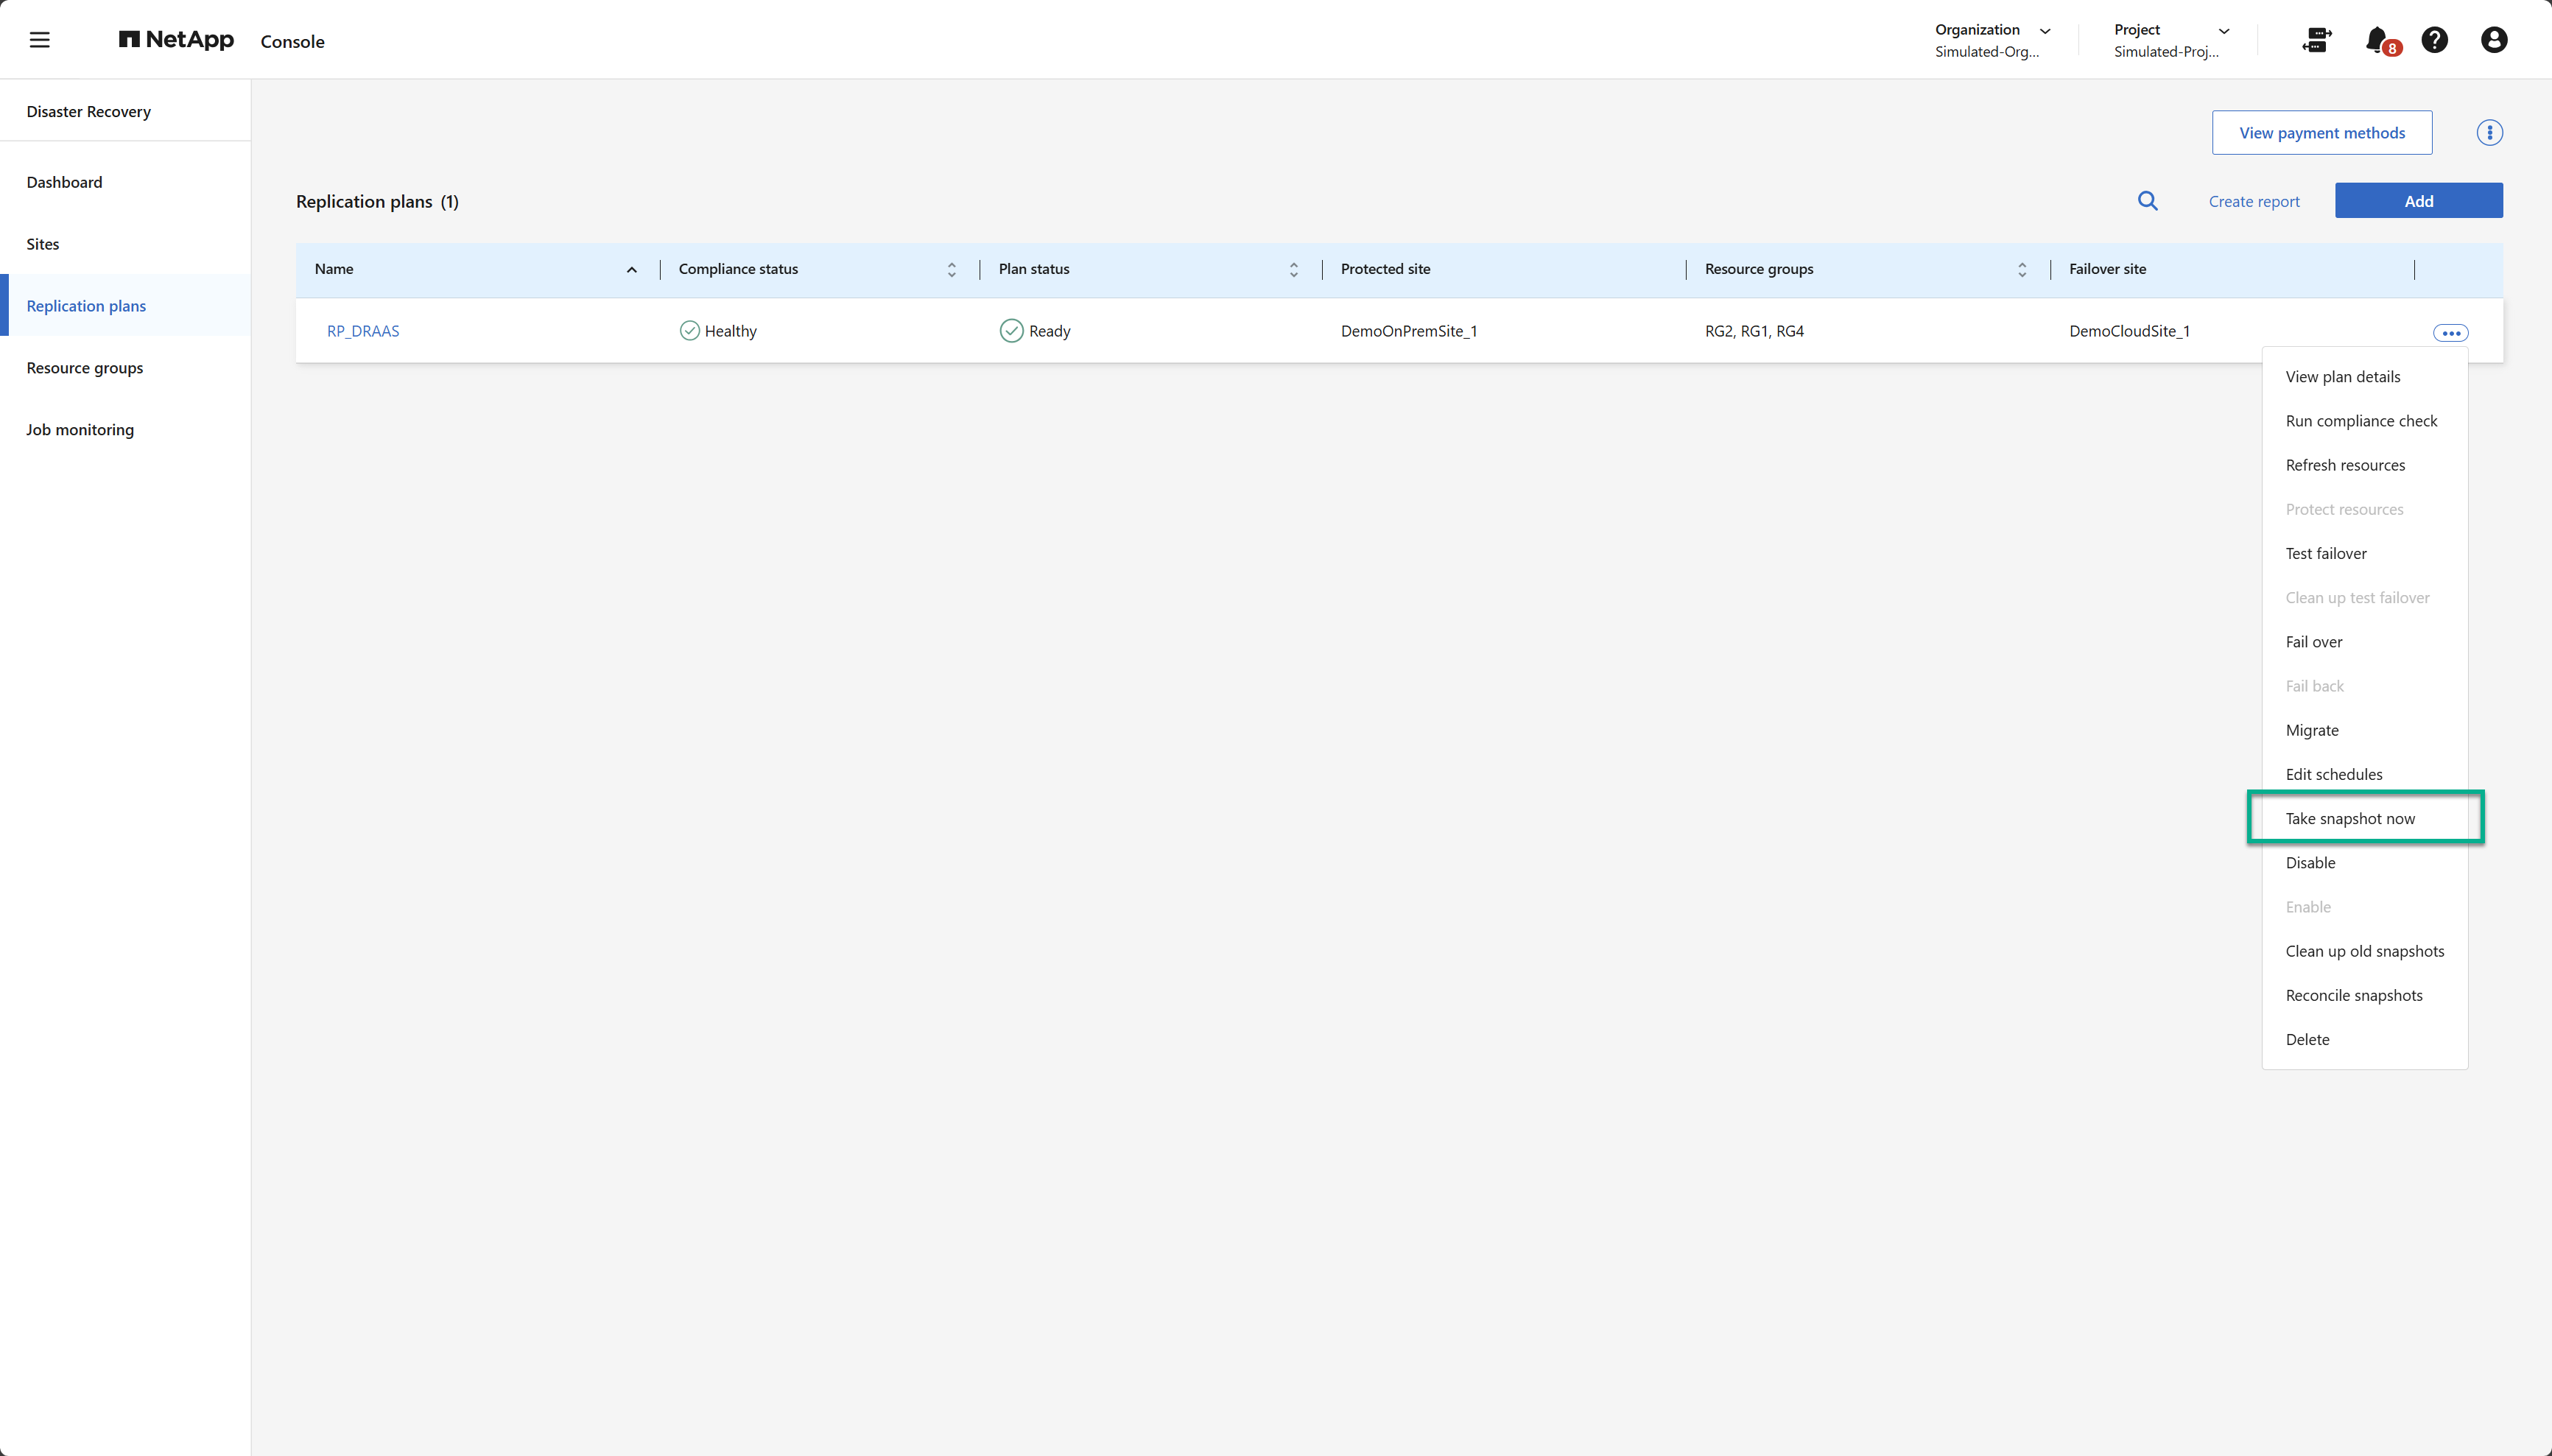
Take a snapshot now
At any time, you can take an immediate snapshot of the replication plan. This snapshot is included in the NetApp Disaster Recovery considerations set by the replication plan's snapshot retention count.
-
Select the Actions option
next to the replication plan. -
To take an immediate snapshot of the replication plan's resources, select Take snapshot now on the replication plan's Actions menu:
Disable or enable replication plan
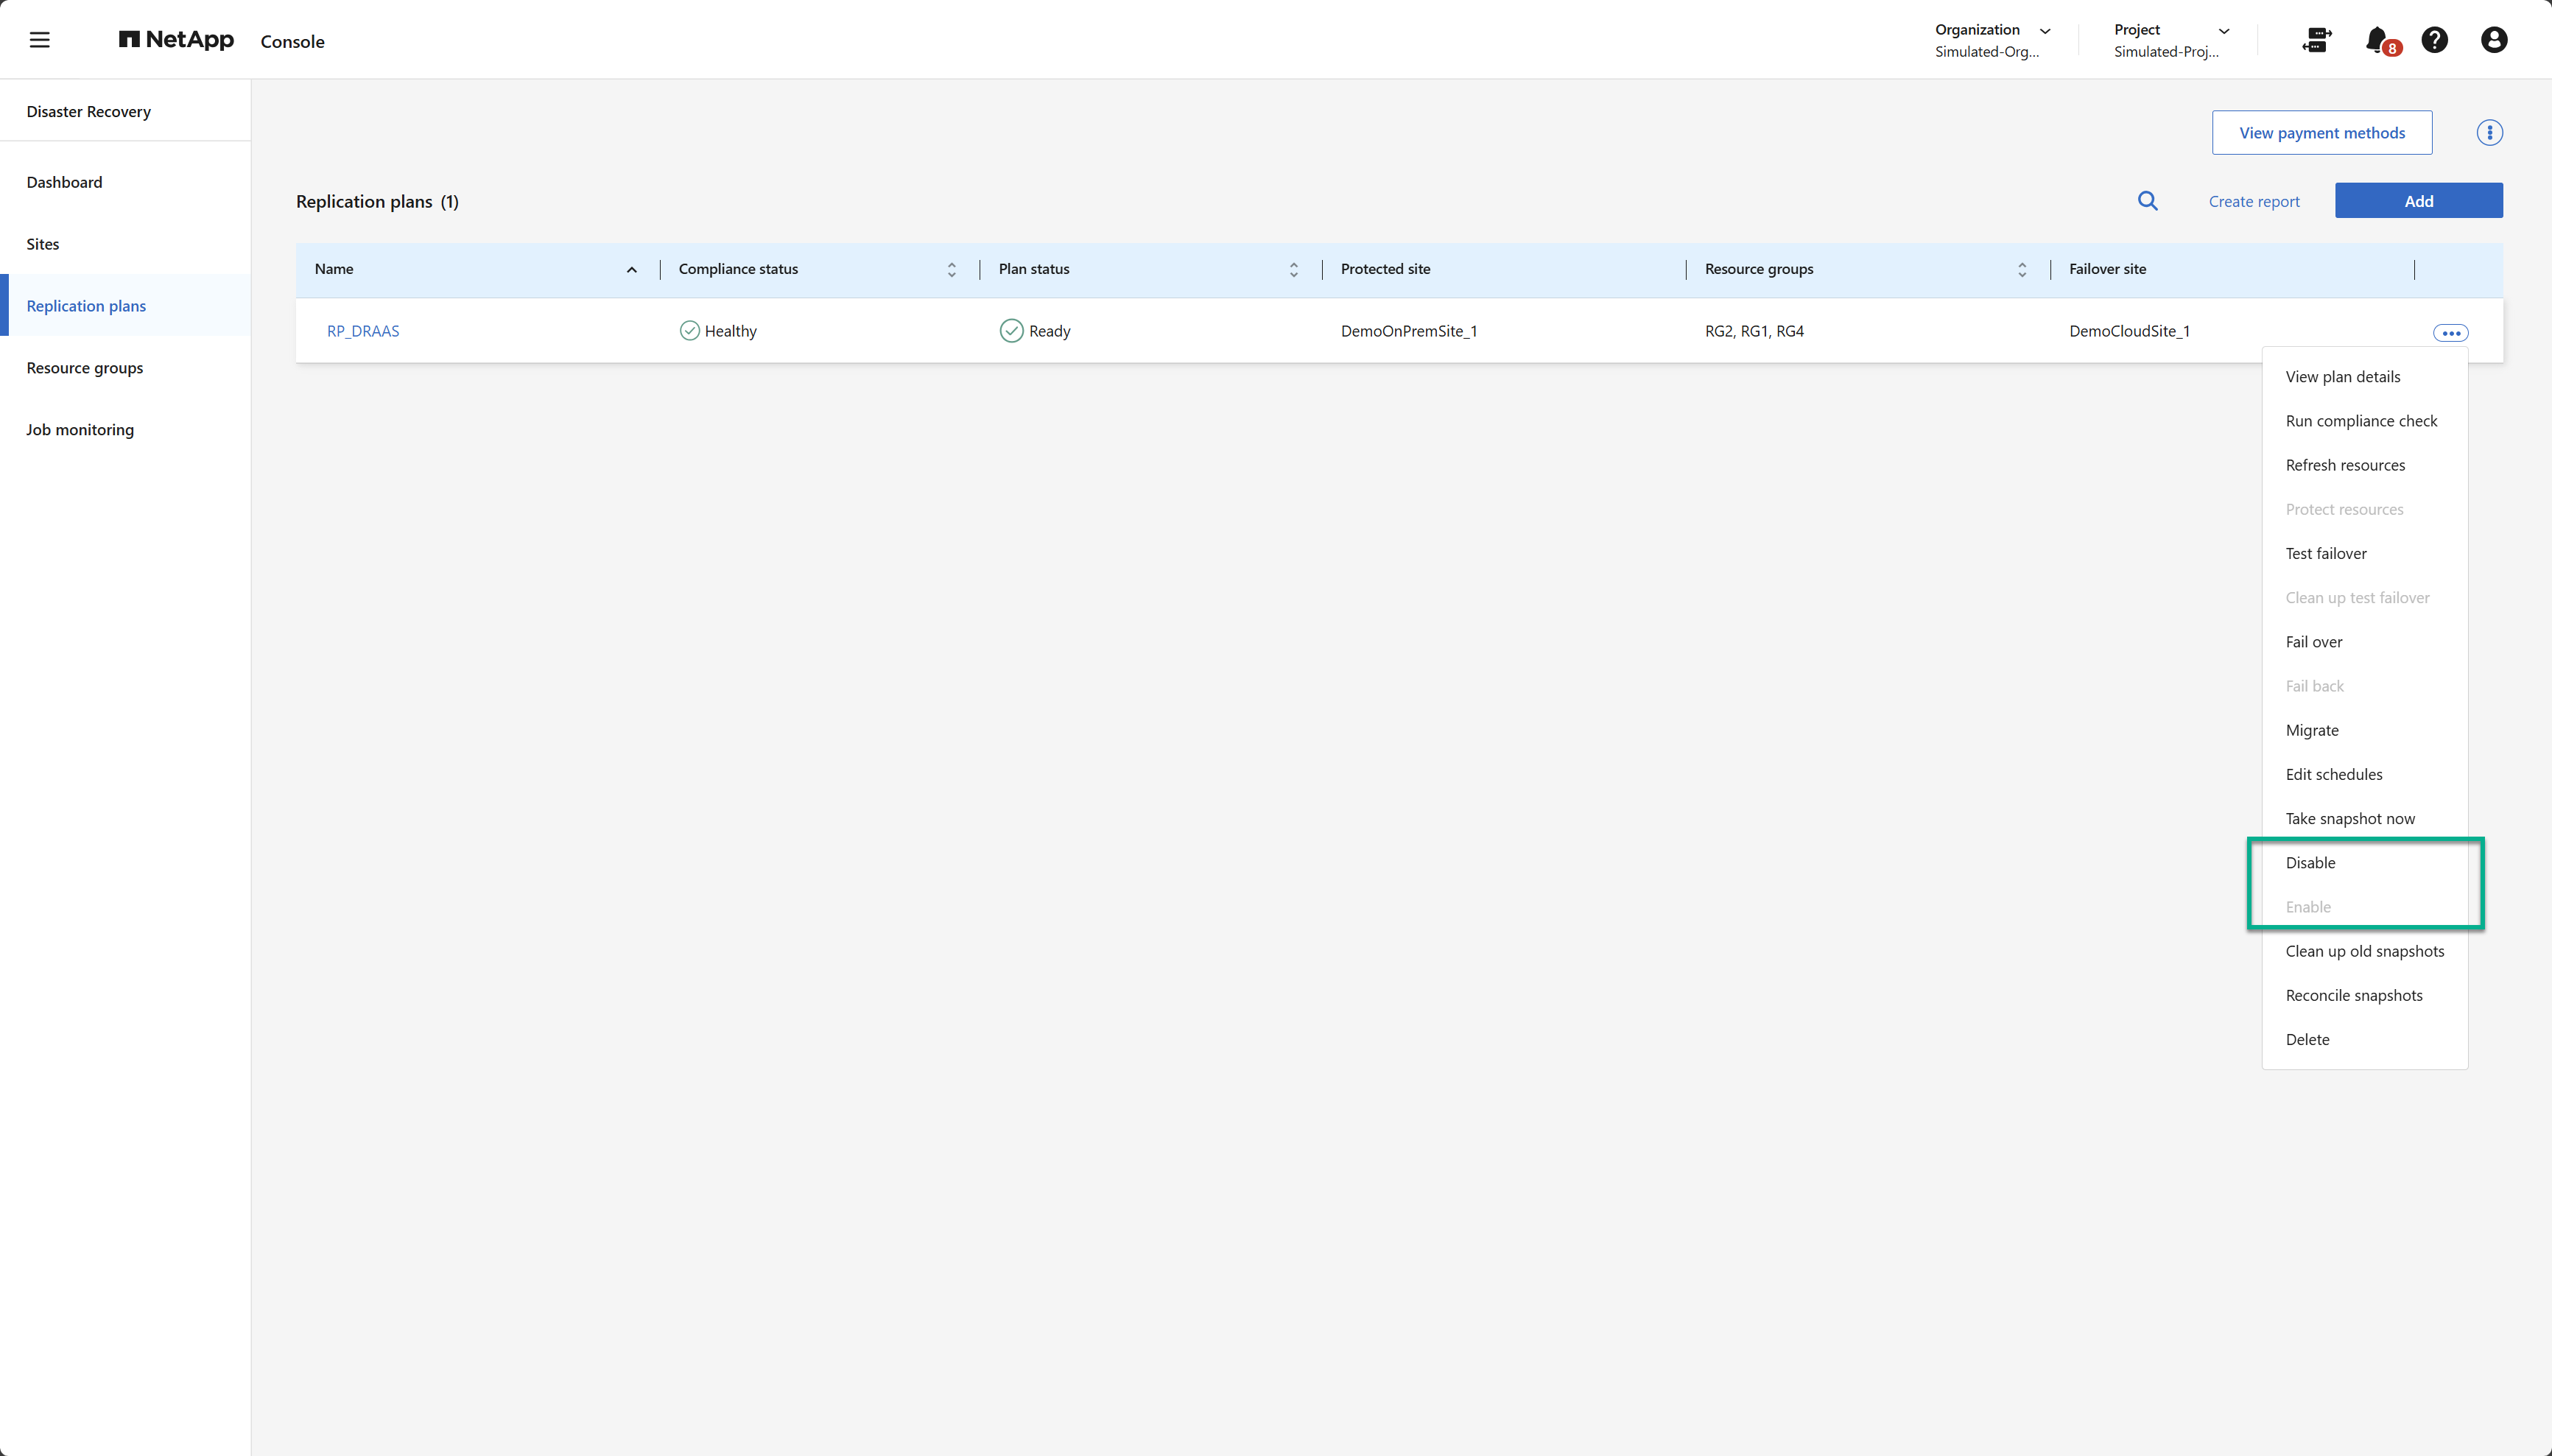
You might need to temporarily stop the replication plan to perform some operation or maintenance that could impact the replication process. The service provides a method to stop and start replication.
-
To temporarily stop replication, select Disable on the replication plan's Actions menu.
-
To restart replication, select Enable on the replication plan's Actions menu.
When the replication plan is active, the Enable command is grayed out. When the replication plan is disabled, the Disable command is grayed out.
Clean up old snapshots
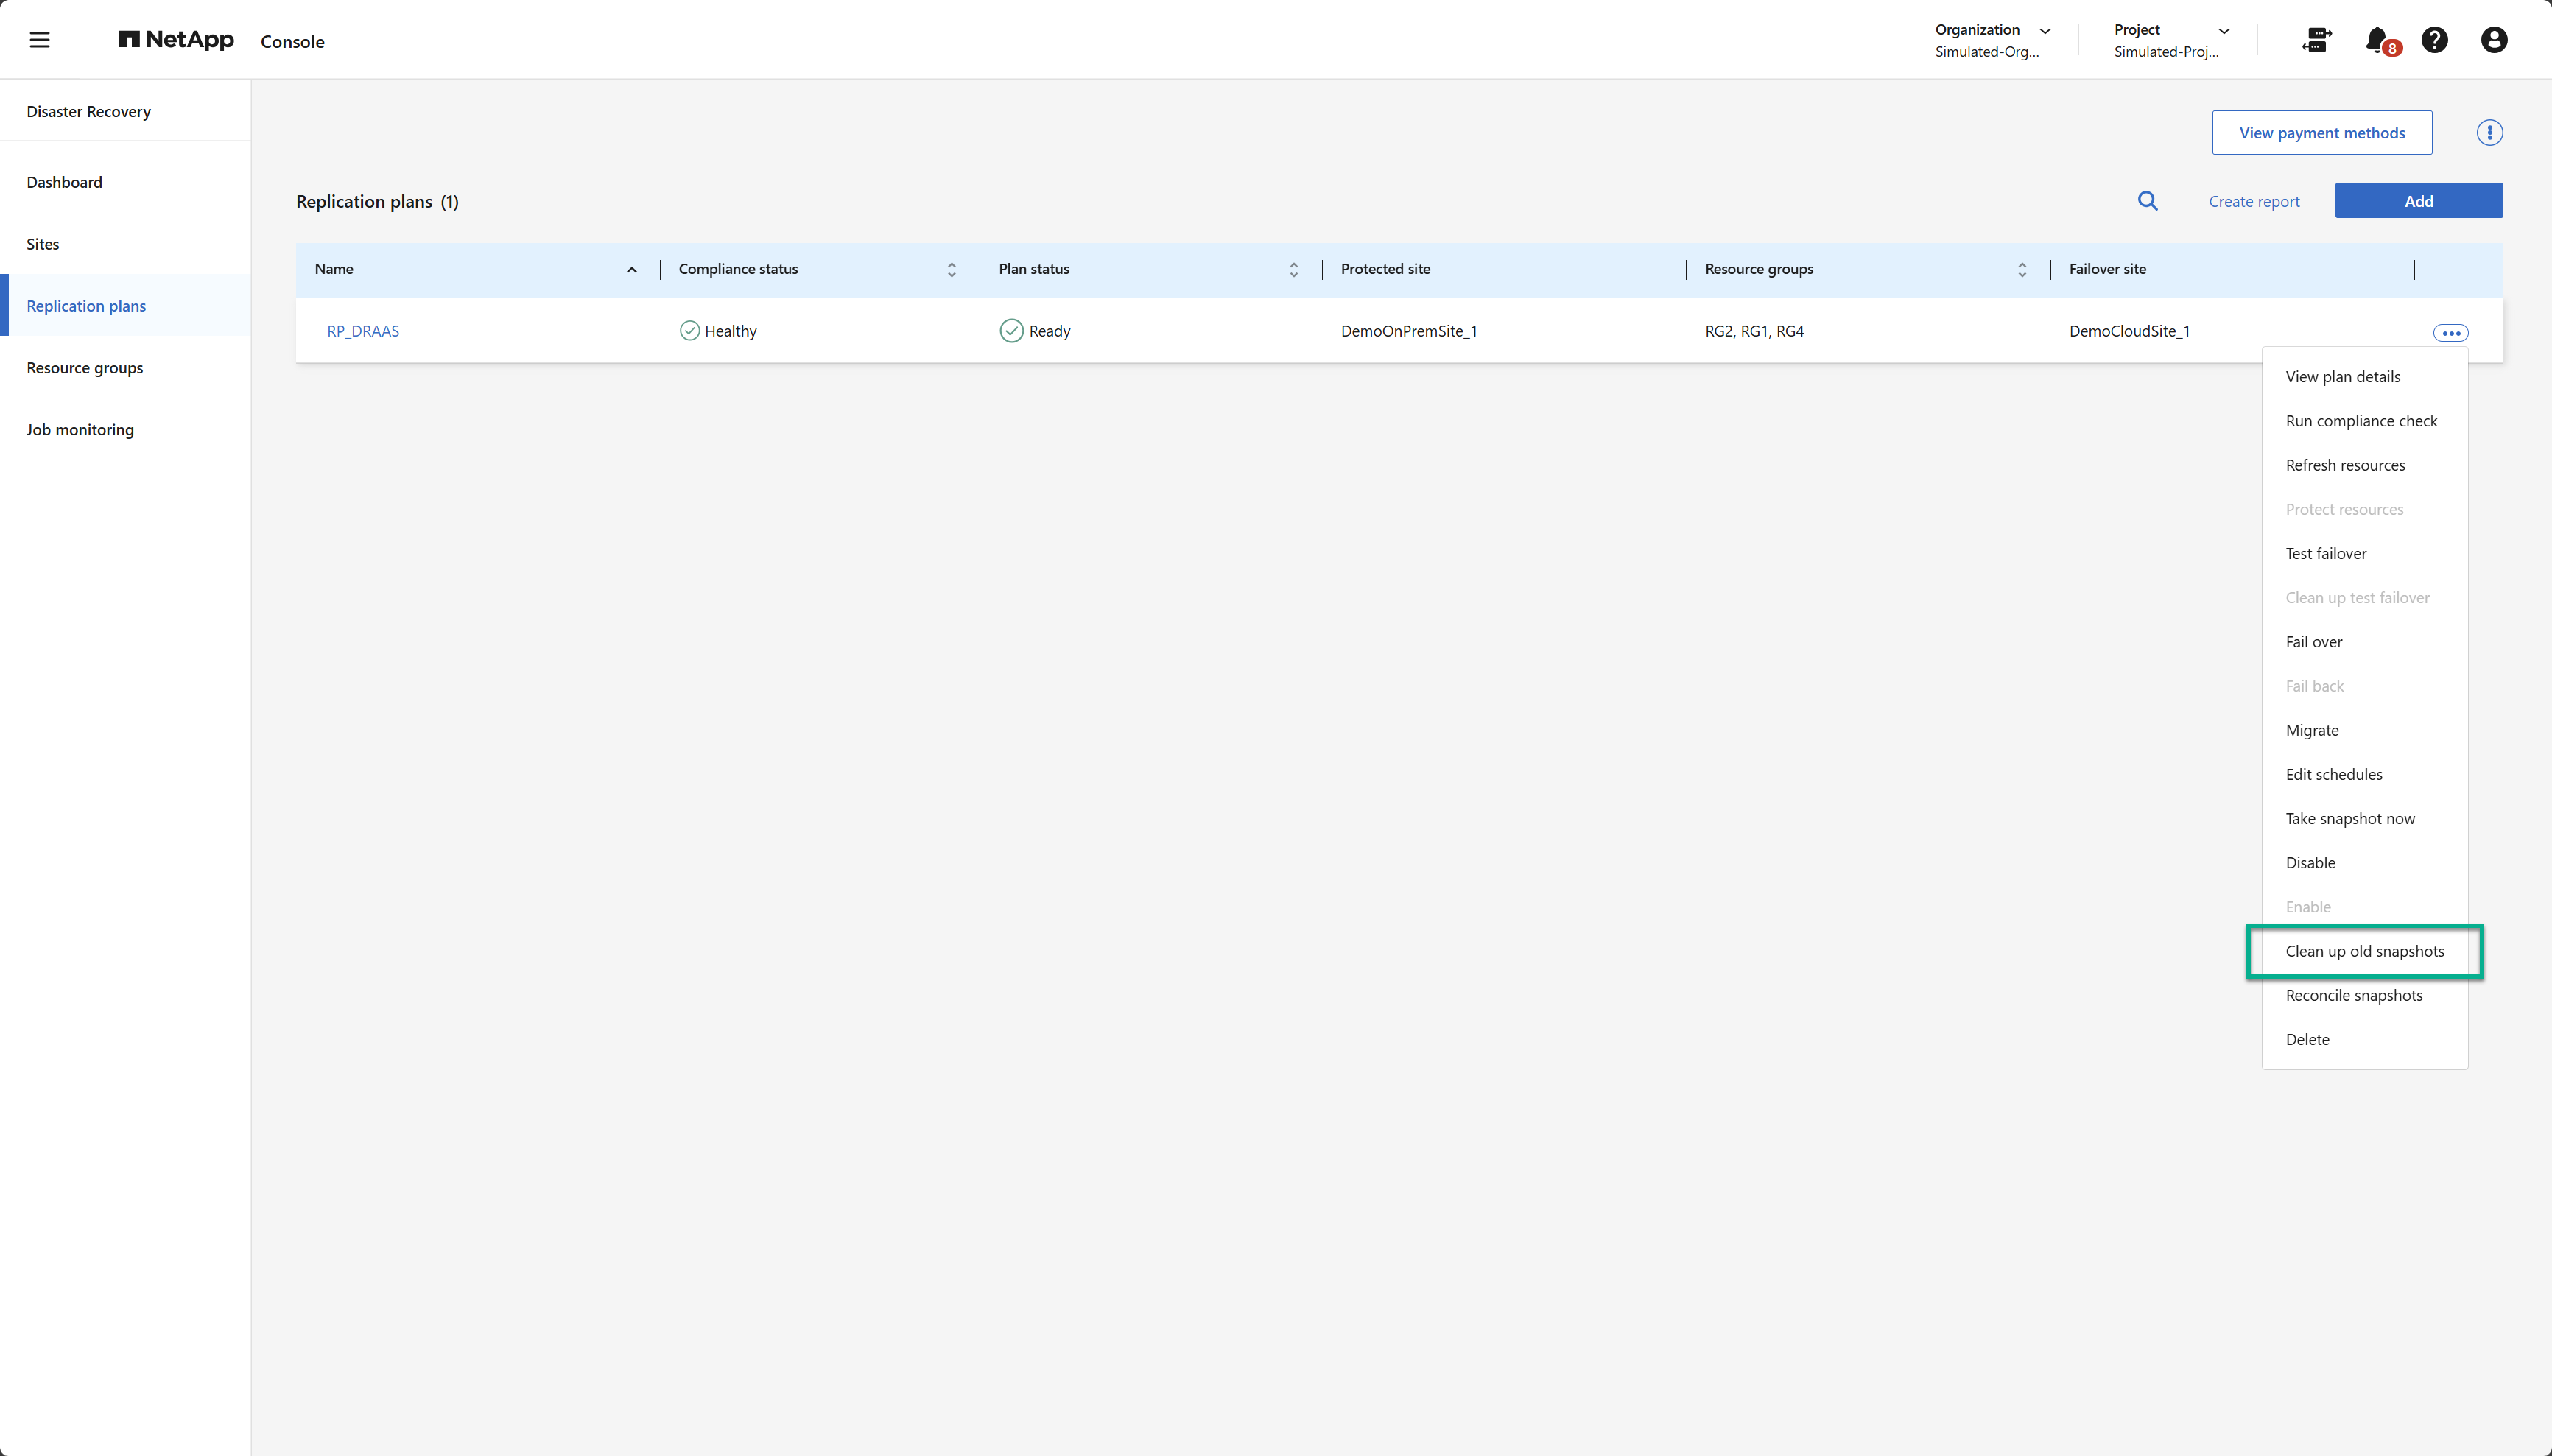
You might want to clean up older snapshots that have been retained on the source and destination sites. This can happen if the replication plan's snapshot retention count is altered.
-
Select the Actions option
next to the replication plan. -
To remove these older snapshots manually, select Clean up old snapshots from the replication plan's Actions menu.
Reconcile snapshots
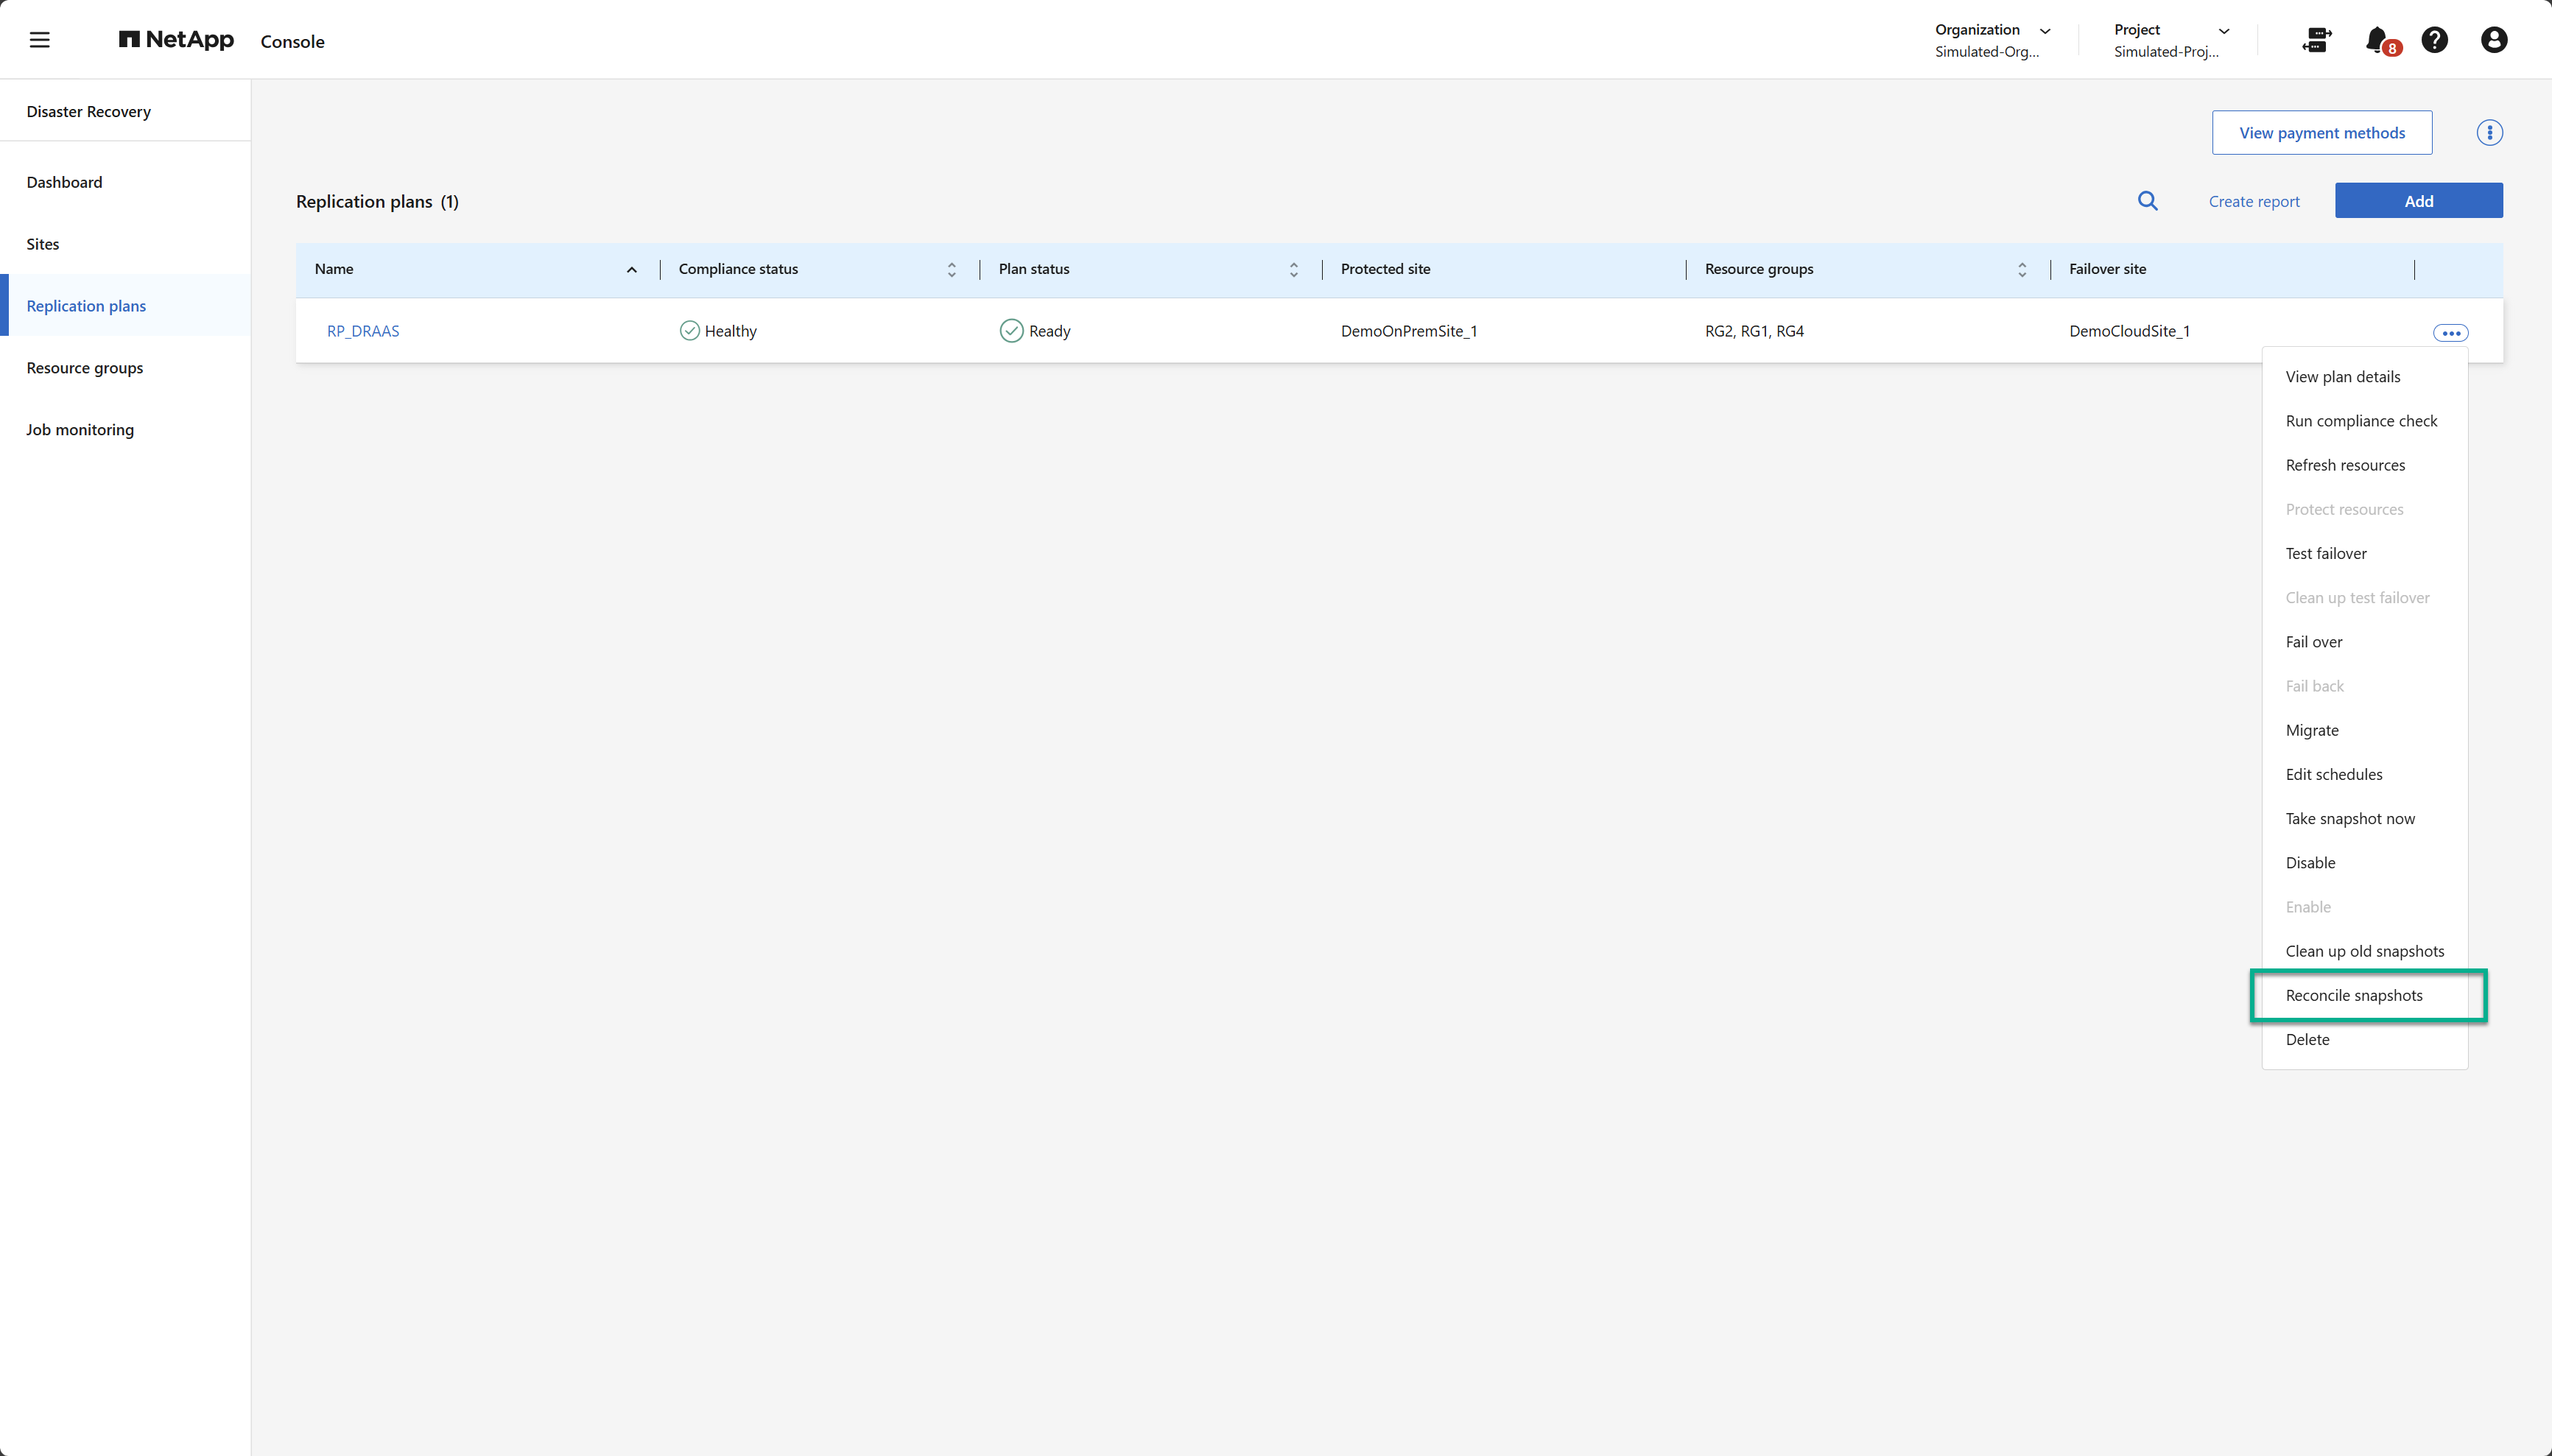
Because Disaster Recovery orchestrates ONTAP volume snapshots, an ONTAP storage administrator can directly delete snapshots using either ONTAP System Manager, the ONTAP CLI, or the ONTAP REST APIs without the service's knowledge. Disaster Recovery automatically deletes any snapshots on the source that are not on the destination cluster automatically every 24 hours. You can delete snapshots manually as needed. This feature enables you to ensure that the snapshots are consistent across all sites.
-
Select the Actions option
next to the replication plan. -
To delete snapshots from the source cluster that do not exist on the destination cluster, select Reconcile snapshots from the replication plan's Actions menu.
Delete replication plan
If the replication plan is no longer needed, you can delete it.
-
Select the Actions option
next to the replication plan. -
To delete the replication plan, select Delete from the replication plan's context menu.
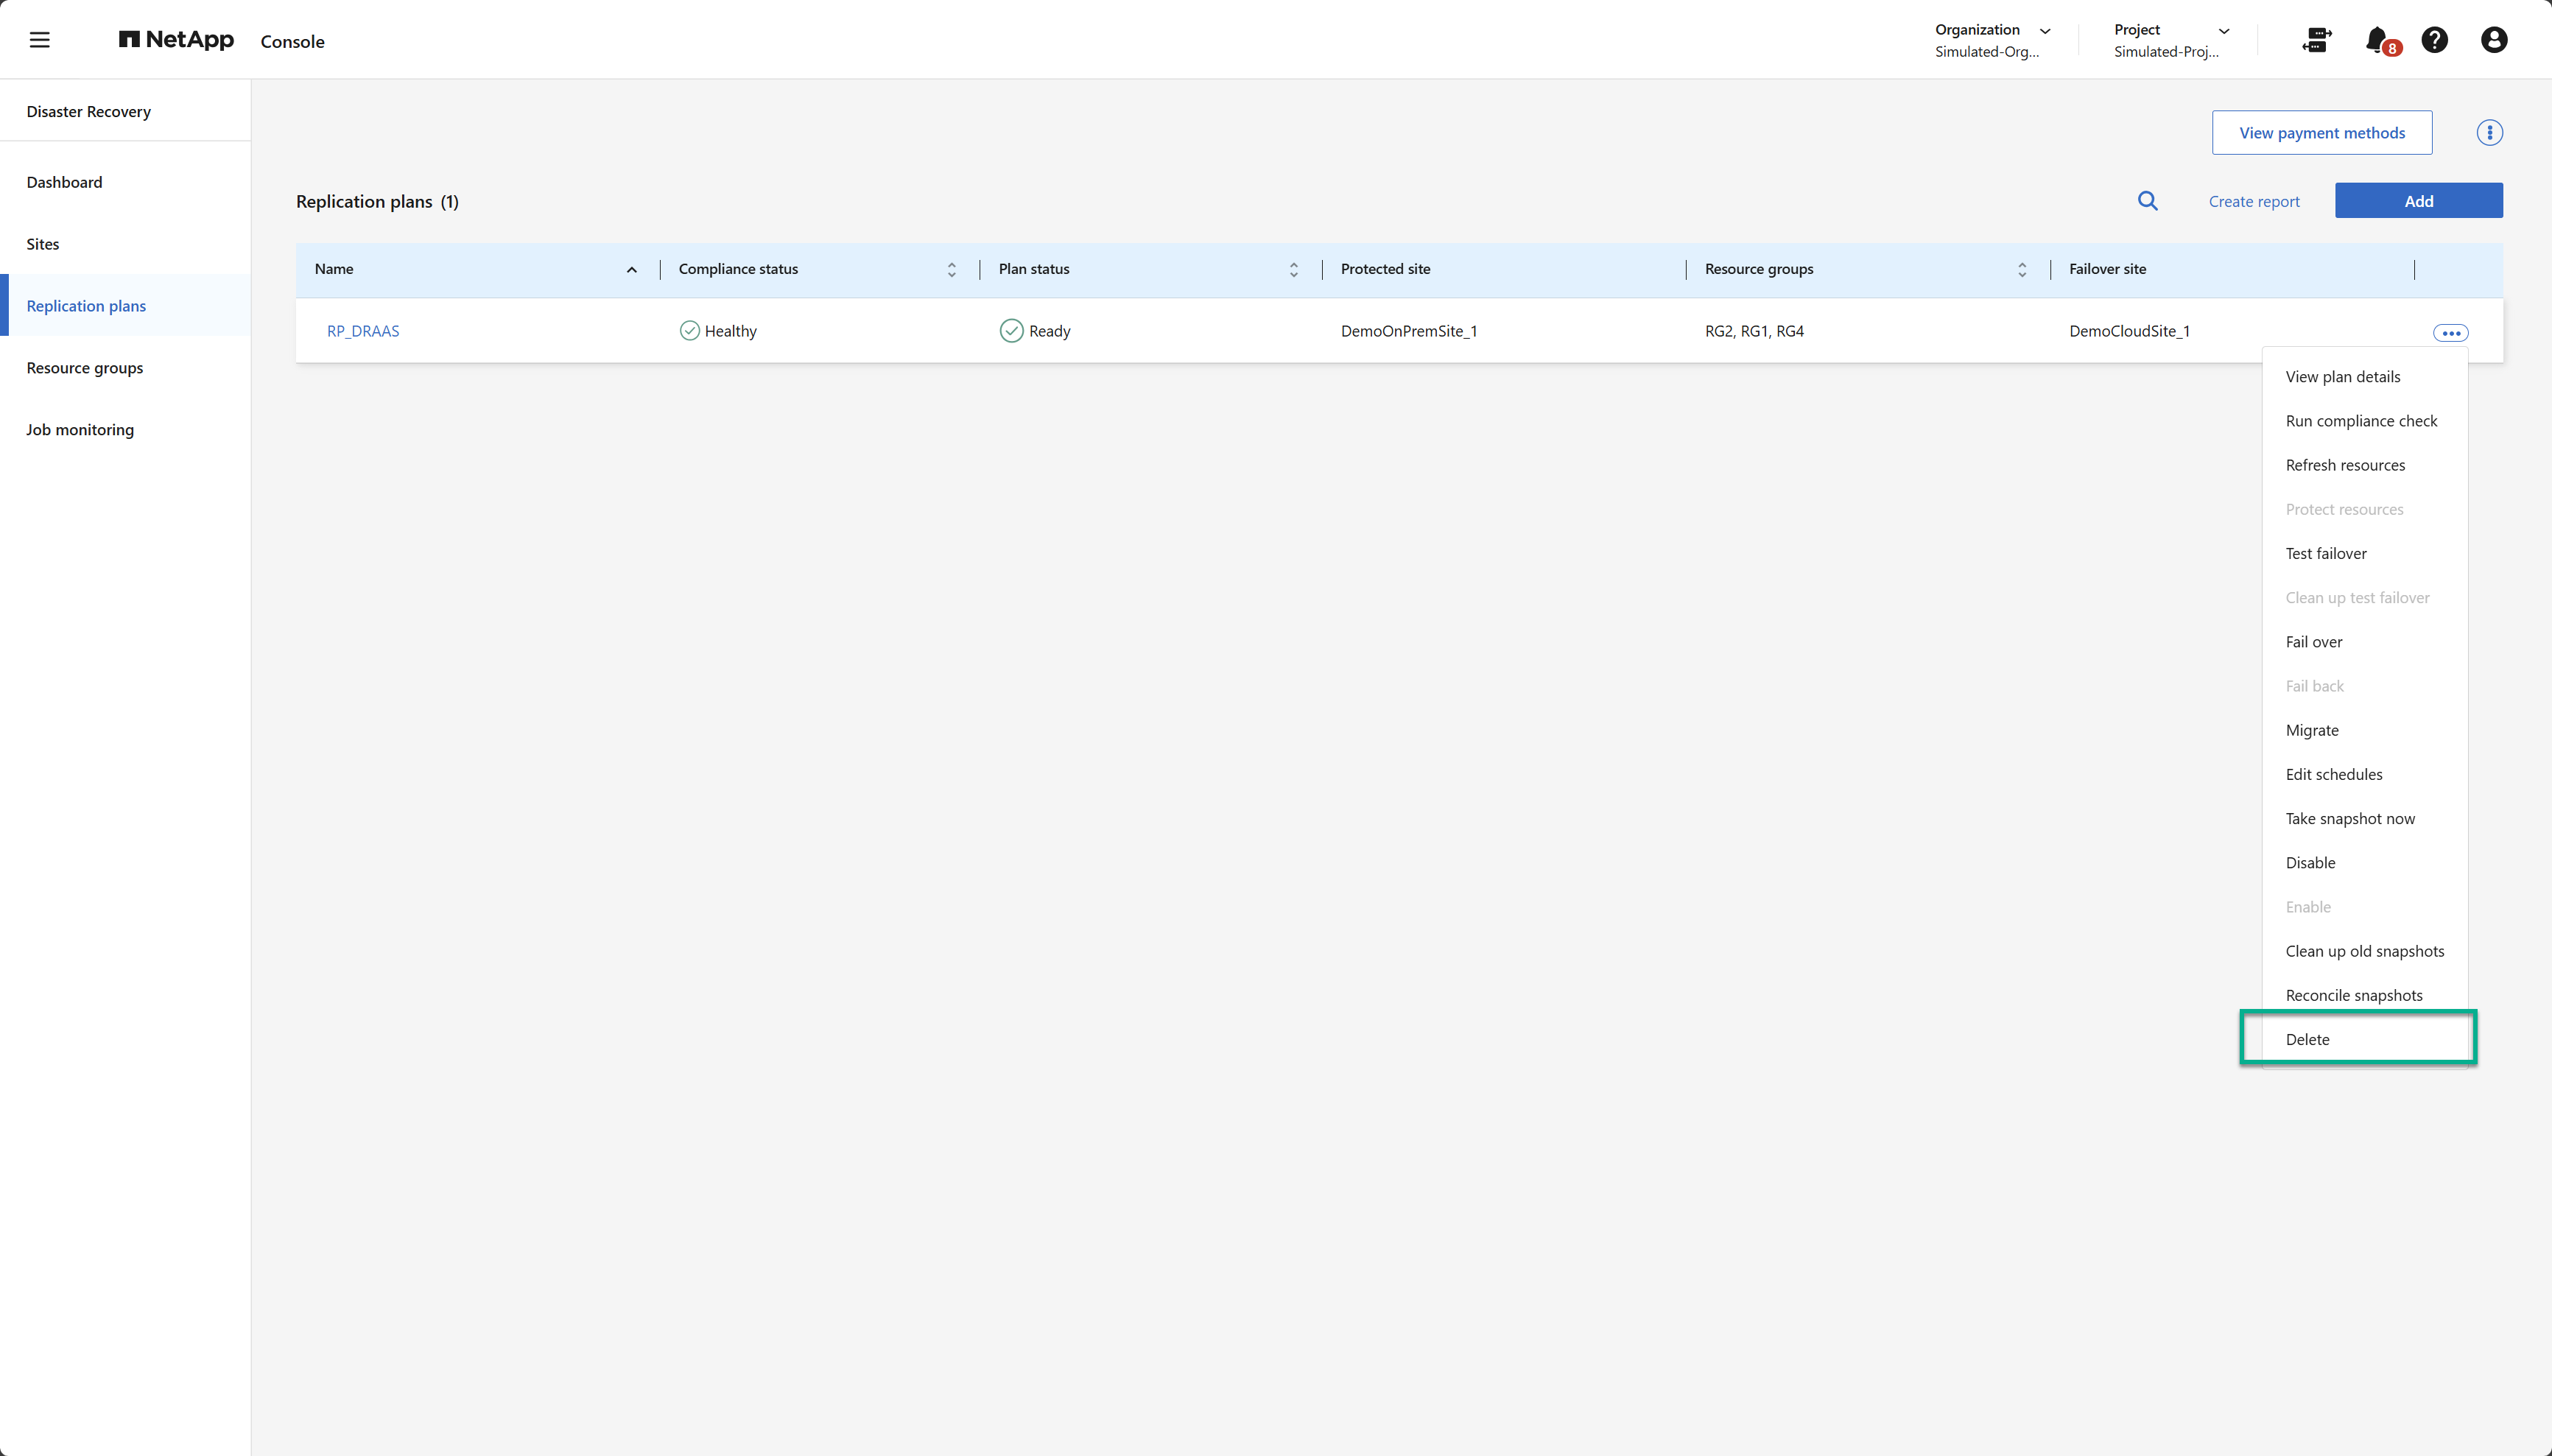
Edit schedules
Two operations are performed automatically on a regular schedule: test failovers and compliance checks.
-
Select the Actions option
next to the replication plan. -
To change these schedules for either of these two operations, select Edit schedules for the replication plan.
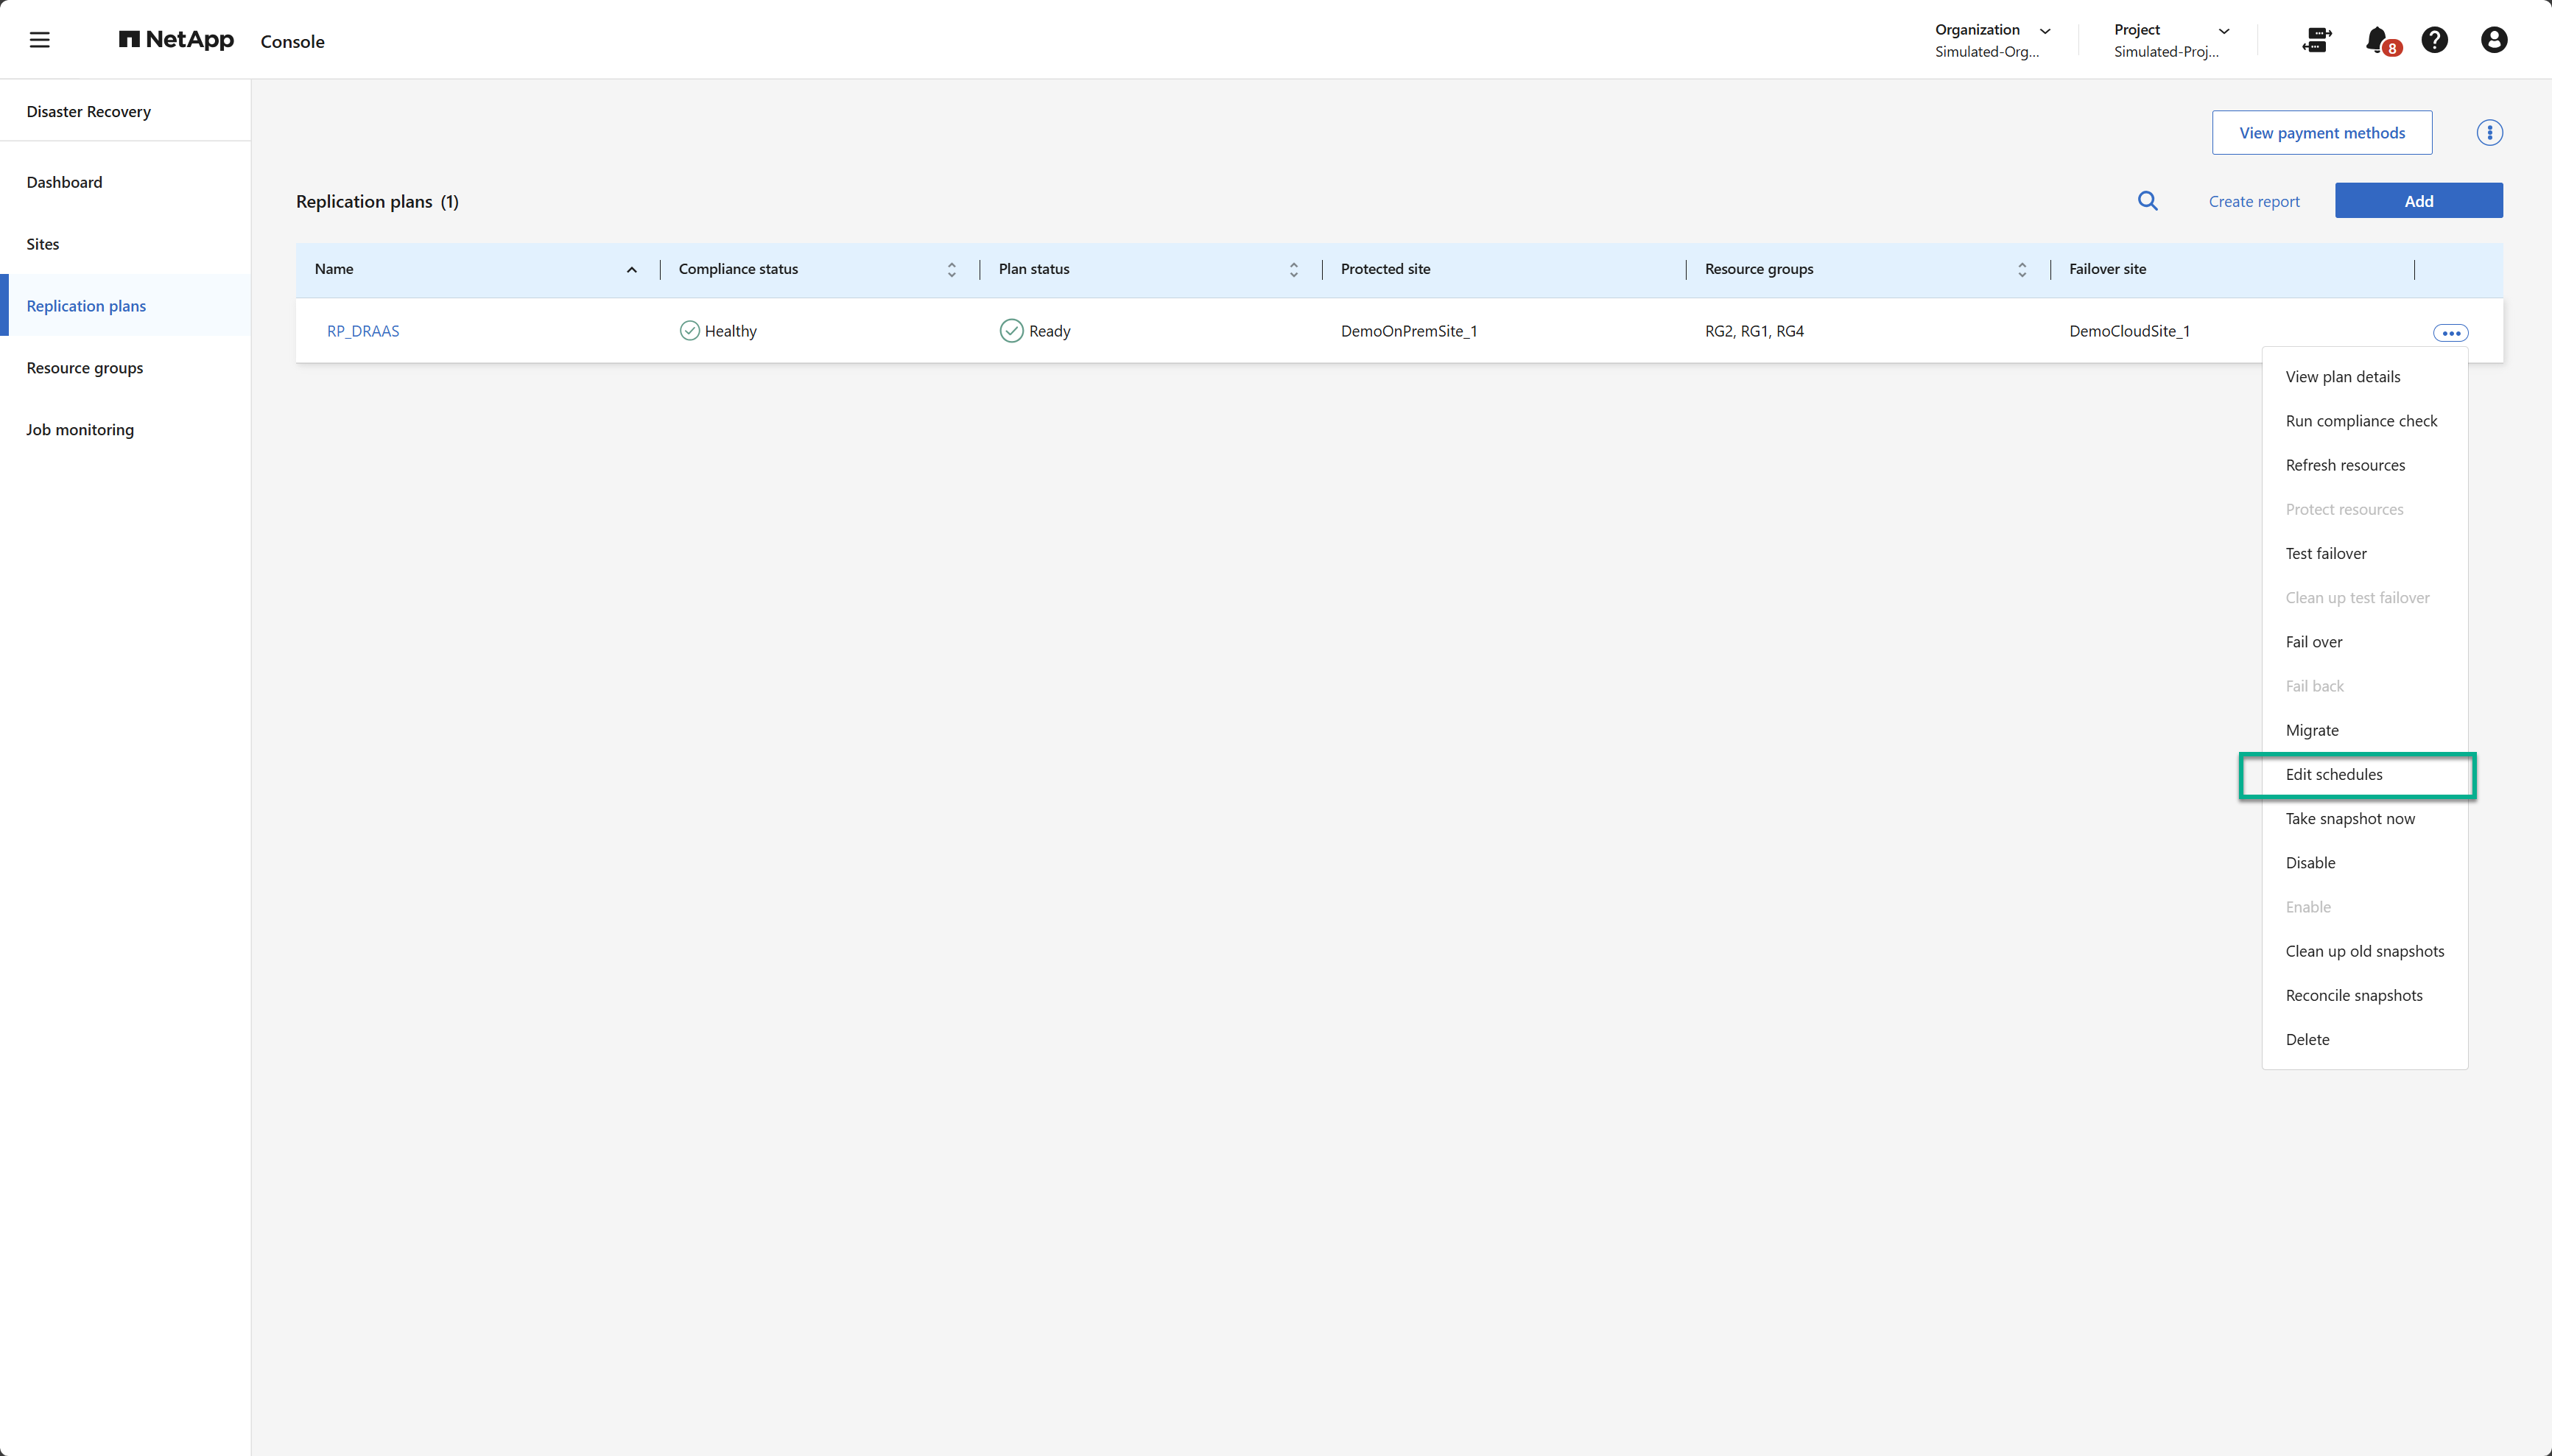
Change compliance check interval
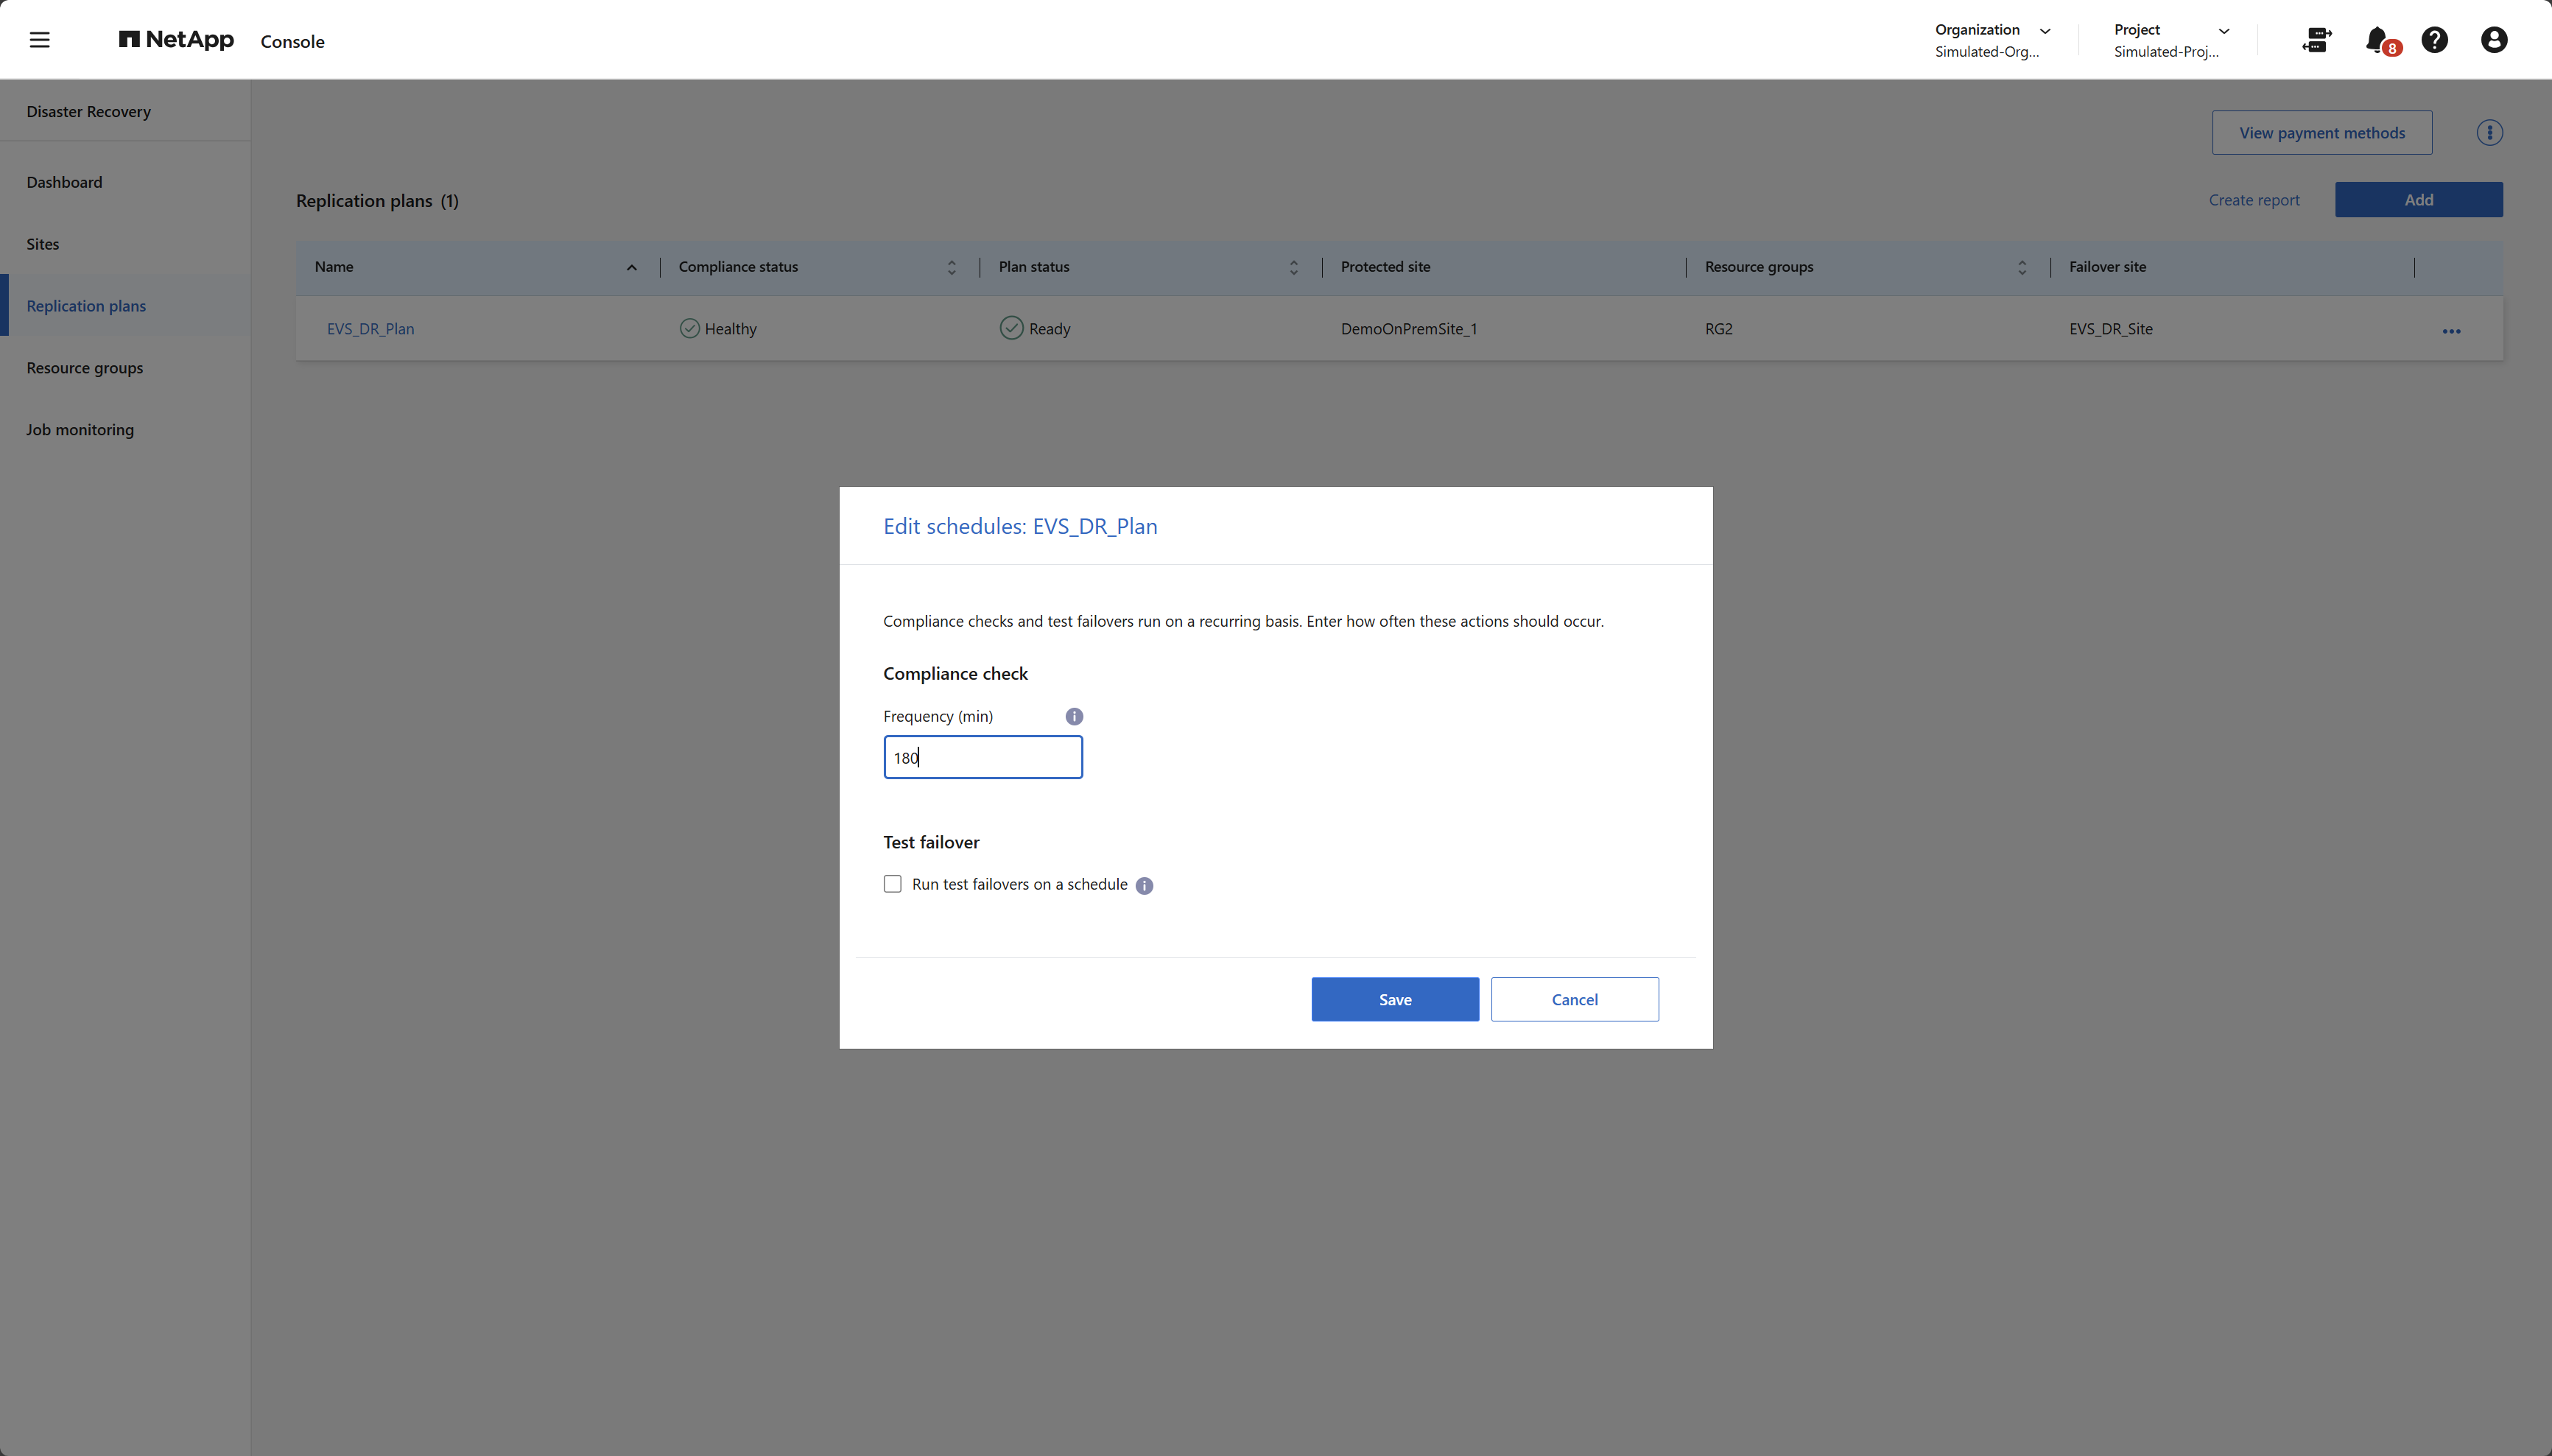
By default, compliance checks are performed every three hours. You can change this to any interval between 30 minutes and 24 hours.
To change this interval, change the Frequency field in the Edit schedules dialog box:
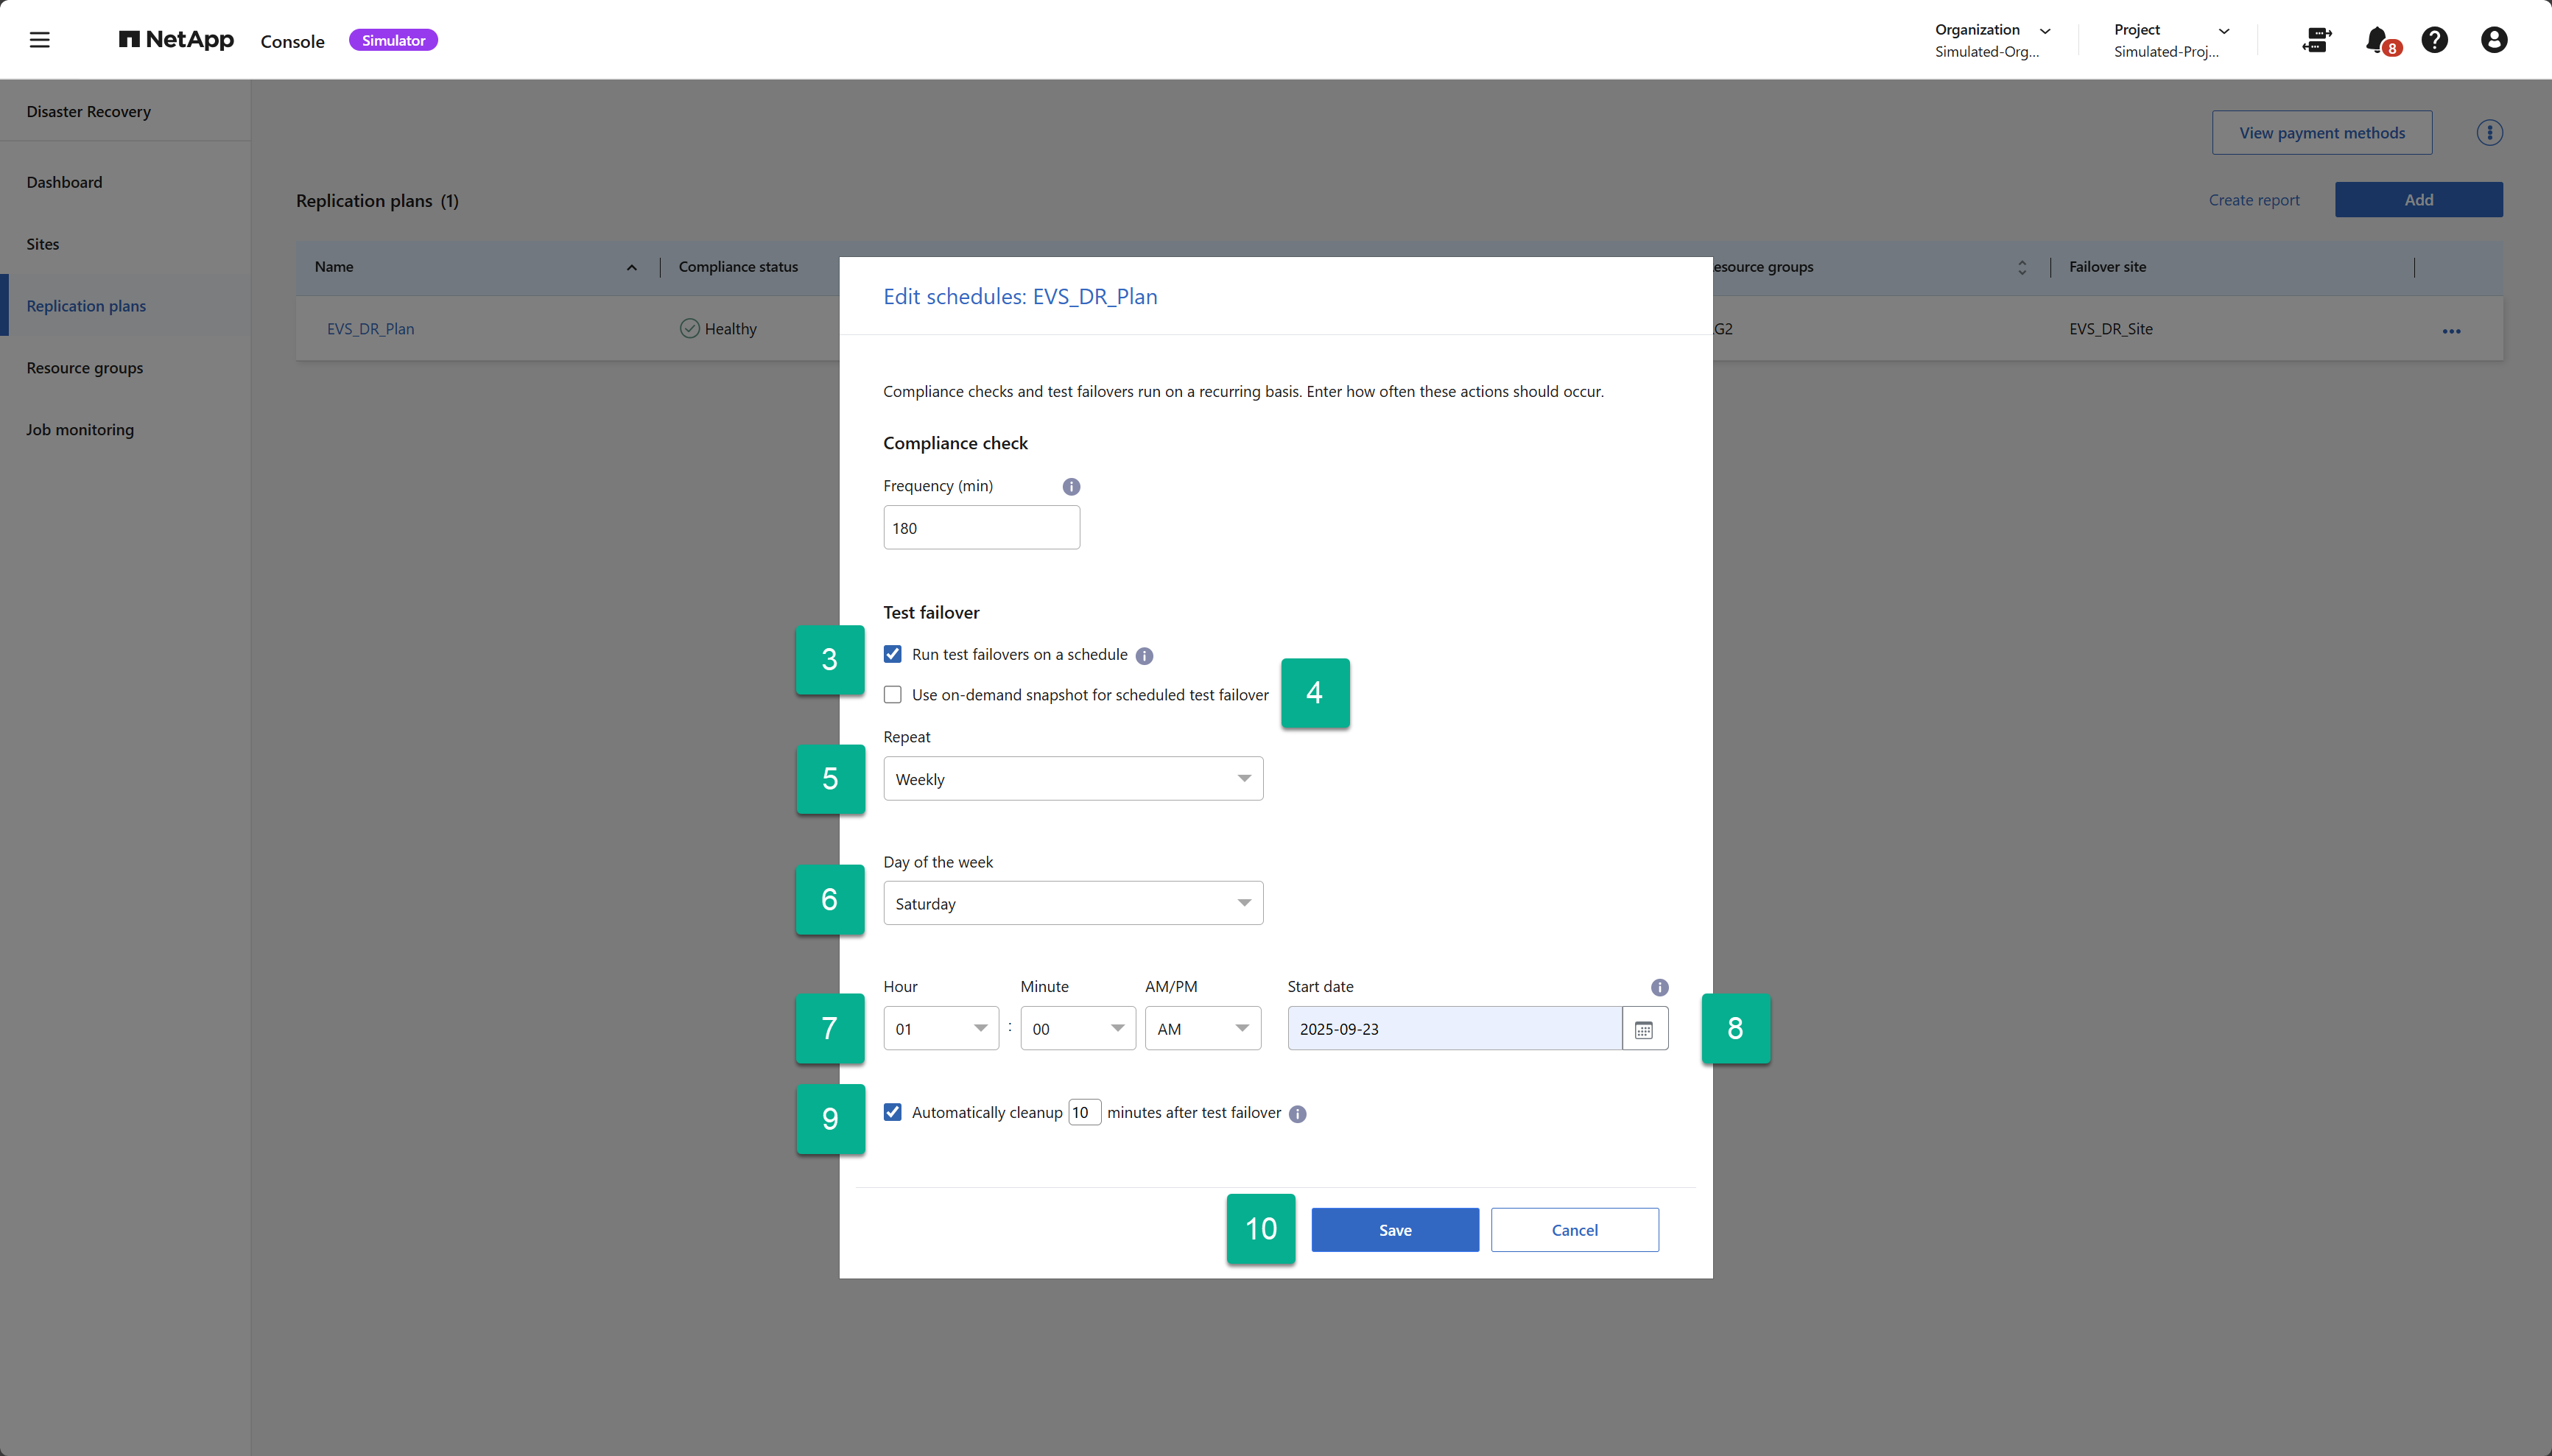
Schedule automated test failovers
Test failovers are manually executed by default. You can schedule automatic test failovers, which helps ensure that your replication plans perform as expected. To learn more about the test failover process, see Test the failover process.
-
Select the Actions option
next to the replication plan. -
Select Run failover.
-
Check the Run test failovers on a schedule checkbox.
-
(Optional) Check the Use on-demand-snapshot for scheduled test failover.
-
Select an interval type in the Repeat drop-down.
-
Select when to perform the test failover
-
Weekly: select the Day of the Week
-
Monthly: select the Day of the month
-
-
Choose the time of day to run the test failover
-
Choose the start date.
-
Decide if you want the service to automatically clean up the test environment and how long you would like the test environment to run before the clean up process starts.
-
Select Save.