


Recover workloads with clean restore in NetApp Ransomware Resilience

 Suggest changes

 PDFs
PDFs
With NetApp Ransomware Resilience, you can perform a guided recovery after an encryption-based ransomware attack using a clean restore. The clean restore identifies optimized recovery paths to minimize data loss and return your workloads online in the shortest amount of time possible.
Before you begin
Required Console role
To perform this task, you need the Super admin or Ransomware Resilience admin role. Learn about Ransomware Resilience roles for NetApp Console.
You must have configured an isolated recovery environment before you can perform a clean restore.
Considerations
-
You can only perform a clean restore for encryption-based attacks (both user behavior and entropy) and suspicious user behavior attacks. Clean restore is not supported for data breach and data destruction attacks.
-
If the isolated recovery environment doesn't have capacity for a new operation, it's queued until there is availability.
-
You can monitor the status of active and queued clean restore operations at any time in the Ransomware Resilience Recovery dashboard.
-
-
When you initiate a clean restore, the original volume is unmounted, which can disrupt IO access.
Considerations for restoring to an alternate location
When you restore a volume using clean restore, you have the option of restoring to an alternate location managed by the same Console agent. The new location can be on the same or different system, storage VM, or aggregate. When you restore to an alternate location:
-
ARP is automatically enabled on the new volume.
-
The junction path is set based on the name you provide. For example:
<Data LIF IP address of destination storage VM>:<new volume name>. -
The export policy on the restored volume is the same as the source volume.
-
The SMB shares on the restored volume are the same as the source volume.
Perform a clean restore
-
In the Recovery section, identify the workload you want to restore. Select Restore.
-
In the Restore Type options, select Clean restore then Next.
-
Select the isolated recovery environment you want to use then Next.
-
Review the isolated recovery environment, confirming it's the correct location. Select Restore.
-
Ransomware Resilience performs the necessary configuration. Once the set up completes successfully, Ransomware Resilience updates the status. To proceed, select Next.
-
After the setup completes, select Run analysis. Ransomware Resilience searches for the most recent unimpacted snapshot.
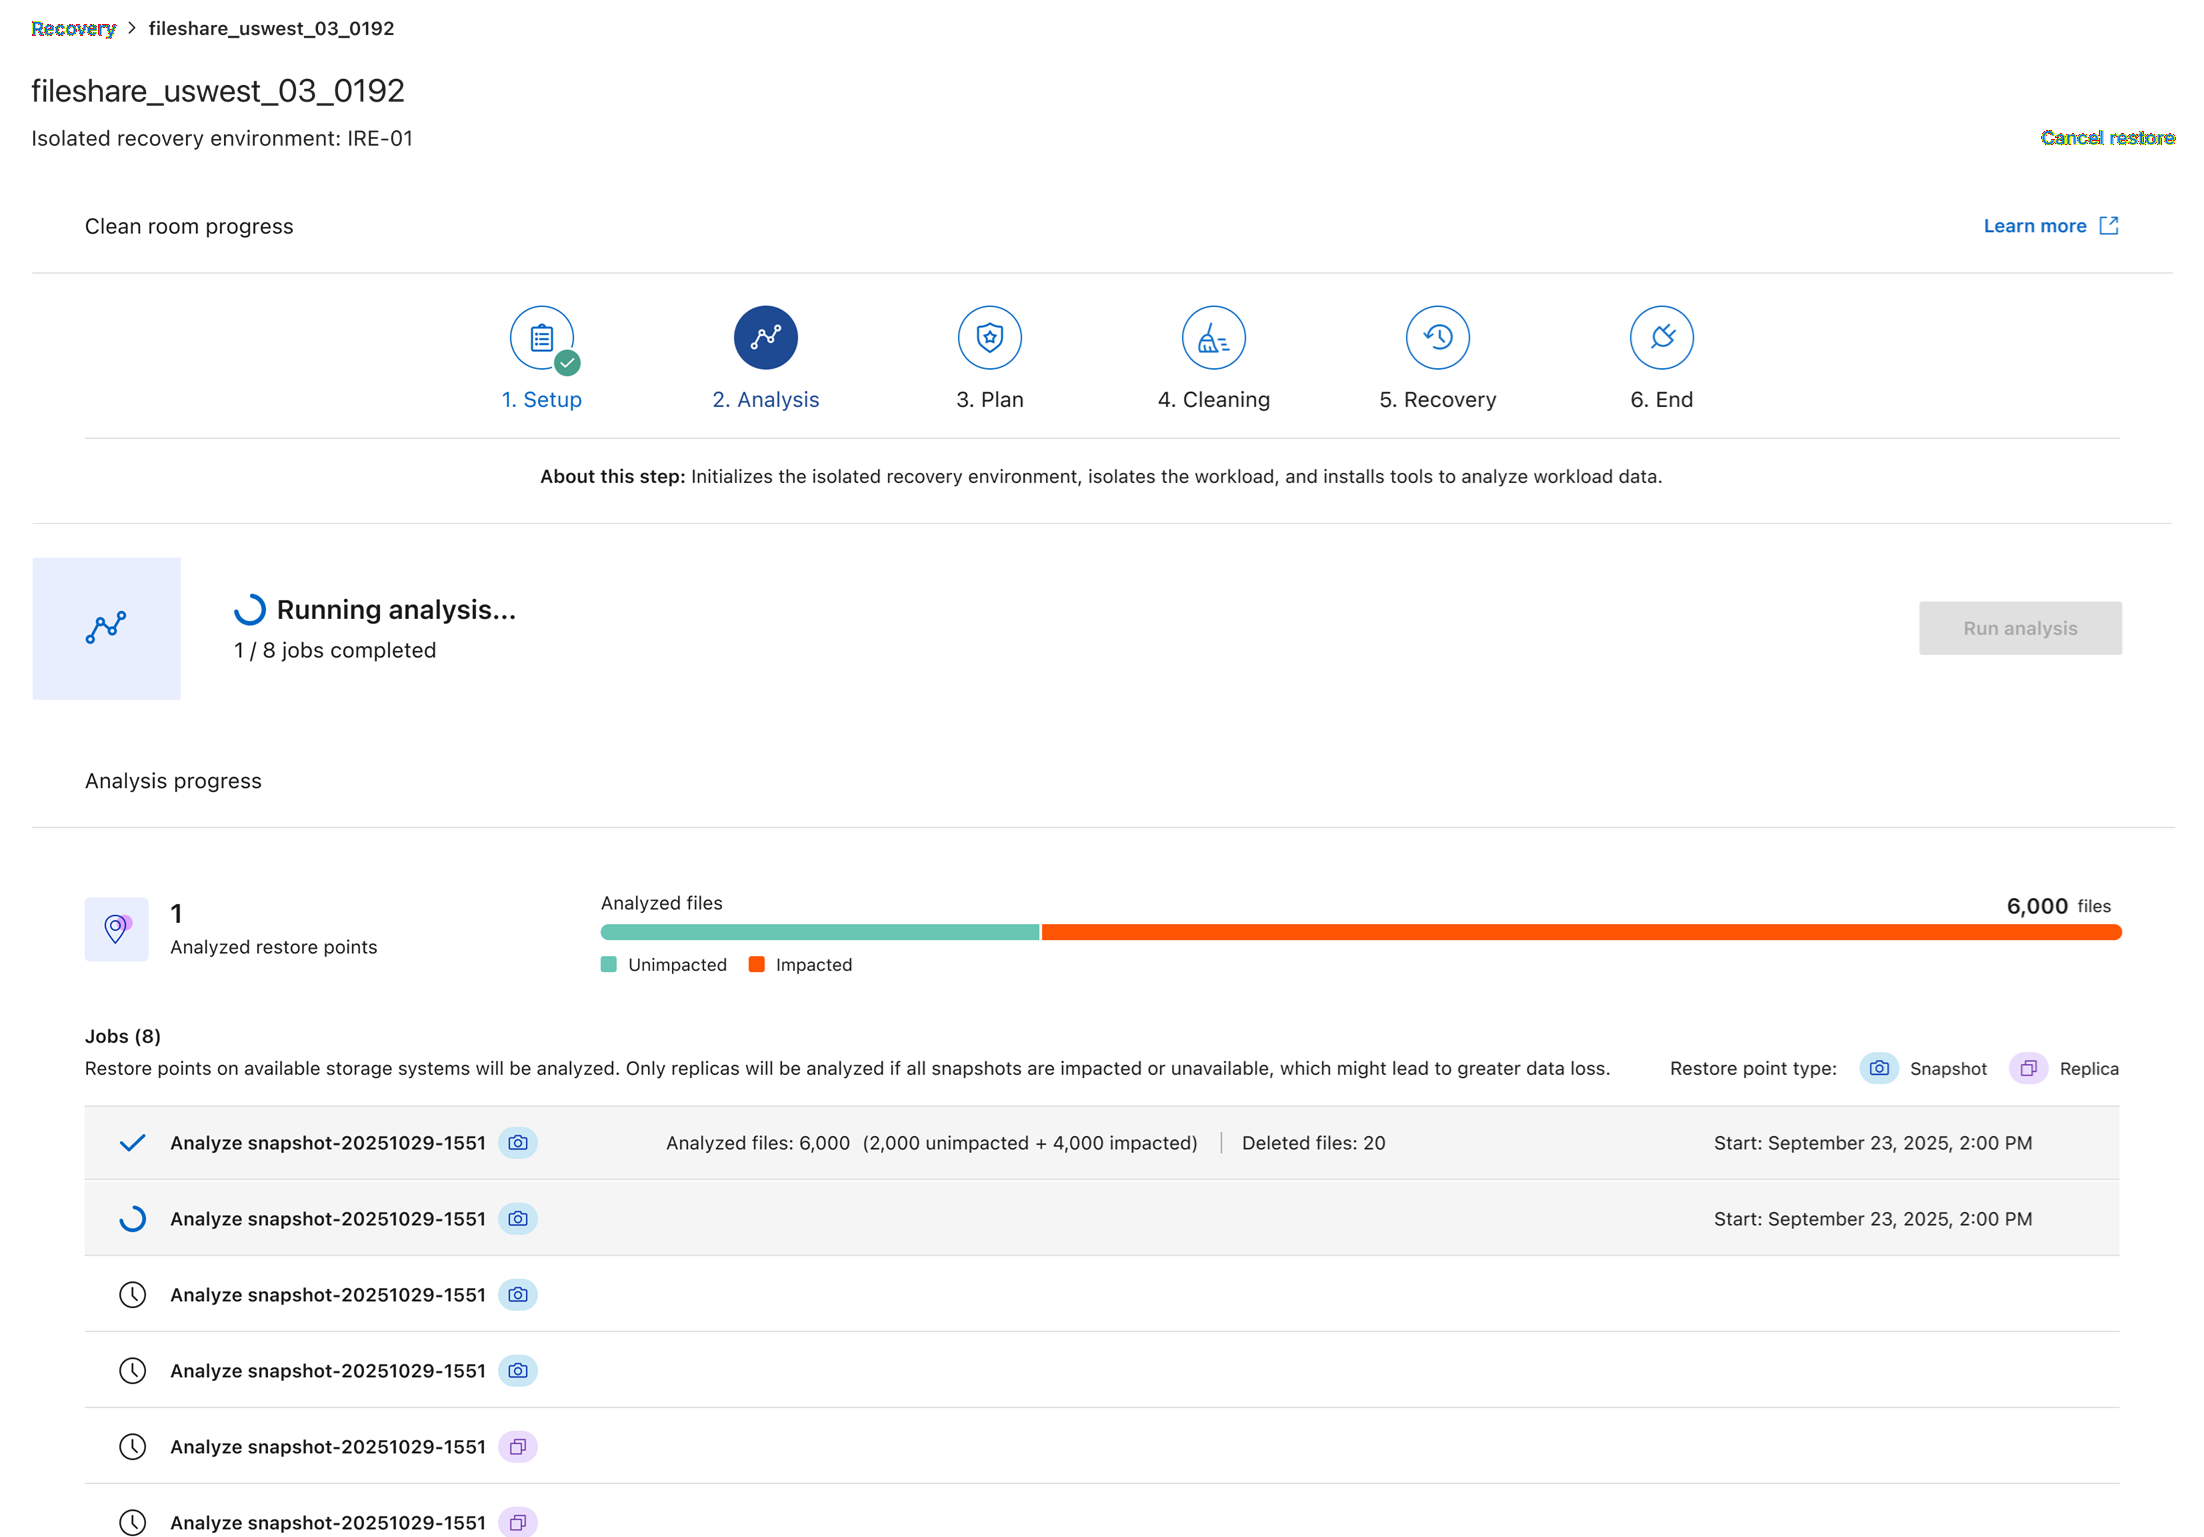
While the analysis runs, you can select Stop. Stopping the analysis requires the clean restore process to be started anew.
-
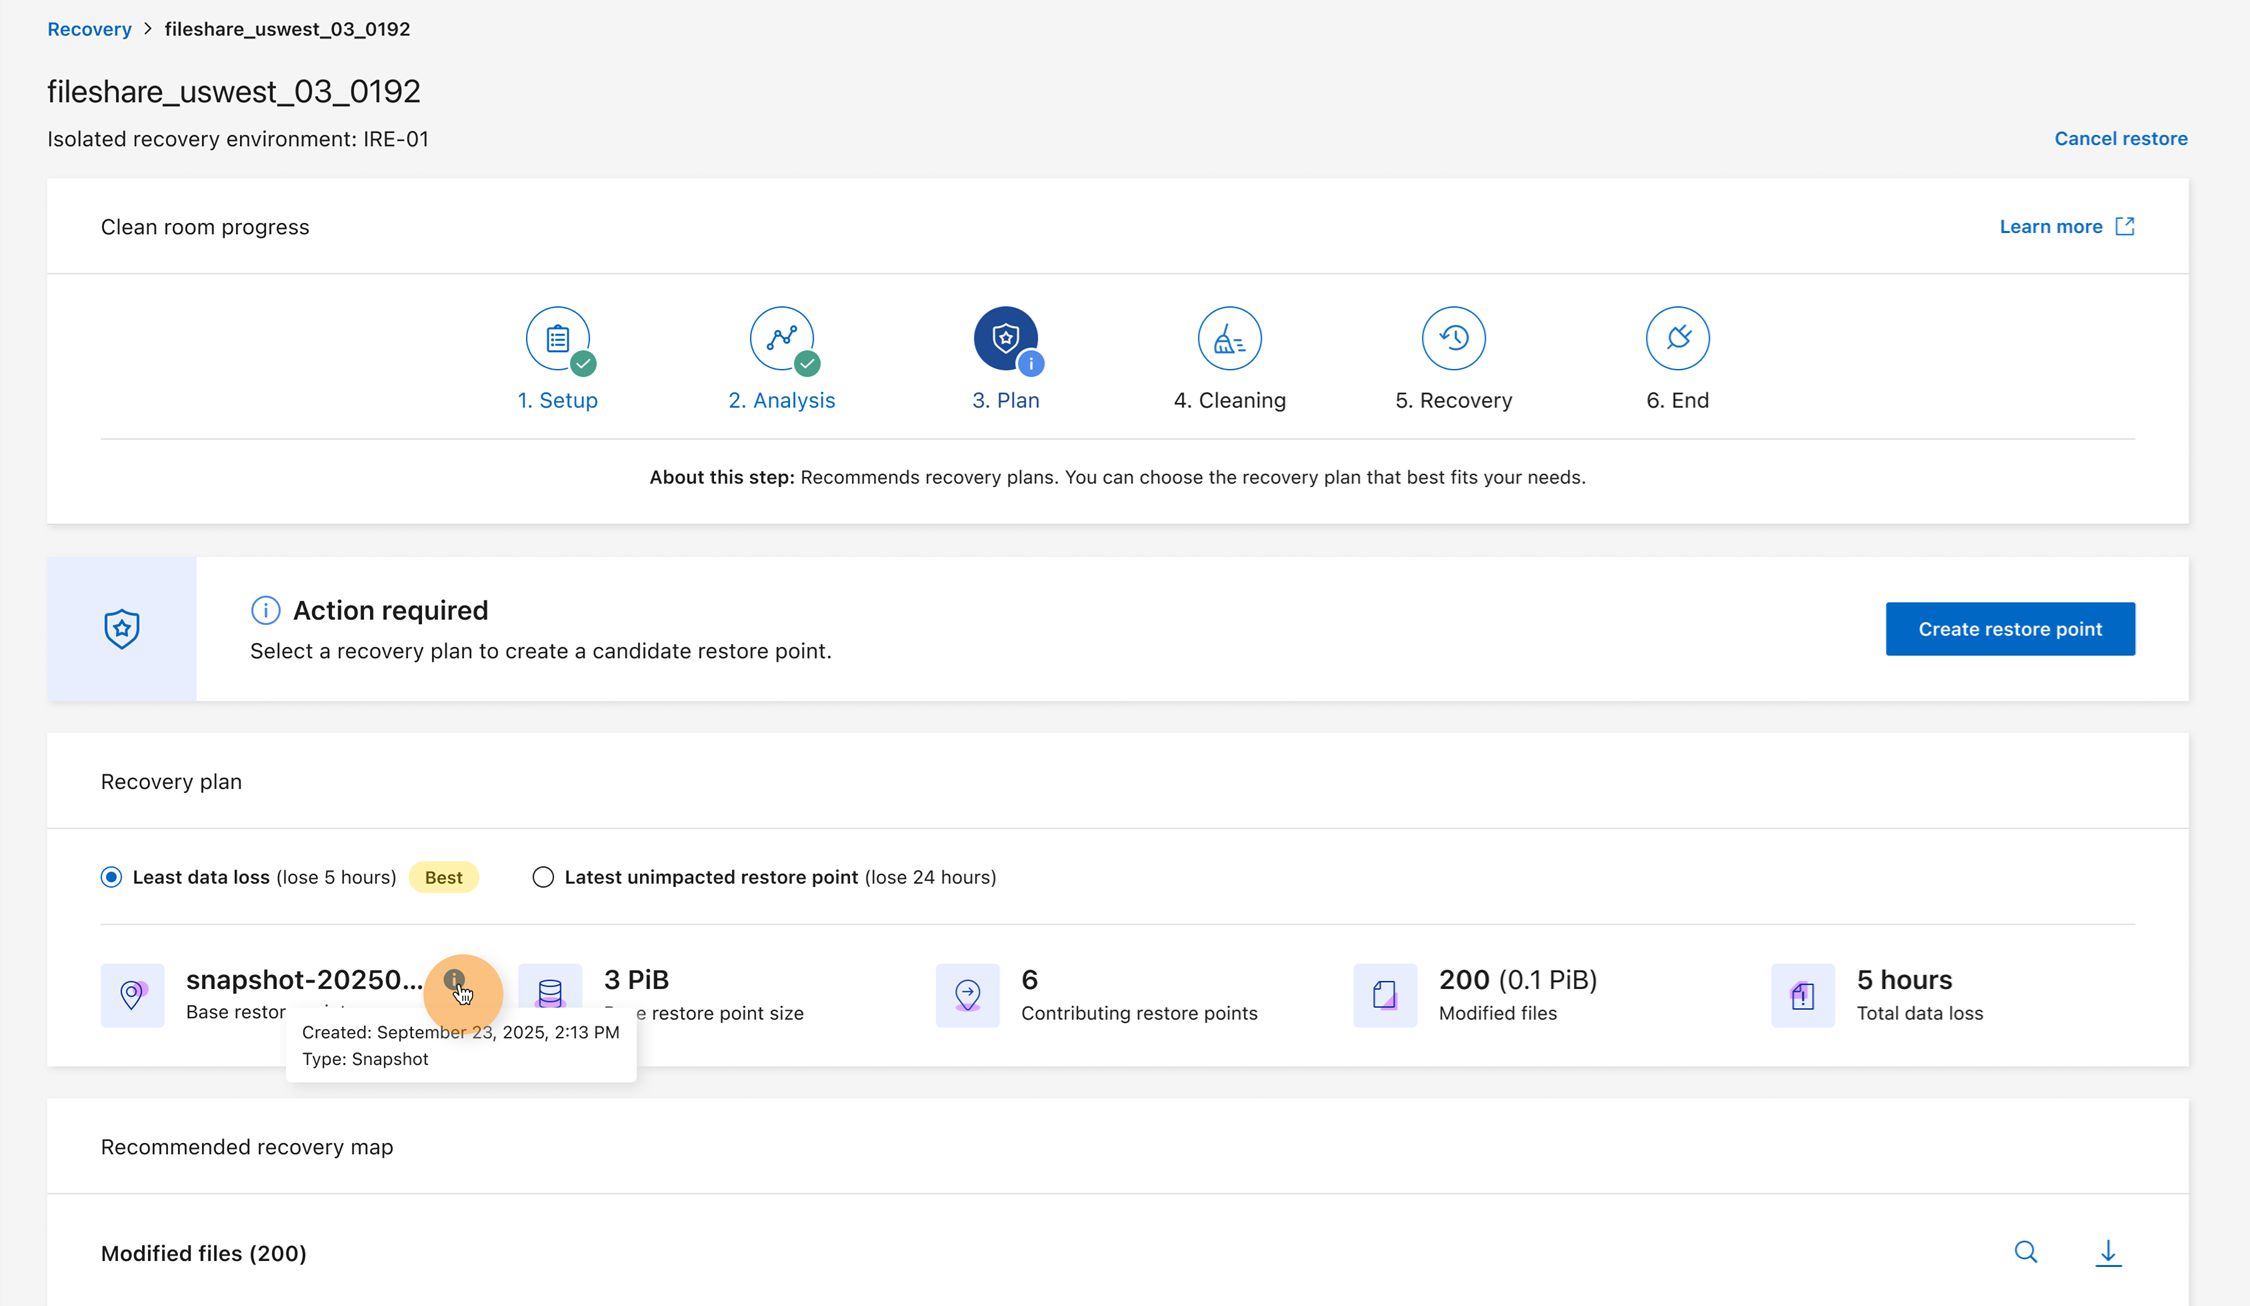
After the analysis completes, select Next to plan your recovery. Ransomware Resilience presents two options: Least data loss and Latest unimpacted restore point. Select either option, and optionally look at individual file data for either restore point.
To view granular file event data, select a file to analyze its encryption status and metadata: when it was created, modified, or deleted, and what restore point corresponds to what action.
-
After you choose your restore point, select Create restore point. Ransomware Resilience begins a series of jobs to create the restore point. Once this process completes, select Next.
-
Select Start cleaning to begin cleaning malware from the files.
-
Once the cleaning completes, select Next.
-
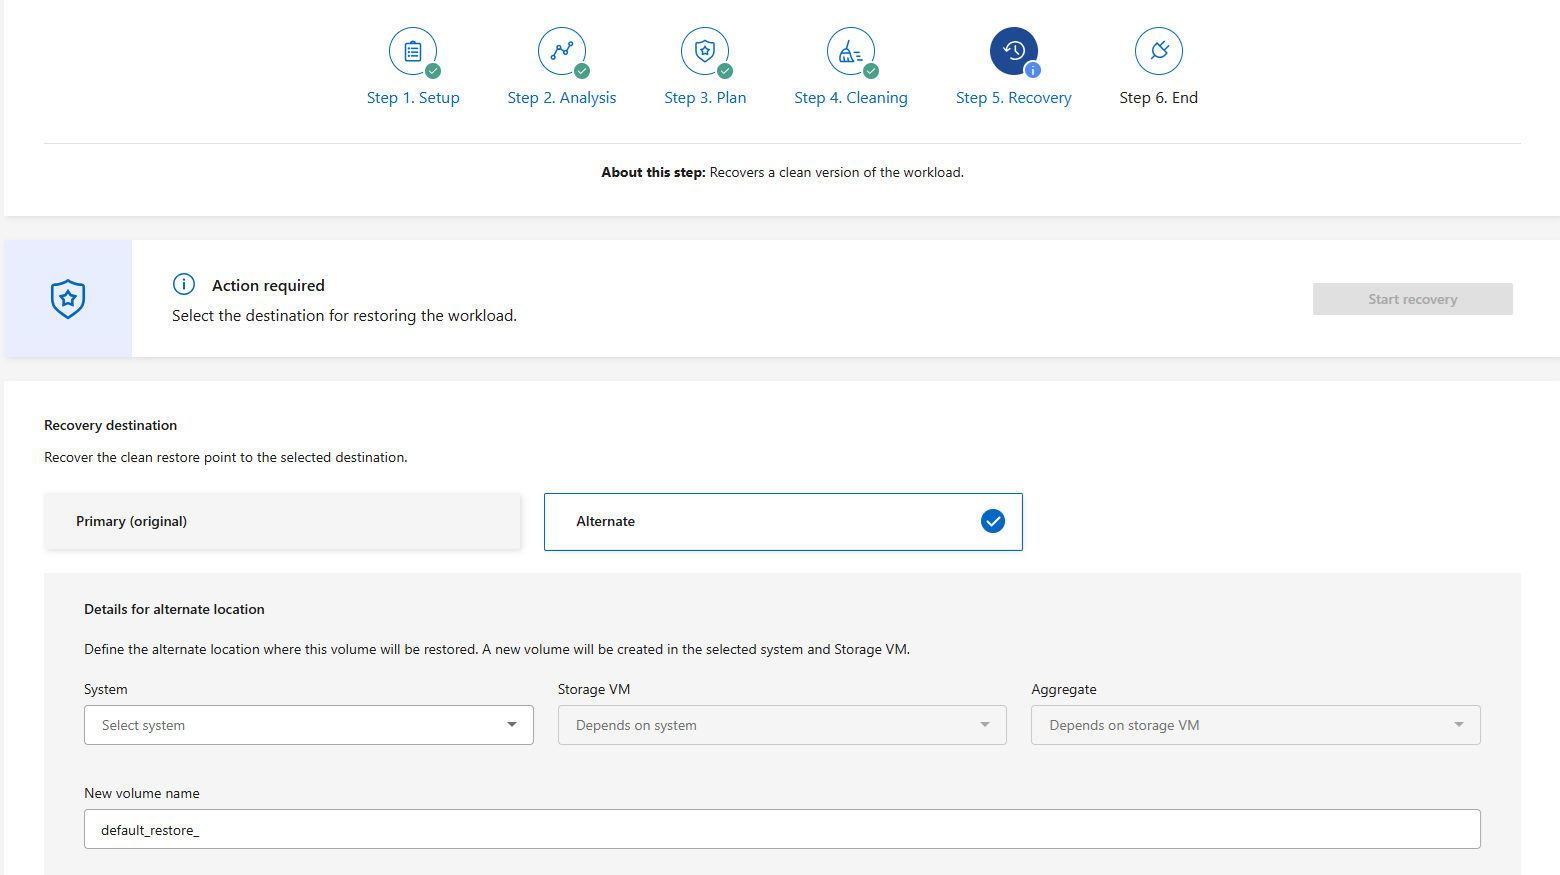
Choose the recovery destination:
-
Select Primary (original) to restore to the original destination.
If the primary location is unavailable and you've configured a secondary source, you can instead restore to the Secondary source.
-
Select Alternate to restore to a new volume. Choose the System, Storage VM, and Aggregate for the new volume then provide a New volume name.
-
-
Select Start recovery to initiate the recovery.
-
When the recovery completes, select Next to move to the final phase.
-
Select Release resources and exit to release the resources and close the clean room. To confirm, select End.