Install the hardware - E2860, E5760, and DE460
 Suggest changes
Learn how to install a E2860, E5760, or DE460 storage system in a two-post rack or a NetApp system cabinet.
-
Register your hardware at NetApp Support.
-
Prepare a flat, static-free work area.
-
Obtain an ESD wristband and take anti-static precautions.
Read through all the instructions before proceeding with the steps below.
-
Unpack the hardware contents, and then inventory the contained hardware against the packing slip.
-
Install the rails.
If instructions were included with your rack-mounting hardware, refer to them to learn how to install the rails. For additional rack-mounting instructions, see Rack-mount hardware.

For square hole cabinets, you must first install the provided cage nuts to secure the front and rear of the shelf with screws. 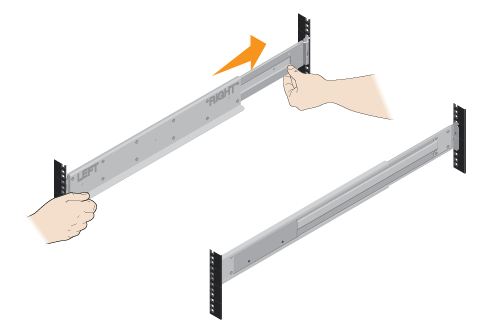
-
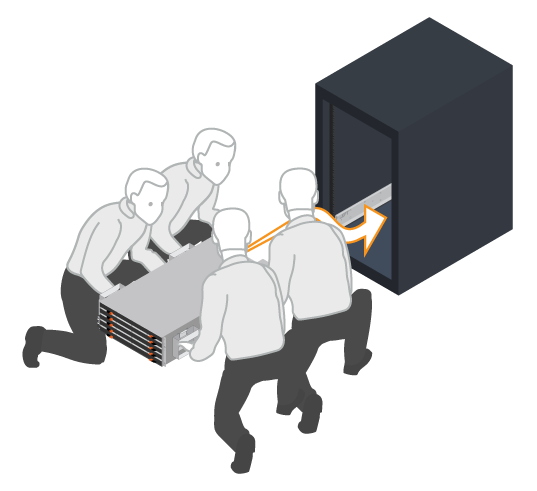
Install the shelf.

An empty shelf weighs approximately 134 lb (61 kg). A mechanized lift or four people using lift handles are required to safely move an empty shelf. -
If lifting the shelf by hand, attach the four lift handles. Push up on each handle until it clicks into place.
-
Supporting the shelf from the bottom, slide it into the cabinet. If the lift handles are used, remove them one set at a time as the shelf slides into the cabinet. To remove the handles, pull back on the release latch, push down, then pull away from the shelf.
-
-
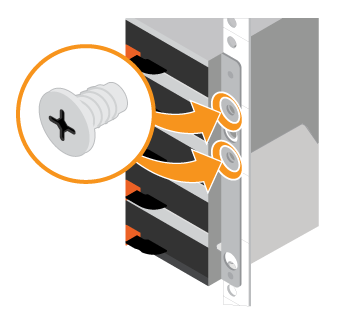
Secure the shelf.
-
Insert screws into the first and third holes from the top of the shelf on both sides to secure it to the front of the cabinet.
-
Place two back brackets on each side of the upper rear section of the shelf. Insert screws into the first and third holes of each bracket to secure the back of the cabinet.
-
-
Install the drives.
-
Wrap the strap end of the ESD wristband around your wrist, and secure the clip end to a metal ground to prevent static discharges.
-
Starting at the front left slot of the top drawer, install each drive by gently positioning into the drive slot and lowering the raised drive handle until it clicks into place.
-
If you are installing fewer than 60 drives, if you have solid-state drives (SSDs), or if your drives have different capacities:
-
Maintain a minimum of 20 drives per shelf. Install drives in the front four slots in each drawer first, for adequate airflow for cooling.
-
Distribute any remaining drives across the drawers. If possible, install an equal number of each type of drive in each drawer to allow for the creation of Drawer Loss Protected volume groups or disk pools.
-
Distribute any SSDs evenly across the drawers.
-
-
-
Carefully slide the drawer back in by pushing the center and gently closing both latches.
-
Do not force the drawer into place.
-
Use the connector tool, disconnect the connector of the snake cable and reconnect it, make sure you hear a click to determine the reconnection is properly done.
-
Disconnection and reconnection should only be required during initial setup or if the tray is shipped to a different location.
-
-
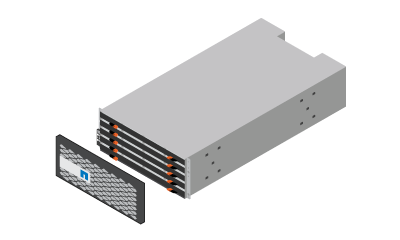
Attach the front bezel.
-
|
||
|