

Replace the power supply - EF300 and EF600
 Suggest changes
You can replace a power supply when it fails in your EF300, EF600, EF300C, or EF600C controller.
If a power supply fails, you must replace it as soon as possible so the controller shelf has a redundant power source.
-
Review the details in the Recovery Guru to confirm that there is an issue with the power supply. Select Recheck from the Recovery Guru to ensure no other items must be addressed first.
-
Check that the amber Attention LED on the power supply is on, indicating that the power supply or its integrated fan has a fault.
-
Make sure you have the following:
-
A replacement power supply that is supported for your controller shelf.
-
An ESD wristband, or you have taken other antistatic precautions.
-
A management station with a browser that can access SANtricity System Manager for the controller. (To open the System Manager interface, point the browser to the controller's domain name or IP address.)
-
Step 1: Remove failed power supply
Remove a failed power supply so you can replace it with a new one.
-
Unpack the new power supply, and set it on a level surface near the drive shelf.
Save all packing materials for use when returning the failed power supply.
-
Disconnect the power cables:
-
Open the power cord retainer, and then unplug the power cord from the power supply.
-
Unplug the power cord from the power source.
-
-
Locate the tab to the right of the power supply and press it towards the power supply unit.
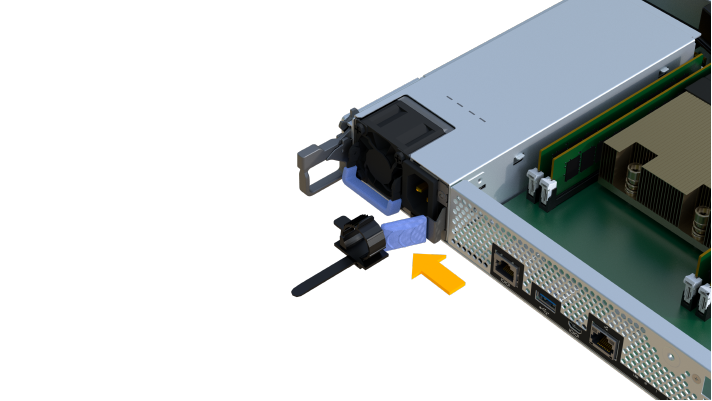
-
Locate the handle on the front of the power supply.
-
Use the handle to slide the power supply straight out of the system.

When removing a power supply, always use two hands to support its weight. 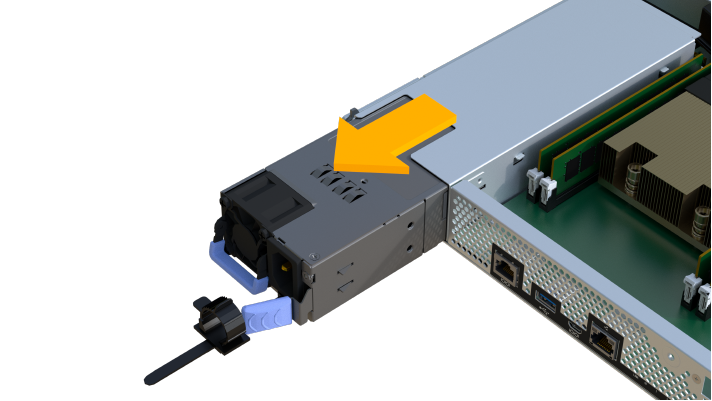
Step 2: Install new power supply and complete the replacement
After removing the failed power supply, install a new one.
-
Using both hands, support and align the edges of the power supply with the opening in the system chassis, and then gently push the power supply into the chassis using the cam handle.
The power supplies are keyed and can only be installed one way.
Do not use excessive force when sliding the power supply into the system; you can damage the connector. 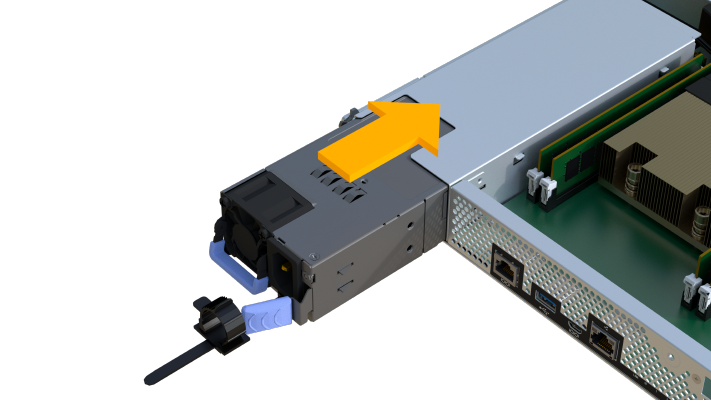
-
Confirm that its status is Optimal and check the controller shelf's Attention LEDs.
If the status is not Optimal or if any of the Attention LEDs are on, confirm that all cables are correctly seated and the controller canister is installed correctly. If necessary, remove and reinstall the controller canister.

If you cannot resolve the problem, contact technical support. -
From SANtricity System Manager, click to ensure that the latest version of SANtricity OS is installed.
As needed, install the latest version.
Your power supply replacement is complete. You can resume normal operations.