Data protection for Container Apps in OpenShift Container Platform using Trident Protect
 Suggest changes
This section of the reference document provides details for creating snapshots and backups of Container Apps using Trident Protect. NetApp Trident Protect provides advanced application data management capabilities that enhance the functionality and availability of stateful Kubernetes applications backed by NetApp ONTAP storage systems and the NetApp Trident CSI storage provisioner.
Trident Protect creates application snapshots and backups. This means that snapshots and backups are created not only for application data in persistent volumes, but also for application metadata. The snapshots and backups created by Trident Protect can be stored in any of the following object storage and restored from them at a later point.
-
AWS S3
-
Azure Blob storage
-
Google Cloud Storage
-
ONTAP S3
-
StorageGrid
-
Any other S3-compatible storage
Trident Protect uses the Kubernetes model of role-based access control (RBAC).
By default, Trident Protect provides a single system namespace called trident-protect and its associated default service account. If you have an organization with many users or specific security needs, you can use the RBAC features of Trident Protect to gain more granular control over access to resources and namespaces.
Additional information on RBAC in Trident Protect can be found in the
Trident Protect documentation

|
The cluster administrator has access to resources in the default trident-protect namespace and can also access resources in all other namespaces. Users cannot create application data management custom resource (CRs) like Snapshot and Backup CRs in the trident-protect namespace. As a best practice, users will need to create those CRs in the application namespace. |
Trident Protect can be installed using the instructions provided in the documentation here. This section will show the workflow for the data protection of container applications and restoration of the applications using Trident Protect.
1. Snapshot creation (on demand or scheduled)
2. Restore from Snapshot (restore to same and different namespace)
3. Backup creation
4. Restore from Backup
Prerequisite
Prior to creating the snapshots and backups for an application, object storage must be configured in Trident Protect to store the snapshots and backups. This is done using the bucket CR. Only administrators can create a bucket CR and configure it.
The bucket CR is known as AppVault in Trident Protect. AppVault objects are the declarative Kubernetes workflow representation of a storage bucket. An AppVault CR contains the configurations necessary for a bucket to be used in protection operations, such as backups, snapshots, restore operations, and SnapMirror replication.
In this example, we will show the use of ONTAP S3 as object storage.
Here is the workflow for creating AppVault CR for ONTAP S3:
1. Create an S3 object store server in the SVM in ONTAP cluster.
2. Create a bucket in the object store server.
3. Create an S3 user in the SVM. Keep the access key and the secret key in a safe location.
4. In OpenShift, create a secret to store the ONTAP S3 credentials.
5. Create an AppVault object for ONTAP S3
Configure Trident Protect AppVault for ONTAP S3
Sample YAML file for configuring Trident Protect with ONTAP S3 as the AppVault
# alias tp='tridentctl-protect'

appvault-secret.yaml

apiVersion: v1
stringData:
  accessKeyID: "<access key id created for a user to access ONTAP S3 bucket>"
  secretAccessKey: "corresponding Secret Access Key"
#data:
# base 64 encoded values
#  accessKeyID: <base64 access key id created for a user to access ONTAP S3 bucket>
#  secretAccessKey: <base 64  Secret Access Key>
kind: Secret
metadata:
  name: appvault-secret
  namespace: trident-protect
type: Opaque

appvault.yaml

apiVersion: protect.trident.netapp.io/v1
kind: AppVault
metadata:
  name: ontap-s3-appvault
  namespace: trident-protect
spec:
  providerConfig:
    azure:
      accountName: ""
      bucketName: ""
      endpoint: ""
    gcp:
      bucketName: ""
      projectID: ""
    s3:
      bucketName: <bucket-name for storing the snapshots and backups>
      endpoint: <endpoint IP for S3>
      secure: "false"
      skipCertValidation: "true"
  providerCredentials:
    accessKeyID:
      valueFromSecret:
        key: accessKeyID
        name: appvault-secret
    secretAccessKey:
      valueFromSecret:
        key: secretAccessKey
        name: appvault-secret
  providerType: OntapS3

# oc create -f appvault-secret.yaml -n trident-protect
# oc create -f appvault.yaml -n trident-protect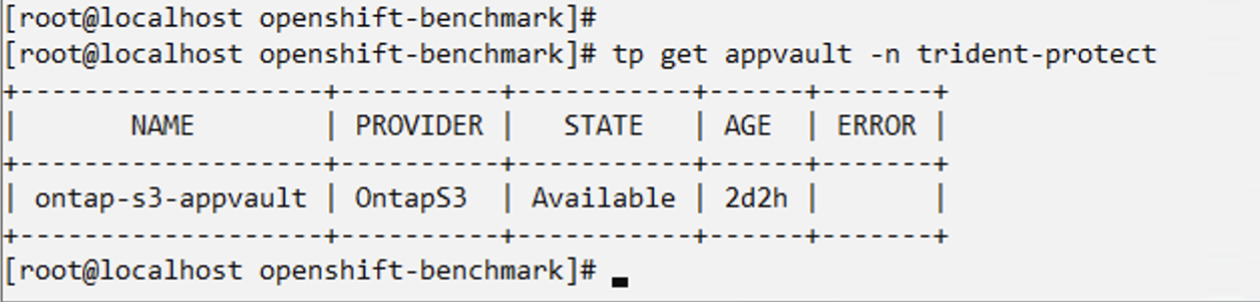
Sample yaml file for installing postgresql app
postgres.yaml
apiVersion: apps/v1
kind: Deployment
metadata:
  name: postgres
spec:
  replicas: 1
  selector:
    matchLabels:
      app: postgres
  template:
    metadata:
      labels:
        app: postgres
    spec:
      containers:
      - name: postgres
        image: postgres:14
        env:
        - name: POSTGRES_USER
          #value: "myuser"
          value: "admin"
        - name: POSTGRES_PASSWORD
          #value: "mypassword"
          value: "adminpass"
        - name: POSTGRES_DB
          value: "mydb"
        - name: PGDATA
          value: "/var/lib/postgresql/data/pgdata"
        ports:
        - containerPort: 5432
        volumeMounts:
        - name: postgres-storage
          mountPath: /var/lib/postgresql/data
      volumes:
      - name: postgres-storage
        persistentVolumeClaim:
          claimName: postgres-pvc
---
apiVersion: v1
kind: PersistentVolumeClaim
metadata:
  name: postgres-pvc
spec:
  accessModes:
    - ReadWriteOnce
  resources:
    requests:
      storage: 5Gi
---
apiVersion: v1
kind: Service
metadata:
  name: postgres
spec:
  selector:
    app: postgres
  ports:
  - protocol: TCP
    port: 5432
    targetPort: 5432
  type: ClusterIP

Now create the Trident Protect application CR for the postgres app. Include the objects in the namespace postgres and create it in the postgres namespace.
# tp create app postgres-app --namespaces postgres -n postgres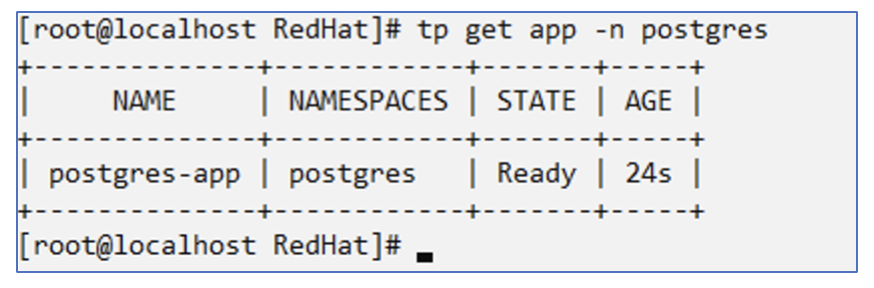
Create Snapshots
Creating an on-demand snapshot
# tp create snapshot postgres-snap1 --app postgres-app --appvault ontap-s3-appvault -n postgres
Snapshot "postgres-snap1" created.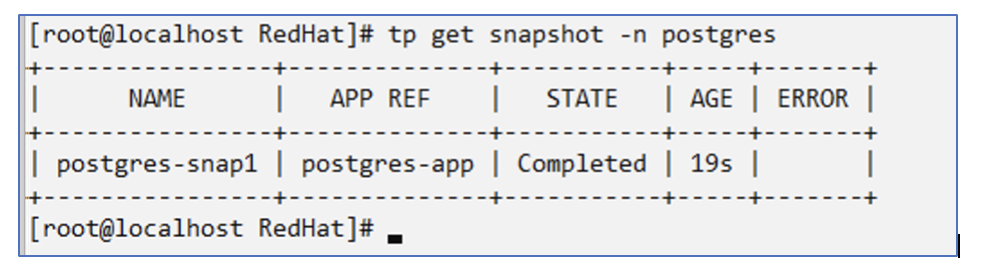
Creating a Schedule
Using the following command, Snapshots will be created daily at 15:33 and two snapshots and backups will be retained.
# tp create schedule schedule1 --app postgres-app --appvault ontap-s3-appvault --backup-retention 2 --snapshot-retention 2 --granularity Daily --hour 15 --minute 33 --data-mover Restic -n postgres
Schedule "schedule1" created.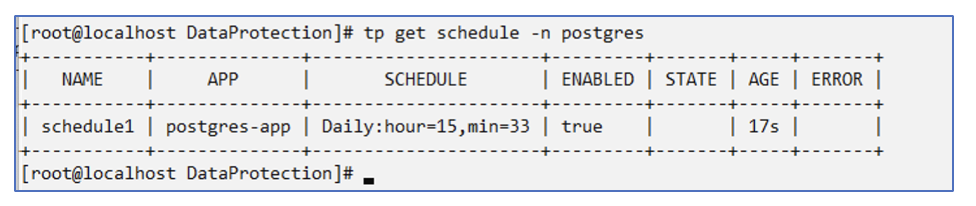
Creating a Schedule using yaml
# tp create schedule schedule2 --app postgres-app --appvault ontap-s3-appvault --backup-retention 2 --snapshot-retention 2 --granularity Daily --hour 15 --minute 33 --data-mover Restic -n postgres --dry-run > hourly-snapshotschedule.yaml

cat hourly-snapshotschedule.yaml

apiVersion: protect.trident.netapp.io/v1
kind: Schedule
metadata:
  creationTimestamp: null
  name: schedule2
  namespace: postgres
spec:
  appVaultRef: ontap-s3-appvault
  applicationRef: postgres-app
  backupRetention: "2"
  dataMover: Restic
  dayOfMonth: ""
  dayOfWeek: ""
  enabled: true
  granularity: Hourly
  #hour: "15"
  minute: "33"
  recurrenceRule: ""
  snapshotRetention: "2"
status: {}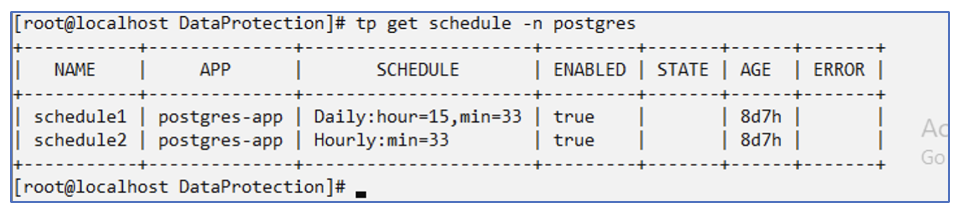
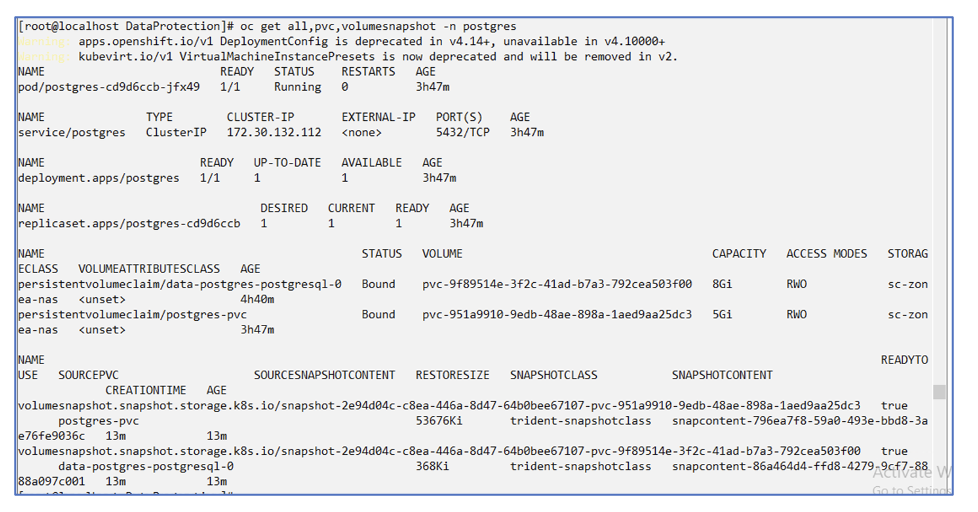
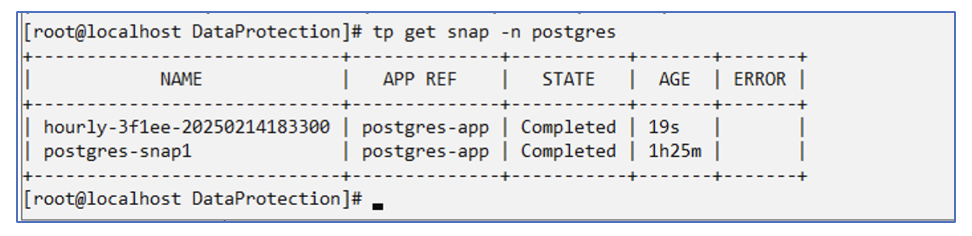
You can see snapshots created on this schedule.
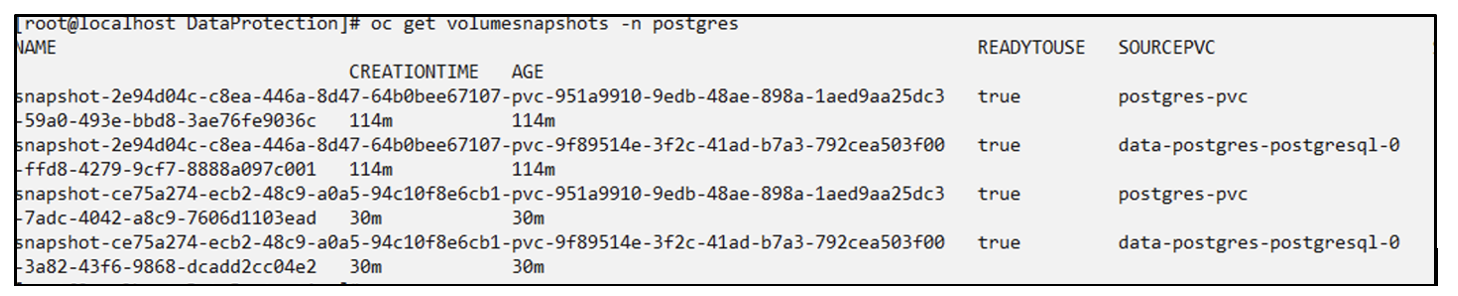
Volume snapshots are also created.
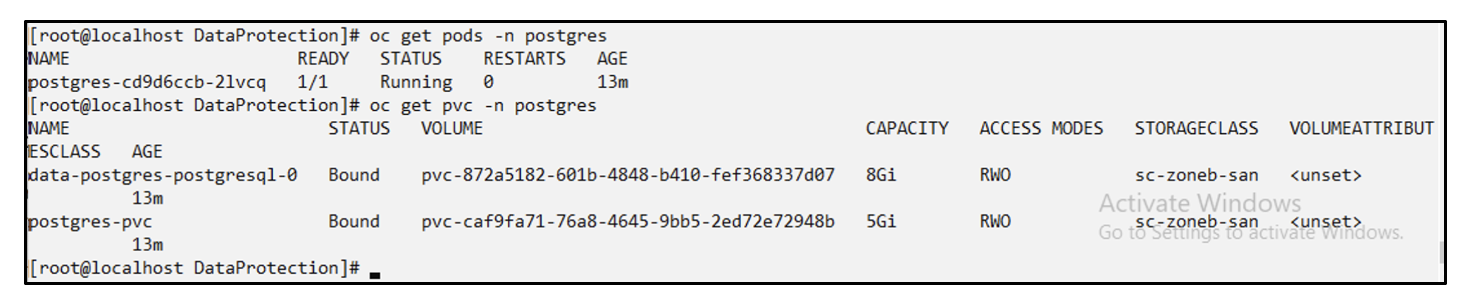
Delete the Application to simulate loss of application
# oc delete deployment/postgres -n postgres
# oc get pod,pvc -n postgres
No resources found in postgres namespace.
Restore from Snapshot to the same namespace
# tp create sir postgres-sir --snapshot postgres/hourly-3f1ee-20250214183300 -n postgres
SnapshotInplaceRestore "postgres-sir" created.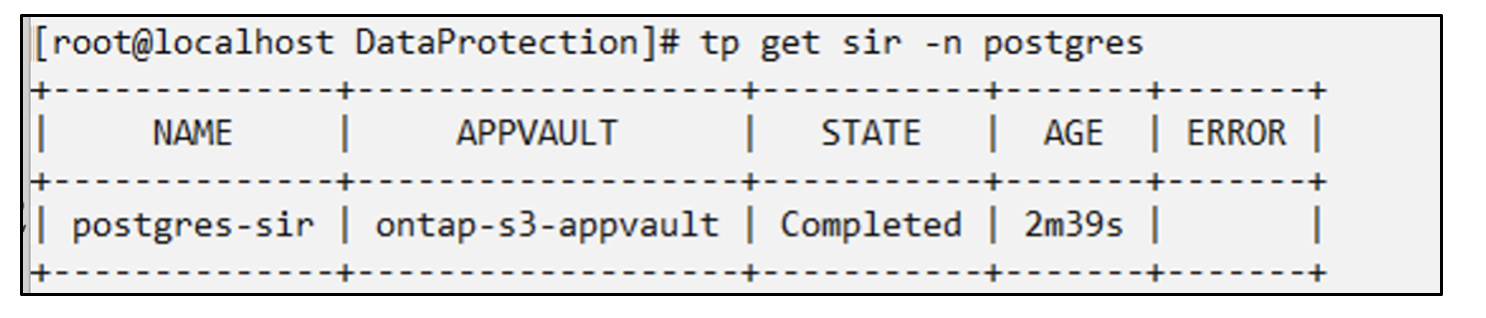
Application and its PVCis restored to the same namespace.

Restore from Snapshot to a different namespace
# tp create snapshotrestore postgres-restore --snapshot postgres/hourly-3f1ee-20250214183300 --namespace-mapping postgres:postgres-restore -n postgres-restore
SnapshotRestore "postgres-restore" created.
You can see that the application has been restored to a new namespace.

Create Backups
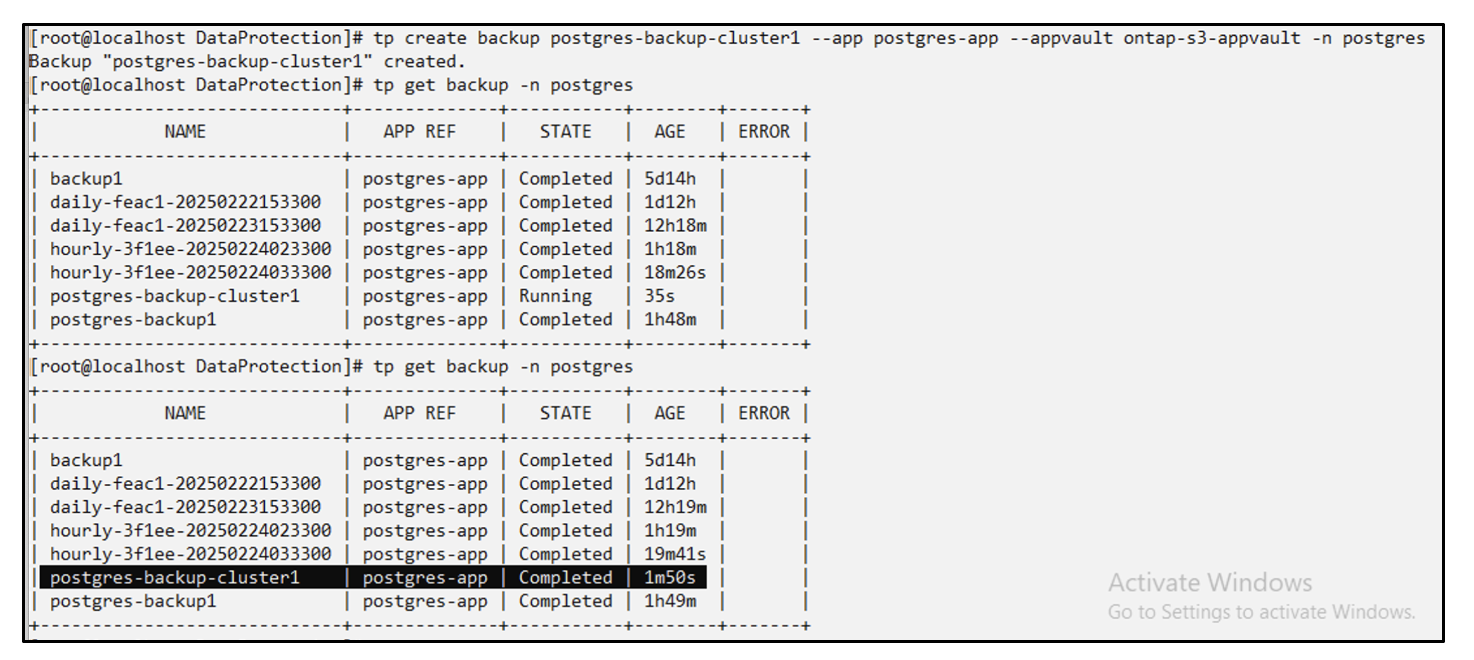
Creating an on-demand Backup
# tp create backup postgres-backup1 --app postgres-app --appvault ontap-s3-appvault -n postgres
Backup "postgres-backup1" created.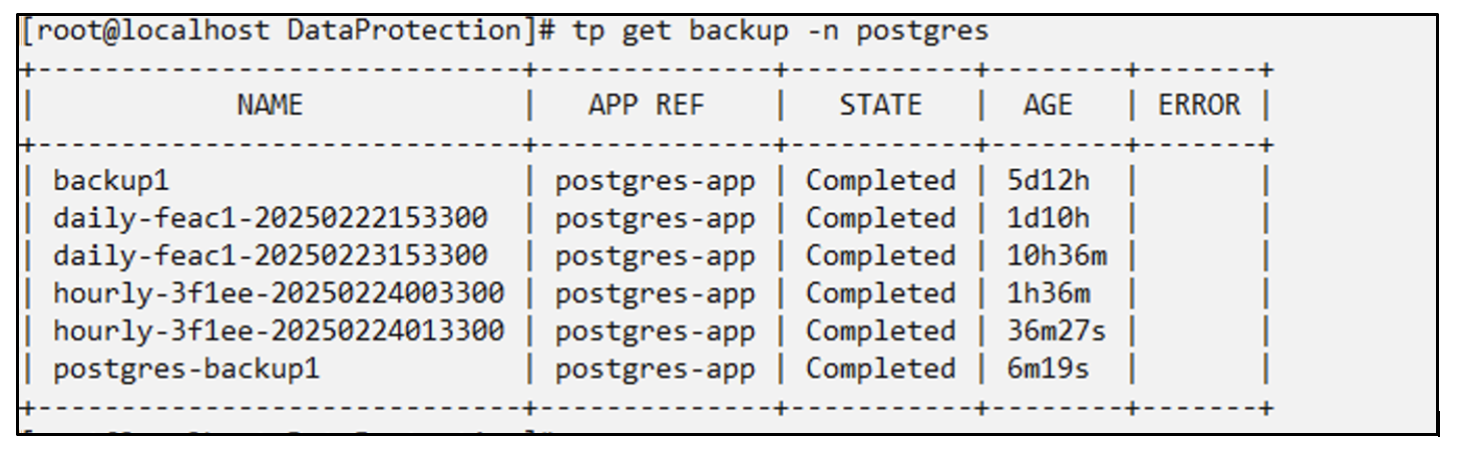
Creating Schedule for Backup
The daily and the hourly backups in the list above are created from the schedule set up previously.
# tp create schedule schedule1 --app postgres-app --appvault ontap-s3-appvault --backup-retention 2 --snapshot-retention 2 --granularity Daily --hour 15 --minute 33 --data-mover Restic -n postgres
Schedule "schedule1" created.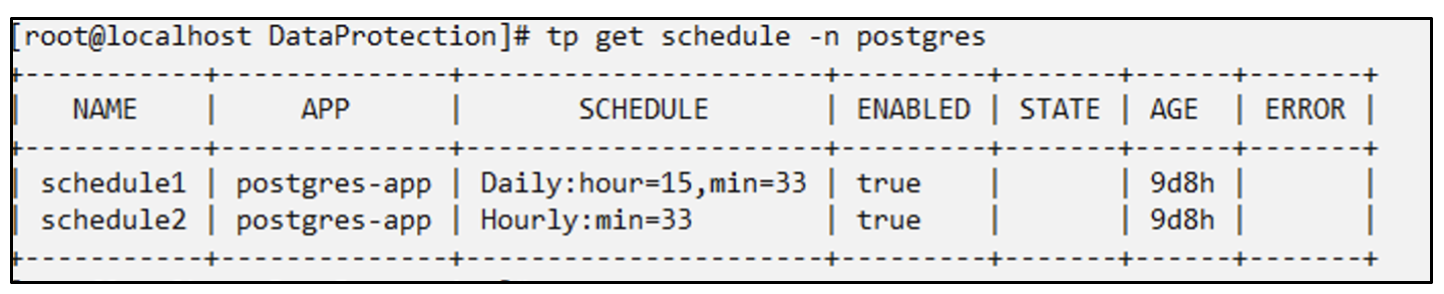
Restore from backup
Delete the application and PVCs to simulate a data loss.
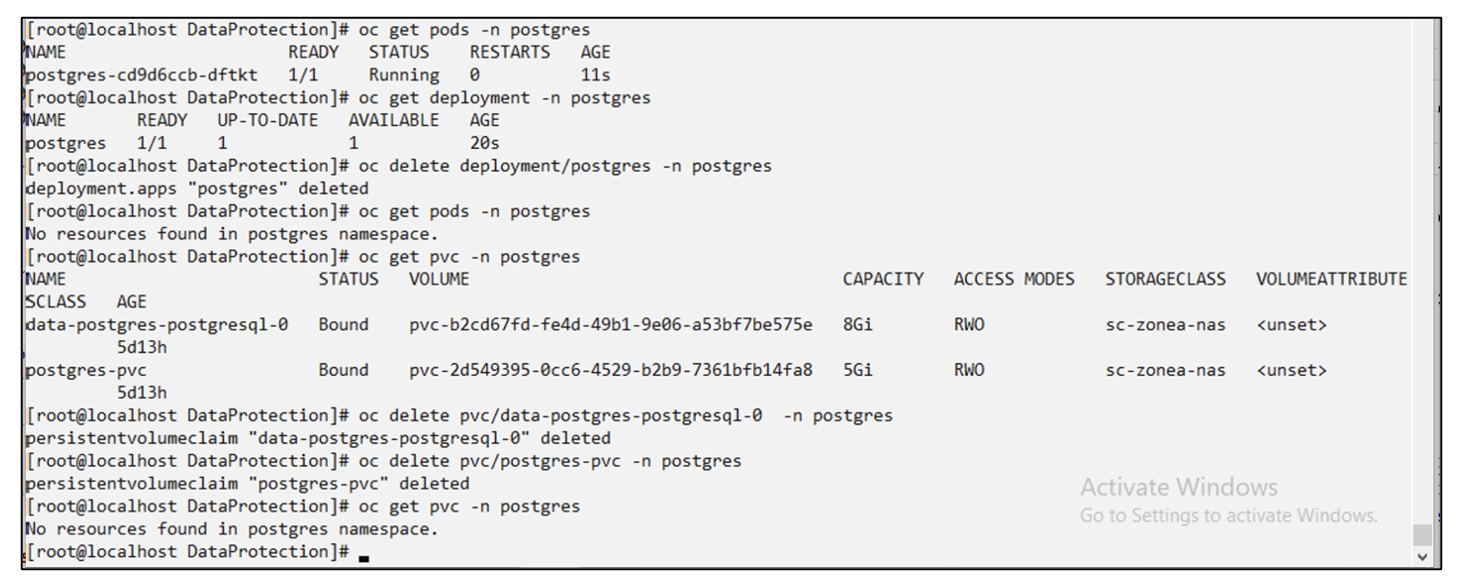
Restore to same namespace
#tp create bir postgres-bir --backup postgres/hourly-3f1ee-20250224023300 -n postgres
BackupInplaceRestore "postgres-bir" created.
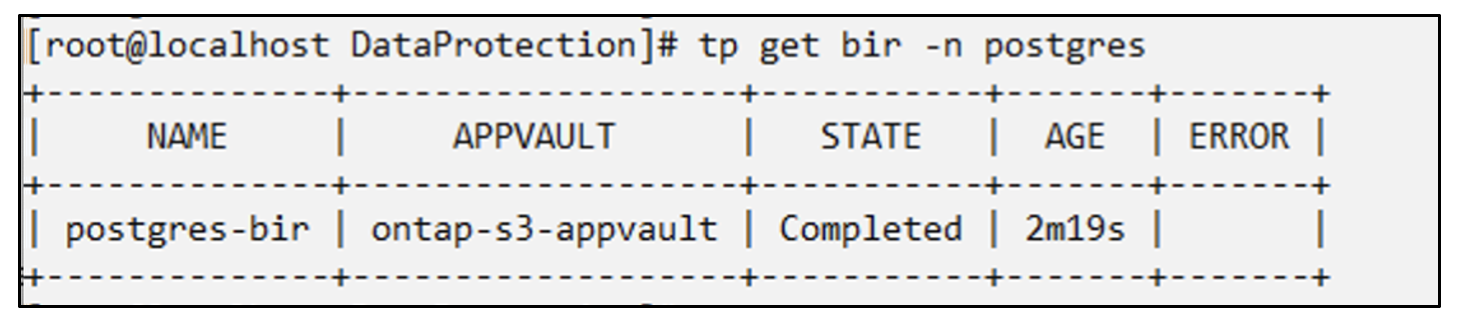
The application and the PVCs are restored in the same namespace.

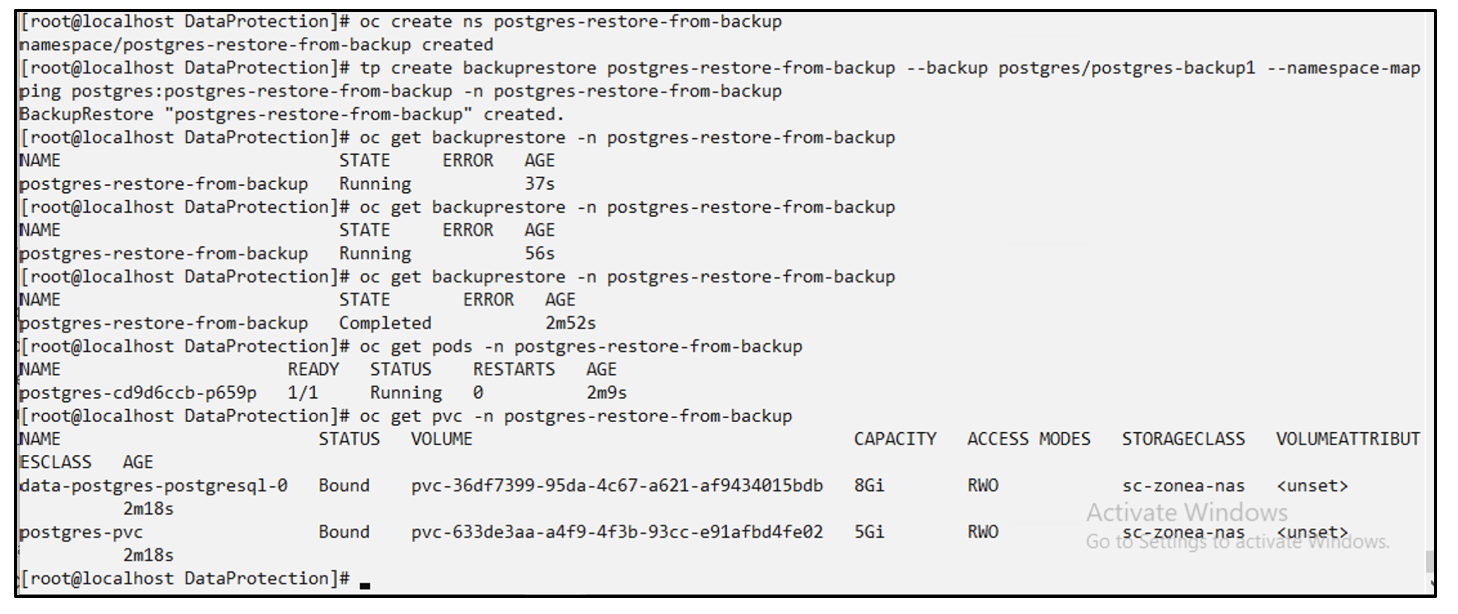
Restore to a different namespace
Create a new namespace.
Restore from a backup to the new namespace.
Migrate Applications
To clone or migrate an application to a different cluster (perform a cross-cluster clone), create a backup on the source cluster, and then restore the backup to a different cluster. Make sure that Trident Protect is installed on the destination cluster.
On the source cluster, perform the steps as shown in the image below:
From the source cluster, switch context to the destination cluster.
Then, ensure that the AppVault is accessible from the destination cluster context and get the AppVault contents from the destination cluster.
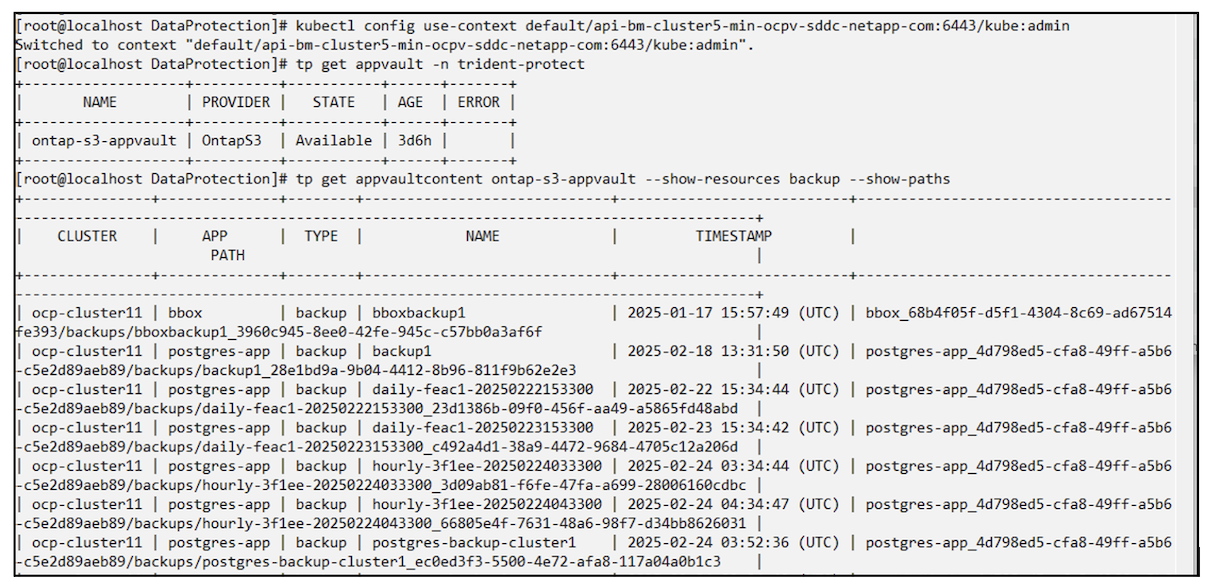
Use the backup path from the list and create a backuprestore CR object as shown in the command below.
# tp create backuprestore backup-restore-cluster2 --namespace-mapping postgres:postgres --appvault ontap-s3-appvault --path postgres-app_4d798ed5-cfa8-49ff-a5b6-c5e2d89aeb89/backups/postgres-backup-cluster1_ec0ed3f3-5500-4e72-afa8-117a04a0b1c3 -n postgres
BackupRestore "backup-restore-cluster2" created.
You can now see that the application pods and the pvcs are created in the destination cluster.