Deployment procedure for using FSx for ONTAP as an iSCSI datastore
 Suggest changes
This section covers the steps to configure an iSCSI datastore using FSx for ONTAP.
Prerequisites
Before you provision and attach FSx for ONTAP as an iSCSI datastore, you must first deploy an Amazon EVS virtualization environment. For more information, see the documentation on Getting started with Amazon EVS guide. This section also assumes you have deployed an FSx for ONTAP file system, please see the Detailed Approach section above for appropriate steps.
High-level deployment steps
Deploying the FSx for ONTAP file system for use as an iSCSI datastore for Amazon EVS and establishing connectivity between the two services will include the following steps:
-
Setting up an iSCSI network adapter for each ESXi host.
-
Creating and configuring the FSx for ONTAP file system, volume, LUN, etc.
-
Connecting the ESXi hosts to the FSx for ONTAP file system server.
-
Creating an iSCSI datastore virtual machine file system (VMFS).
Add iSCSI network adapter
The following steps need to be performed on each ESXi host in your environment.
-
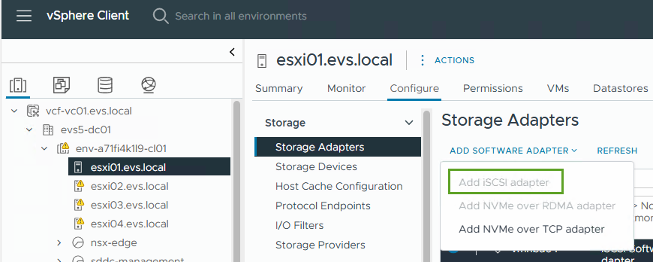
Enter the vSphere client and select the ESXi host. Under the Configure tab, choose "Add Software Adapter" then select "Add iSCSI adapter" from the drop-down menu, as shown here:
-
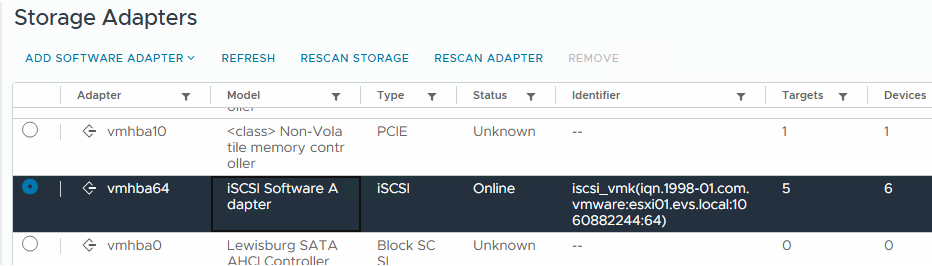
Once the installation is complete, you'll be on the Storage Adapters screen. Select "Rescan Adapter" from the menu bar. Record the IQN of the iSCSI adapter: iqn.xxxx. This value will be used in the LUN mapping step later.
Create an FSx for ONTAP volume
-
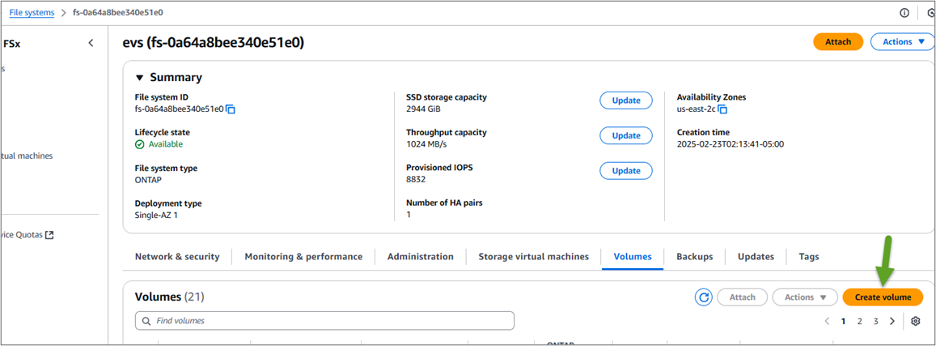
Go to the AWS Console and enter the page for your FSx for ONTAP file system and click "Create volume".
-
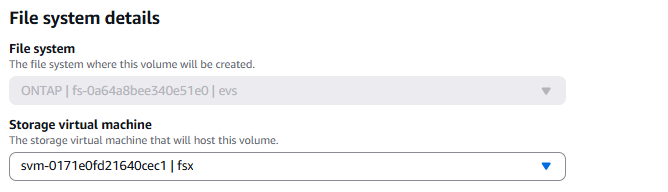
Select the SVM where you want to create the volume.
-
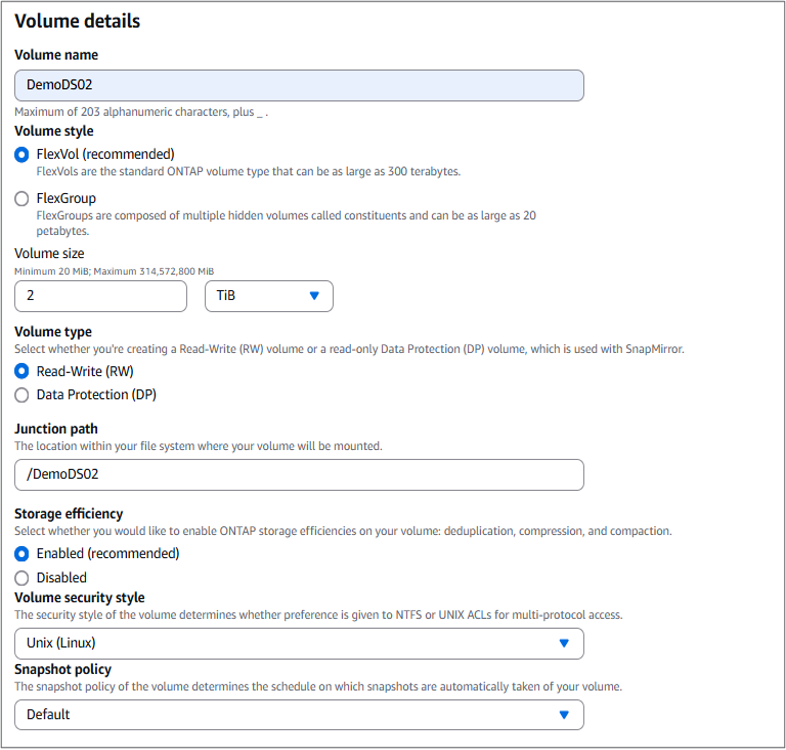
On the "Volume details" page, enter the details as shown in the screenshot below. When you are done, click "Create" to set up the volume. Choose "Enabled" to turn on the ONTAP storage efficiency features (compression, deduplication, and compaction).
-
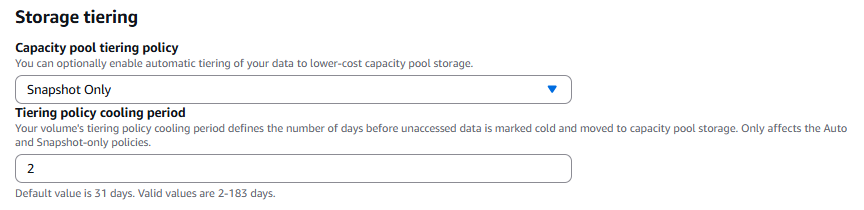
For the storage tiering option, select "Snapshot Only" from the drop-down menu and set a tiering policy cooling period. The default is 31 days, but for this example we set a two-day cooling period.
-
Once the volume has been created, use the ONTAP CLI to set the following values:
Setting Configuration Volume guarantee
None (thin provisioned)
fractional_reserve
0%
snap_reserve
0%
Autosize
grow_shrink
Storage efficiency
Enabled
Volume Tiering Policy
Snapshot only
Access time update (-atime-update)
False
Minimum readahead (-min-readahead)
False
Snapshot policy
None
LUN space reservation
Disabled
LUN space allocation
Enabled
Create a LUN, igroup, and mapping the LUN
In this section we show how to create the LUN which will appear as a disk in vSphere. We will also show how to create an initiator group (igroup), which is the list of the initiators that have access to the LUN. The igroup will allow access to the LUN from the vSphere ESXi hosts. Finally, we will show how to map the igroup to the LUN.
-
To access the ONTAP CLI, establish an SSH session on the management port of the FSx for ONTAP file system or SVM by running the following command:
[~]$ ssh fsxadmin@management_endpoint_ip
-
Create the LUN. Be sure to set space-allocation and space-reservation as enabled. The size should be up to 90% of the volume size:
Fsxid::> lun create -vserver fsx -path /vol/DemoDS02/lun_name -size 1.8T -ostype vmware -space-allocation enabled -space-reservation disabled
-
Create the igroup, and add the IQN of all ESXi hosts within the cluster.
Fsxid::> lun igroup create -vserver fsx -igroup evs1 -protocol iscsi -ostype vmware -initiator iqn.1998-01.com.vmware:esxi01.evs.local:1060882244:64,iqn.1998-01.com.vmware:esxi02.evs.local:1911302492:64,iqn.1998-01.com.vmware:esxi03.evs.local:2069609753:64,iqn.1998-01.com.vmware:esxi04.evs.local:1165297648:64
-
Map the LUN with the following code:
Fsxid::> lun mapping create -vserver fsx -path /vol/DemoDS02/lun1 -igroup evs1 -lun-id 2
-
Review the LUN mapping and verify that the state was changed to "mapped." This is a necessary double check to make sure the LUN is in a mapped state:
Fsxid::> lun show
Vserver   Path                            State   Mapped   Type        Size
--------- ------------------------------- ------- -------- -------- --------
fsx       /vol/DemoDS02/lun1              online  mapped   vmware     1.80TB
Obtain iSCSI configuration information from the SVM
-
Run iSCSI show and record the Target Name. This will be used in the vSphere discovery of the FSx for ONTAP disks (Note: This target name is unique to your SVM):
Fsxid::> iscsi show -vserver fsx Vserver: fsx Target Name: iqn.1992-08.com.netapp:sn.c083e374f1b711ef9d9f8123a3ebcf46:vs.3 Target Alias: fsx Administrative Status: up -
Record the iSCSI IP addresses:
Fsxid::> network interface show -vserver fsx -data-protocol iscsi -fields address
vserver lif       address
------- -------   -----------
fsx     iscsi_1   10.0.10.134
fsx     iscsi_2   10.0.10.227
Discover the FSx for ONTAP iSCSI server
Now that we have the LUN mapped, we can discover the FSx for ONTAP iSCSI server for the SVM. Note that for each ESXi host that exists in your SDDC you will need to repeat the steps listed here.
-
First, make sure the security group linked to the FSx for ONTAP file system (i.e., the one connected to the ENI) allows iSCSI ports.
For a full list of iSCSI protocol ports and how to apply them refer to File System Access Control with Amazon VPC.
-
In the vSphere Client, go to ESXi Host > Storage Adapters > Static Discovery and click "Add."
-
Enter the iSCSI Server IP address from above (Port is 3260). The iSCSI target name is the IQN from the iSCSI show command. Click "OK" to proceed.

-
The wizard will close and you will be on the Datastore Static Discovery screen. In the table on this page you will be able to verify that the target has been discovered.

Create an iSCSI datastore
Now that we have discovered the iSCSI server, we can create an iSCSI datastore.
-
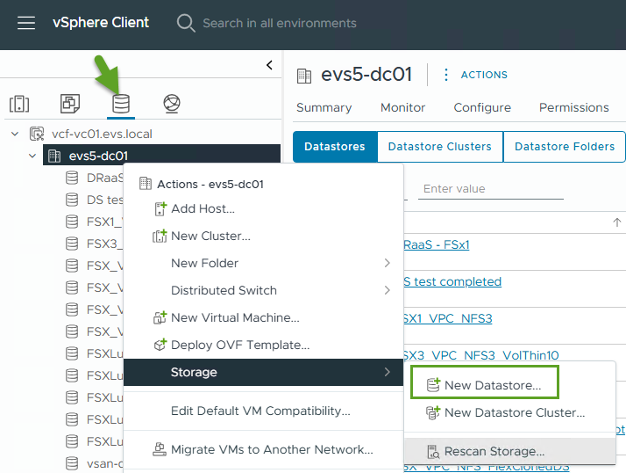
In the vSphere client, go to the Datastore tab, select the SDDC where you want to deploy the datastore. Right click and select the Storage icon (indicated by the green arrow in the screenshot below), then select "New Datastore" from the drop-down menu:
-
You will now be in the New Datastore wizard. In the "Type" step, select the VMFS option.
-
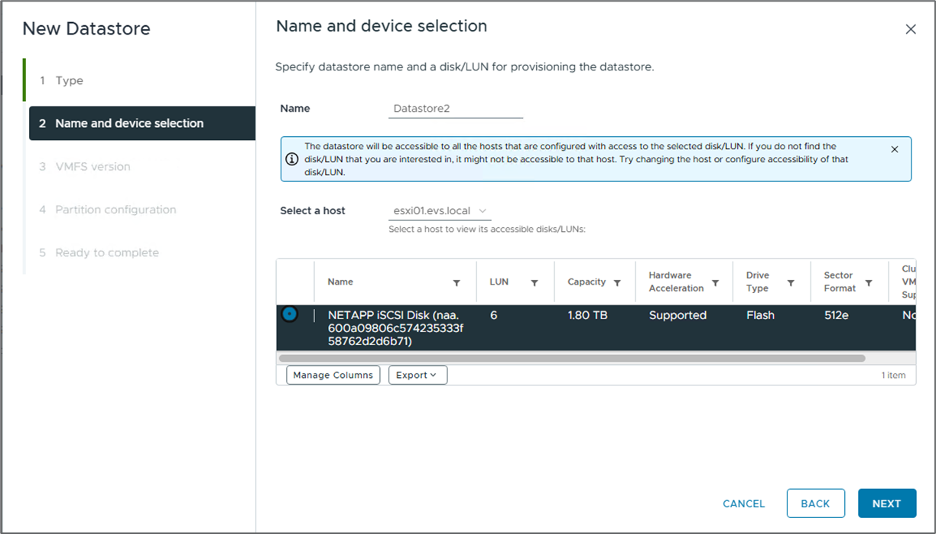
In the "Name and device selection" step:
-
Provide a name for your datastore.
-
Select which ESXi host you want to connect to the datastore.
-
Select the discovered disk (LUN) and click "Next."
-
-
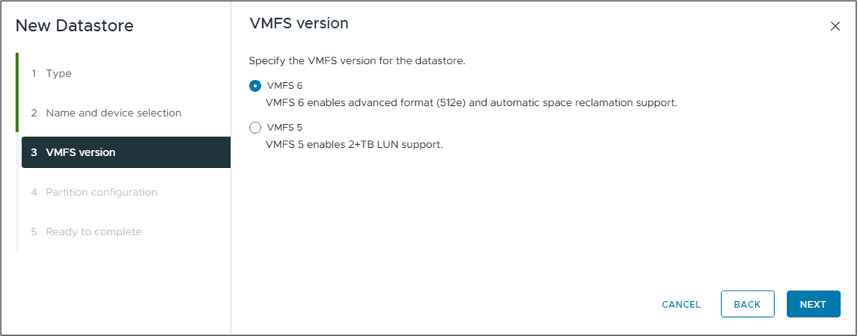
In the "VMFS version" step, select "VMFS 6."
-
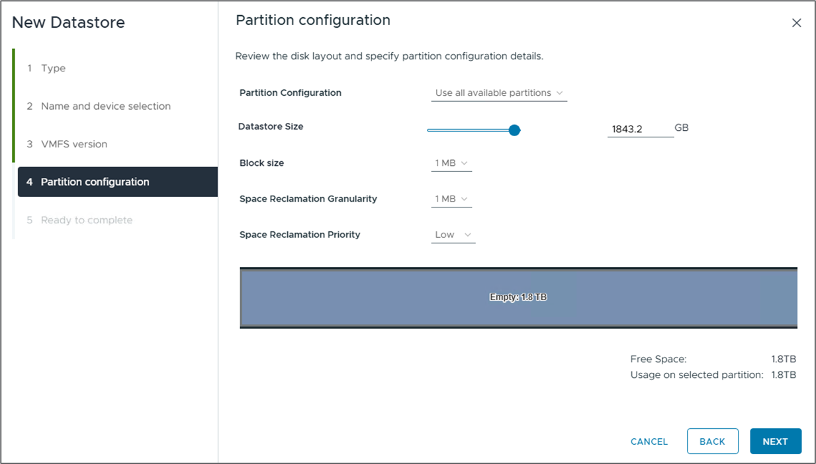
In the "Partition configuration" step, leave the default settings as is, including "Use all available partitions" option. Click "Next" to proceed.
-
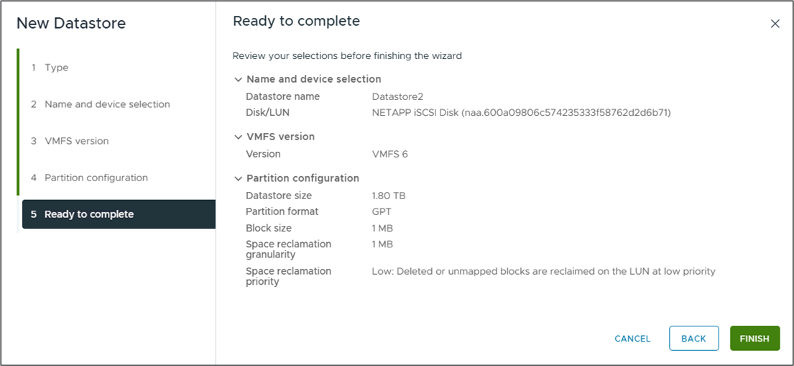
In the "Ready to complete" step, make sure the settings are correct. When you are done, click "FINISH" to complete the set up.
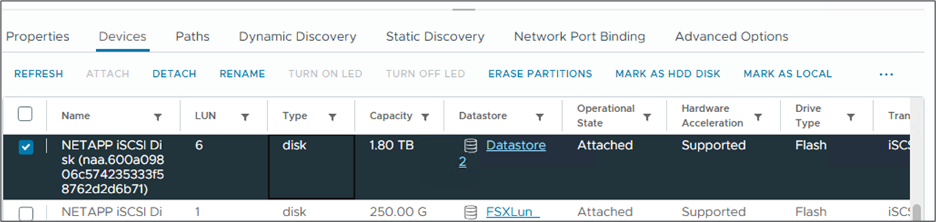
-
Return to the Devices page and verify that the datastore has been attached.