Deployment procedure for using FSx for ONTAP as an NFS datastore
 Suggest changes
This section will show the steps on how to deploy FSx for ONTAP as an NFS datastore. The steps for deploying an iSCSI datastore are detailed in the next section.
High-level deployment steps
Deploying the FSx for ONTAP file system for use as an NFS datastore for Amazon EVS and establishing connectivity between the two services will include the following steps:
-
Setting up an FSx for ONTAP file system in the same VPC where the Amazon EVS VCF environment is located.
-
Validating the security groups and routing table.
-
Attaching an FSx for ONTAP storage volume for use as an NFS datastore for Amazon EVS.
Prerequisites
The following prerequisites should be in place before you begin the process to set up an FSx for ONTAP as an NFS datastore for Amazon EVS:
-
An Amazon EVS virtualization environment. For more information on how to do that, see the documentation on Getting started with Amazon EVS guide.
-
Create Single-Availability Zone (AZ) FSx for ONTAP with appropriate SSD storage capacity, provisioned IOPS and throughput.
-
For optimal performance, place FSx for ONTAP file system within the same VPC as the Amazon EVS instance. Note that VPC Peering is also supported for the case where FSx for ONTAP is deployed in a different VPC.
-
Based on the performance requirements, select the correct IOPS and throughput needed for a Single-AZ FSx for ONTAP file system. See performance specification details for FSx for ONTAP to understand the throughput and IOPS each available option provides.

|
For this guide we will deploy the FSx for ONTAP file system in the same subnet as the service access subnet. |
Once the Amazon EVS virtualization environment has been deployed in the VPC, you can proceed with setting up the Single-AZ FSx for ONTAP file system that will be used as an NFS datastore.
|
|
Your FSx for ONTAP file system should be deployed in the same AZ as the Amazon EVS SDDC. |
Create an FSx for ONTAP file system
The following steps will show you how to provision and mount an FSx for ONTAP file system:
-
Go to the Amazon FSx Console at
https://console.aws.amazon.com/fsx/using your internet browser and sign in with your credentials. -
In the console, select Create file system. This will begin the setup wizard to create an FSx for ONTAP file system.
-
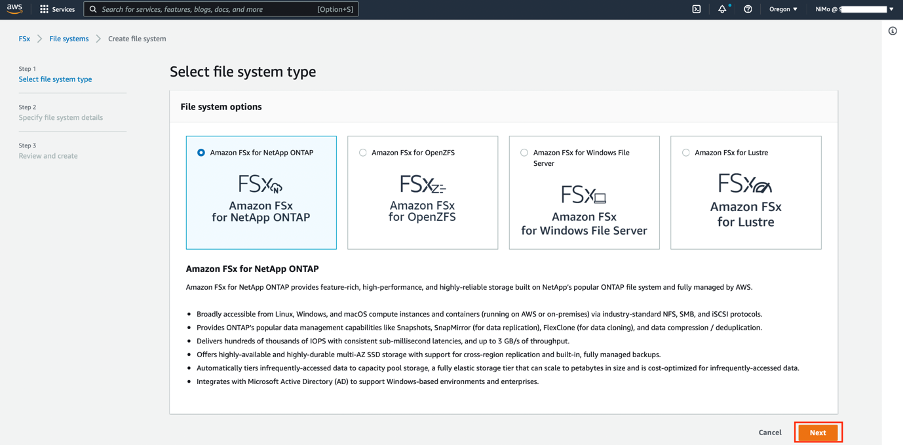
First, select the file system type. From the file system options available, select "Amazon FSx for NetApp ONTAP" and proceed by clicking the "Next" button.
-
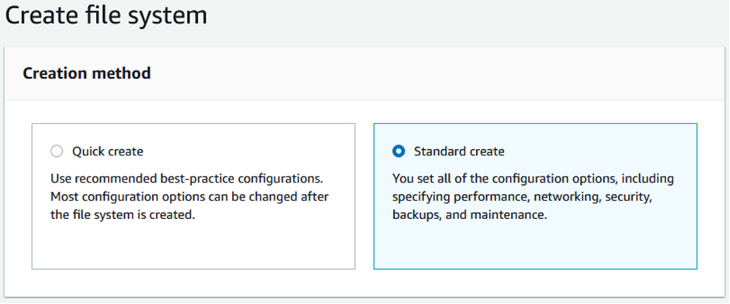
You will be presented with a choice between the Quick create and Standard create options. Quick create offers predefined configurations and Standard create lets you define your own configurations.
Select the "Standard create" option.
You will now be in the Standard create file system setup wizard. In the file system details page, choose and enter the same information as shown in the image below:

-
Scroll down to where you find a section labelled "Network & security." In this section you will set the details for the subnet and VPC. For the purposes of this guide, we selected "EVS-VPC" from the drop-down menu, and selected service access subnet (untagged VLAN) as the subnet for the EVS virtual environment.
The subnet can be any untagged private subnet in the VPC. It can also be in a different VPC/subnet connected via VPC Peering, as long as proper routing has been configured. 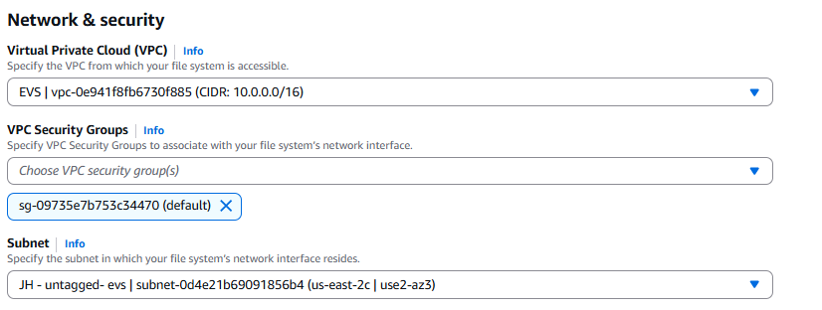
-
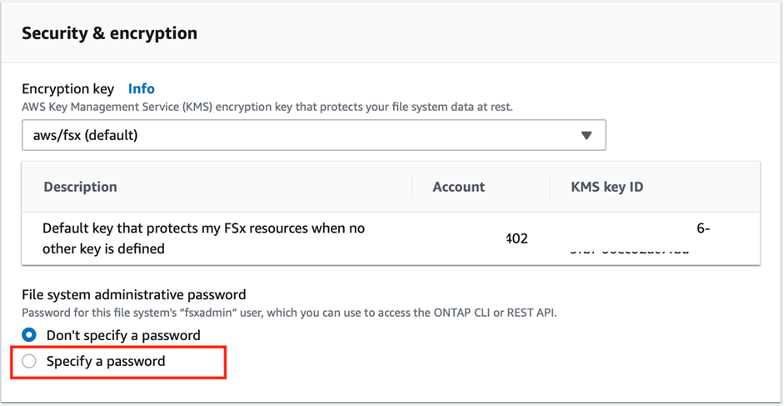
Scrolling down, you'll find the "Security & encryption" section. Here, select the encryption key from the drop-down menu. These keys are provided by AWS Key Management Service (AWS KMS) and will protect the at-rest data in your FSx for ONTAP file system.
Next, in the "File system administrative password" setting, specify a unique password for the fsxadmin user who will be administering the file system.
-
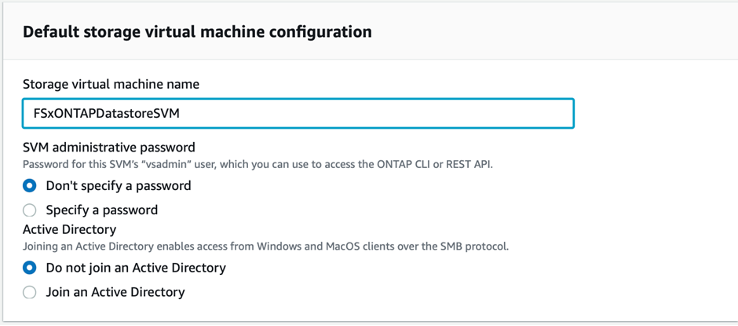
Next, you'll scroll down to a section titled "Default storage virtual machine configuration." Here, you will need to provide a name for the storage virtual machine (SVM).
-
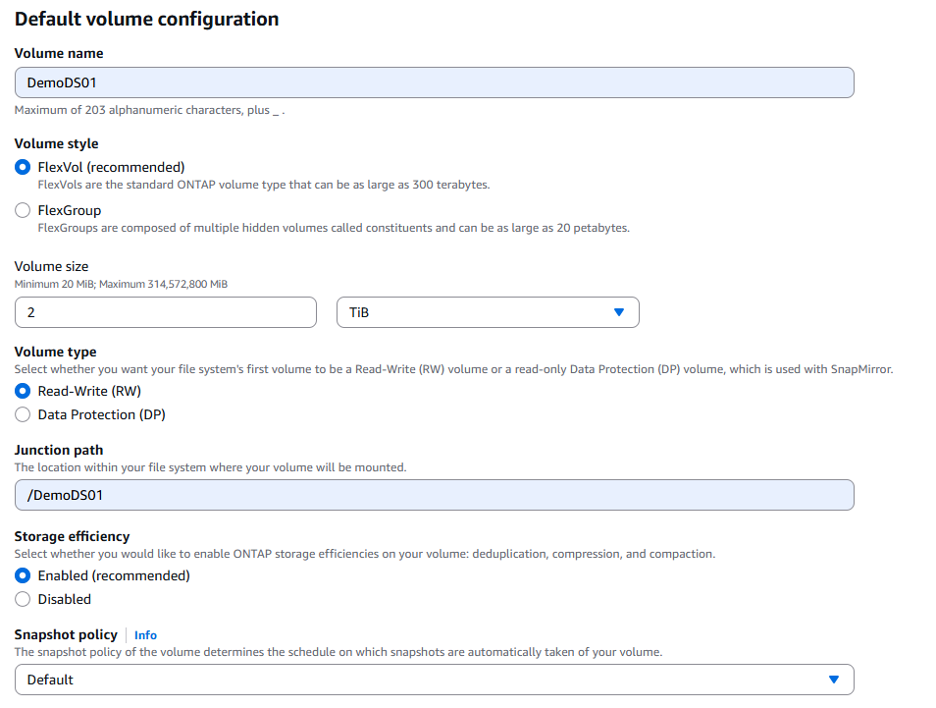
Next, scroll down to the section titled "Default volume configuration." Here you will provide a name for the volume and set the volume size. The volume protocol should be NFS v3 (enabled by default). Click the option to enable storage efficiency features (compression, deduplication, and compaction) to reduce your overall storage usage and costs.
-
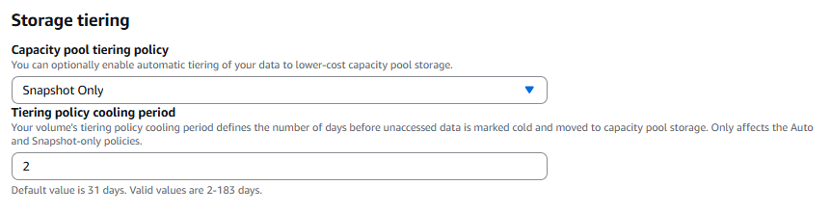
For the storage tiering option, select "Snapshot Only" from the drop-down menu and set a tiering policy cooling period. The default is 31 days, but for this example we set a two-day cooling period.
-
Once you've created the volume, modify the following parameters using the ONTAP command line interface (ONTAP CLI):
Setting Configuration Volume guarantee
None (thin provisioned)
fractional_reserve
0%
snap_reserve
0%
Autosize
grow_shrink
Storage efficiency
Enabled
Volume Tiering Policy
Snapshot only
Access time update (-atime-update)
False
Minimum readahead (-min-readahead)
False
Snapshot policy
None
-
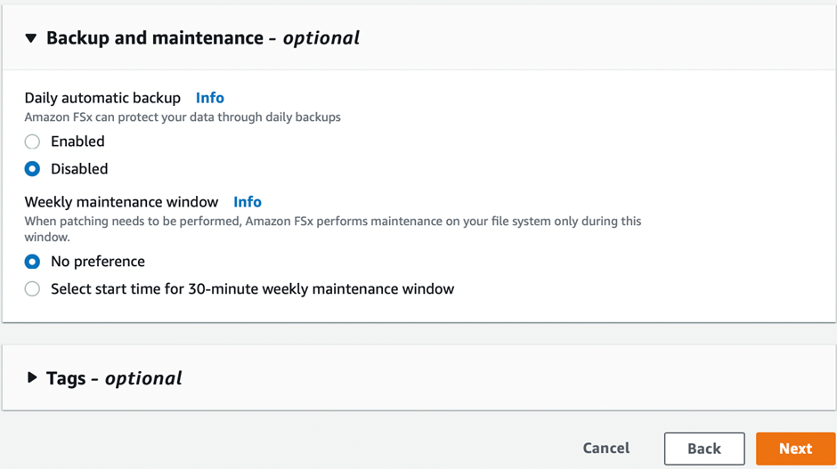
In the optional "Backup and maintenance" step, disable daily automatic backups and select "No preference" for the weekly maintenance window.
Click "Next" when you are done.
-
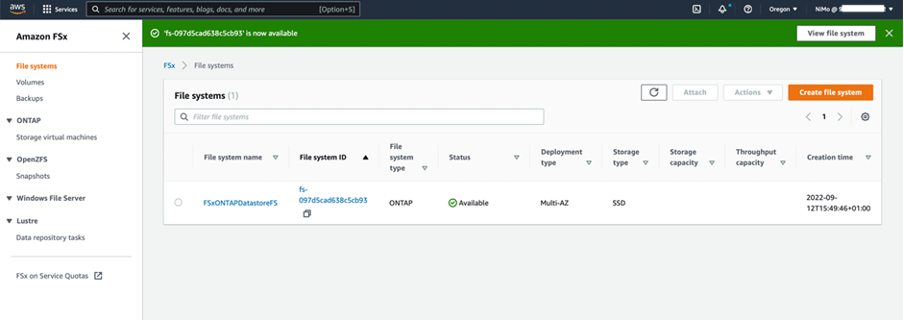
You will now be provided with a review of the entire file system configuration that you set up following the previous steps. Check that all the parameters are correct, then click the "Create file system" button to complete the set up.

To create additional FSx for ONTAP file systems, you can follow the steps detailed above, adjusting the values that affect performance and disk capacity as needed. To learn more about performance options for FSx for ONTAP, see this documentation page.
Validating VPC and virtualization environment routing and security groups
Validating the VPC and SDDC routing and security groups is important to make sure the Amazon EVS virtualization environment and FSx for ONTAP file system components can work together properly.
-
Browse to the Elastic VMware Service > Virtualization Environments > [your Amazon EVS environment] and select the Service access subnet, as indicated by the green arrow below:
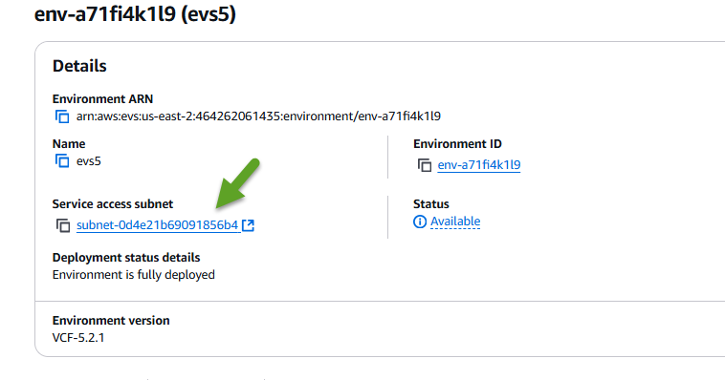
-
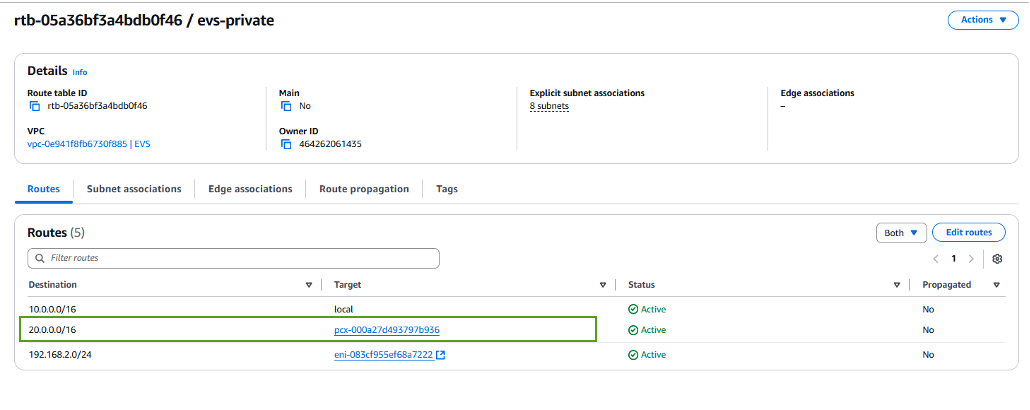
This will open the subnet panel. Find the Routes table on this panel and click it.
In this example the FSxN ONTAP file system is in the same VPC as the Amazon EVS VCF environment, so the default routes are sufficient.
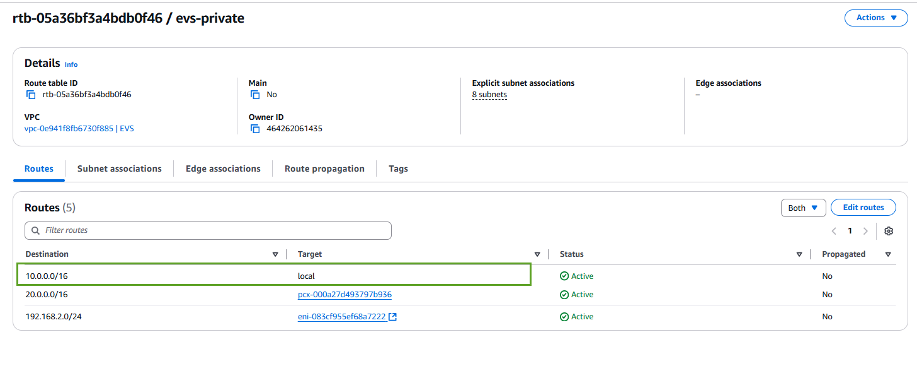
If FSx for ONTAP file system is in a different VPC, then check that the routes to that VPC have been added. In this example, routes for VPC Peering to the VPC where the FSx for ONTAP system resides have been added.
-
Next, you'll need to check that the security group connected to the FSx for ONTAP file system (i.e. the one connected to the elastic network interface (ENI)—allows access to NFS ports).
For a full list of NFS and iSCSI protocol ports, refer to the link:https://docs.aws.amazon.com/fsx/latest/ONTAPGuide/limit-access-security-groups.html]File System Access Control with Amazon VPC documentation].
To verify your FSx for ONTAP file system is associated with the security group:
-
In the AWS Console, navigate to FSx > File Systems > [your FSx for ONTAP file system].
-
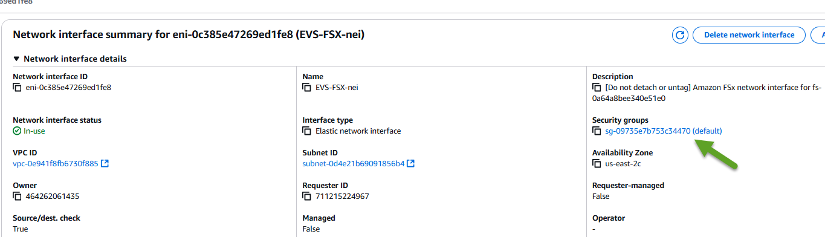
In the Network & Security tab, click the ENI.
-
Find the Security group listed under the Network interface details. associated with the ENI (indicated by the green arrow in the image below).
-
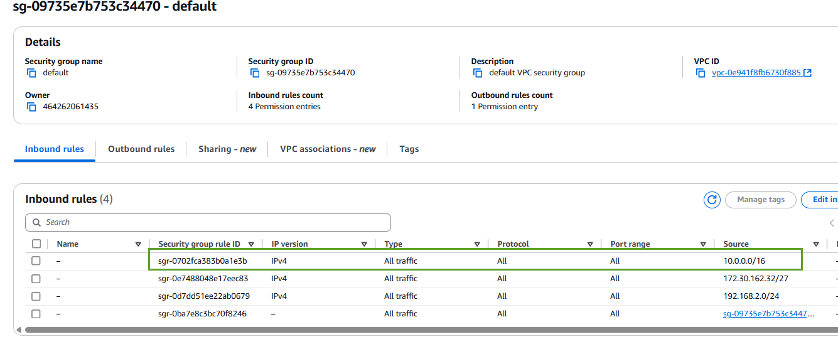
Validate the ports. In this example shown in the following screen, all traffic is allowed.
However, you can limit those to NFS ports only. Here is the list of the ports:-
Port 111 TCP: Portmapper, used to negotiate which ports are used in NFS requests.
-
Port 635 TCP: Mountd, which is for receiving incoming mount requests.
-
Port 2049 TCP: NFS, which handles NFS traffic.
-
Port 4045 TCP: Network Lock Manager (NLM), which deals with lock requests.
-
Port 4046 TCP: Network Status Monitor (NSM), which sends NFS clients notifications when the server reboots for lock management.
-
-
Attaching an FSx for ONTAP NFS volume to Amazon EVS for use as a datastore
Now that your FSx for ONTAP file system has been provisioned and all the proper connectivity parameters have been validated, it is time to attach an FSx for ONTAP storage volume to Amazon EVS.
The following steps will show how to access vCenter and mount the FSx for ONTAP volume as an NFS datastore:
-
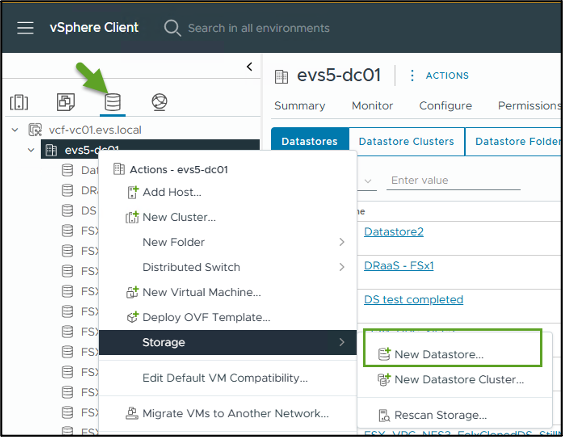
In the vSphere client, go to the "Datastore" tab. Find the Datacenter navigate to Storage > New Datastore, as shown below:
-
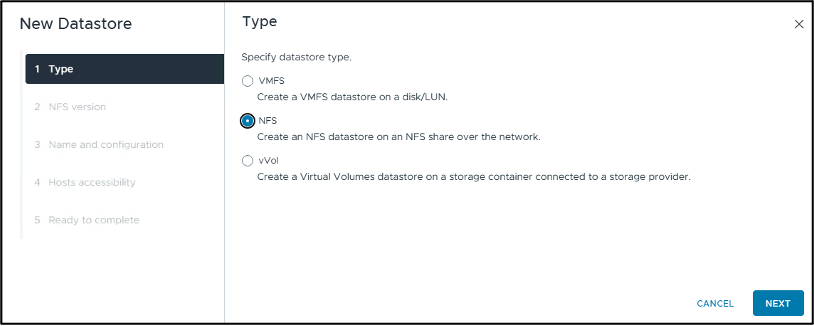
You will now be in the New Datastore wizard. In the "Type" step, you will choose a datastore type. Select "NFS" and click "NEXT" to proceed.
-
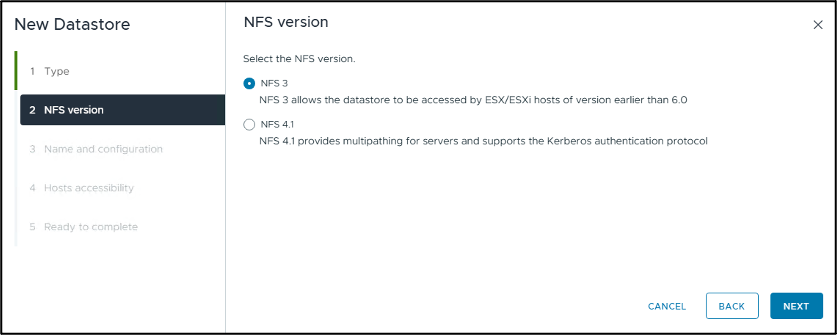
In the "NFS version" step, you will select an NFS version.
For the purposes of this example, we will choose "NFS 3" but note that NFS v4.1 can also be used.
-
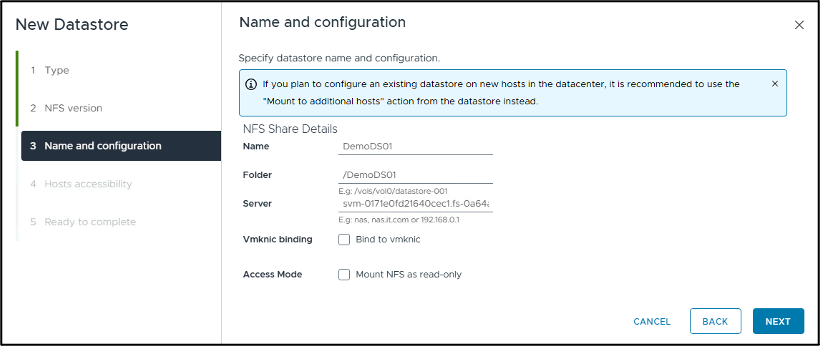
In the "Name and configuration" step, you will:
-
Name the datastore.
-
Name the folder. Use the junction path to your NFS volume.
-
Name the server. Use either the NFS DNS name of your SVM or the IP address of the NFS.
Click "NEXT" to continue.
-
-
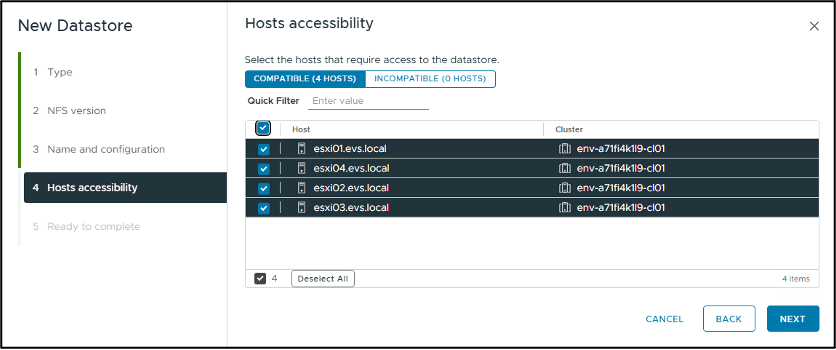
In the "Host accessibility" step, select all the hosts that require access to the datastore, then click "NEXT" to continue.
-
In the "Ready to complete" step, review the data and click "FINISH" to complete the set up.
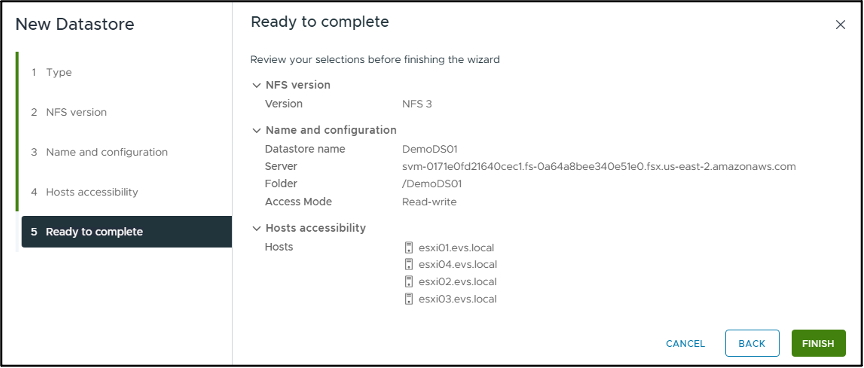
-
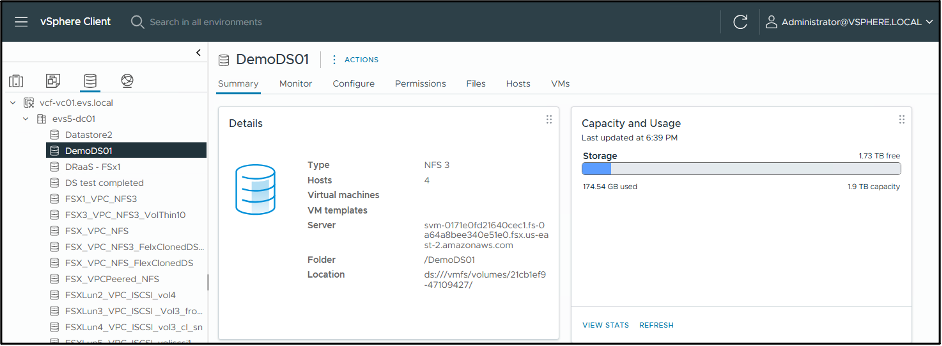
Validate that the NFS datastore has been connected by accessing vCenter, as shown below: