Setup procedure for SnapCenter Plug-in for VMware
 Suggest changes
This section covers the steps to setup SnapCenter Plug-in for VMware.
Prerequisites
The following prerequisites are required before you get started:
-
For registering the vCenter server while deploying the OVA, specify the fully qualified domain name (FQDN) or the IP address of the vCenter.
-
For the vCenter credentials, use an account with minimum required privileges
-
Open firewall ports for vCenter Server access.
-
Update the Security Group of the Amazon VPC where FSx for ONTAP is running to allow SCV access to FSx for ONTAP.

|
SCV is available free of charge. |
Setting up the SnapCenter Plug-in for VMware
To protect VMs and NFS/iSCSI-based datastores hosting them, SCV must be deployed. It's a simple OVF import.
The steps to deploy are as follows:
-
Download the OVA from NetApp Support Site.
-
Log in to the Amazon EVS vCenter.
-
Within vCenter, right-click any inventory object such as a data center, folder, cluster, or host and select "Deploy OVF template".
-
Select the correct settings, including storage, segment and customize the template to update the vCenter and its credentials, create SCV credentials and IP details. Once reviewed, select "Finish".
-
Wait for the OVF import and deployment tasks to complete.
-
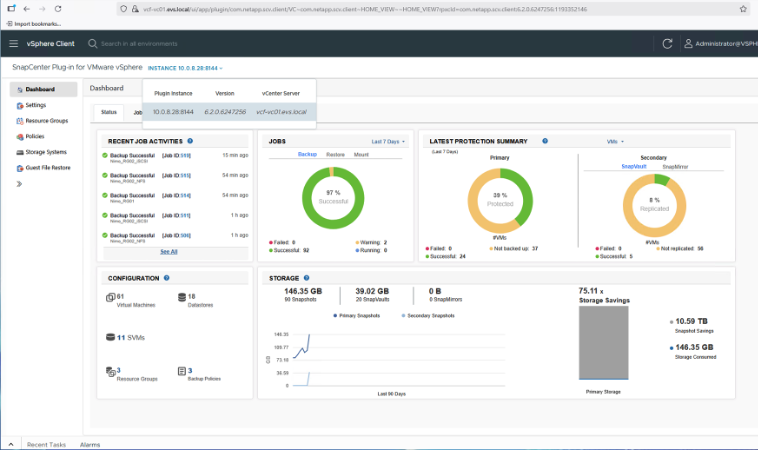
Once SCV is successfully deployed, it will be registered within vCenter.
-
To access the plug-in, navigate to the left sidebar of the vCenter web client page, select "SnapCenter Plug-in for VMware".