


Deploy SQL Server 2025 on NetApp AFF using SMB 3 continuously available shares


 Suggest changes

 PDFs

Deploy SQL Server 2025 on Windows Server 2025 with user databases, transaction logs, TempDB, and backups on SMB 3 continuously available shares on a NetApp AFF system. This procedure includes configuring the ONTAP SVM, volumes, and shares, installing SQL Server, and protecting the databases with SnapCenter.
Scope
This procedure deploys a standalone SQL Server 2025 instance on a single Windows Server 2025 host, with user databases, transaction logs, TempDB, and backups on SMB 3 continuously available (CA) shares. The same storage design applies to SQL Server failover cluster instances (FCI) and Always On availability groups, but their cluster-specific configuration is not covered. SQL Server performance tuning and sizing are also out of scope. For the benefits, solution components, design principles, and an explanation of how continuous availability works, see Learn about SQL Server 2025 on NetApp AFF with SMB 3 continuous availability.
Audience
This procedure is intended for:
-
Storage administrators, who configure the ONTAP cluster, the SVM, the volumes and the SMB shares.
-
Windows and Active Directory administrators, who prepare the Windows Server 2025 host, the service accounts and the network.
-
Database administrators, who install and configure SQL Server 2025 and set up backup and recovery.
Basic knowledge of ONTAP System Manager, Windows Server and SQL Server administration is assumed.
Lab environment
The screenshots in this procedure were taken in the following lab environment. Replace the values with the values of your environment.
| Component | Value used in the lab |
|---|---|
Storage system |
NetApp AFF A50 HA pair, cluster |
SVM |
|
SMB data LIFs |
192.168.175.138 (node 1), 192.168.175.139 (node 2) |
Active Directory domain |
|
SQL Server host |
|
SQL Server |
SQL Server 2025 Enterprise Edition (17.0.1000.7), default instance |
SQL Server service account |
|
| Volume / share | Size | UNC path | Content |
|---|---|---|---|
|
1024 GiB |
|
User database data files ( |
|
512 GiB |
|
User database transaction log files ( |
|
500 GiB |
|
TempDB data and log files |
|
2000 GiB |
|
Native SQL Server backup files ( |

|
Use separate volumes for data, log, TempDB and backups. This lets you apply different QoS, snapshot, efficiency and replication settings per volume. It also keeps TempDB, which changes constantly, out of the snapshots of your user databases. |
Prerequisites
Make sure that the following requirements are met before you start:
-
The AFF HA pair is installed, and the cluster is set up and healthy.
-
The CIFS (SMB) license is installed. It is included in ONTAP One.
-
At least one data aggregate (local tier) exists on each node.
-
Time is synchronized between the cluster and Active Directory through NTP. The maximum allowed clock skew for Kerberos is 5 minutes.
-
The data network ports, broadcast domain and (optionally) VLANs for the SMB LIFs are configured.
-
An Active Directory domain is available, and the DNS servers can be reached from the SVM data LIFs.
-
You have an account with permission to create computer objects in the target OU, for the CIFS server.
-
A dedicated domain user account as service account is available for the SQL Server Database Engine and SQL Server Agent services.

|
SQL Server must run under a domain account when its files are on an SMB share.
Built-in virtual accounts (NT SERVICE\MSSQLSERVER) and local accounts cannot be granted access to a remote file share.
|
-
Windows Server 2025 (Desktop Experience) is installed, patched and joined to the domain.
-
The SQL Server 2025 installation media (ISO) and a valid product key (or a free edition) are available.
-
SMB 3.0 or later must be enabled on the SVM.
-
All volumes that host CA shares must use the NTFS security style and must have been NTFS from the start.
-
SMB Direct (RDMA) is not supported.
-
ReFS is not supported. ONTAP (WAFL) provides the file system for the shares.
Step 1: Prepare the ONTAP cluster
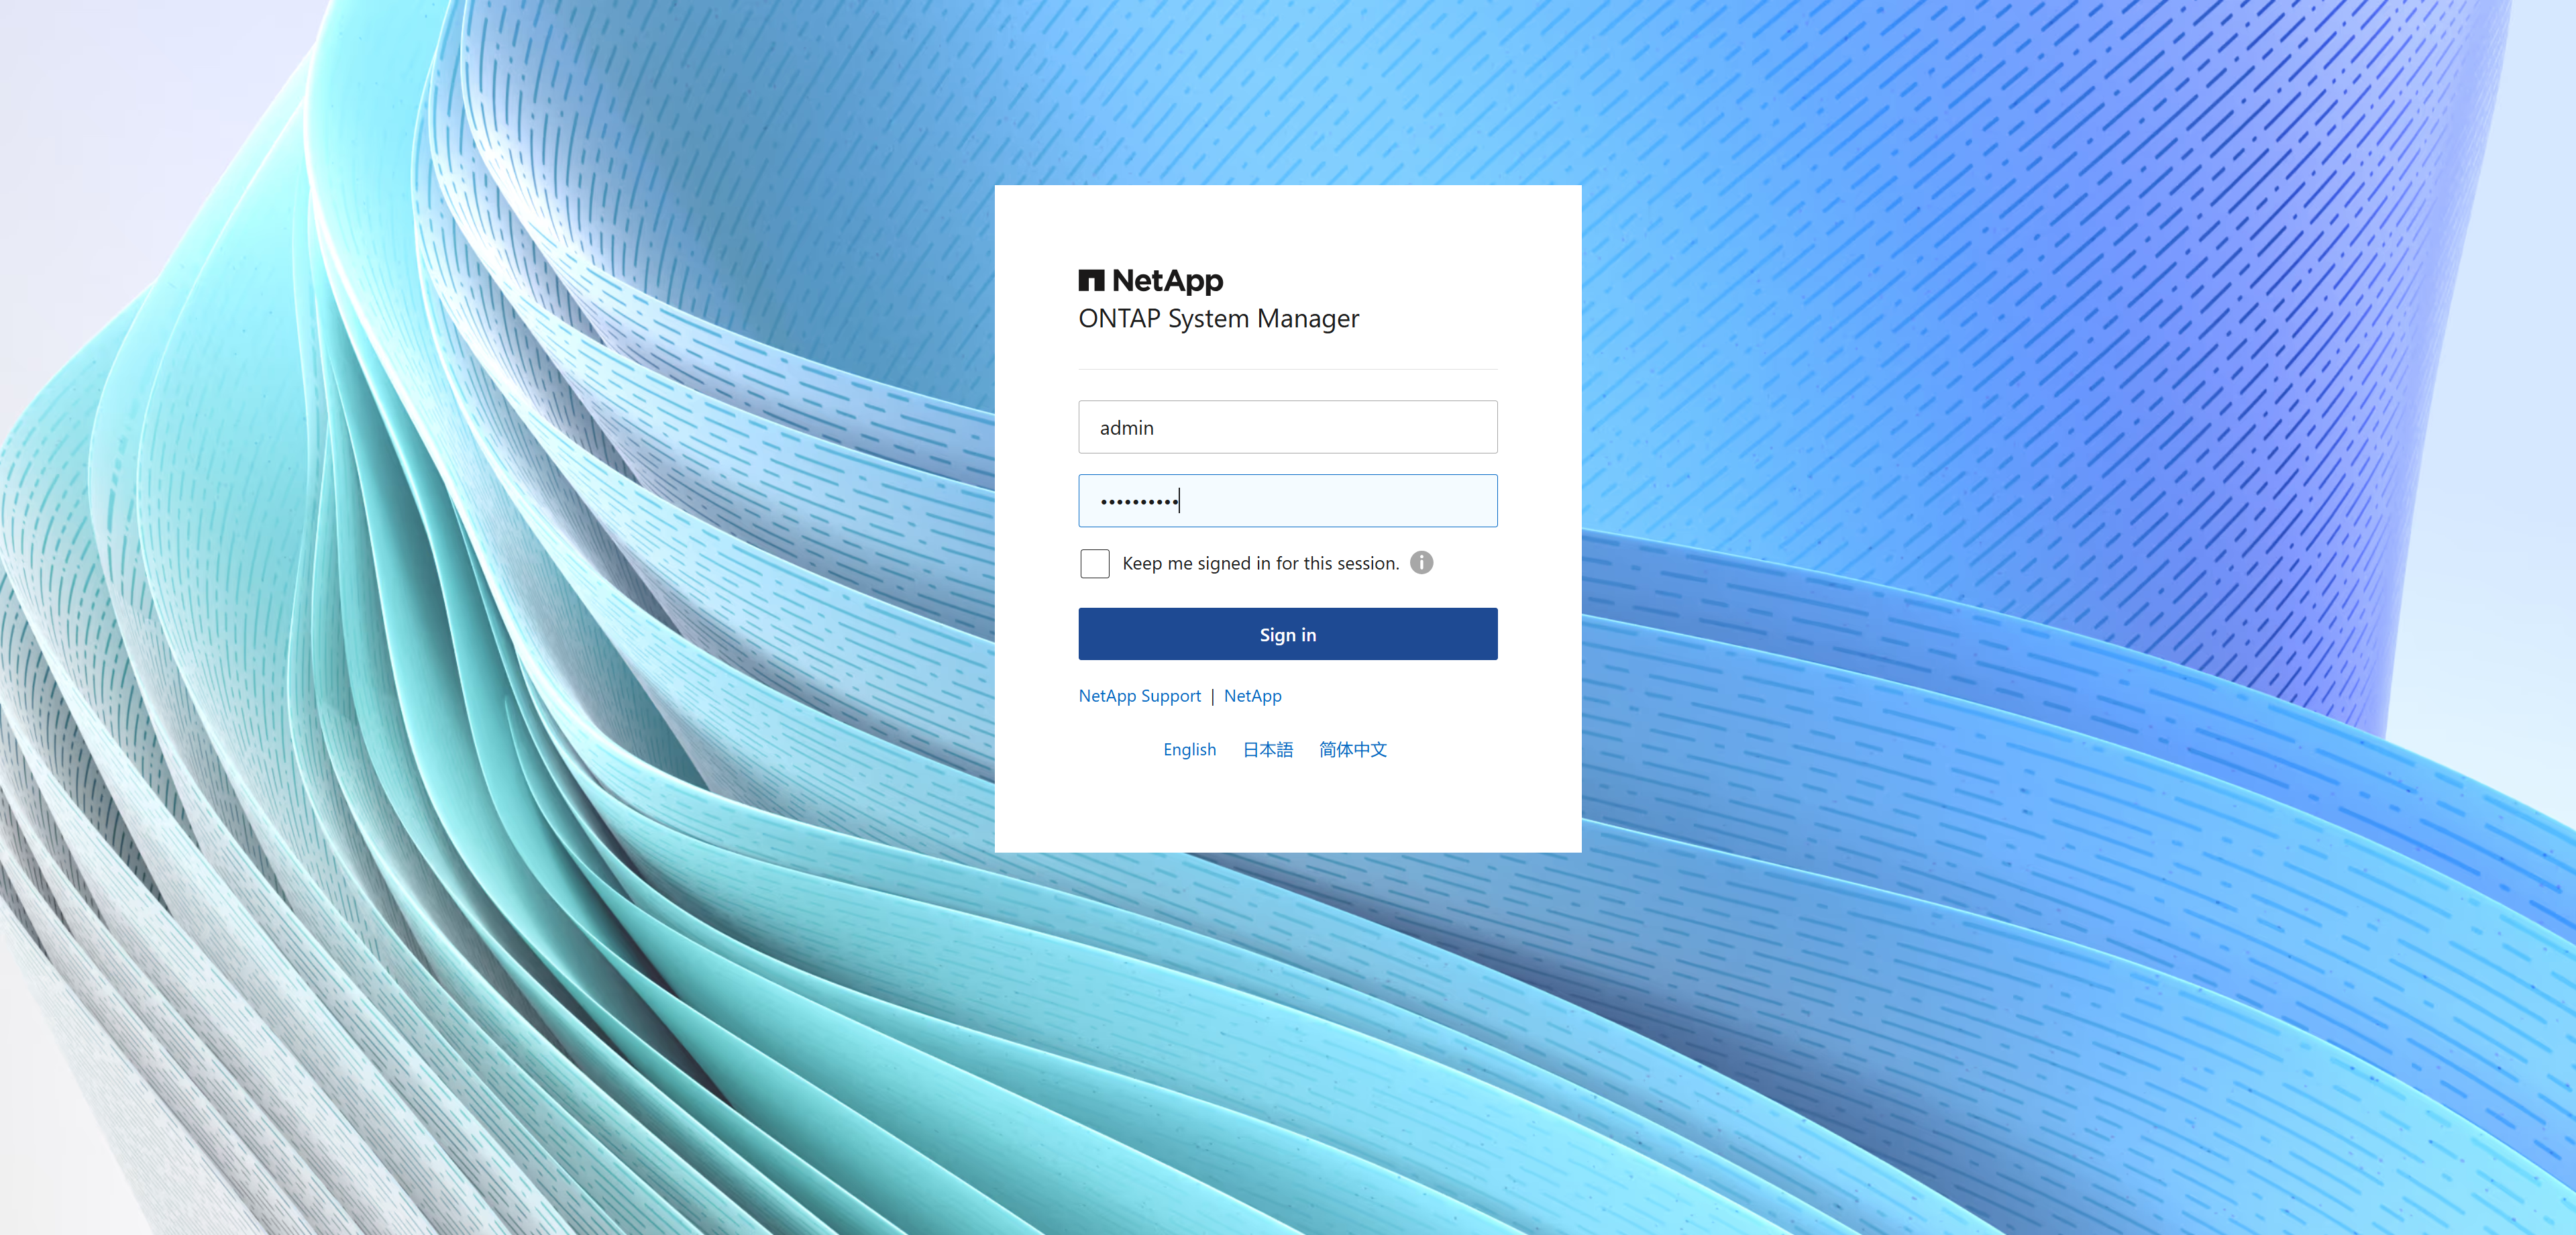
Connect to ONTAP System Manager and make sure that the cluster time is synchronized with Active Directory. Kerberos authentication for the SMB shares fails if the clock skew exceeds 5 minutes.
-
Open a web browser and connect to ONTAP System Manager at
https://<cluster-management-IP>. Log in with the cluster administrator account.Show example
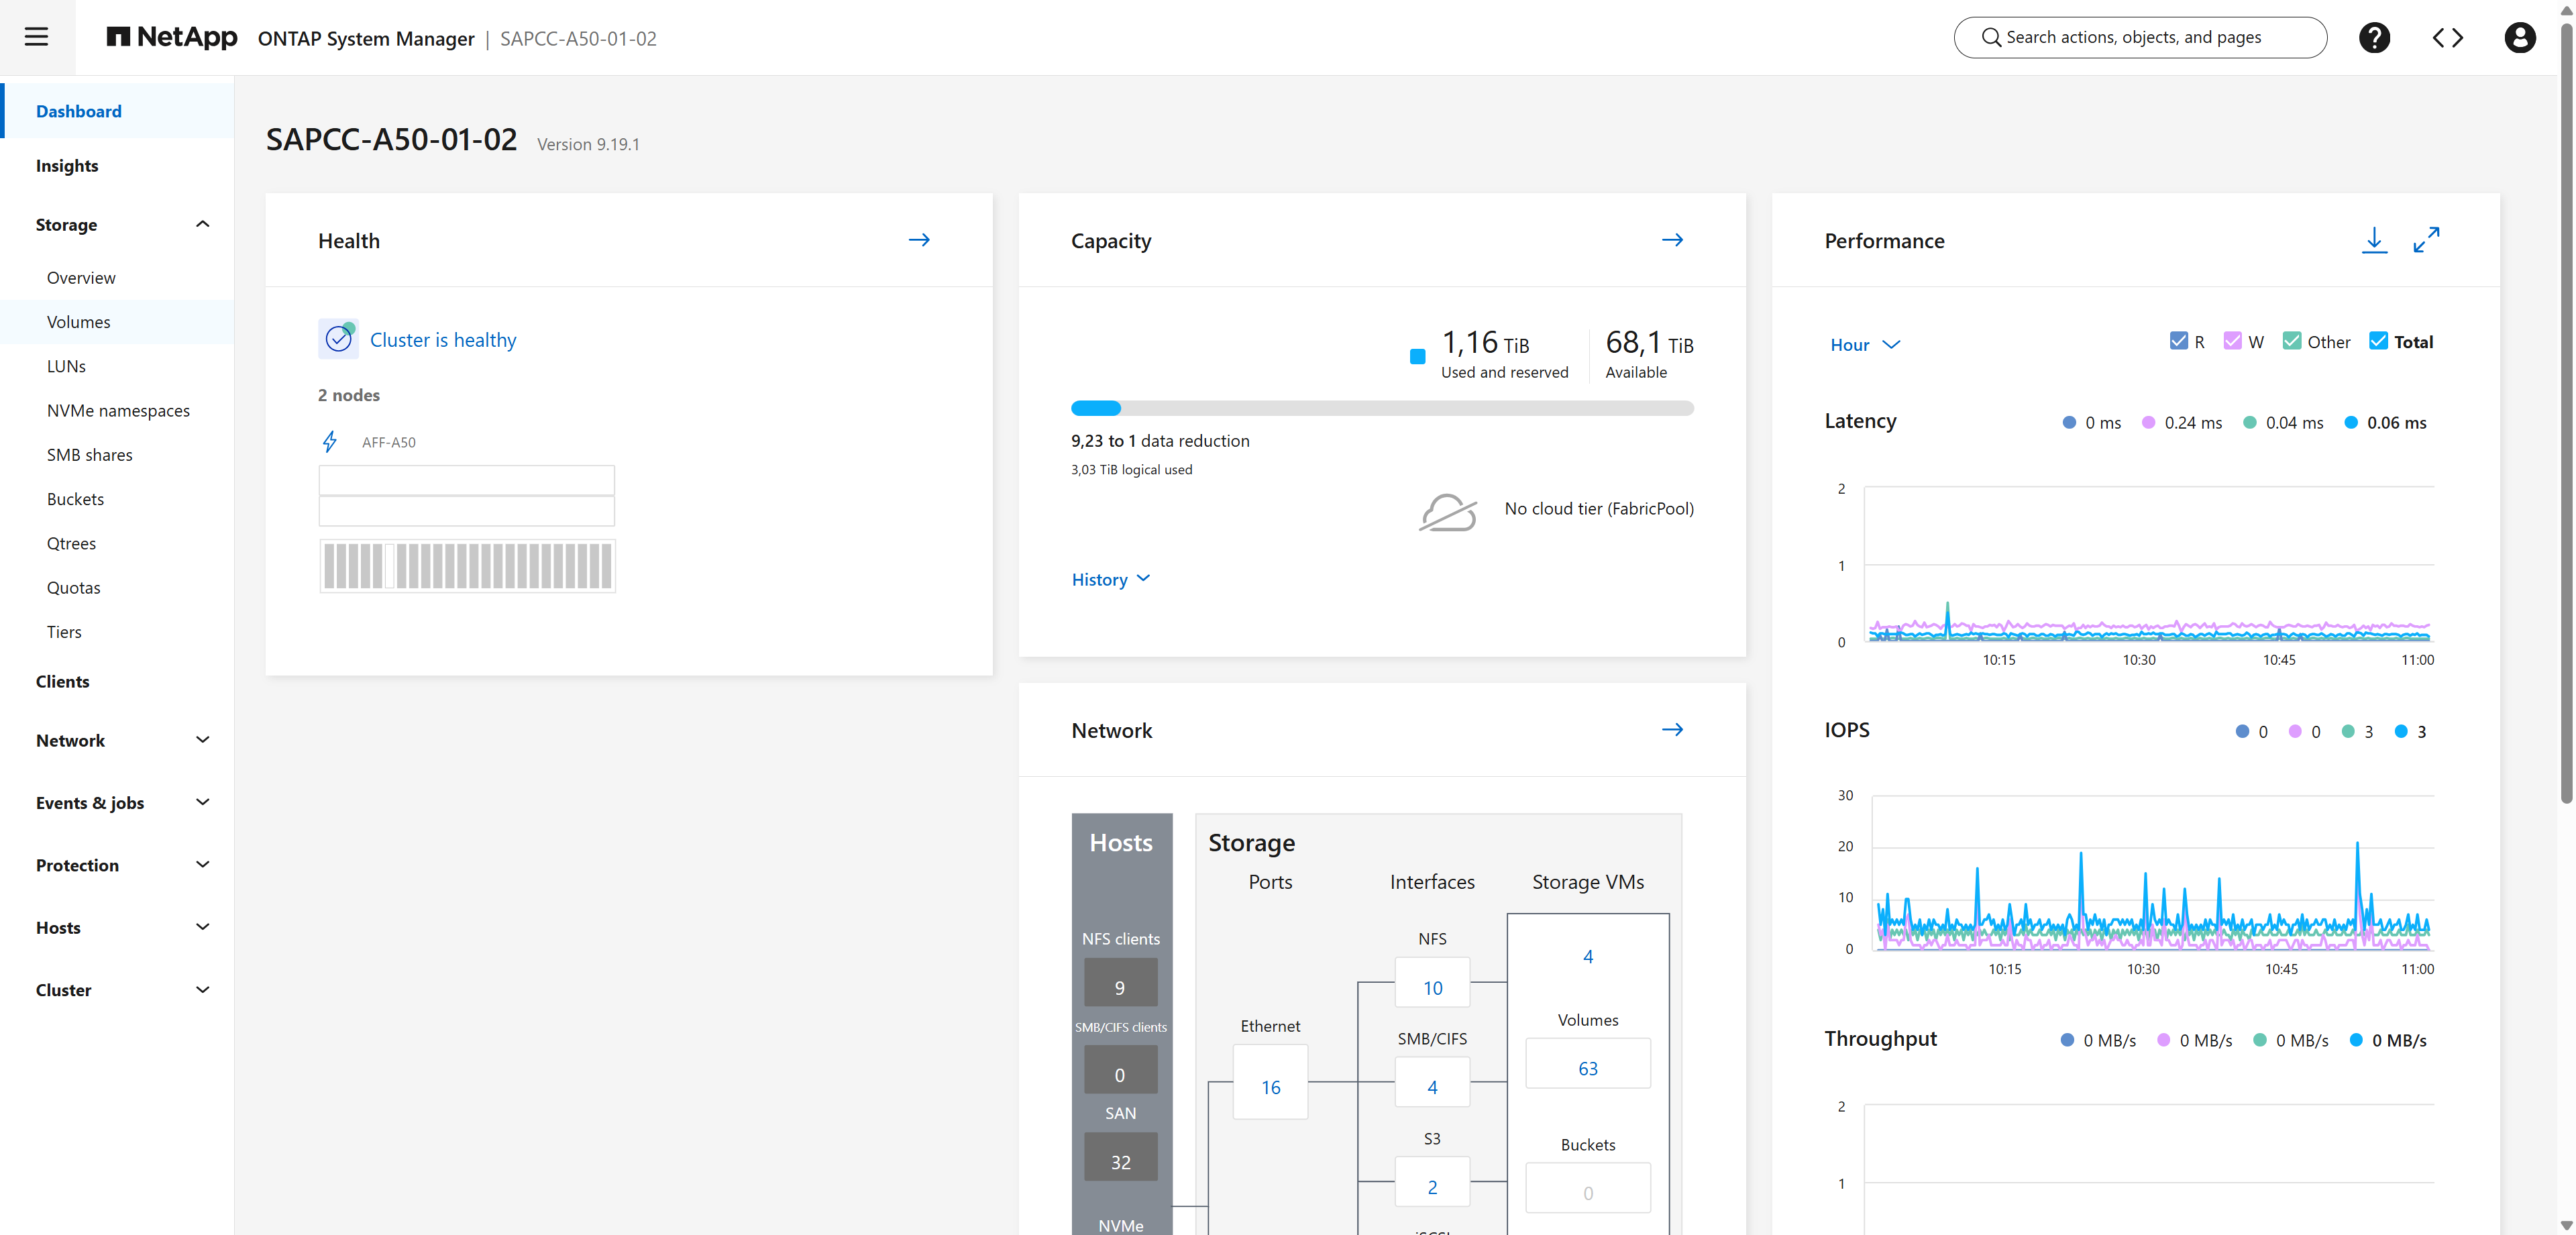
-
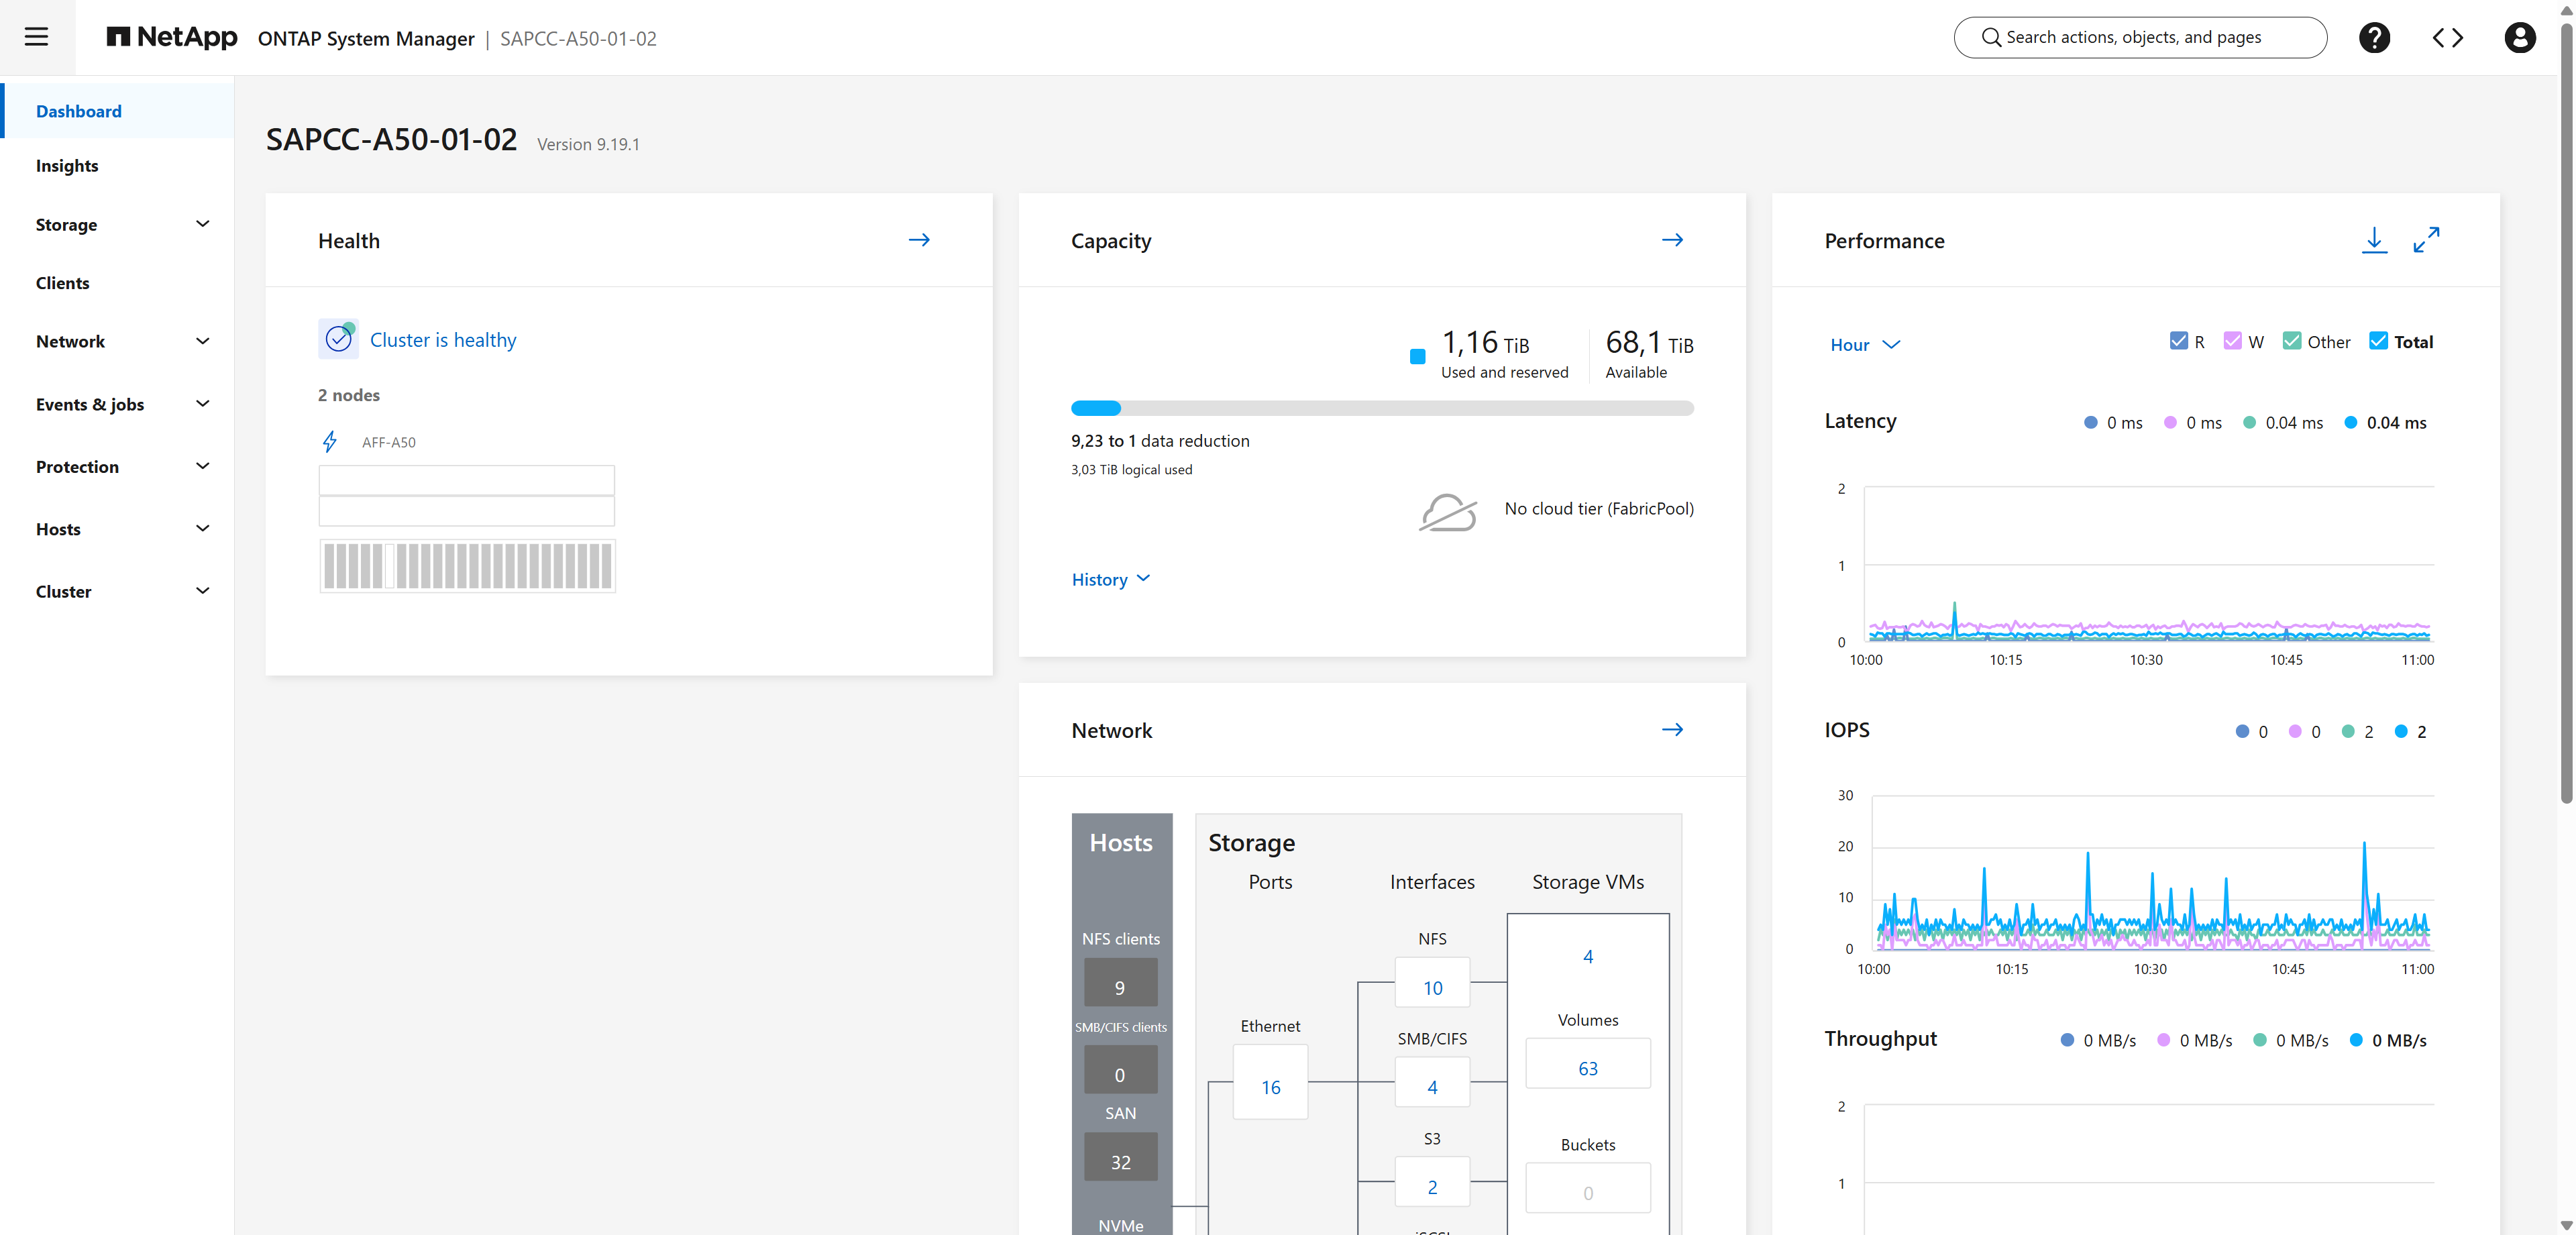
The Dashboard is the entry point for further configuration in System Manager.
Show example
-
If NTP isn't configured yet, add your domain controllers or the corporate NTP servers using the CLI (SSH to the cluster management LIF):
cluster::> cluster time-service ntp server create -server <NTP-server-IP>
Step 2: Create and configure the storage VM (SVM)
Use a dedicated SVM for SQL Server. The SVM joins Active Directory as a CIFS server and provides one SMB data LIF on each node of the HA pair.
-
Create the SVM with System Manager or the CLI:
System Manager-
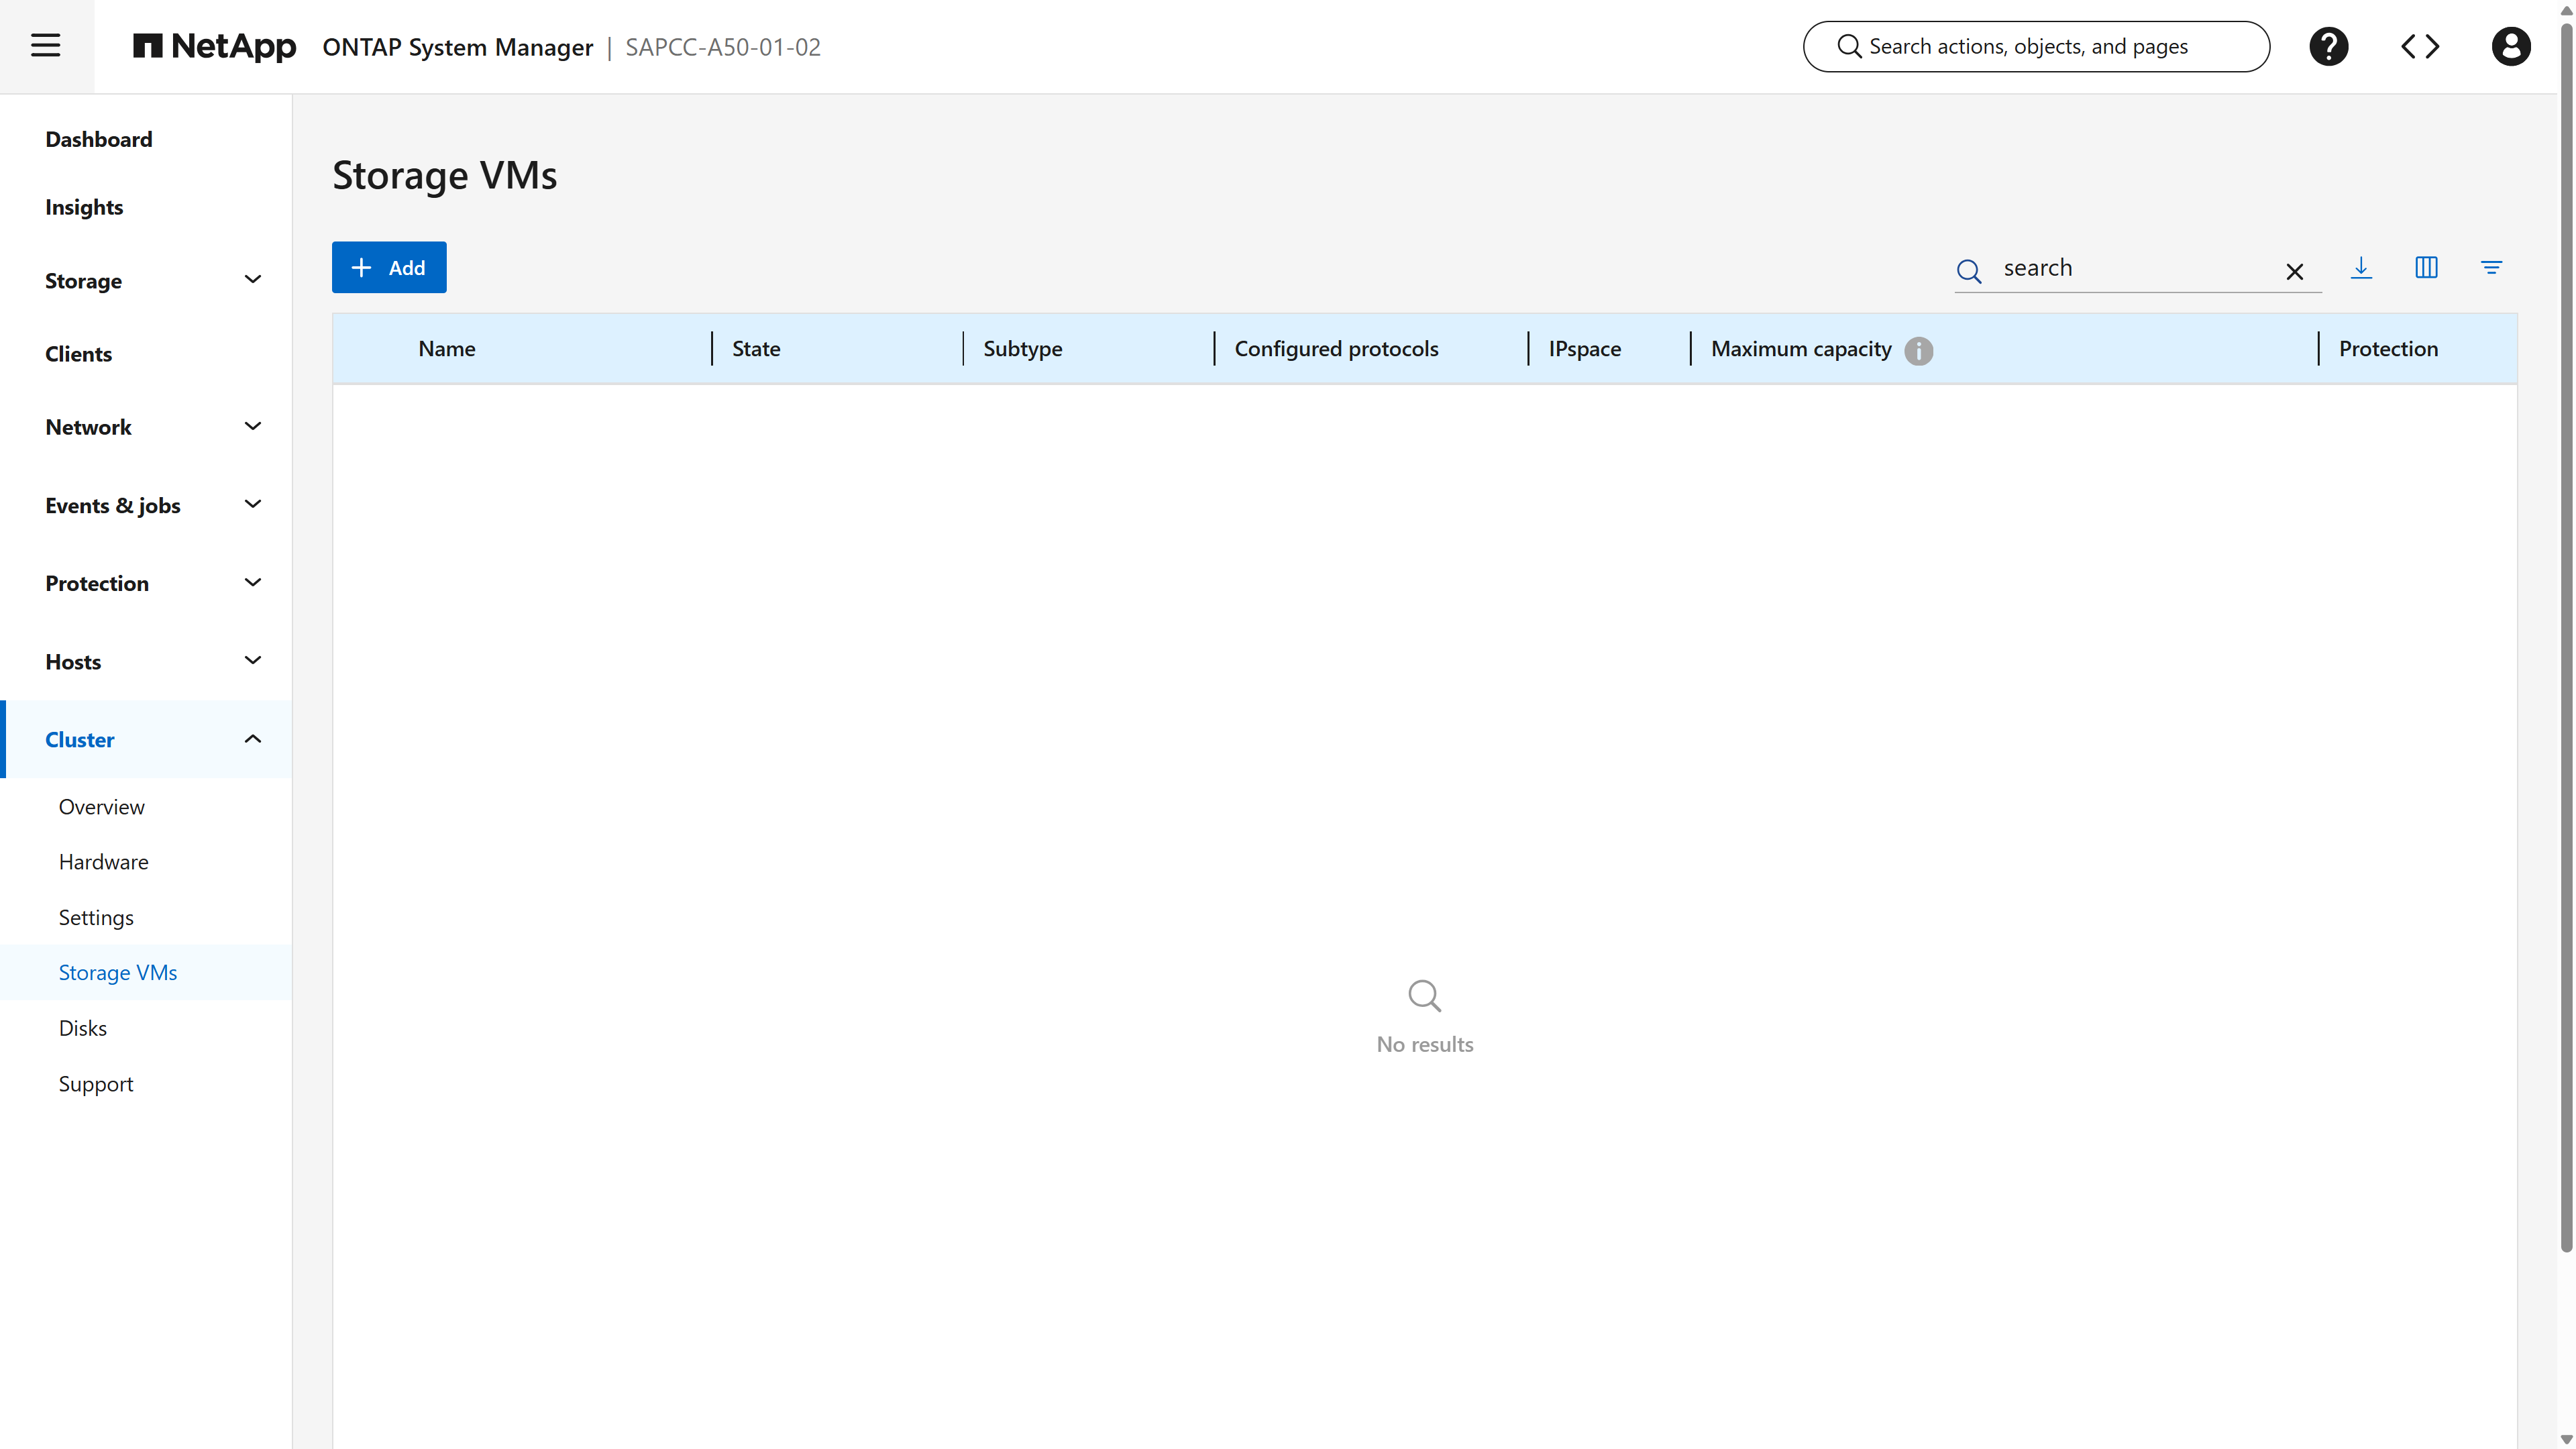
In System Manager, go to and click + Add.
Show example
-
Enter the Storage VM name
a50-sql. In Access protocol, select the SMB/CIFS, NFS, S3 tab and select Enable SMB/CIFS.Show example
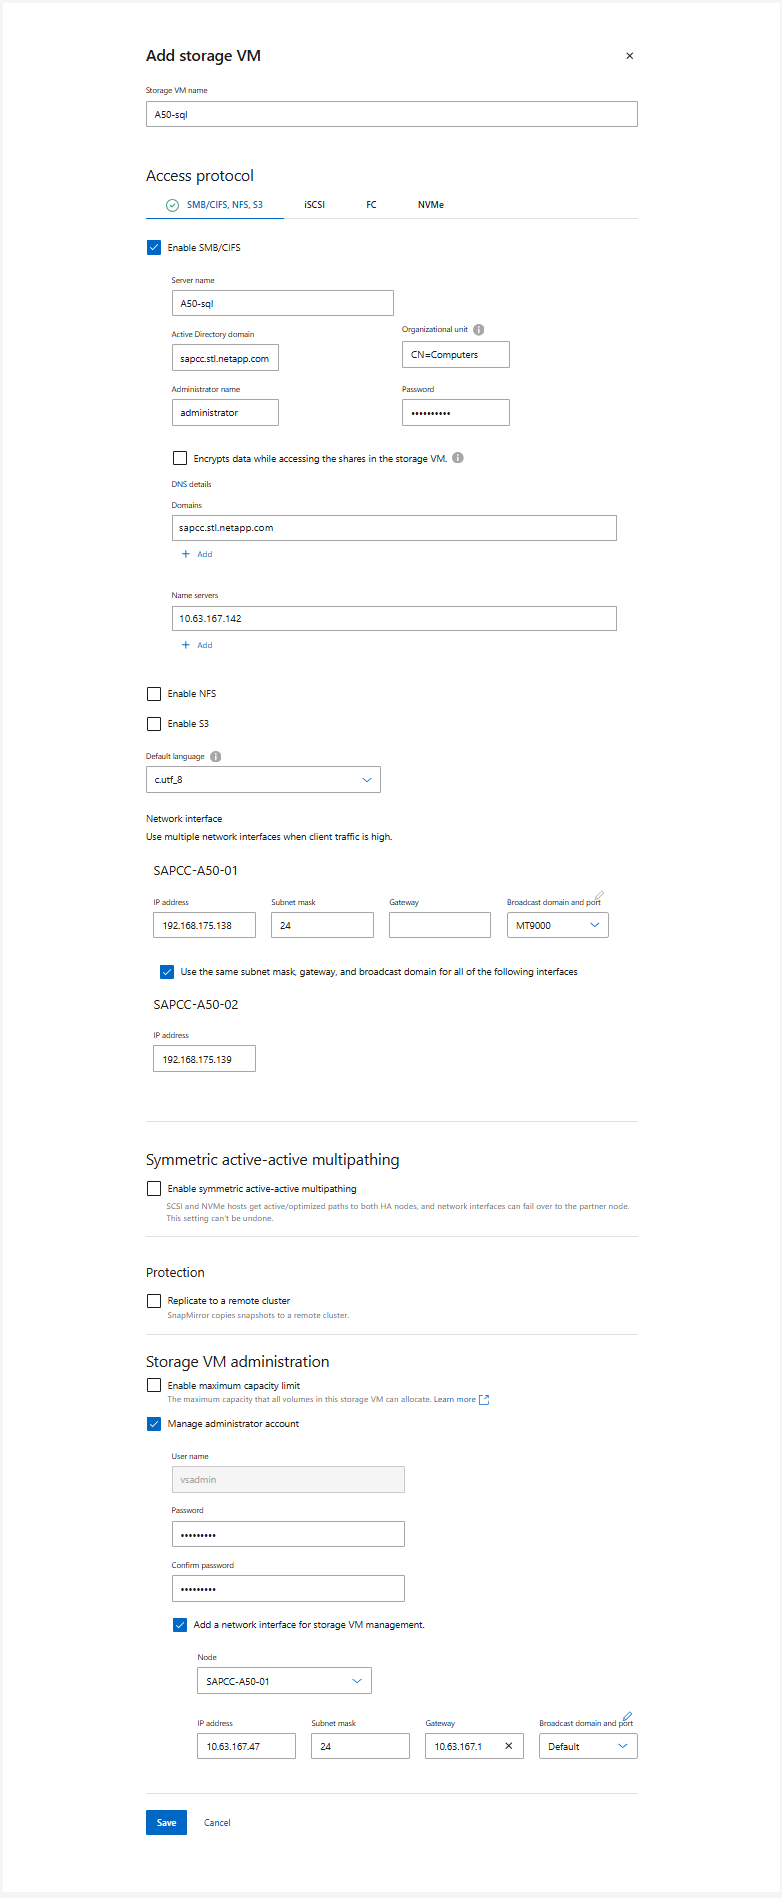

The Storage VM name is the SMB name of the CIFS server. -
Enter the Active Directory information (domain, administrator name and password, and OU) and the DNS information (DNS domain and name servers).
-
Under Network interface, configure one data LIF on each node.
One LIF per node gives SQL Server a direct (local) path to each node, and it is a prerequisite for SMB multichannel and for nondisruptive failover. Use 25 GbE or faster ports, and use the same MTU end to end.
You must register these network interfaces in your DNS server. For details, see Map the SMB server to the DNS server. -
Click Save. System Manager creates the SVM, the root volume, the LIFs and the DNS configuration, and it joins the CIFS server to the domain.
-
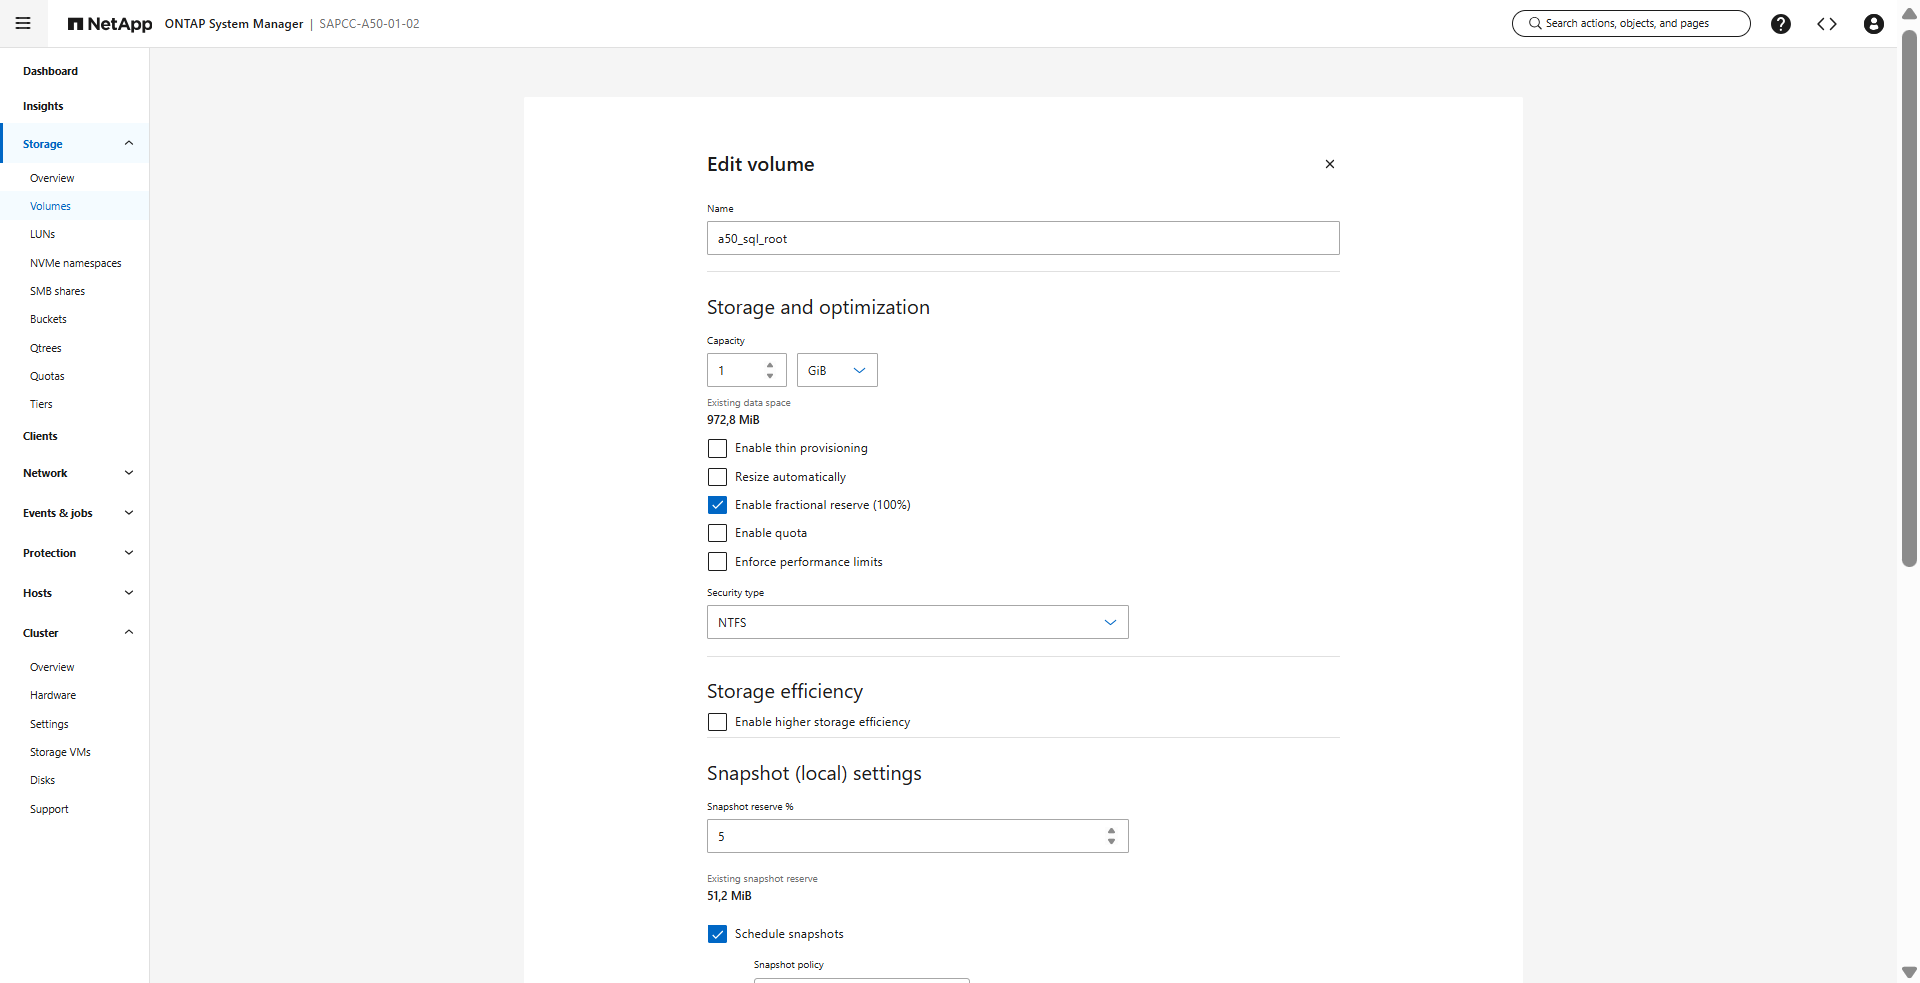
Verify the SVM root volume (
a50_sql_rootin the lab). It must use the NTFS security style as otherwise SMB shares will not work. Go to , select the root volume, and click Edit to review its settings.Show example
ONTAP CLIThe following commands create the same configuration from the CLI. Replace the placeholder values in angle brackets.
cluster::> vserver create -vserver a50-sql -rootvolume a50_sql_root -aggregate <aggr_node1> -rootvolume-security-style ntfs cluster::> vserver modify -vserver a50-sql -allowed-protocols cifs cluster::> network interface create -vserver a50-sql -lif a50-sql_smb_n1 -service-policy default-data-files -home-node <node1> -home-port <port> -address 192.168.175.138 -netmask <netmask> cluster::> network interface create -vserver a50-sql -lif a50-sql_smb_n2 -service-policy default-data-files -home-node <node2> -home-port <port> -address 192.168.175.139 -netmask <netmask> cluster::> vserver services name-service dns create -vserver a50-sql -domains sapcc.stl.netapp.com -name-servers <dns1>,<dns2> cluster::> vserver cifs create -vserver a50-sql -cifs-server A50-SQL -domain sapcc.stl.netapp.com -ou CN=Computers -
-
Configure the SMB server options. Verify that the SMB options required for SQL Server are enabled on the SVM:
cluster::> set -privilege advanced
cluster::*> vserver cifs options show -vserver a50-sql -fields smb3-enabled,is-multichannel-enabled,is-large-mtu-enabled,copy-offload-enabled,shadowcopy-enabled
cluster::*> vserver cifs options modify -vserver a50-sql -smb3-enabled true -is-multichannel-enabled true -is-large-mtu-enabled true -copy-offload-enabled true -shadowcopy-enabled true
cluster::*> set -privilege admin
Option Purpose smb3-enabledSMB 3.x is required for continuously available shares.
is-multichannel-enabledSMB multichannel uses several TCP connections and network paths for higher throughput and resiliency.
is-large-mtu-enabledAllows SMB reads and writes of up to 1 MB.
copy-offload-enabledODX copy offload; copies are performed inside the storage system.
shadowcopy-enabledRemote VSS for SMB shares. Required by backup applications that use VSS for SMB shares.
-
Verify that the CIFS server is registered in DNS and can be resolved from the SQL Server host:
PS C:\> Resolve-DnsName a50-sql.sapcc.stl.netapp.com
Step 3: Create the SQL Server volumes and SMB shares
Create one volume and one SMB share for each file type. System Manager creates the share together with the volume.
-
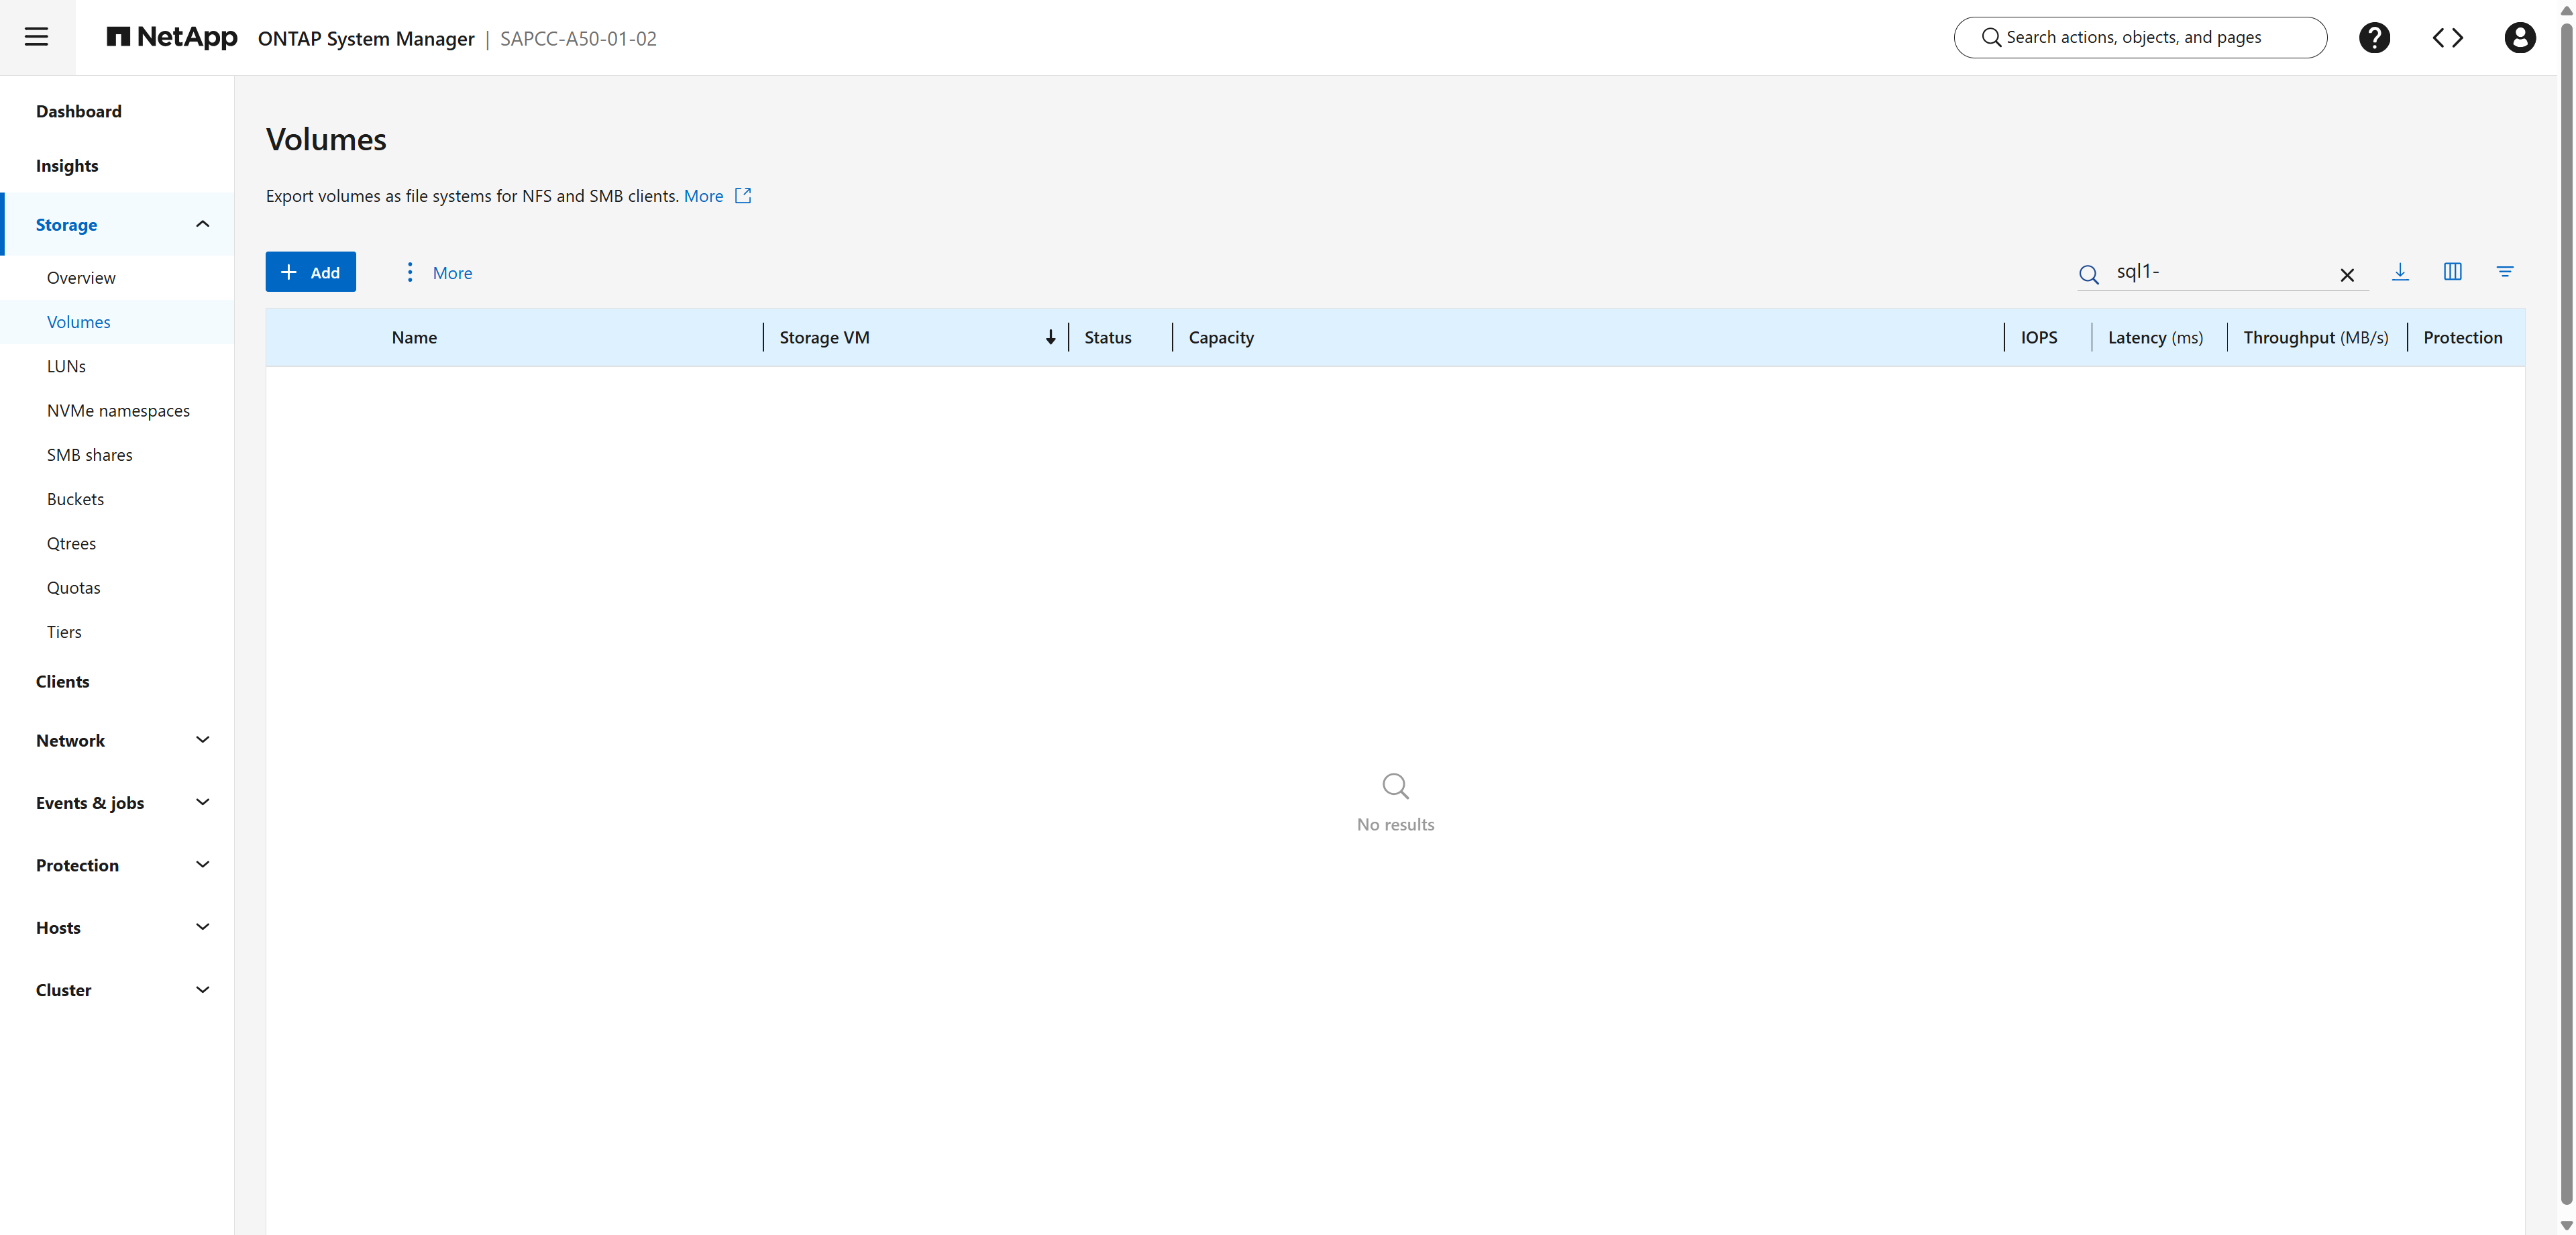
In System Manager, expand Storage and click Volumes.
Show example
-
The volume list opens. Click + Add.
Show example
-
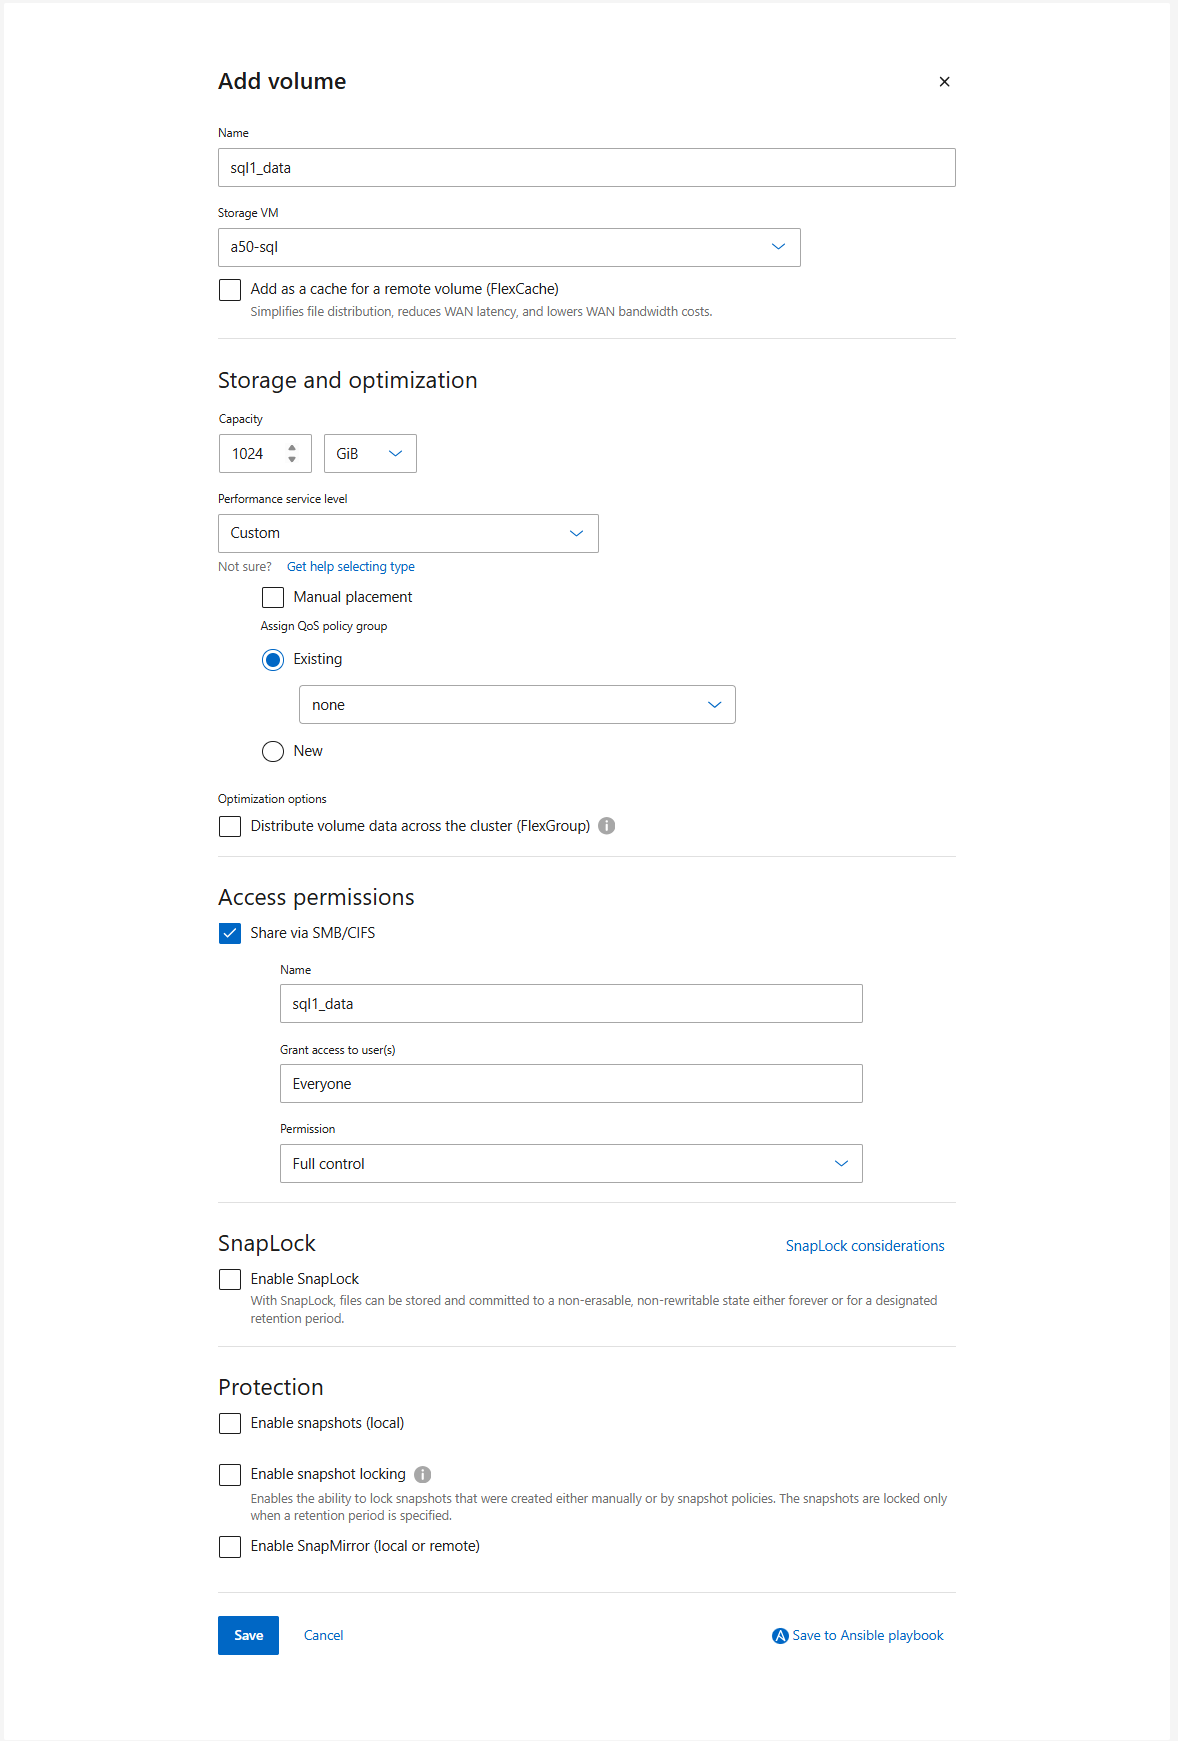
Create the
sql1_datavolume and its SMB share for the user database data files.-
In the Add volume dialog, enter the following values:
-
Name:
sql1_data -
Storage VM:
a50-sql -
Capacity:
1024 GiB -
Performance service level: Custom, Assign QoS policy group: Existing >
none -
Access permissions: select Share via SMB/CIFS. Share name
sql1_data, grant access to user(s)Everyone, permission Full control. -
Protection: leave Enable snapshots (local) cleared. Application-consistent backups are created by NetApp SnapCenter.
Click Save.
Show example
-
-
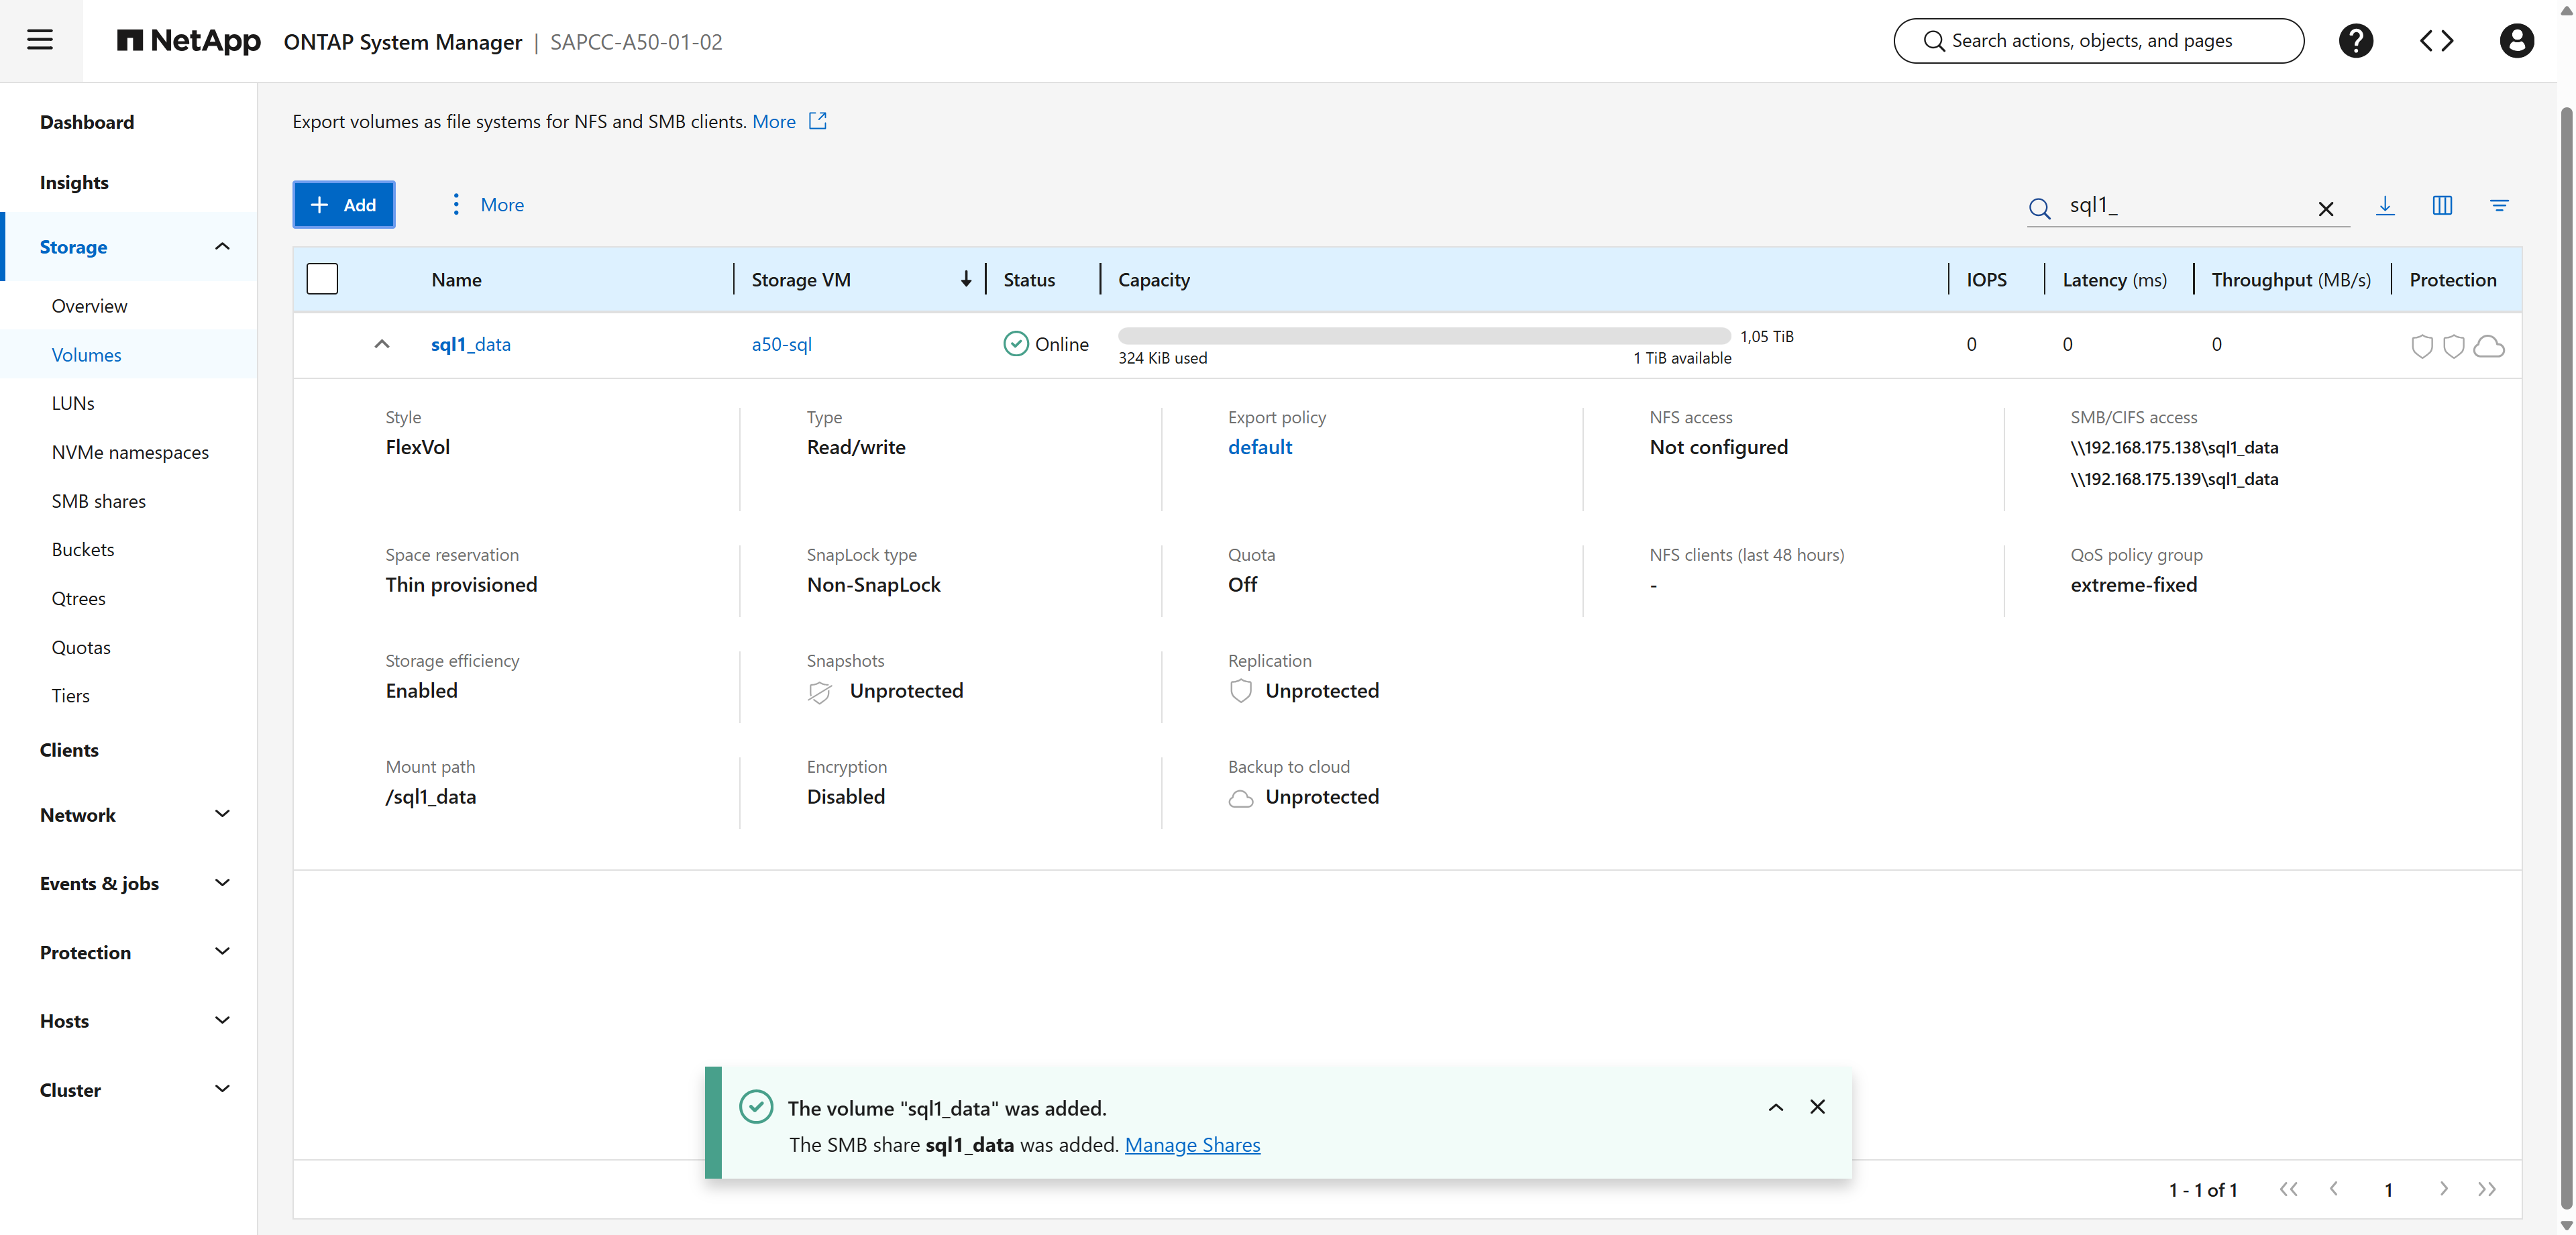
The volume is created and shows as Online. Expand the volume row to review the details: NTFS security style, SMB access paths through both LIFs (
\\192.168.175.138\sql1_dataand\\192.168.175.139\sql1_data), and the QoS policy group.Show example
-
-
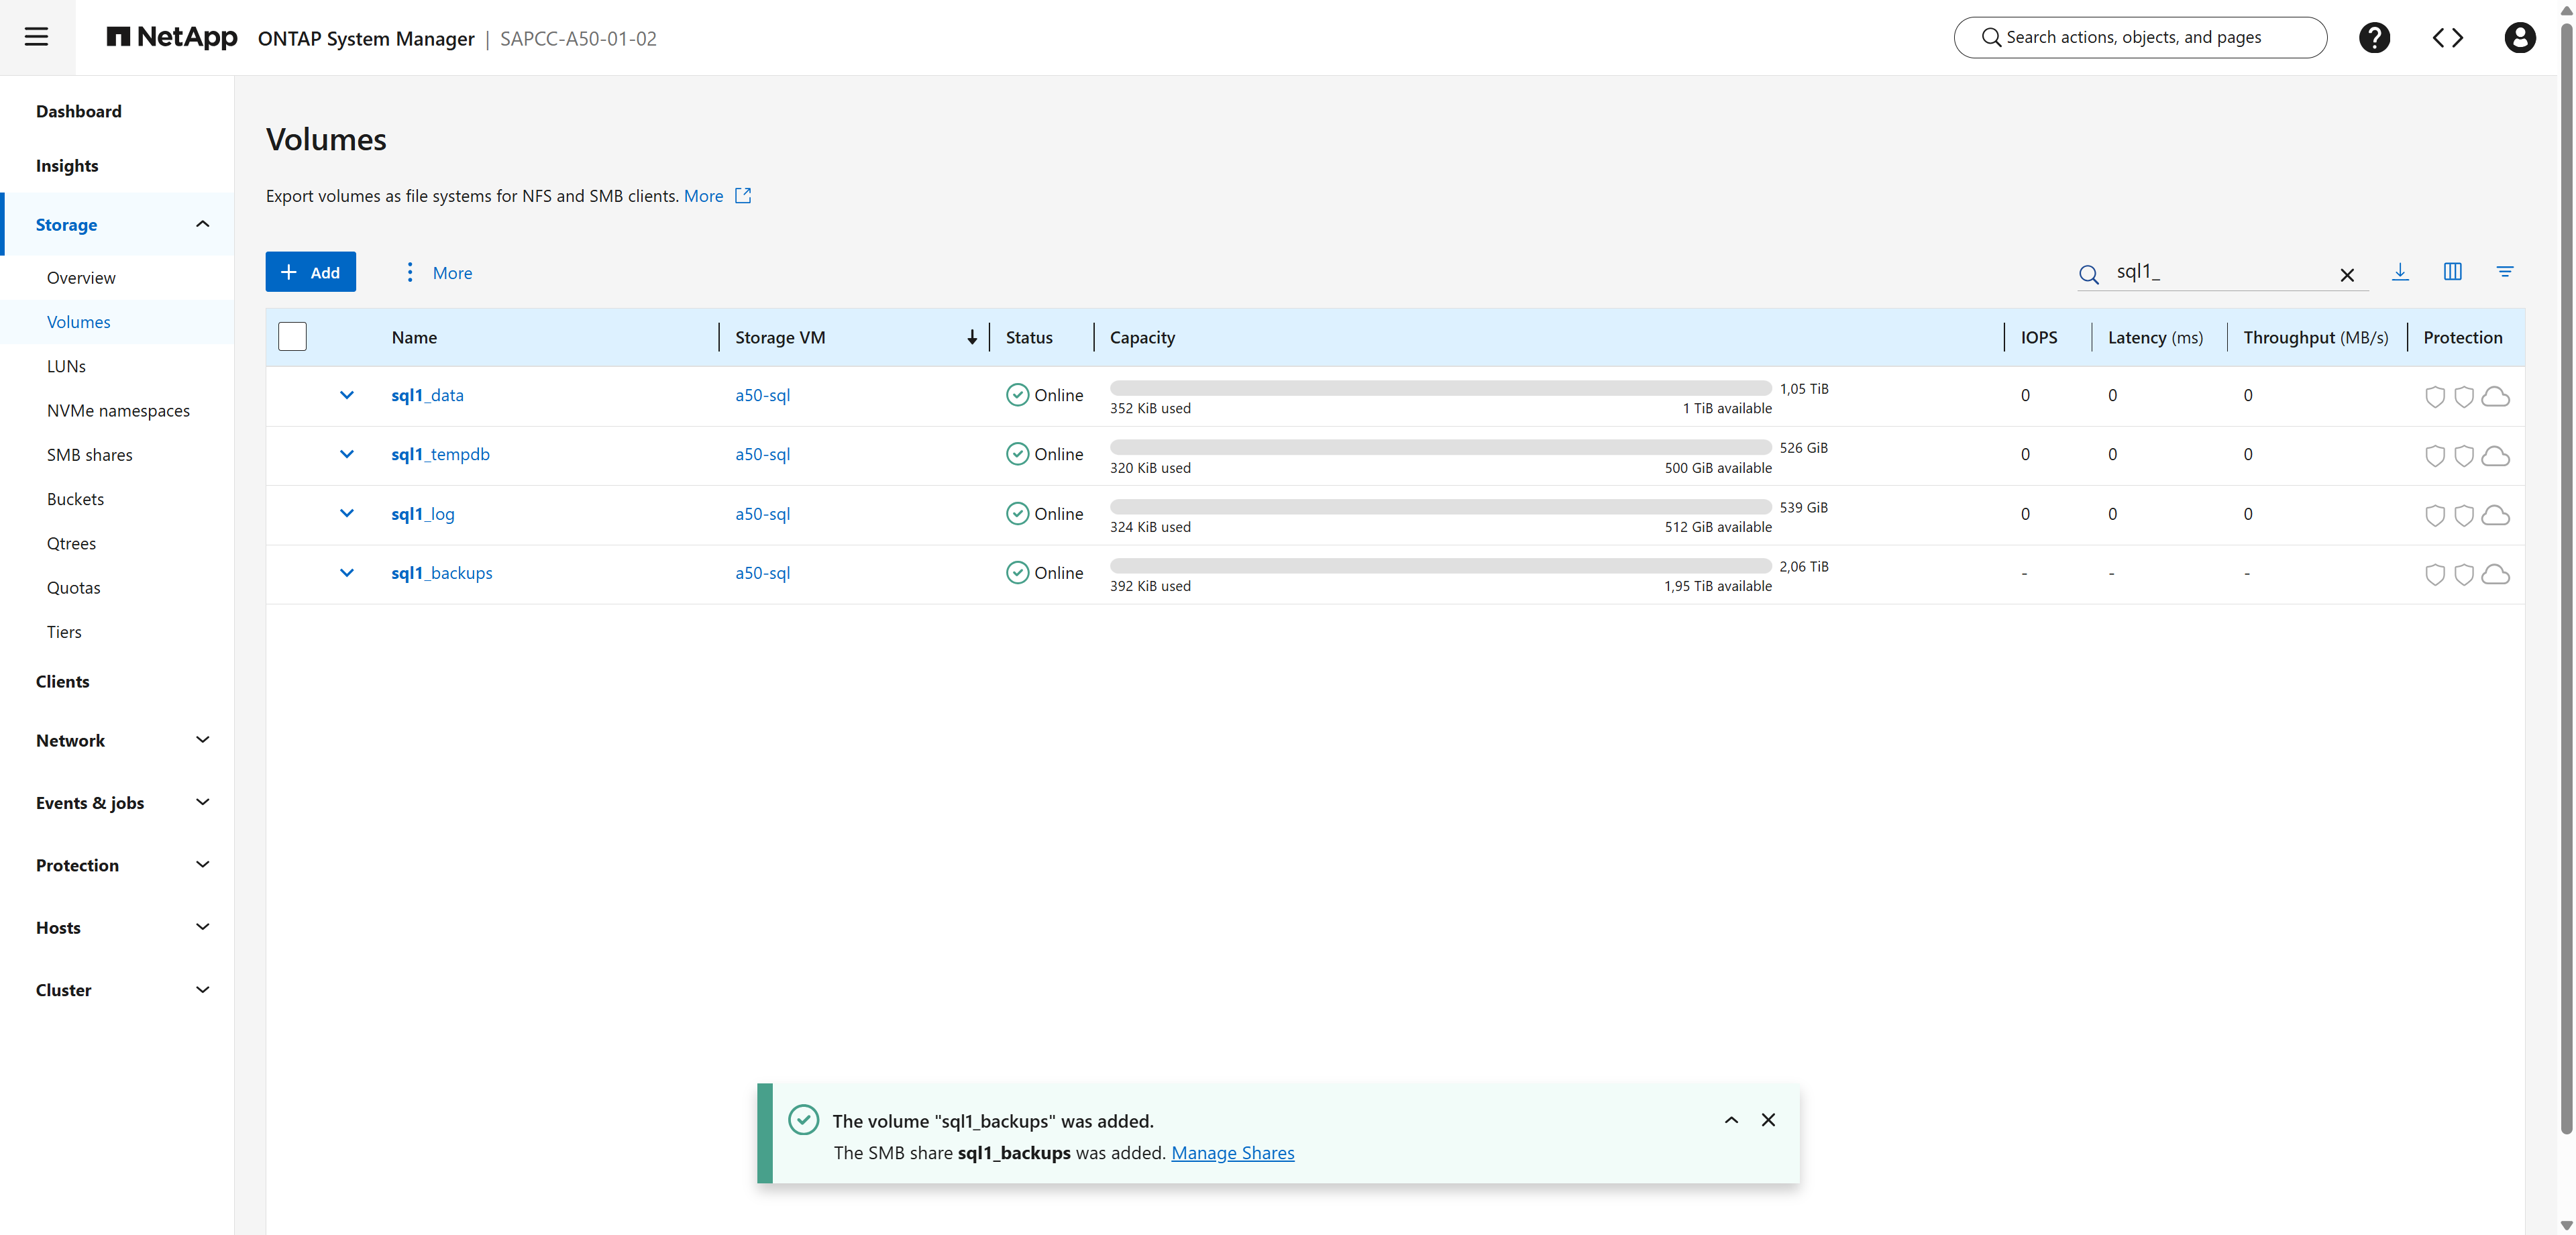
Repeat the steps for the log, TempDB, and backup volumes with the sizes and names listed in Lab environment.
Show example

The lab grants Everyone / Full control on the share level for simplicity. In production, restrict the share ACL to the SQL Server service account, the SQL Server Agent account and the DBA administration group, for example: cluster::> vserver cifs share access-control create -vserver a50-sql -share sql1_data -user-or-group SAPCC\sql1admin -permission Full_Control cluster::> vserver cifs share access-control create -vserver a50-sql -share sql1_data -user-or-group "SAPCC\SQL Admins" -permission Full_Control cluster::> vserver cifs share access-control delete -vserver a50-sql -share sql1_data -user-or-group Everyone -
Repeat the commands for
sql1_log,sql1_tempdbandsql1_backups. The service account also needs Full Control on the NTFS permissions of the share root. SQL Server Setup checks this, as shown in Step 7.
Step 4: Adjust the volume settings
Review and adjust the space and snapshot settings of each SQL Server volume.
-
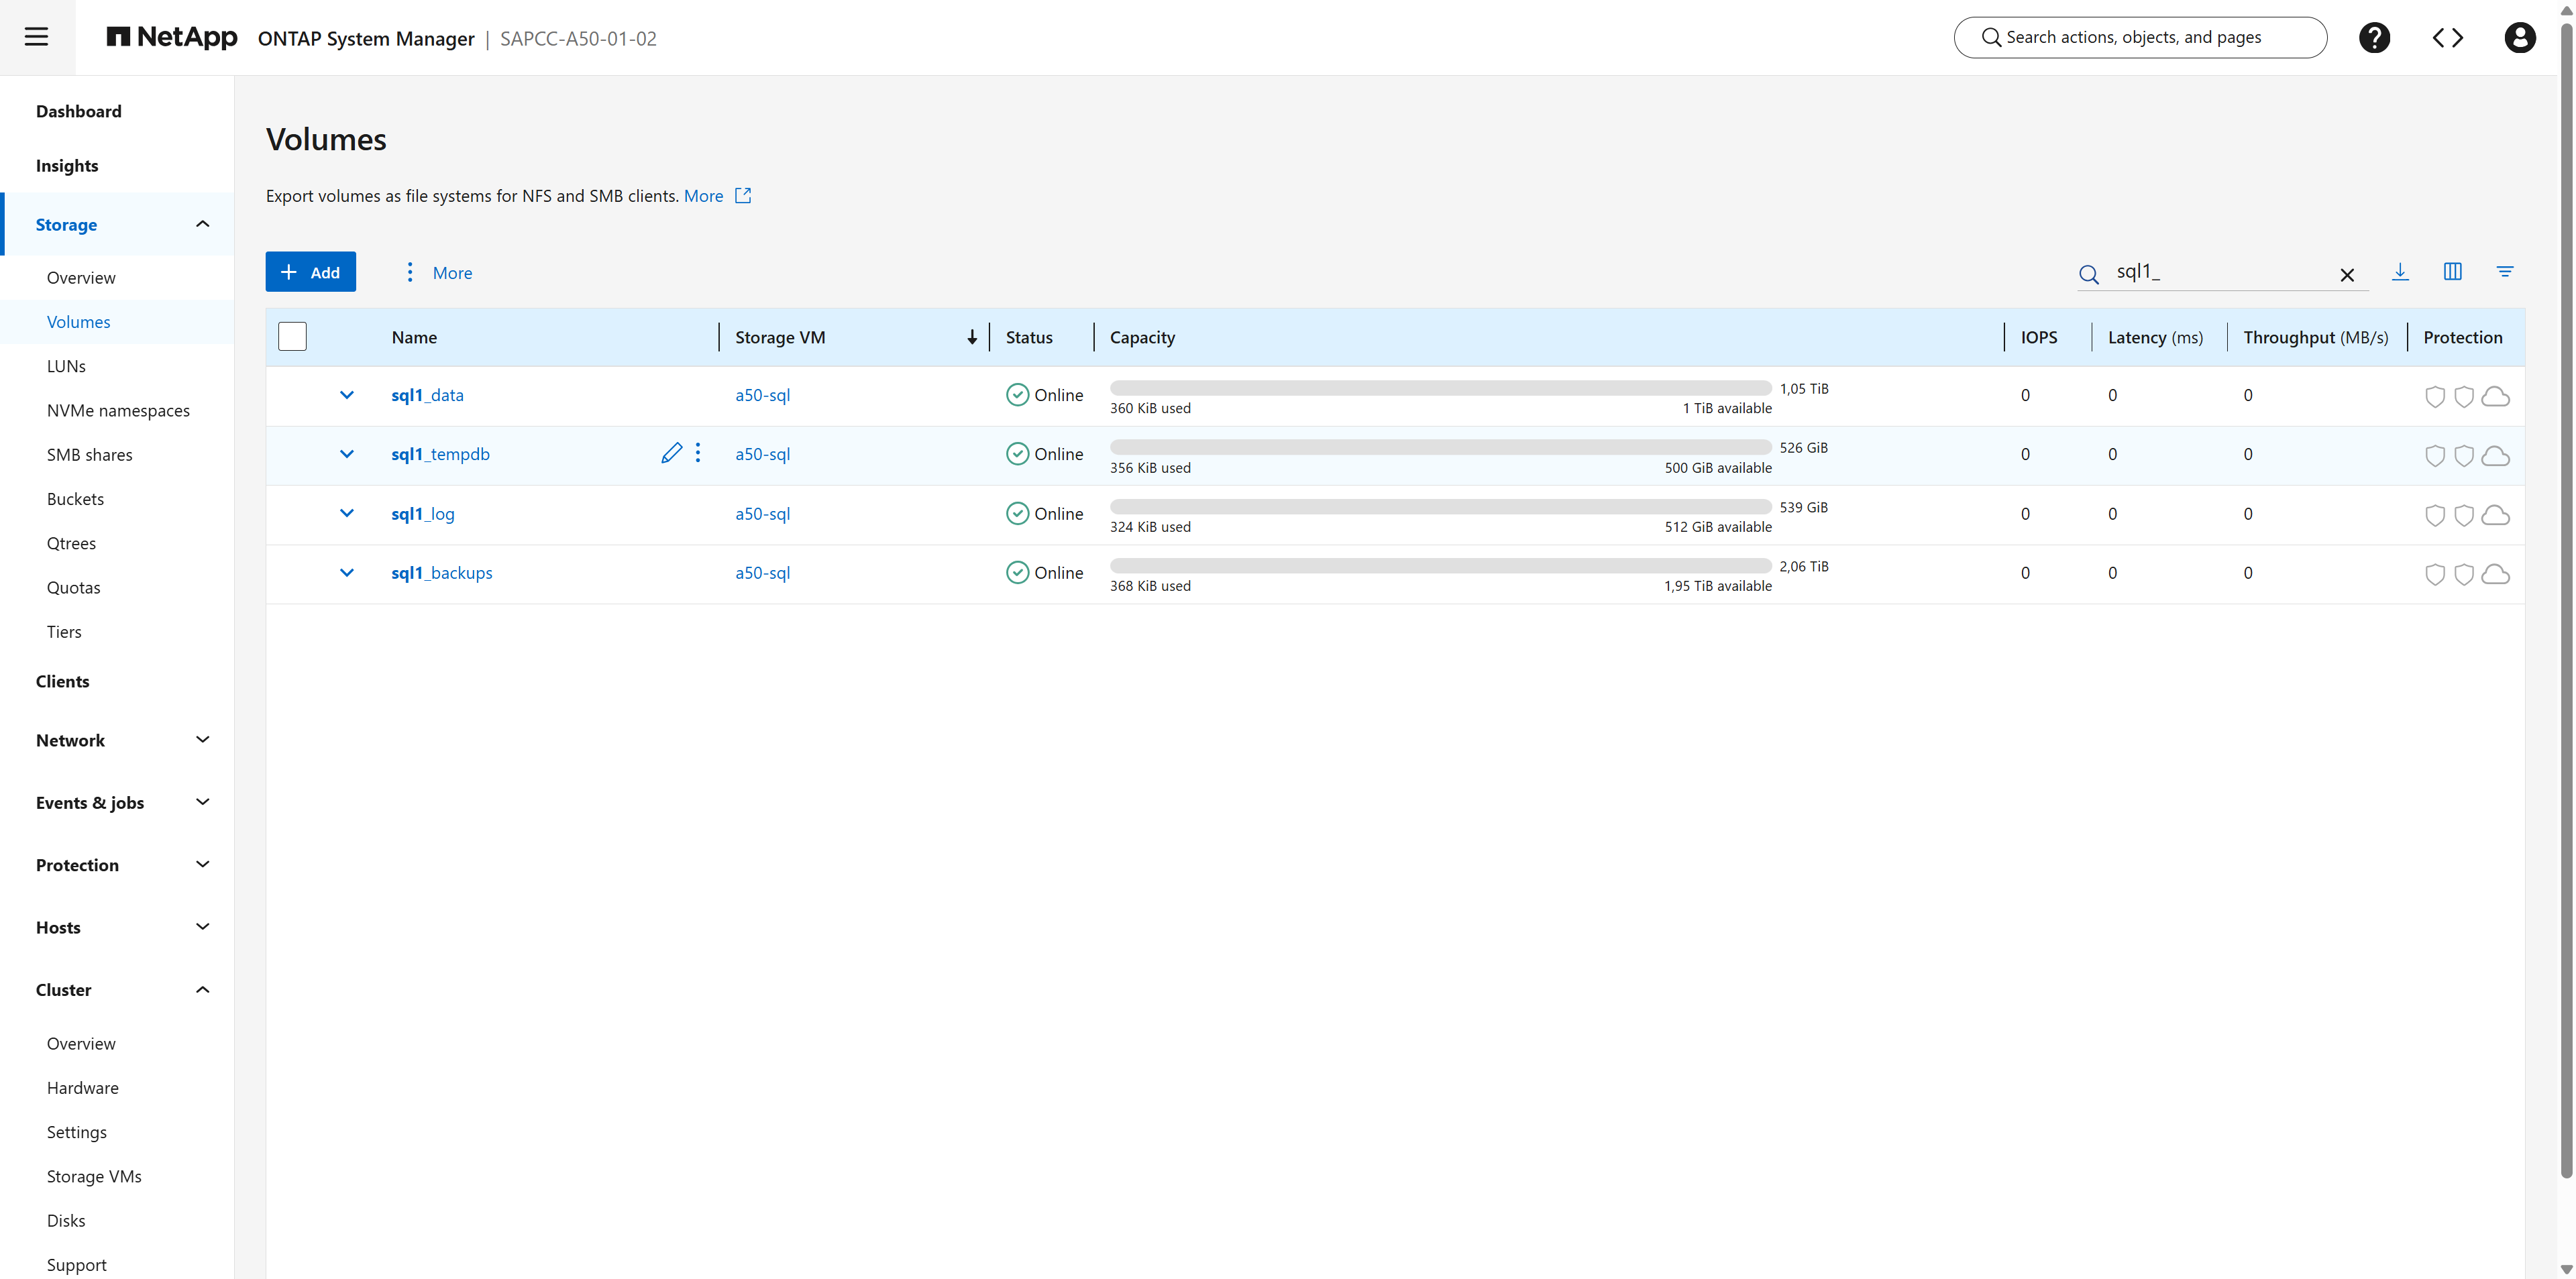
In the volume list, hover over the volume and click the pencil icon (Edit).
Show example
-
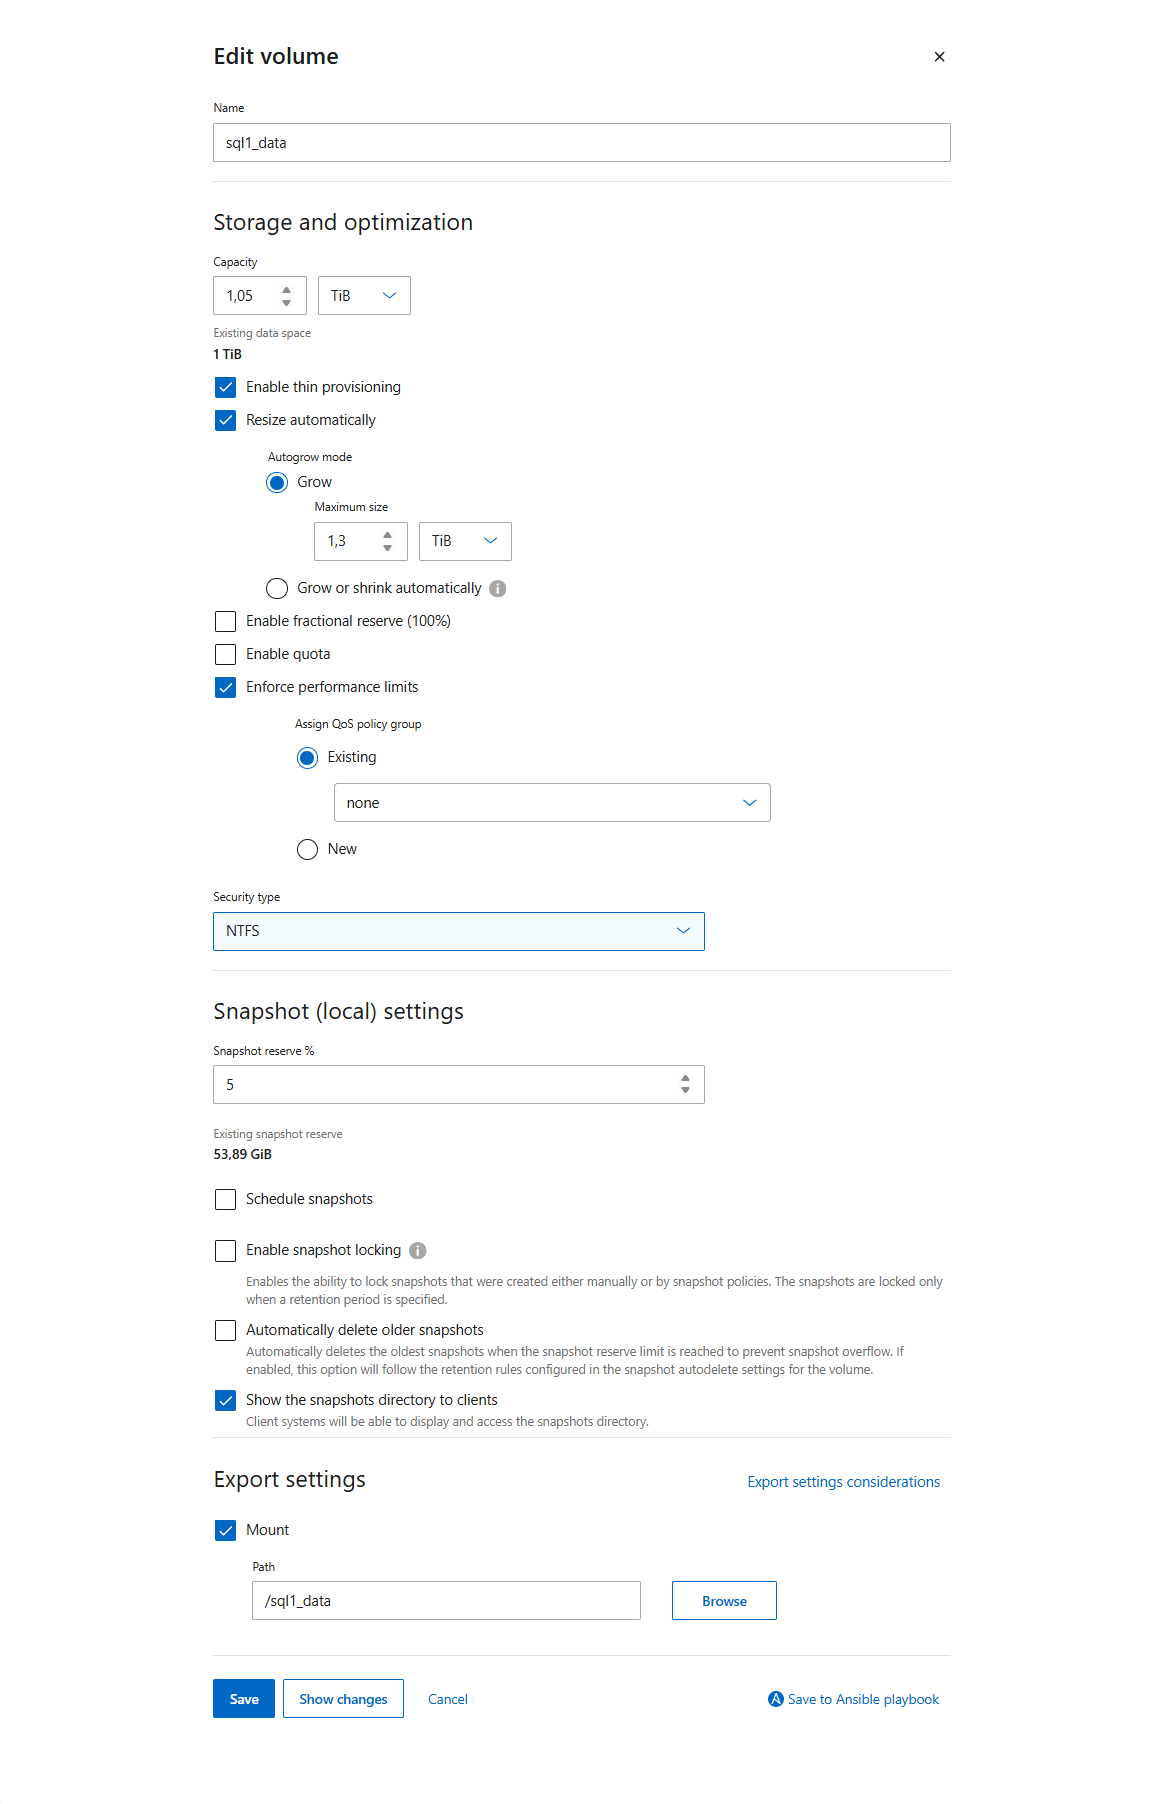
Configure the volume as follows (shown for
sql1_data):-
Enable thin provisioning: selected
-
Resize automatically: selected, Autogrow mode: Grow, Maximum size: for example
1.3 TiB(about 125–130 % of the volume size) -
Enable fractional reserve (100%): cleared
-
Security type:
NTFS -
Snapshot reserve %:
5(0forsql1_tempdb) -
Schedule snapshots: cleared. Snapshots that are not application-consistent are of no use for SQL Server; use NetApp SnapCenter instead.
-
Show the snapshots directory to clients: optional (the lab left it selected; clearing it hides
~snapshotfrom the share)Click Save, and repeat for
sql1_log,sql1_tempdbandsql1_backups.Show example
-
cluster::> volume modify -vserver a50-sql -volume sql1_data -space-guarantee none -fractional-reserve 0 -percent-snapshot-space 5 -snapshot-policy none -autosize-mode grow -max-autosize 1.3TB|
|
Keep storage efficiency (deduplication, compression, compaction) enabled on AFF. It is inline and has no measurable impact on SQL Server performance. |
Step 5: Enable continuous availability on the SMB shares
Continuous availability is the most important setting for SQL Server on SMB. Without it, SQL Server loses its open file handles during an ONTAP takeover or LIF migration, and the databases go suspect.
-
Enable continuous availability on the SMB shares with System Manager or the CLI:
System Manager-
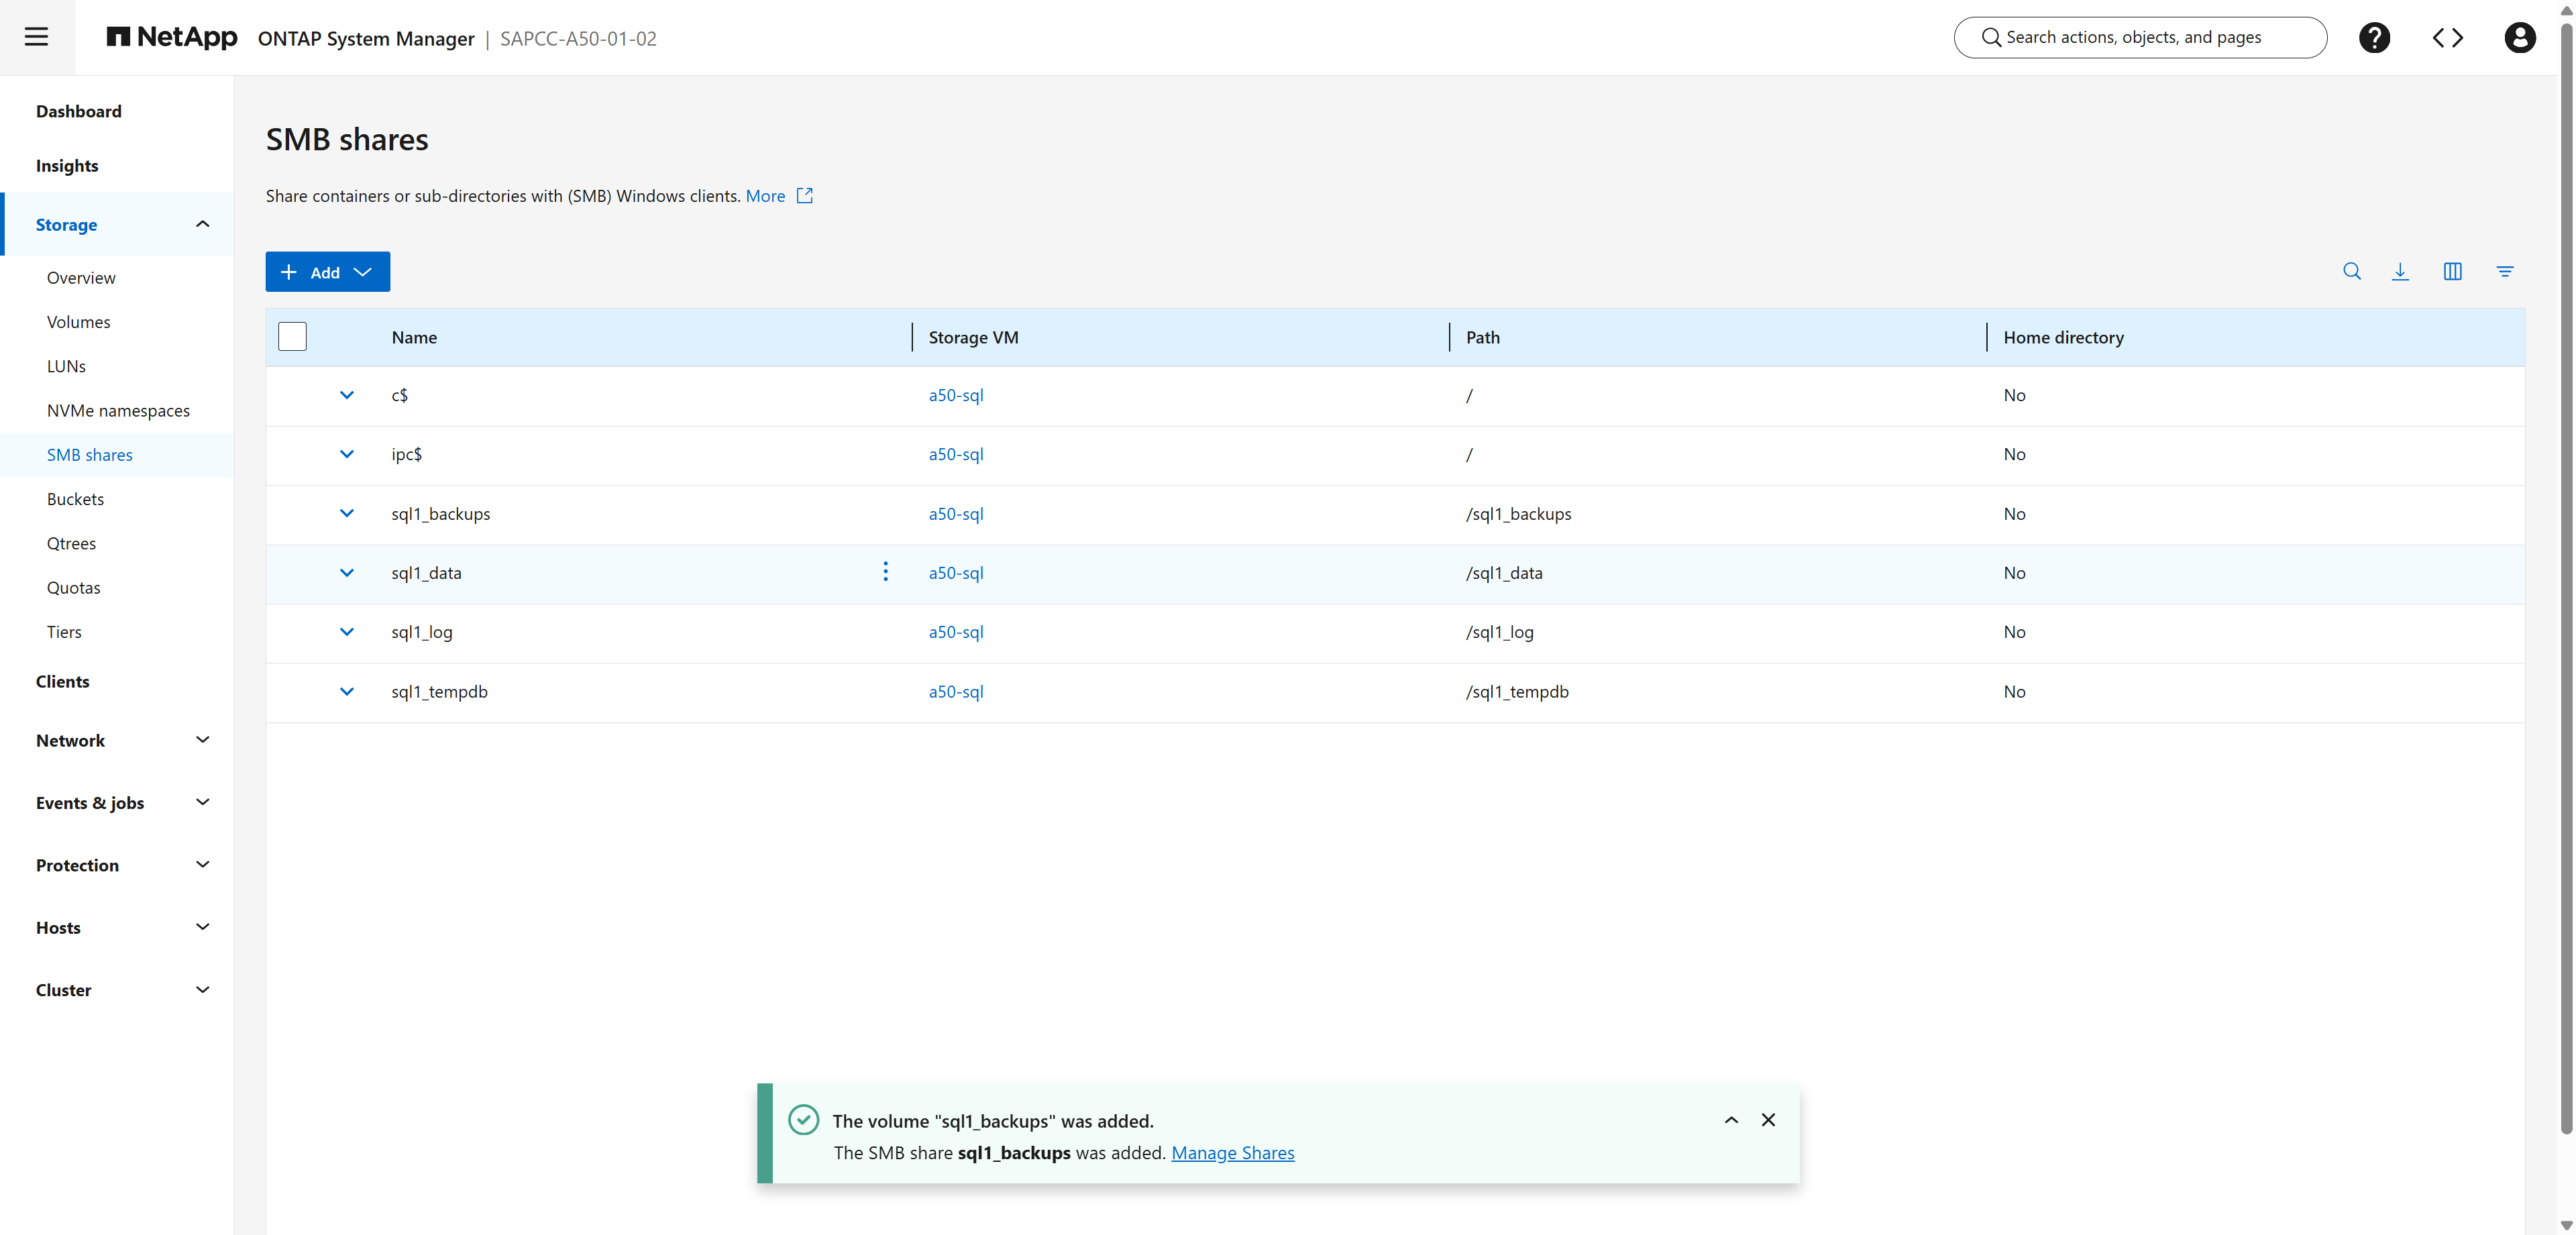
Go to . The list shows the four new shares and the default administrative shares
c$andipc$.Show example
-
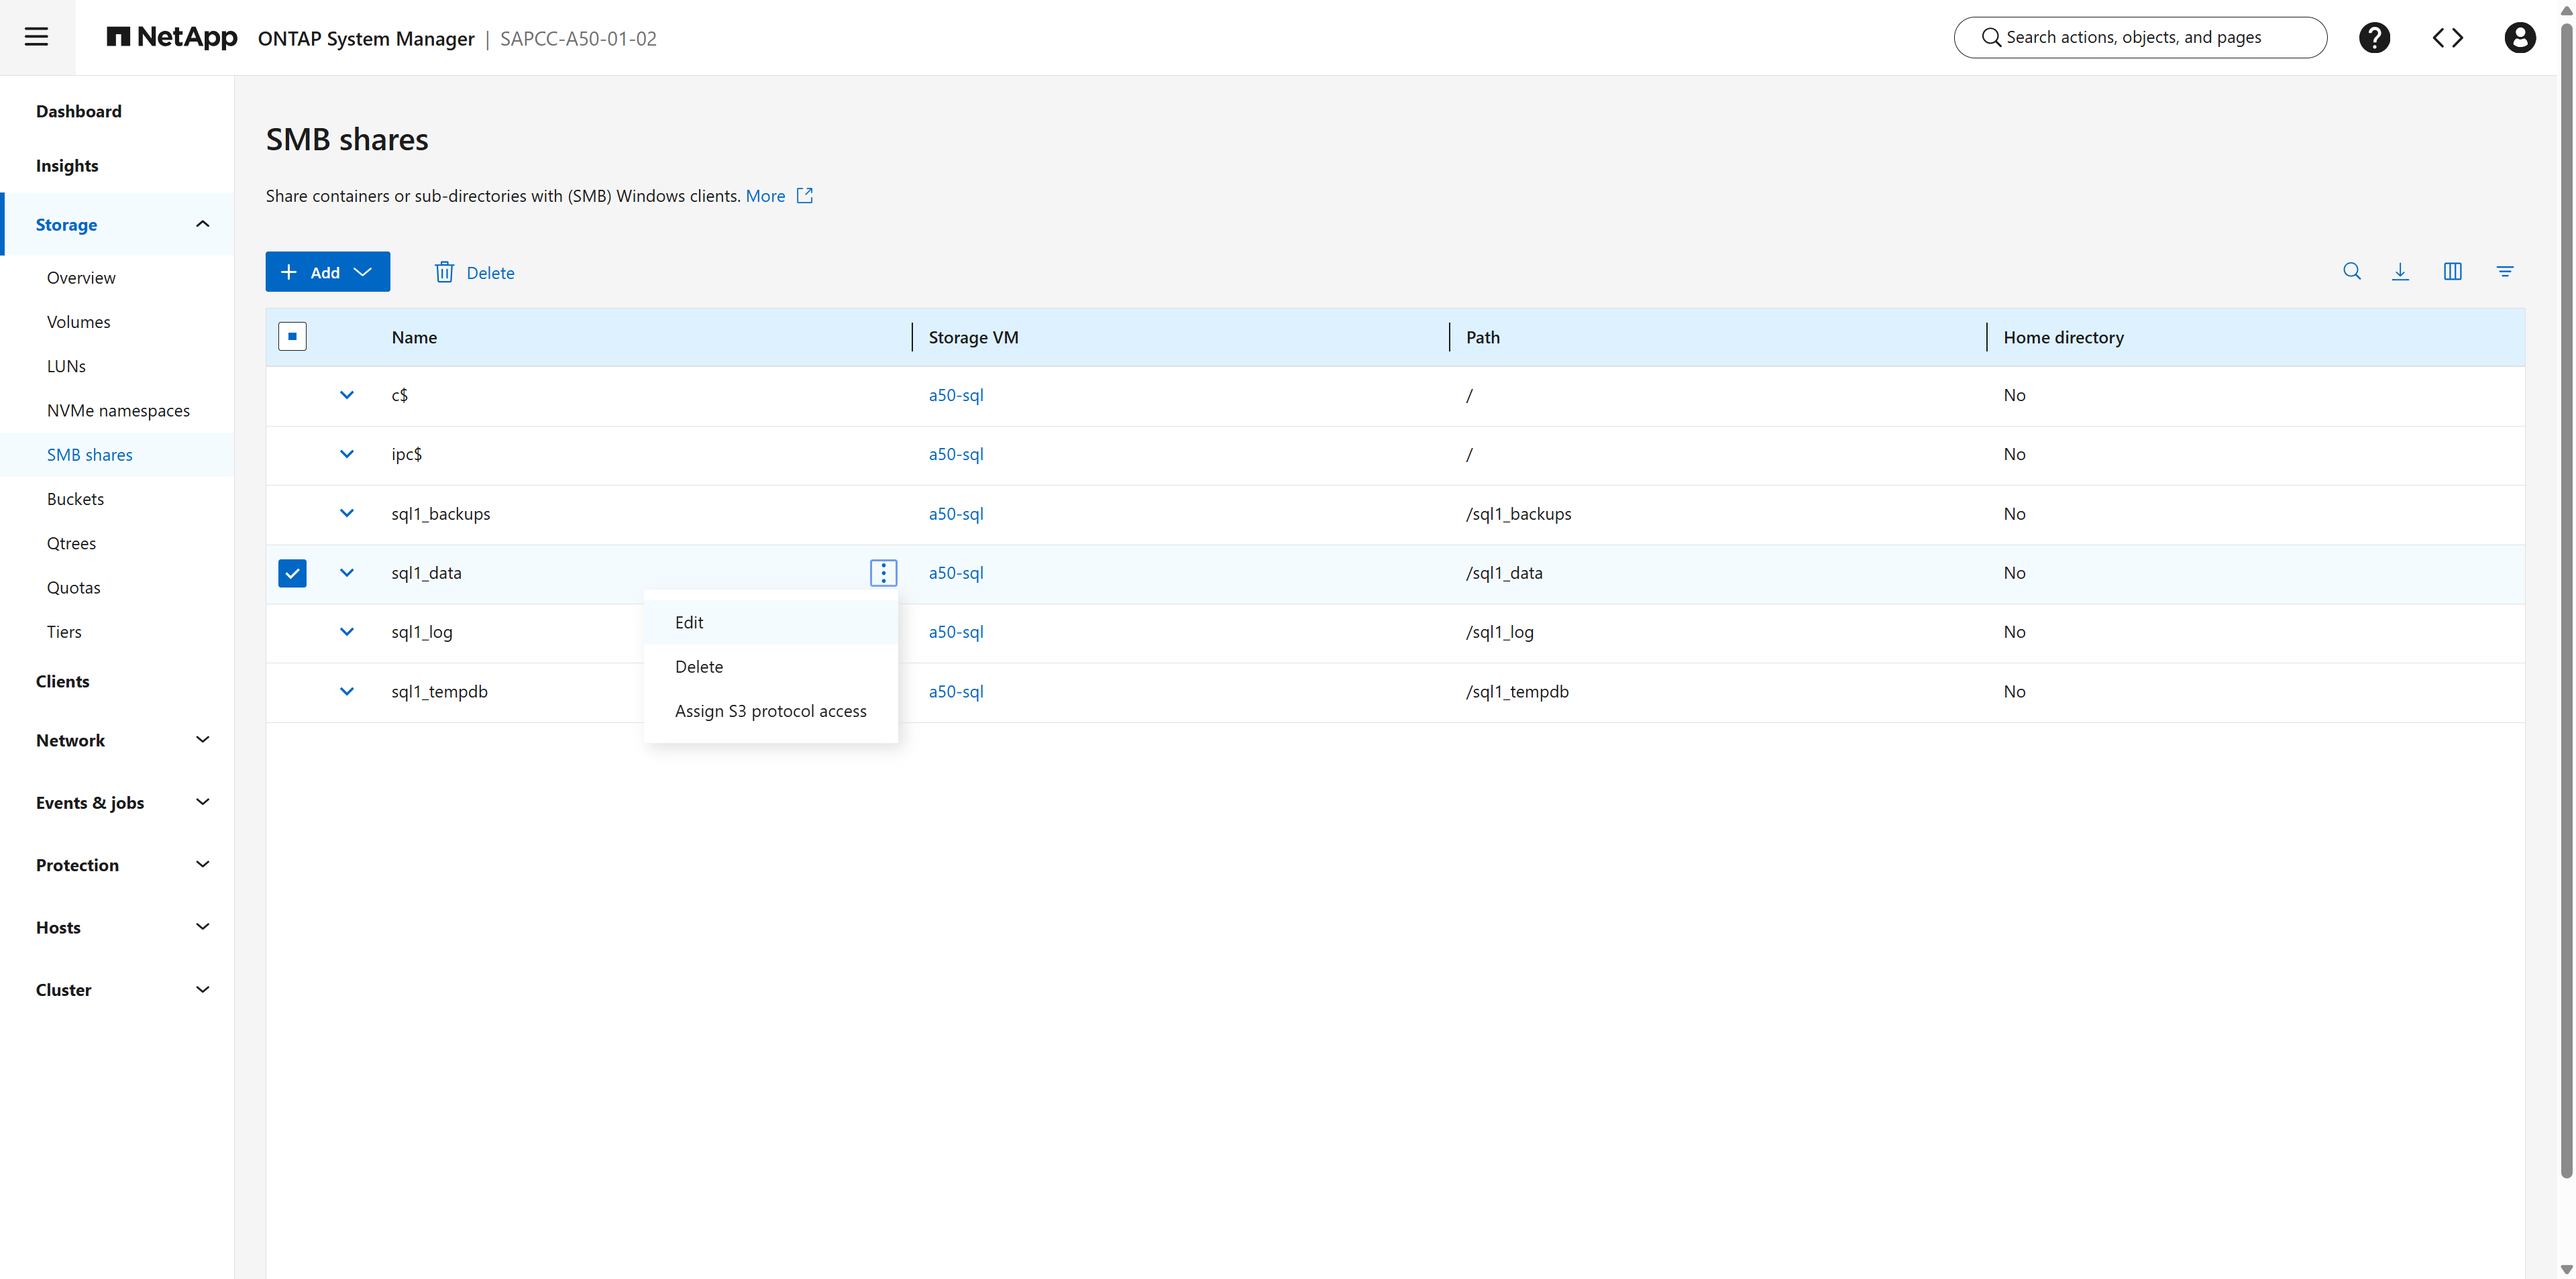
Click the more icon (⋮) next to the share
sql1_dataand select Edit.Show example
-
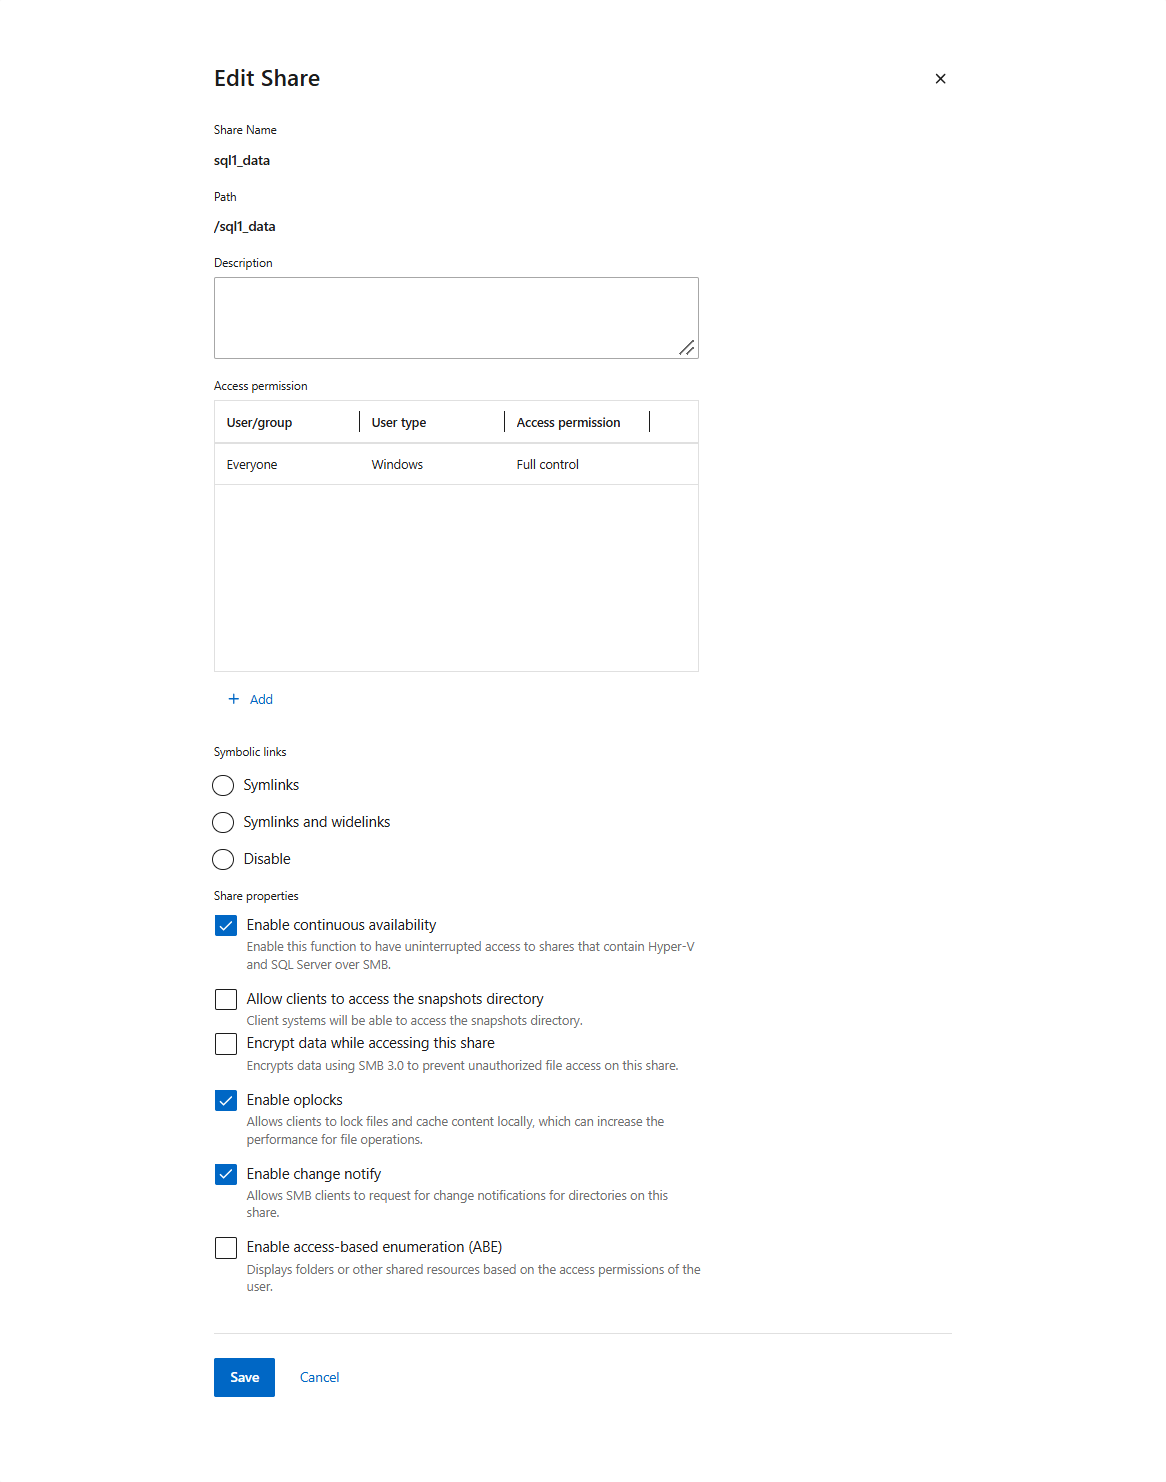
Under Share properties, set the following:
-
Enable continuous availability: selected
-
Allow clients to access the snapshots directory: cleared
-
Encrypt data while accessing this share: cleared (optional, depending on your security requirements)
-
Enable oplocks: selected
-
Enable change notify: selected
-
Enable access-based enumeration (ABE): cleared
Click Save.
Show example
-
-
Repeat these steps for
sql1_log,sql1_tempdbandsql1_backups.
ONTAP CLIcluster::> vserver cifs share properties add -vserver a50-sql -share-name sql1_data -share-properties continuously-available cluster::> vserver cifs share properties add -vserver a50-sql -share-name sql1_log -share-properties continuously-available cluster::> vserver cifs share properties add -vserver a50-sql -share-name sql1_tempdb -share-properties continuously-available cluster::> vserver cifs share properties add -vserver a50-sql -share-name sql1_backups -share-properties continuously-available cluster::> vserver cifs share show -vserver a50-sql -fields share-name,path,share-properties -
Step 6: Prepare Windows Server 2025
Perform the following steps on the SQL Server host sql-1 as a domain administrator.
-
Verify that the server is joined to the domain and that the CIFS server can be resolved (see Configure the SMB server options).
-
Make sure that the SQL Server service account exists in Active Directory, for example
SAPCC\sql1admin. Use the same account for the Database Engine and for SQL Server Agent, or use a separate account for each. Whichever you choose, grant each account access to all four shares. -
Test access to the shares in the security context of the service account:
PS C:\> runas /user:SAPCC\sql1admin "cmd /c dir \\a50-sql\sql1_data && echo test > \\a50-sql\sql1_data\write-test.txt && del \\a50-sql\sql1_data\write-test.txt" -
Open the SQL Server port in the Windows firewall:
PS C:\> New-NetFirewallRule -DisplayName "SQL Server (TCP 1433)" -Direction Inbound -Protocol TCP -LocalPort 1433 -Action Allow -
Verify the SMB connection to the SVM. The dialect must be 3.x and
ContinuouslyAvailablemust beTrue:PS C:\> dir \\a50-sql\sql1_data | Out-Null PS C:\> Get-SmbConnection -ServerName a50-sql | Format-Table ServerName,ShareName,Dialect,ContinuouslyAvailable,Encrypted,Signed PS C:\> Get-SmbMultichannelConnection -ServerName a50-sql
|
|
By default, Windows Server 2025 requires SMB signing for all outbound SMB connections. ONTAP supports SMB signing and negotiates it automatically. Signing adds CPU overhead on both sides, so include it in your performance tests. Don't disable signing without a security review. |
Step 7: Install SQL Server 2025
Install SQL Server 2025 on the Windows Server host with the Setup wizard. Install the binaries and system databases on the local disk, and point the user database, transaction log, TempDB, and backup locations to the SMB shares you created.
-
Start the standalone installation from the SQL Server Installation Center.
-
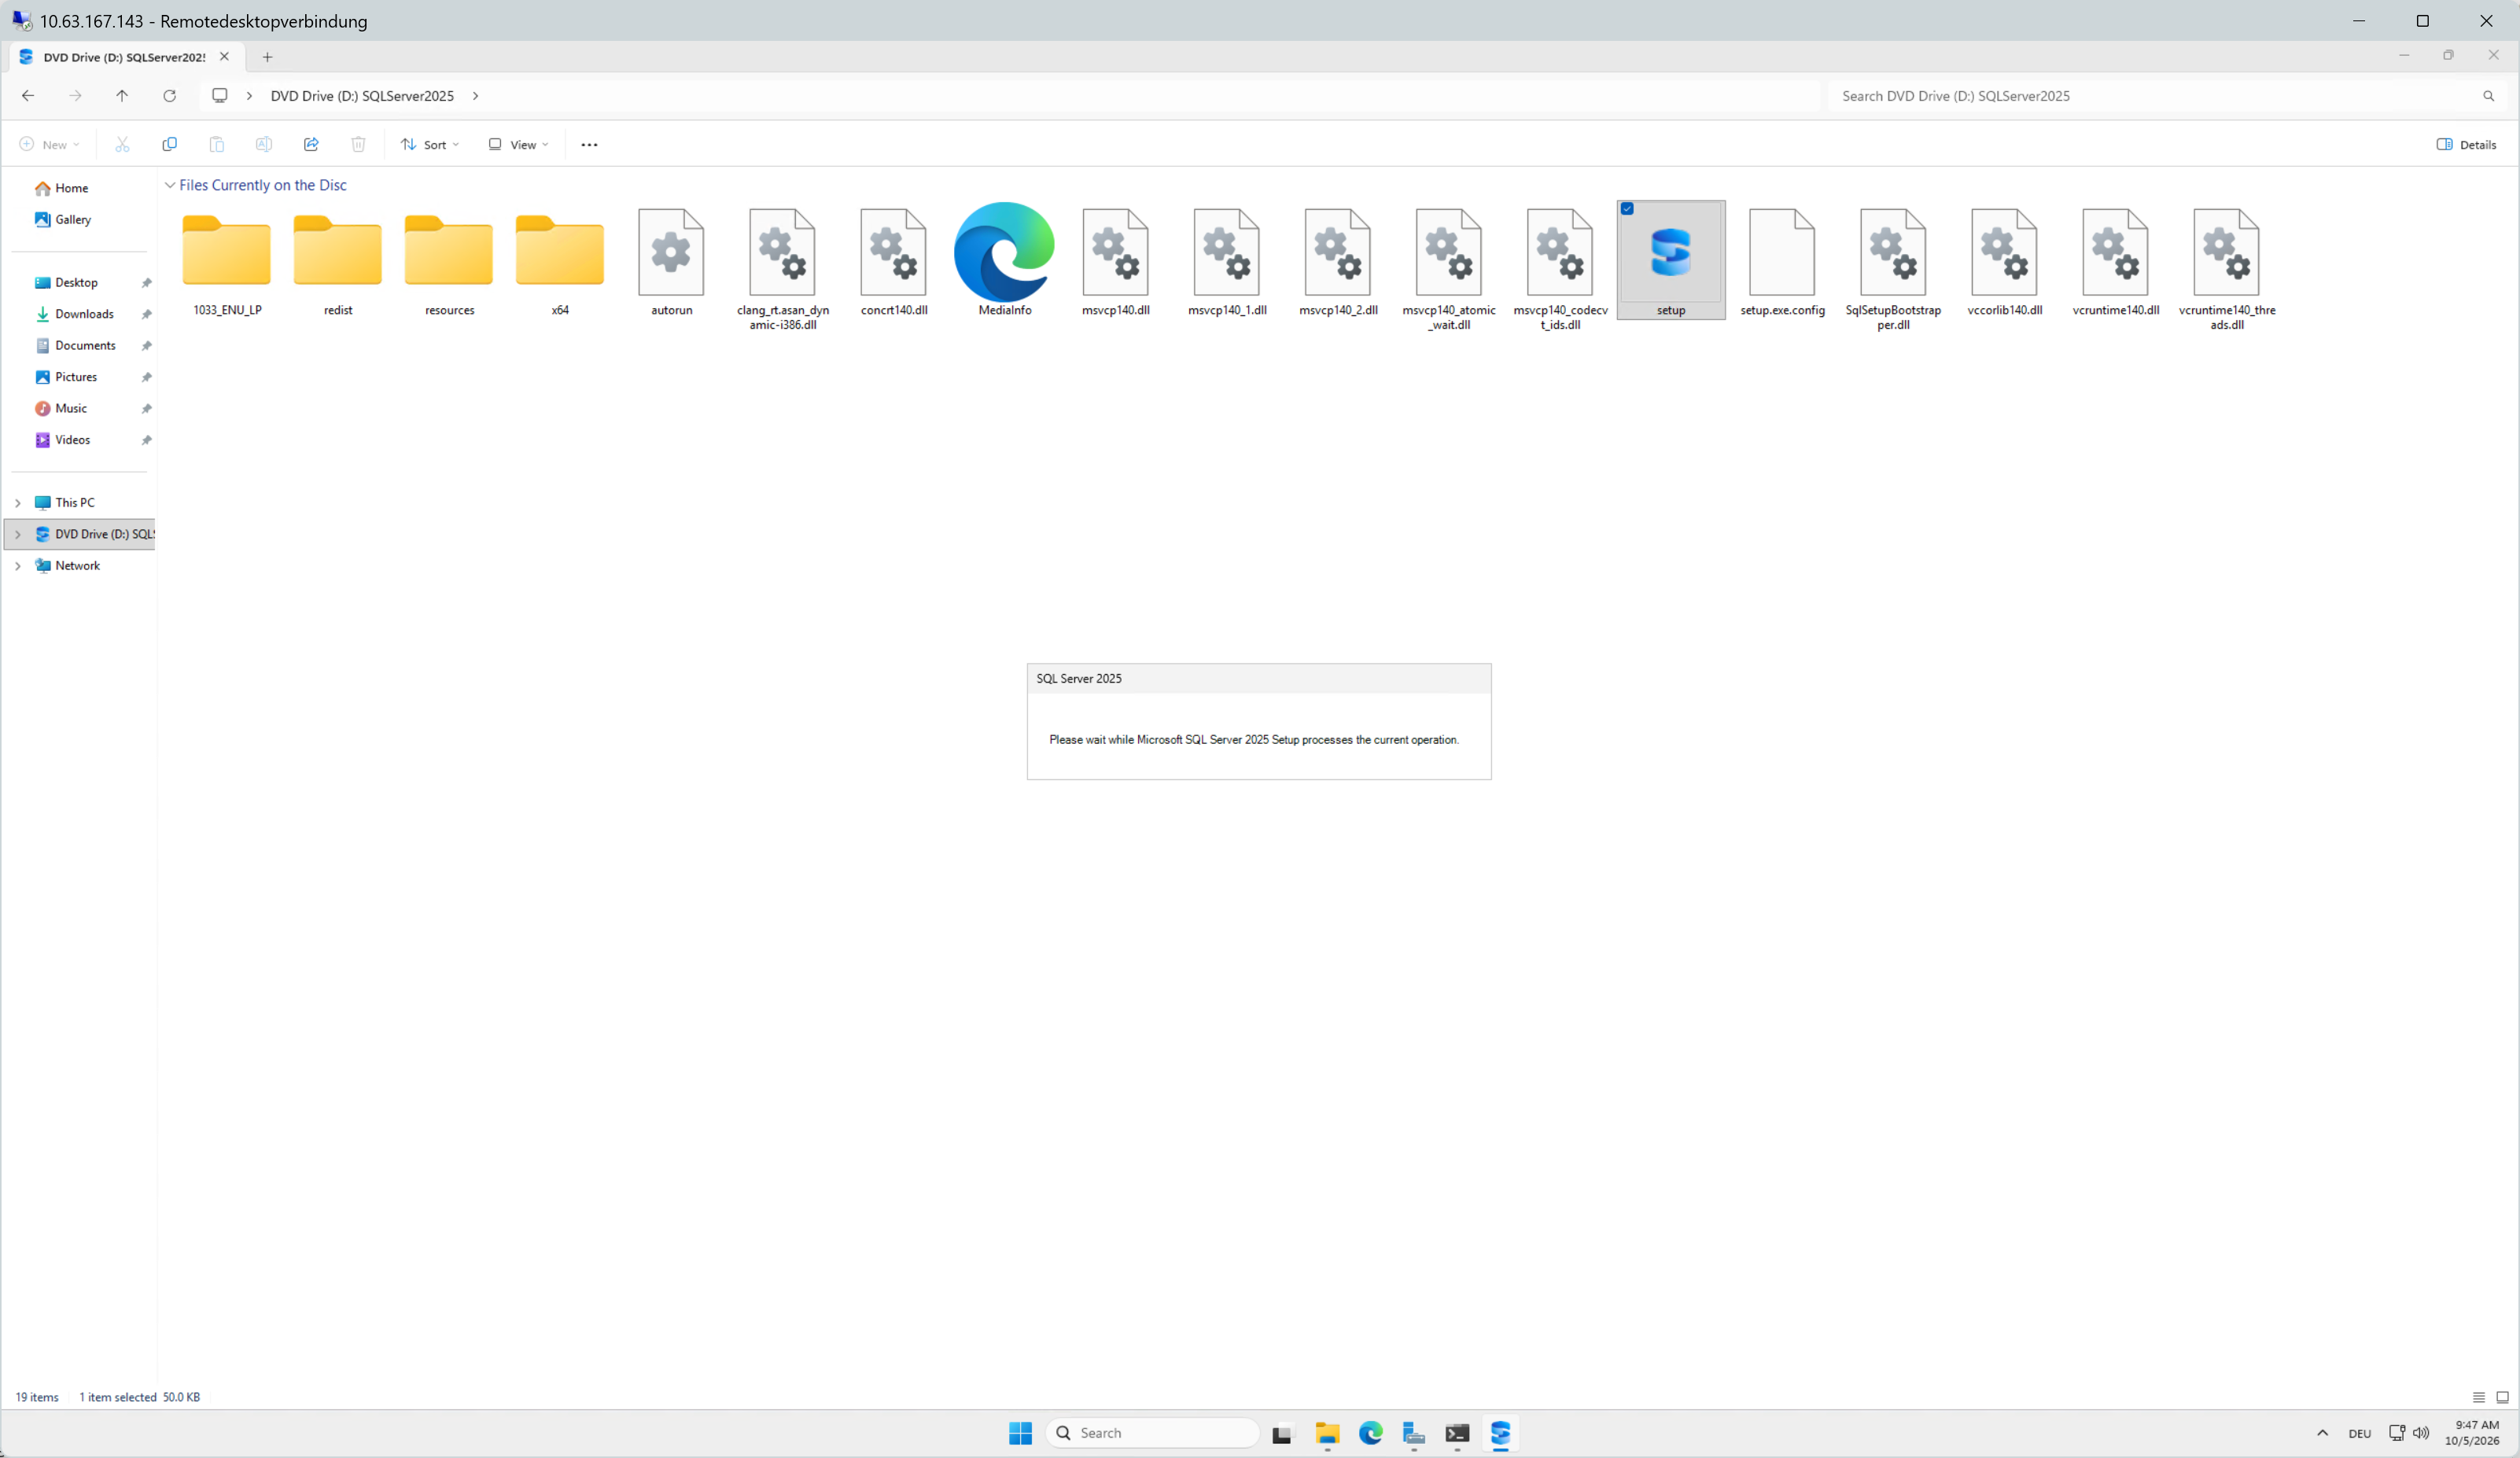
Mount the SQL Server 2025 ISO image. In File Explorer, open the DVD drive (
D:in the lab) and double-click setup.Show example
-
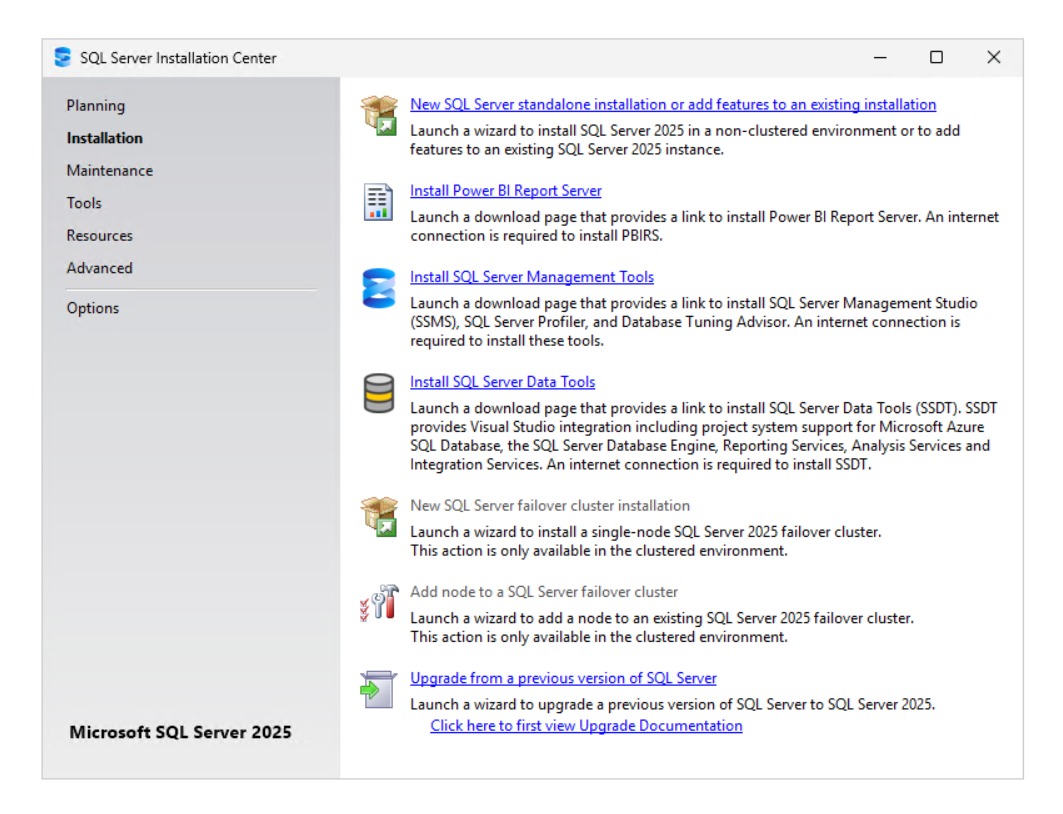
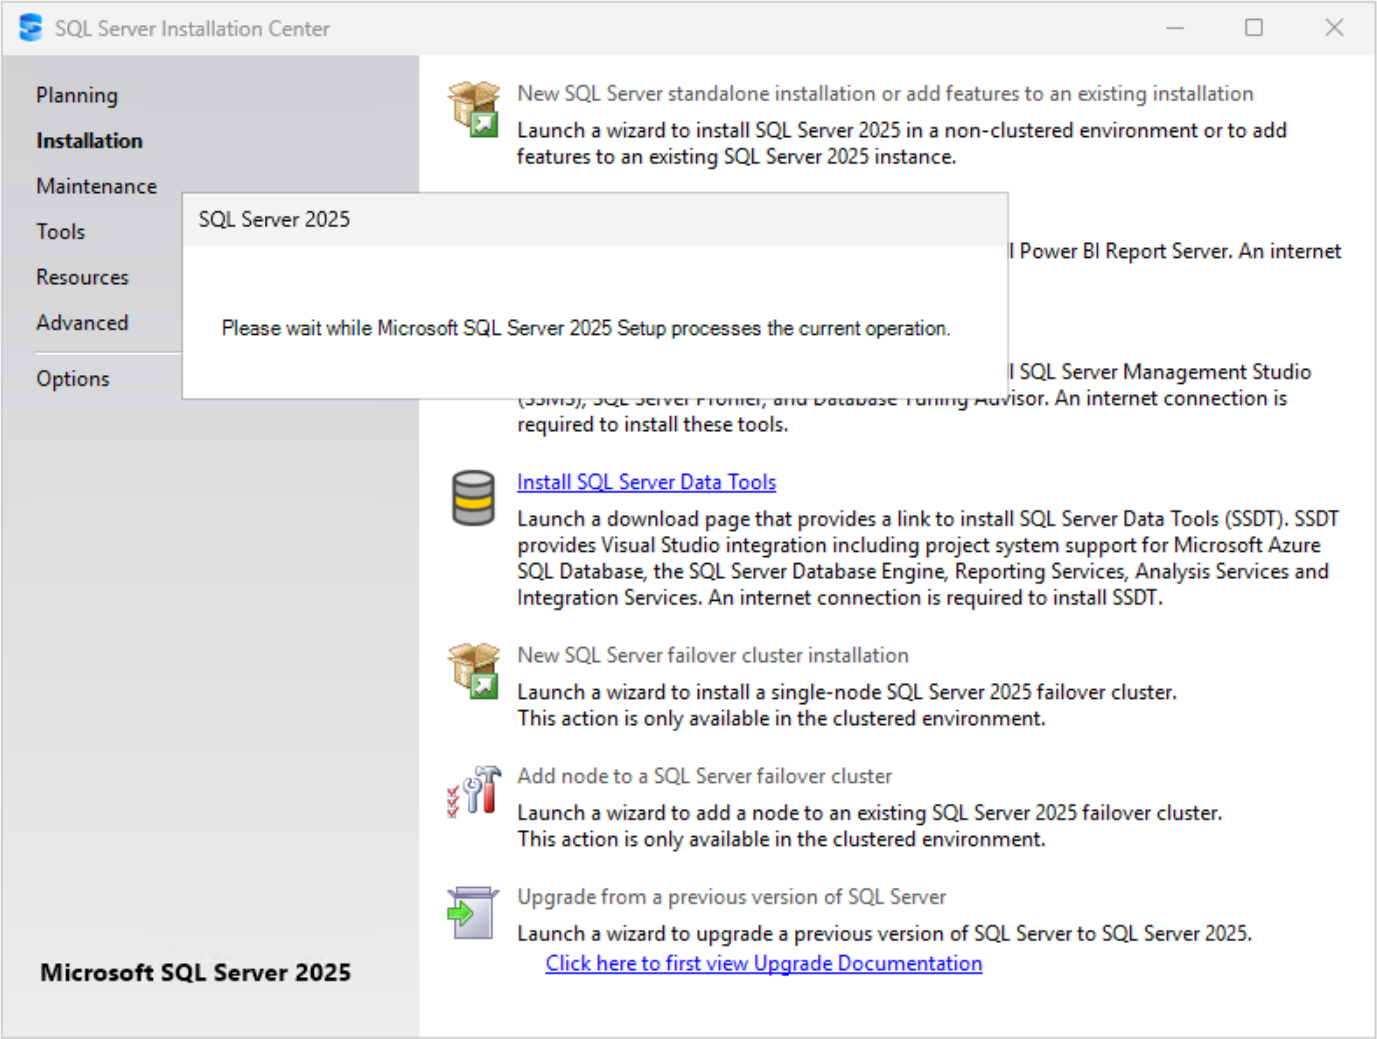
The SQL Server Installation Center opens. Select Installation in the left pane and click New SQL Server standalone installation or add features to an existing installation.
Show example
-
-
Select the SQL Server edition, accept the license terms, and let Setup check for product updates.
-
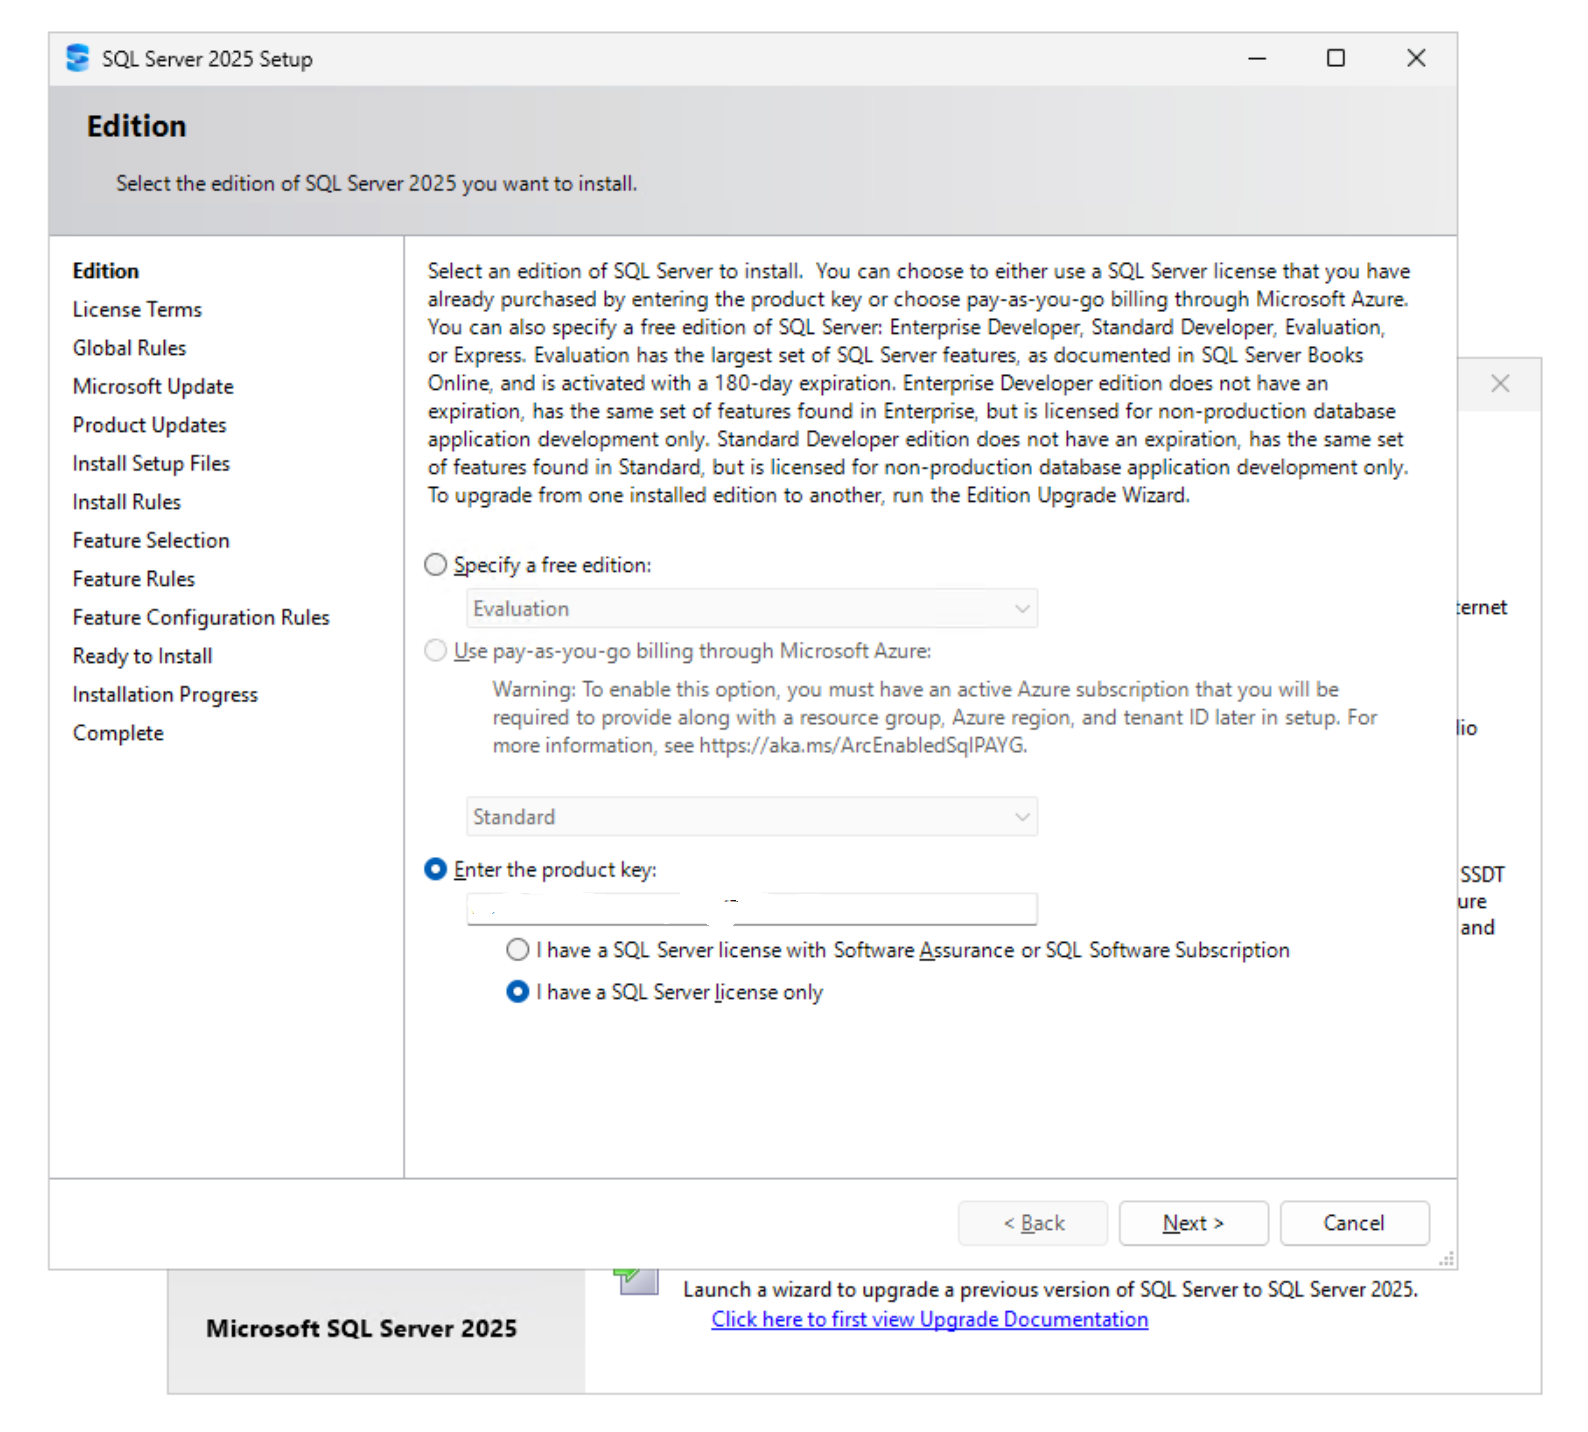
On the Edition page, select Enter the product key and enter your product key, or select a free edition (Evaluation, Enterprise Developer, Standard Developer or Express). Select the license type that applies to you (I have a SQL Server license only in the lab) and click Next.
Show example
-
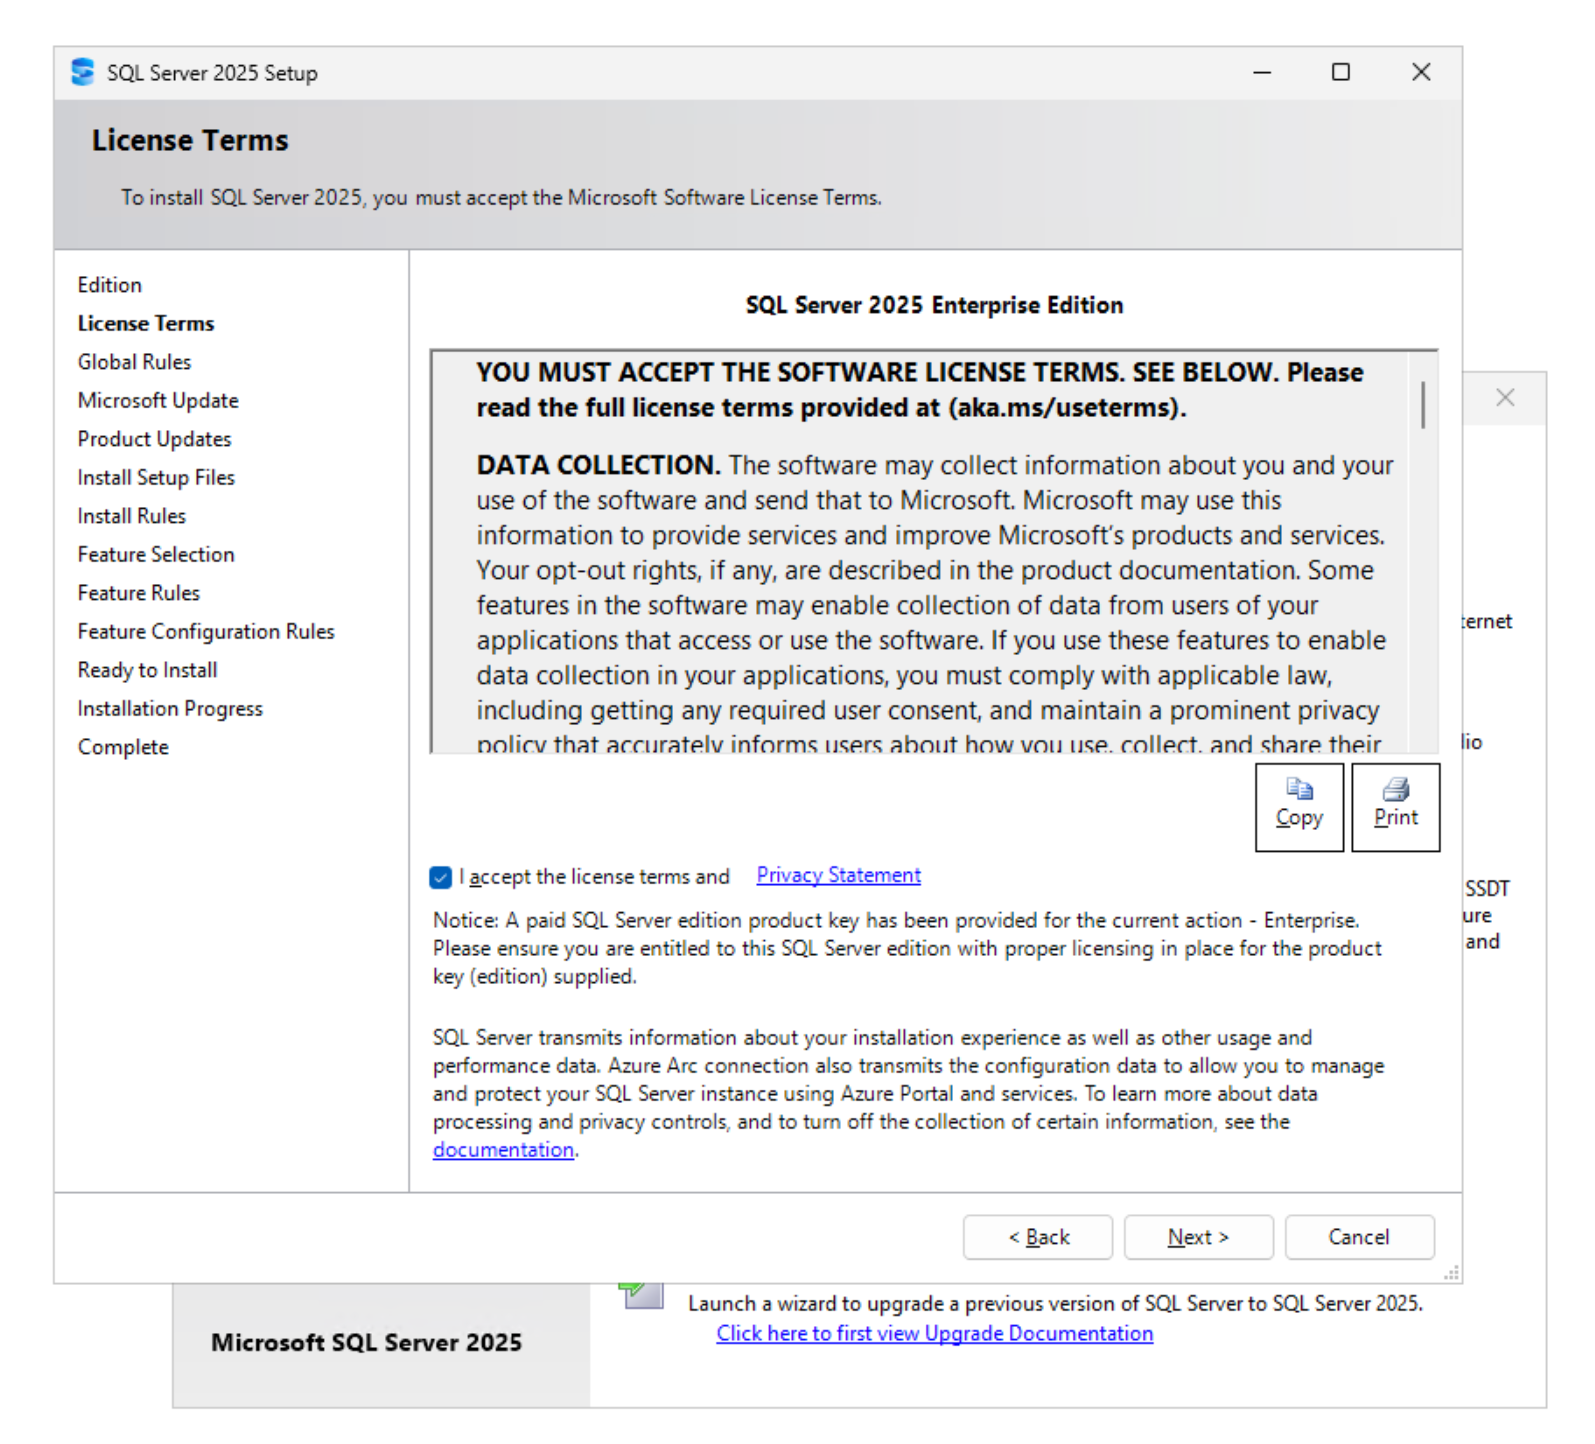
On the License Terms page, read the terms, select I accept the license terms and Privacy Statement, and click Next.
Show example
-
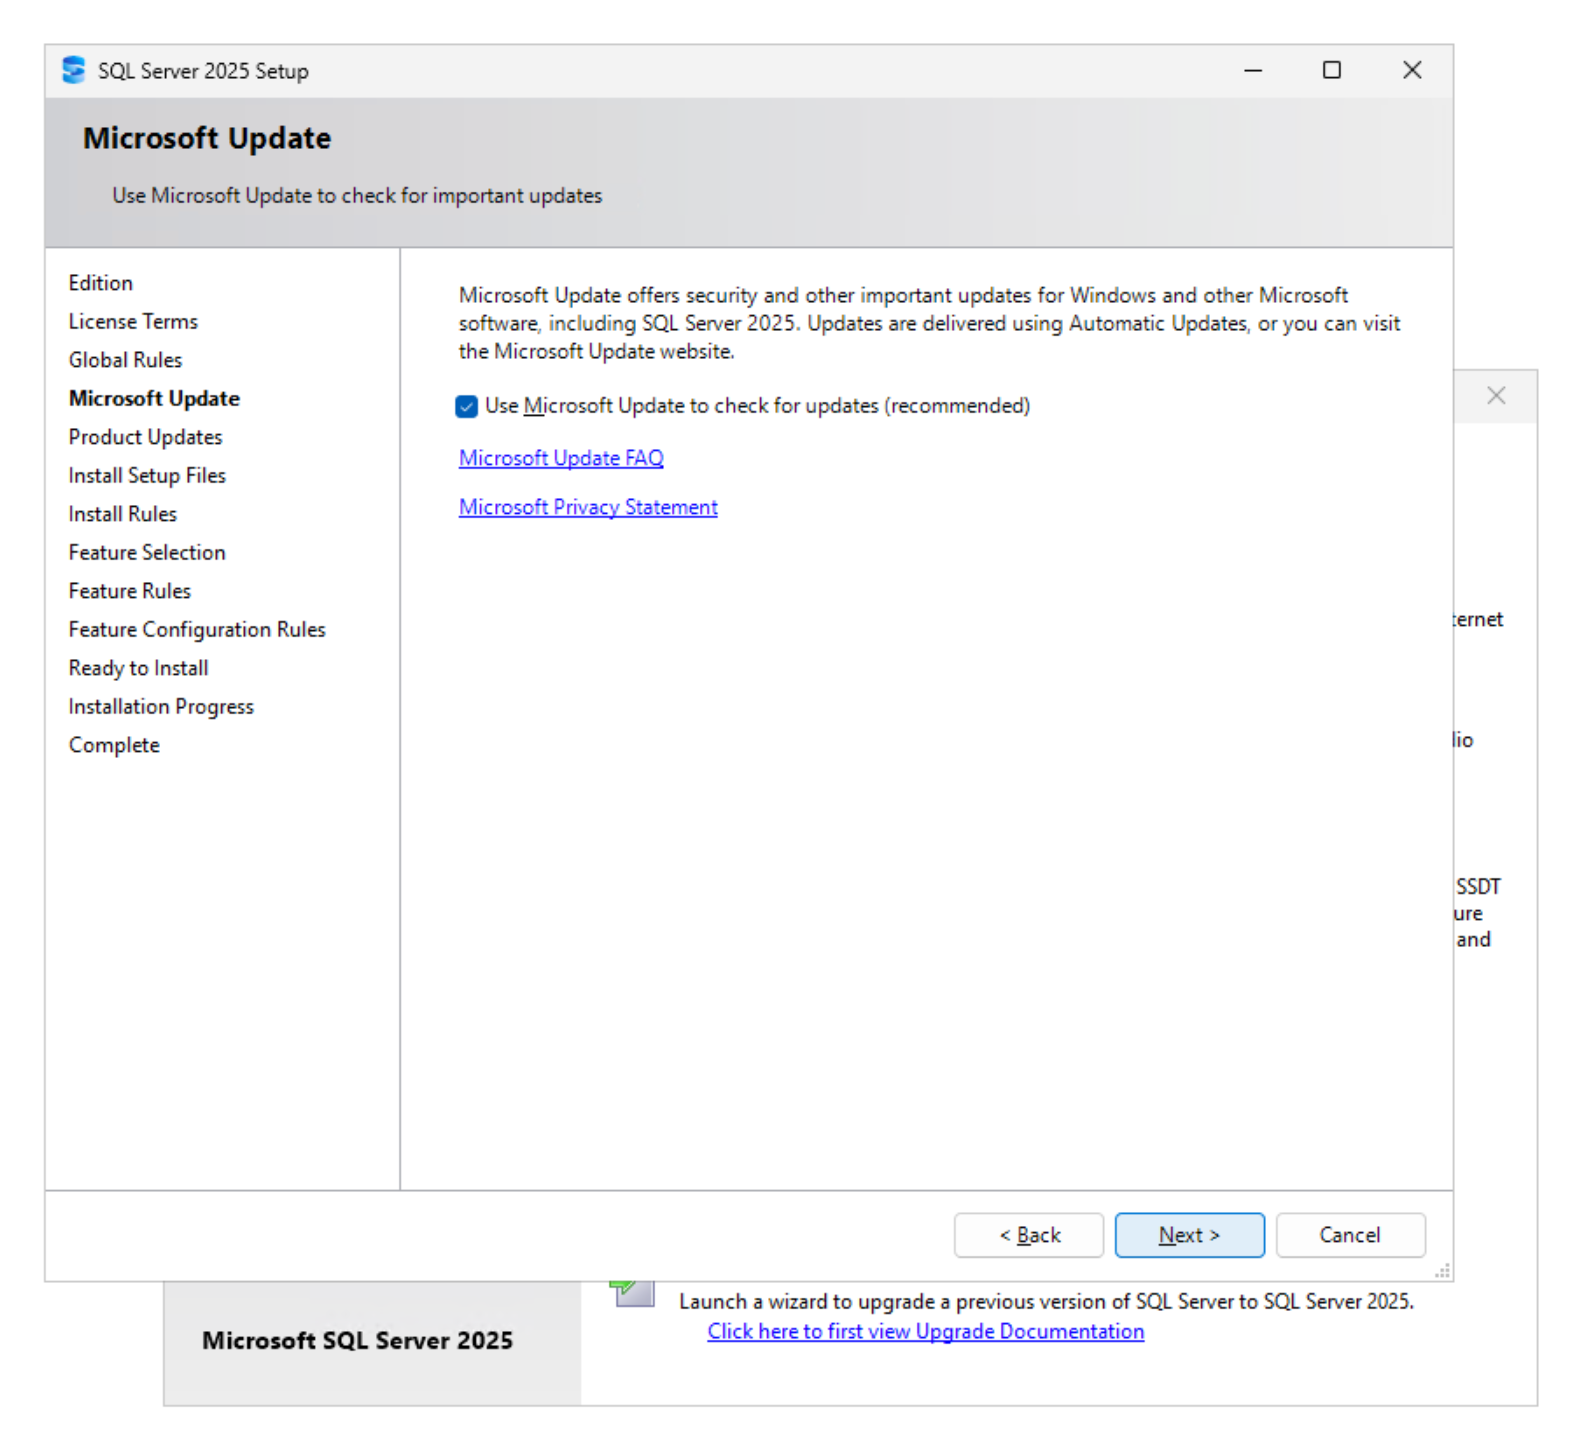
On the Microsoft Update page, select Use Microsoft Update to check for updates (recommended) and click Next. Setup then runs the Global Rules, Product Updates, Install Setup Files and Install Rules checks.
Show example
-
-
Select the SQL Server features and the instance to install. The binaries stay on the local disk; only the database files are placed on the SMB shares.
-
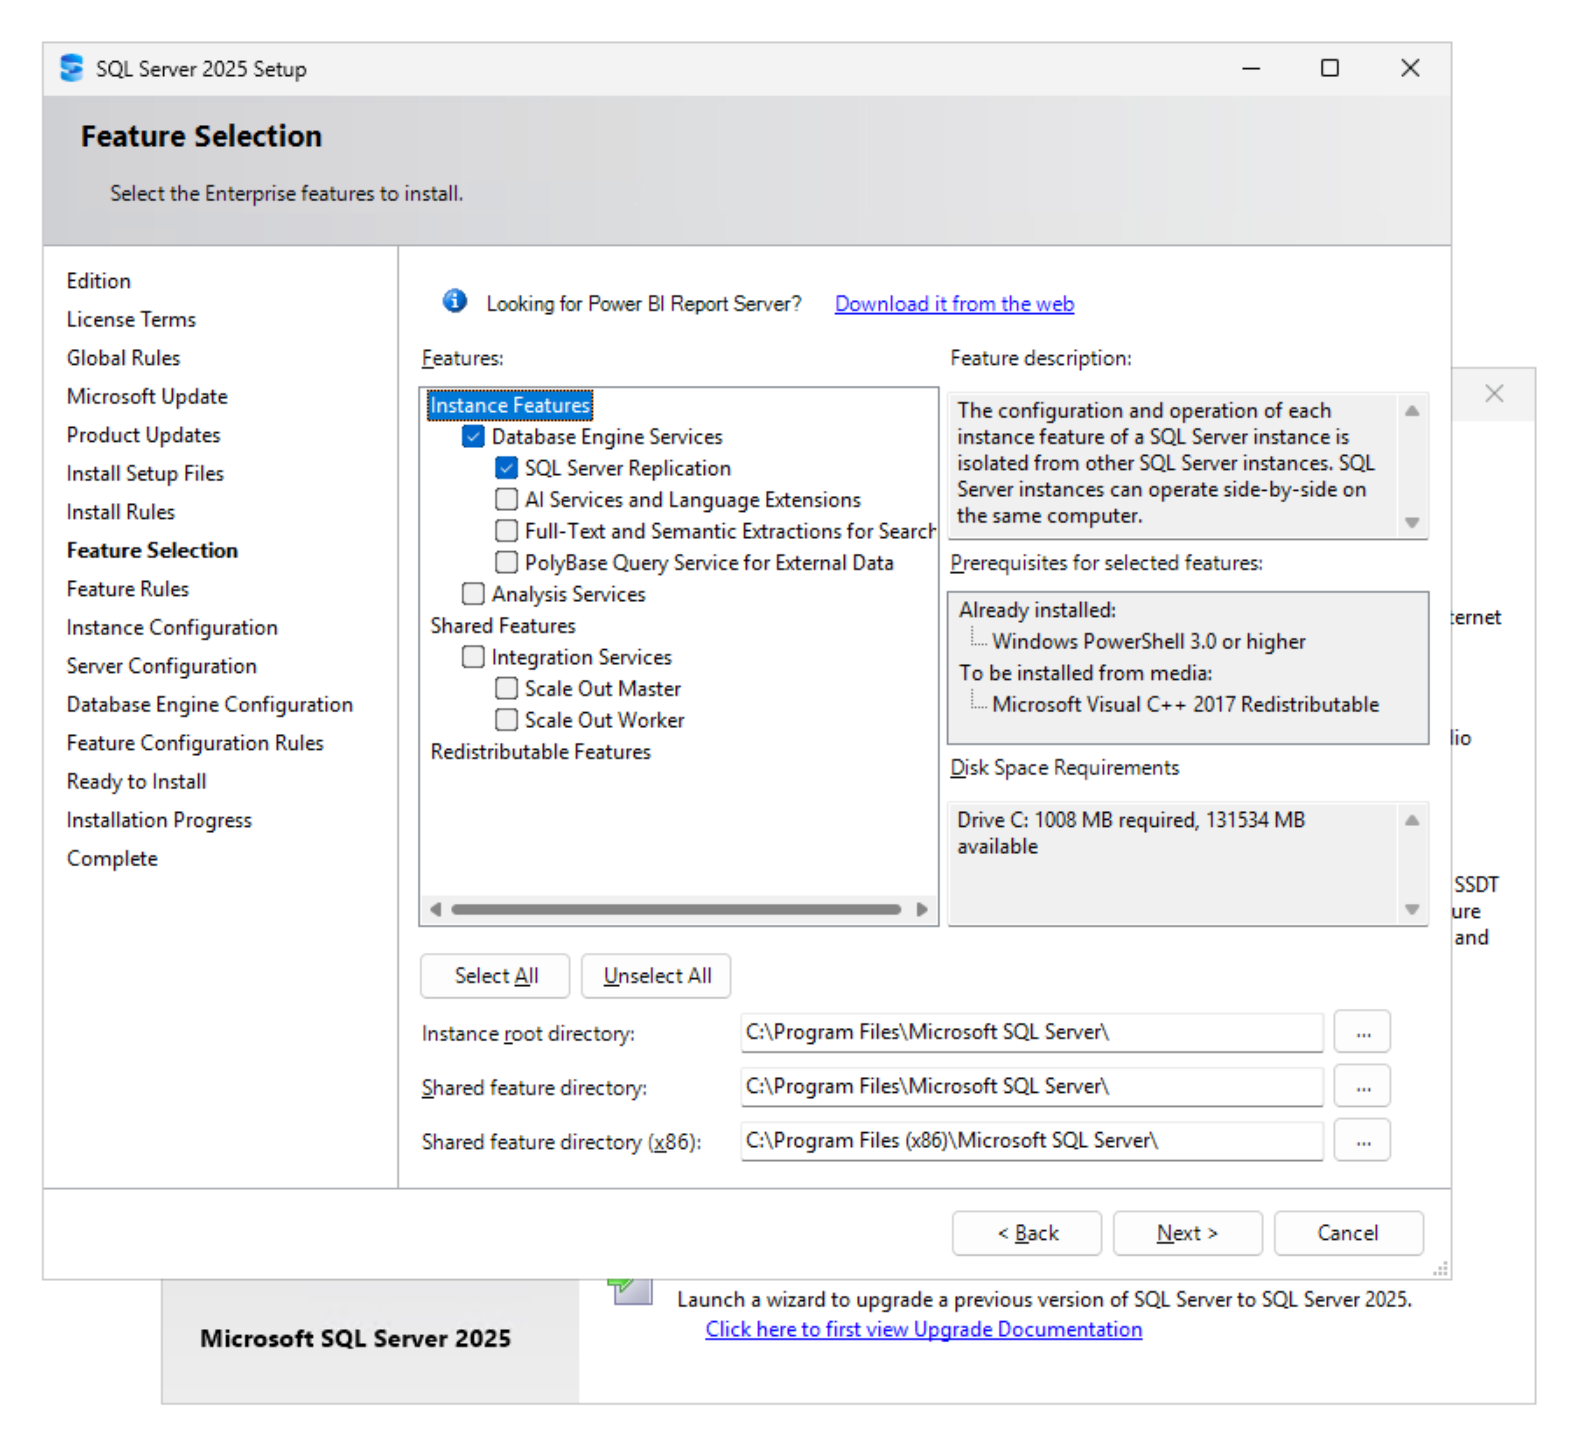
On the Feature Selection page, select Database Engine Services and any additional features you need (the lab also selected SQL Server Replication). Leave the Instance root directory and Shared feature directory on the local disk
C:. The binaries are installed locally; only the database files go to the SMB shares.Show example
-
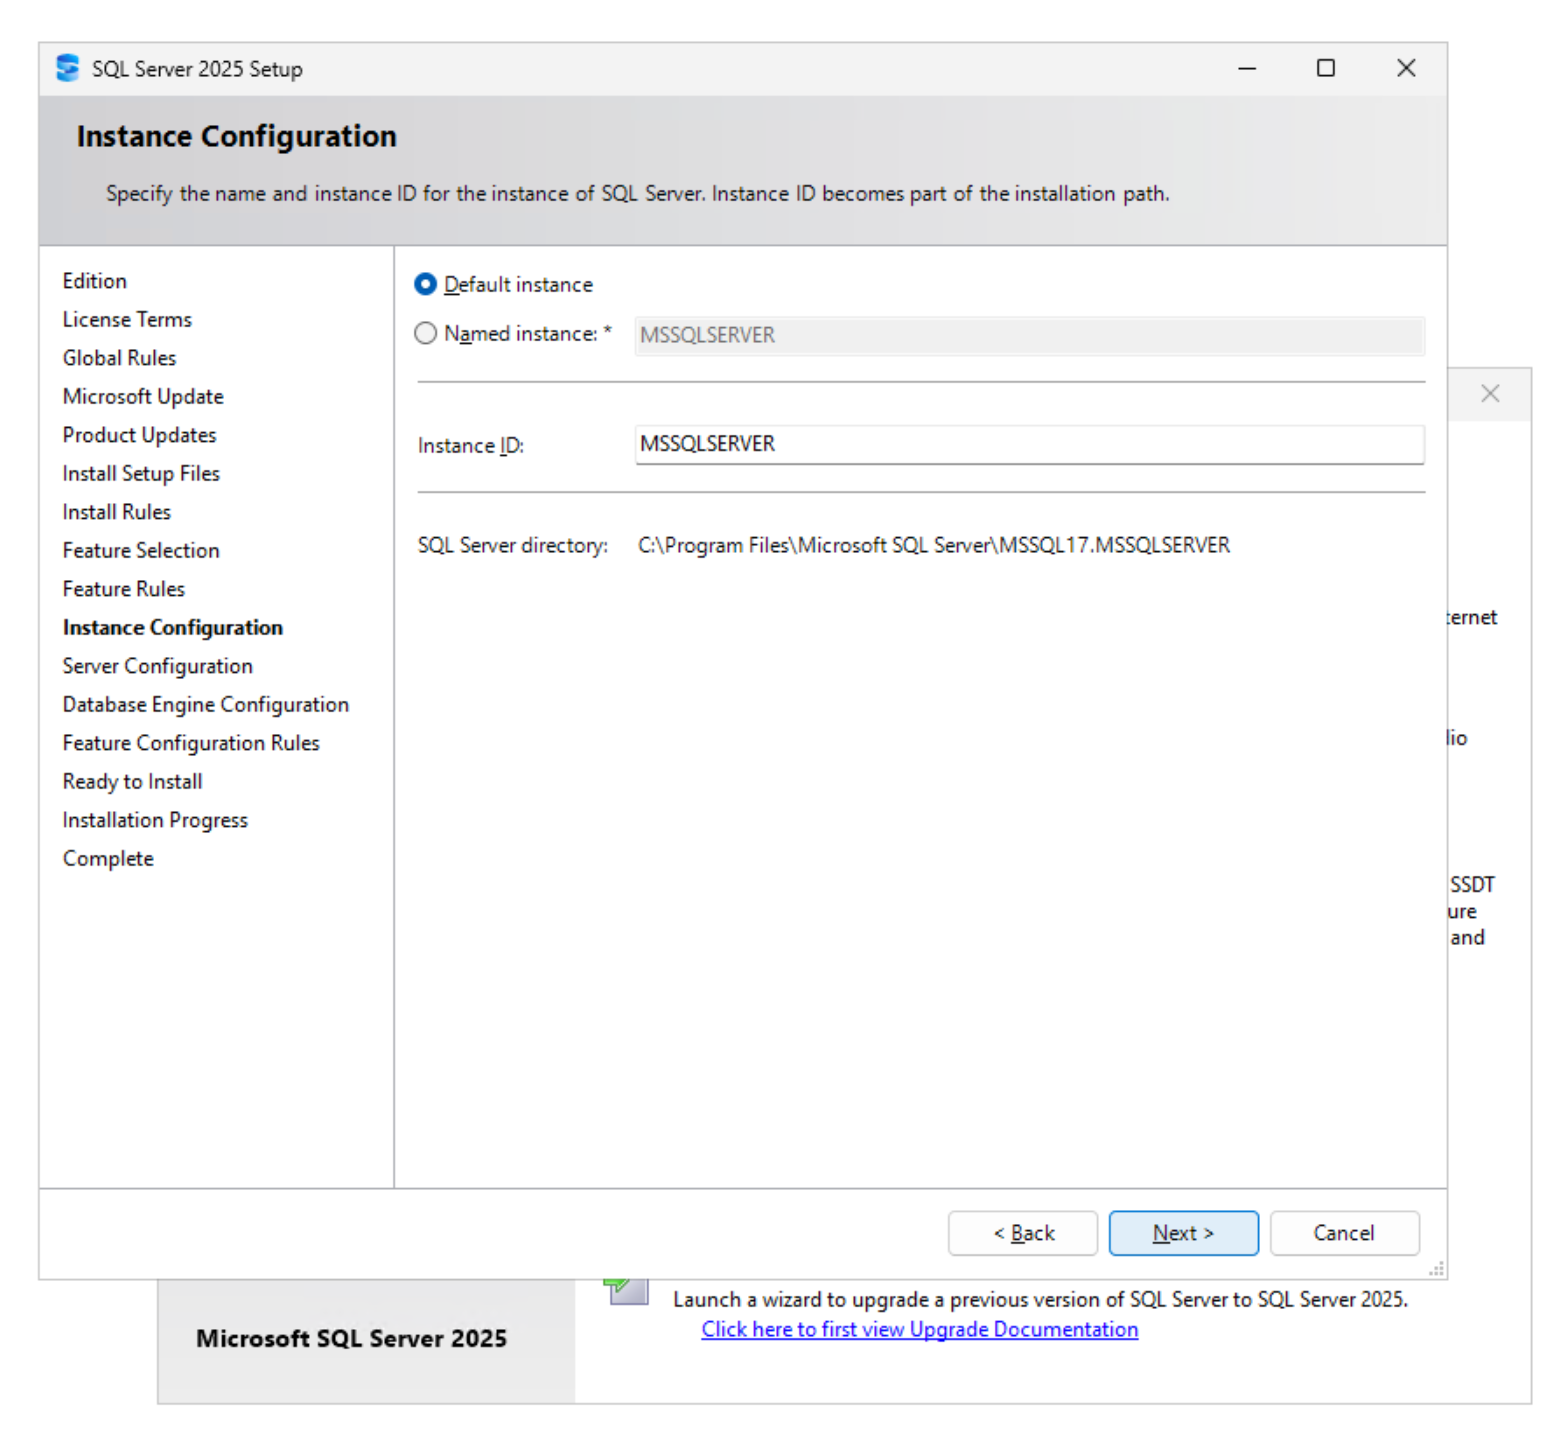
On the Instance Configuration page, select Default instance (
MSSQLSERVER), or enter a named instance, and click Next.Show example
-
-
Configure the SQL Server Database Engine and SQL Server Agent services to run under a domain account that has access to the SMB shares.
-
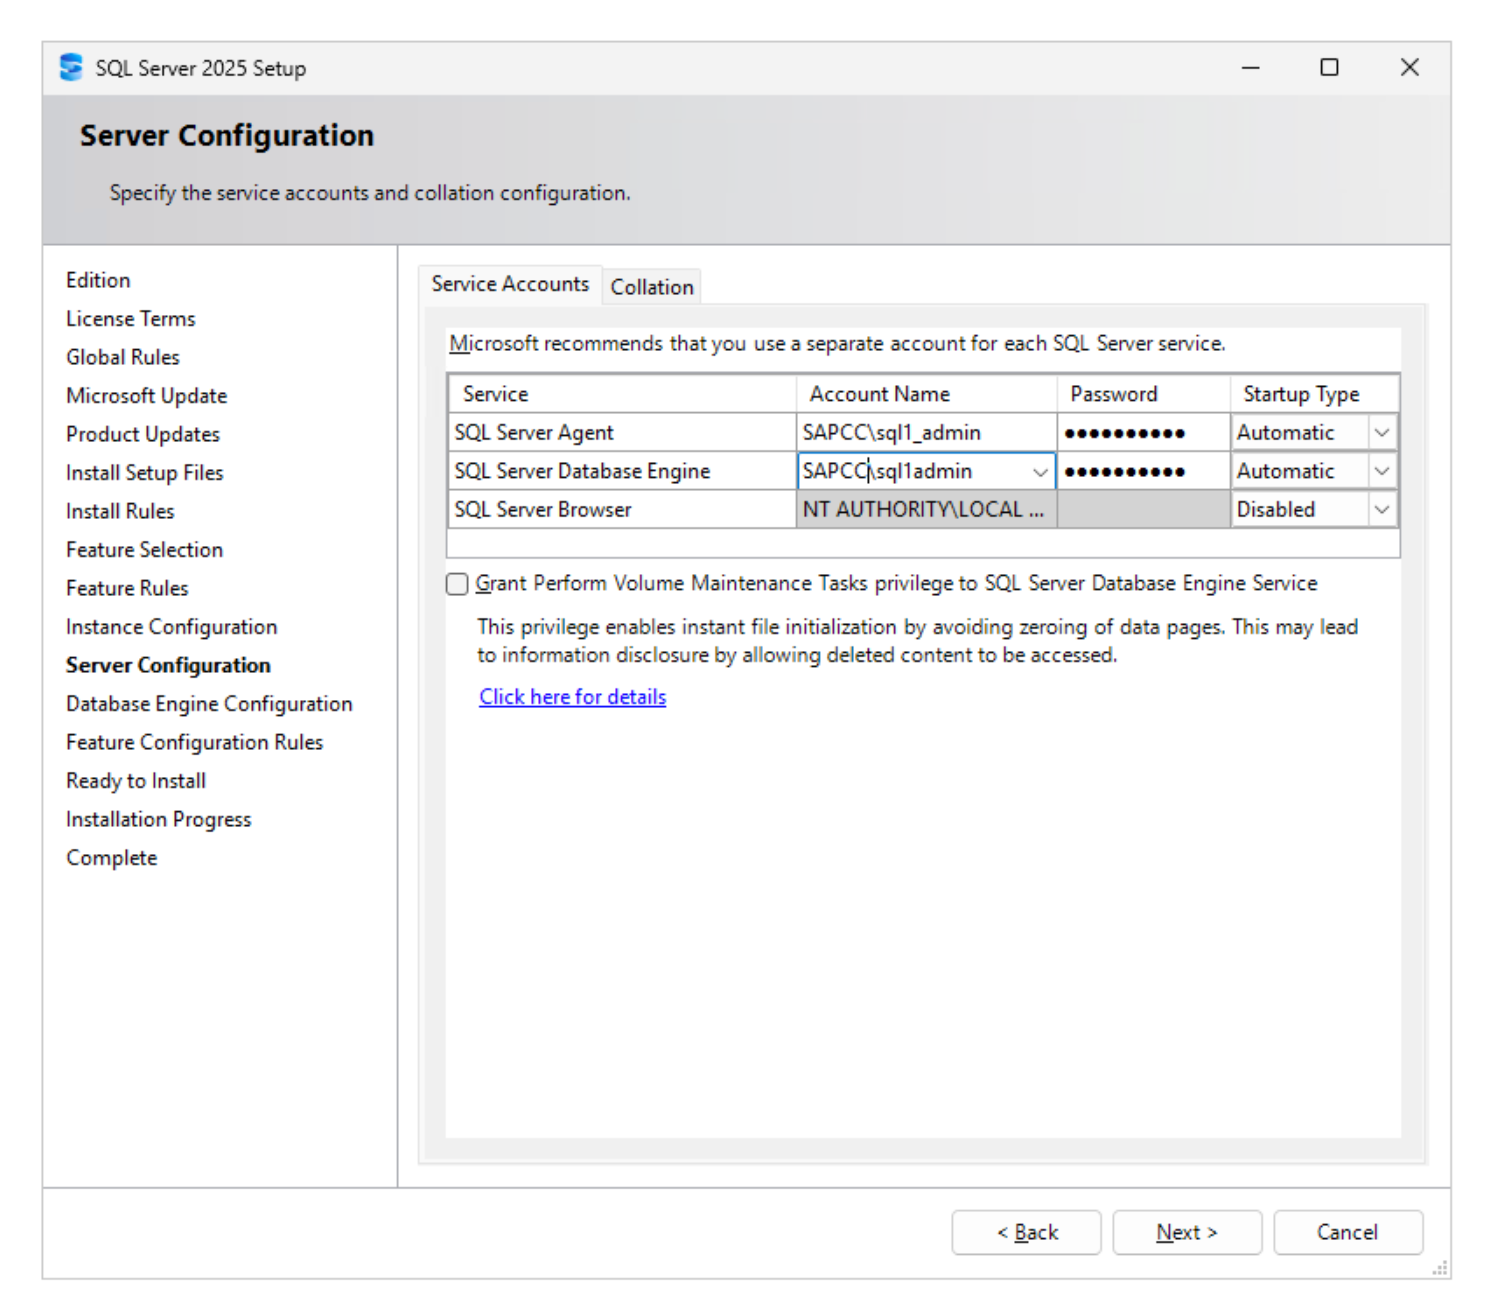
On the Server Configuration page, Service Accounts tab, enter the domain account and password for SQL Server Agent and SQL Server Database Engine, and set the Startup Type to Automatic.
Use the domain account that has Full Control on the SMB shares. The screenshot shows two different spellings ( SAPCC\sql1_adminandSAPCC\sql1admin). Make sure that every account you enter exists in Active Directory and has access to all four shares.
Select Grant Perform Volume Maintenance Task privilege to SQL Server Database Engine Service. This enables instant file initialization, which speeds up database creation, file growth and restores considerably. Show example
-
-
Set the authentication mode and the SQL Server administrators, and enter the UNC paths of the SMB shares for the user database, transaction log, backup, and TempDB files.
-
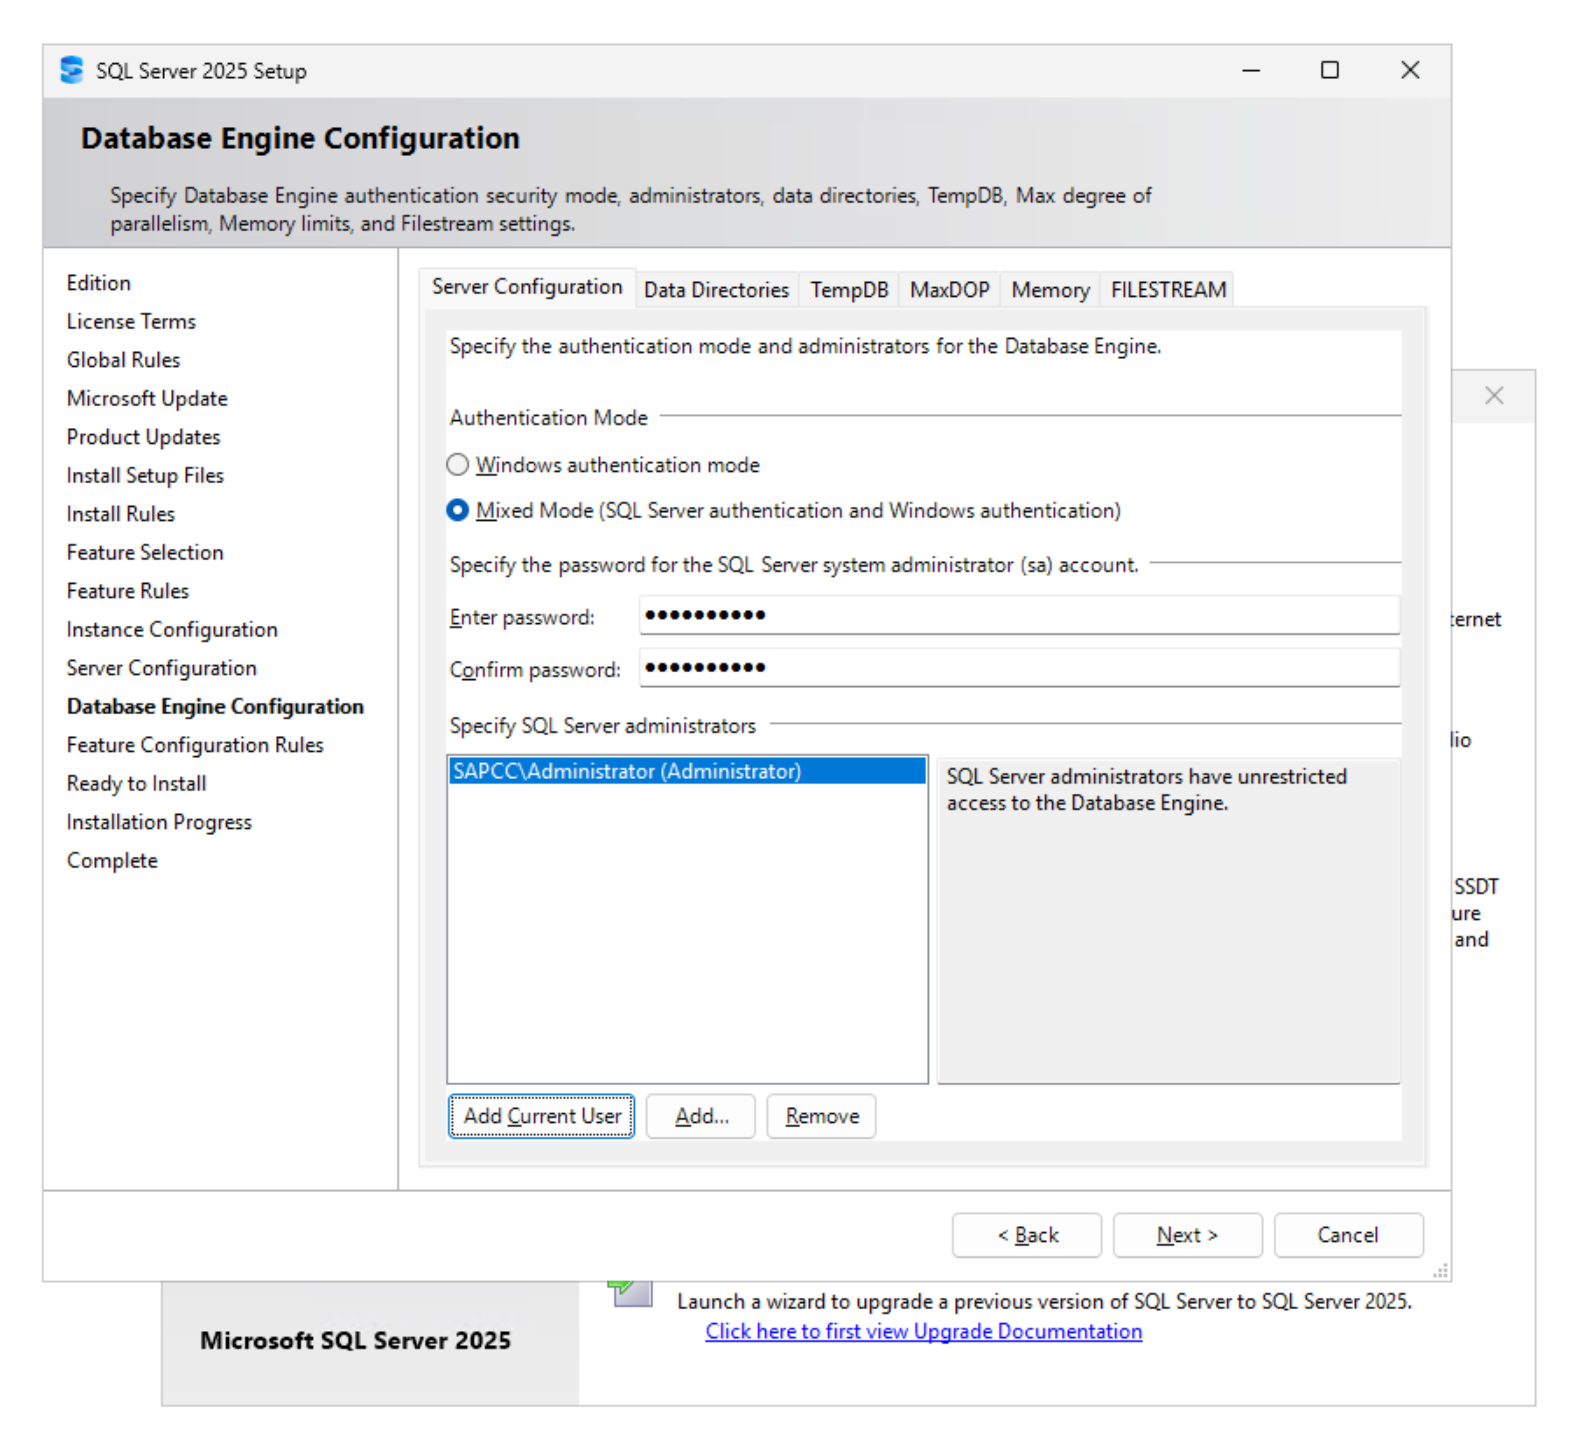
On the Database Engine Configuration page, Server Configuration tab, select the authentication mode. The lab uses Mixed Mode with a strong password for the
saaccount. Click Add Current User and Add… to add the SQL Server administrators (users or, preferably, an AD group).
Use Windows authentication mode unless applications require SQL Server logins. Show example
-
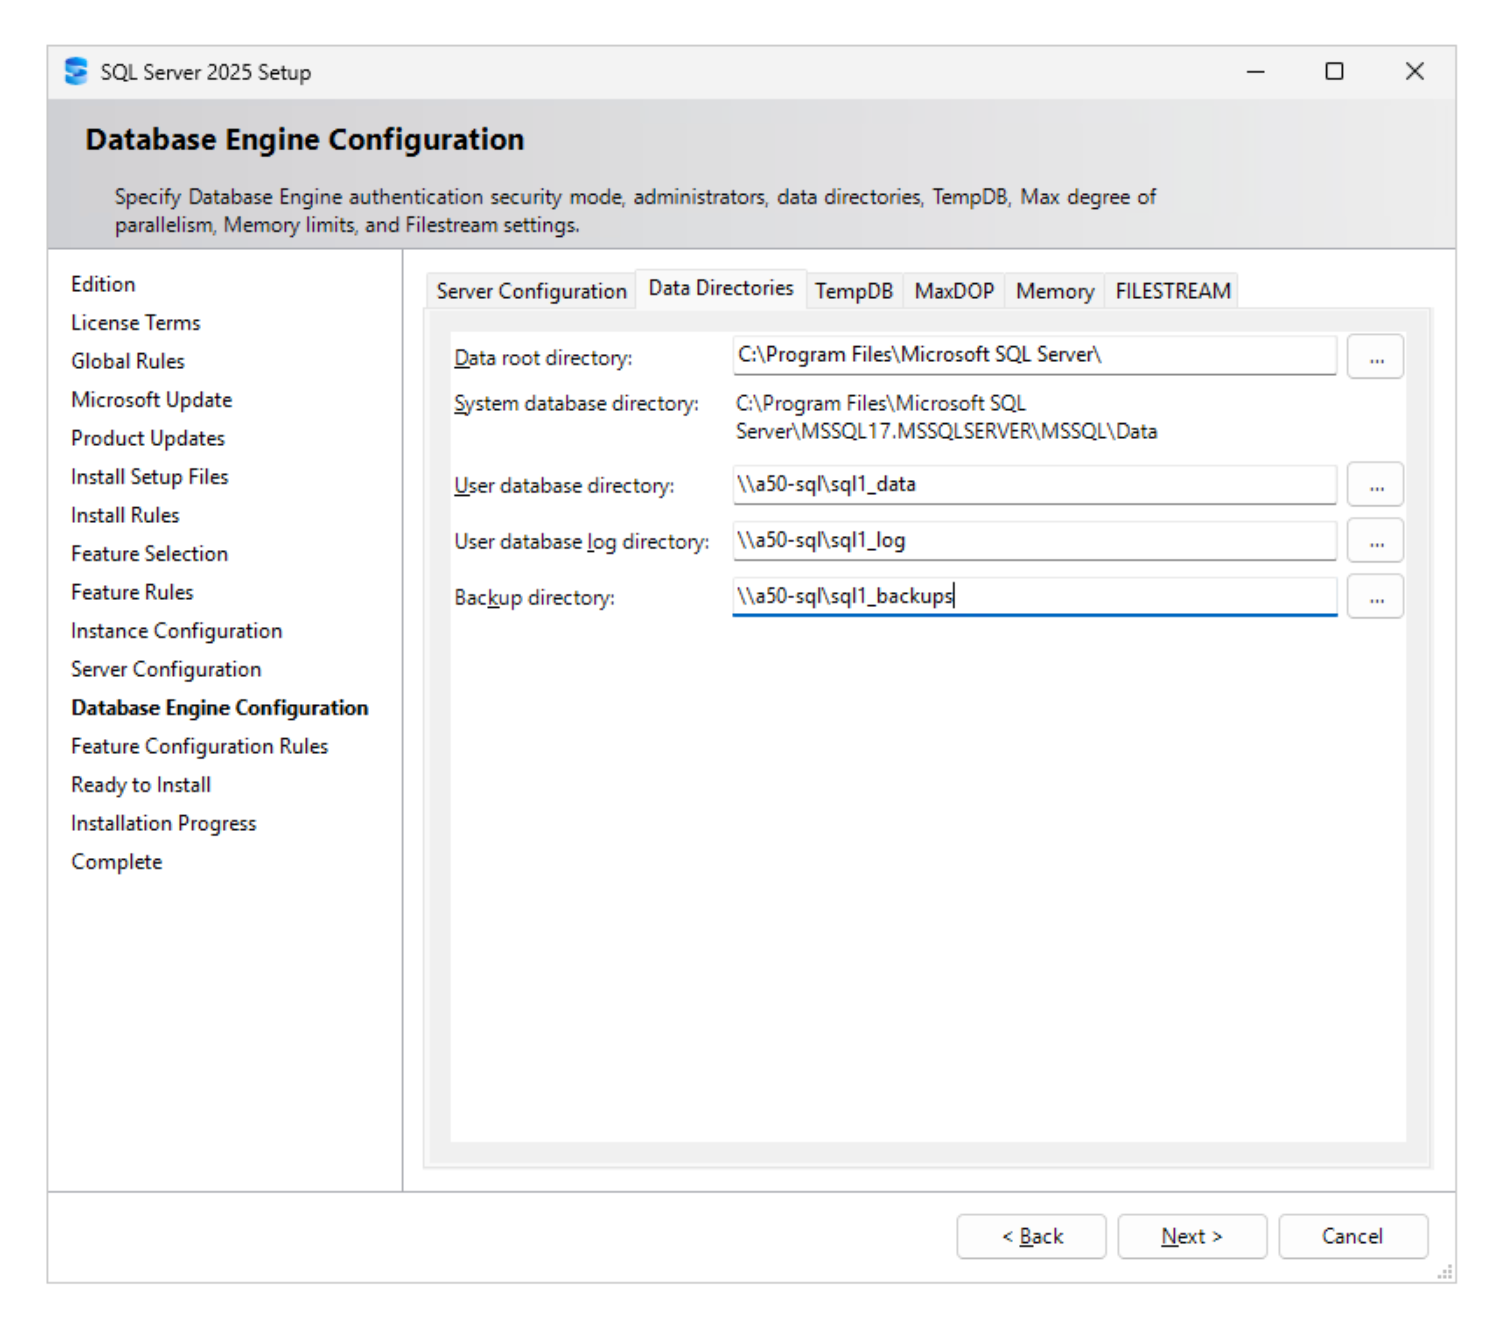
On the Data Directories tab, enter the UNC paths of the SMB shares:
Setting Value Data root directory
C:\Program Files\Microsoft SQL Server\(local; system databases stay onC:)User database directory
\\a50-sql\sql1_dataUser database log directory
\\a50-sql\sql1_logBackup directory
\\a50-sql\sql1_backups
To place the system databases ( master,model,msdb) on the SMB share as well, set Data root directory to a UNC path. Create a new volume and share for the system databases if this is desired.
You need to use the UNC paths for the directories as mapped drives are not supported. Show example
-
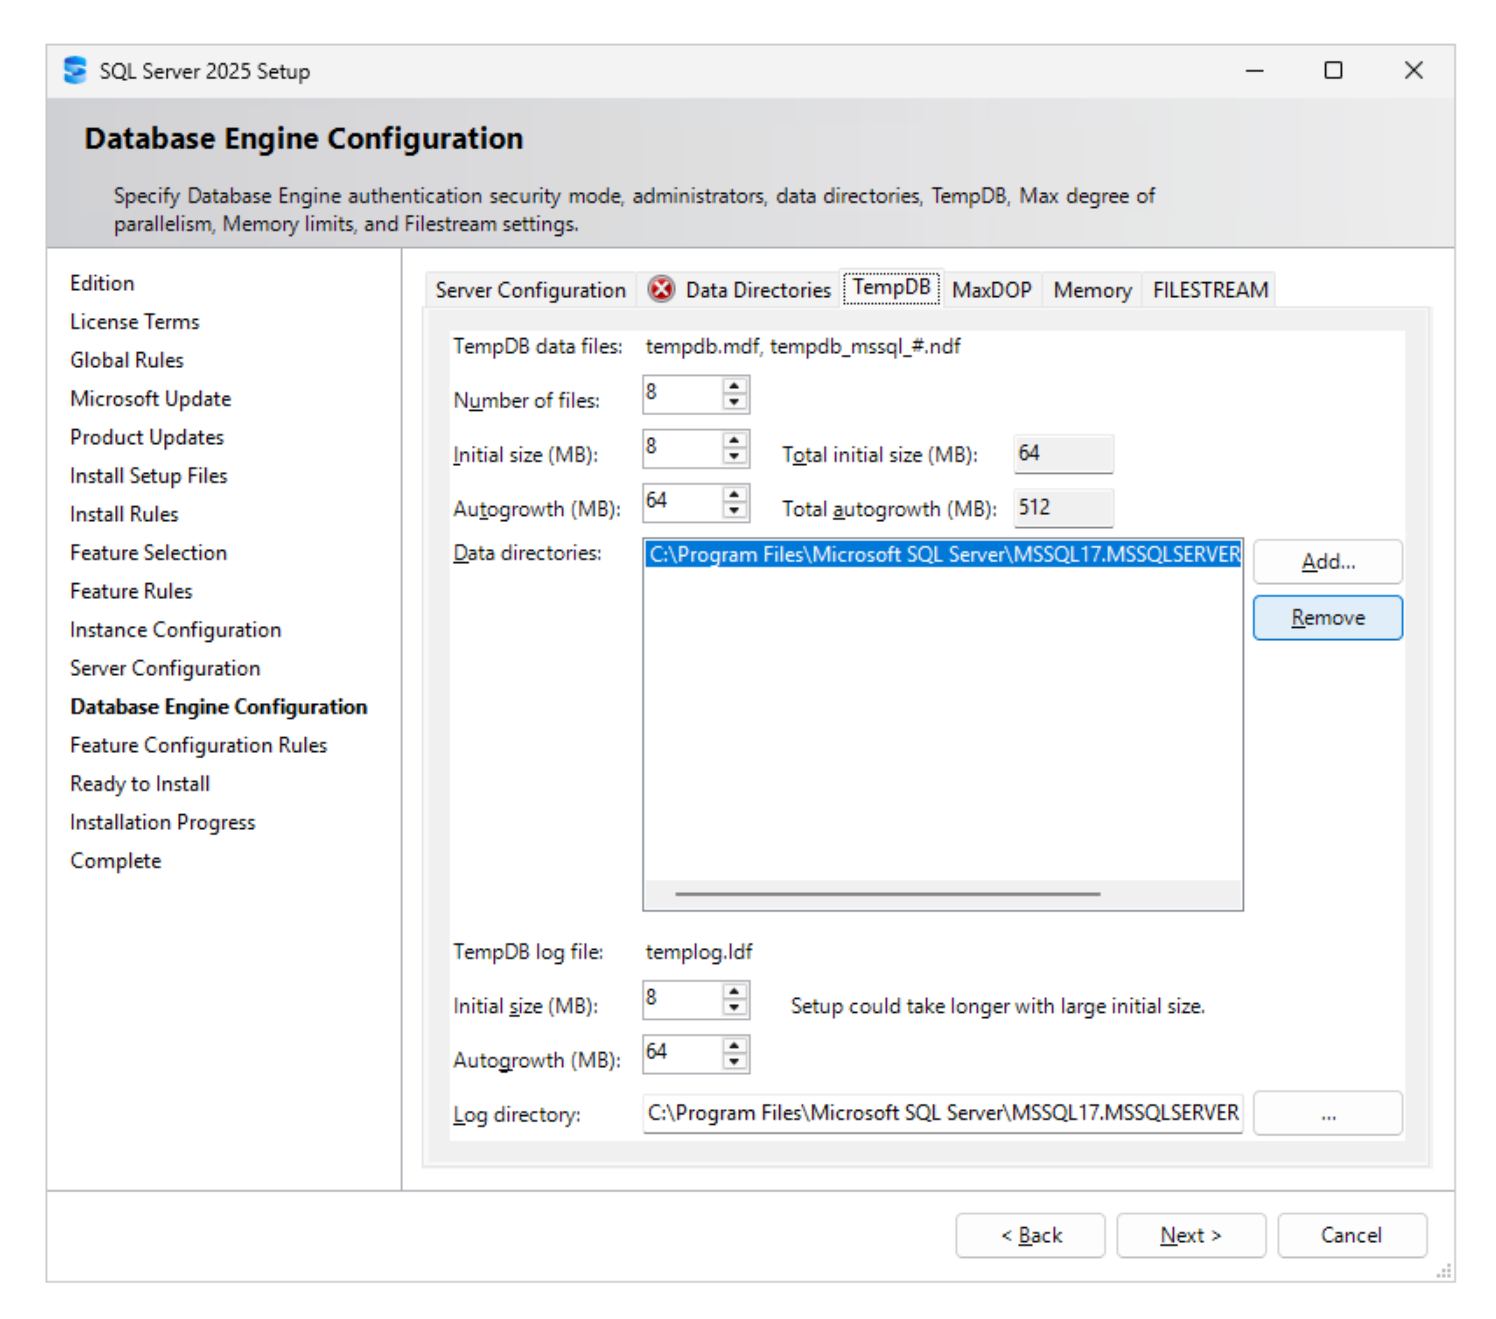
On the TempDB tab, select the default local data directory and click Remove.
Show example
-
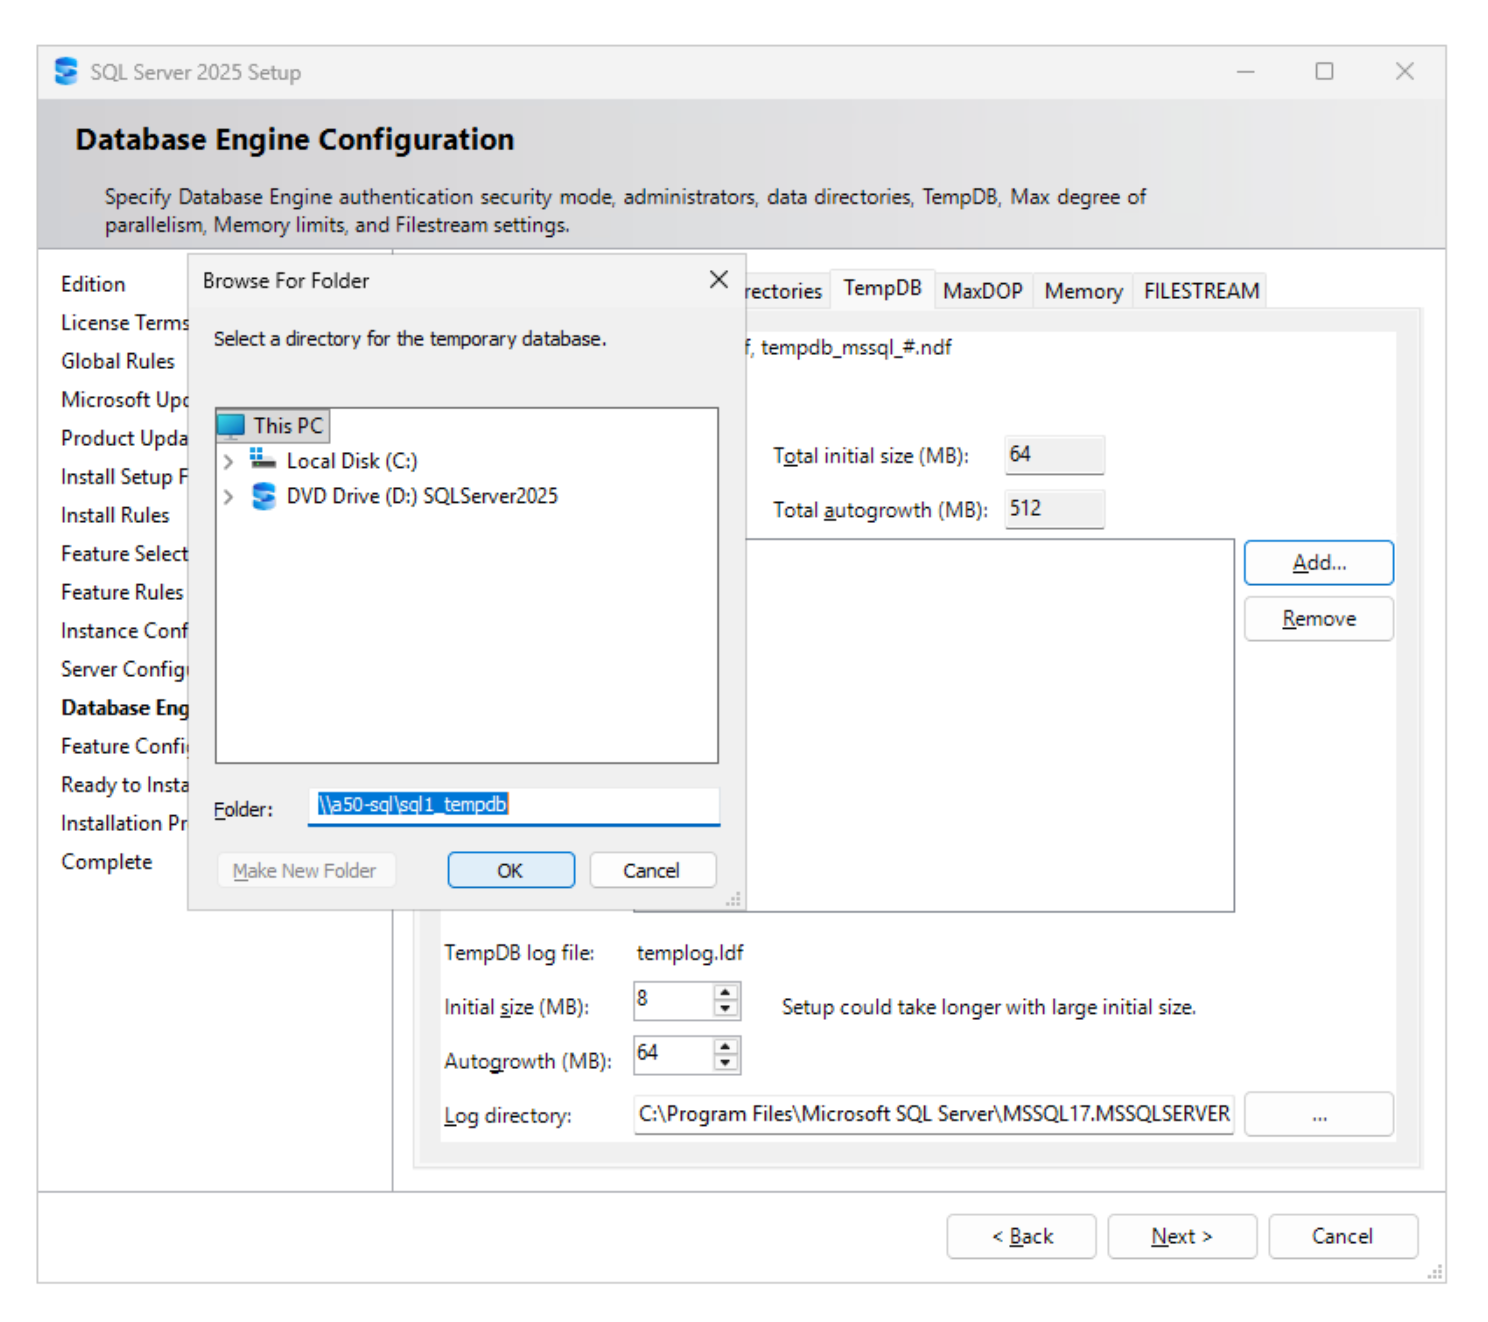
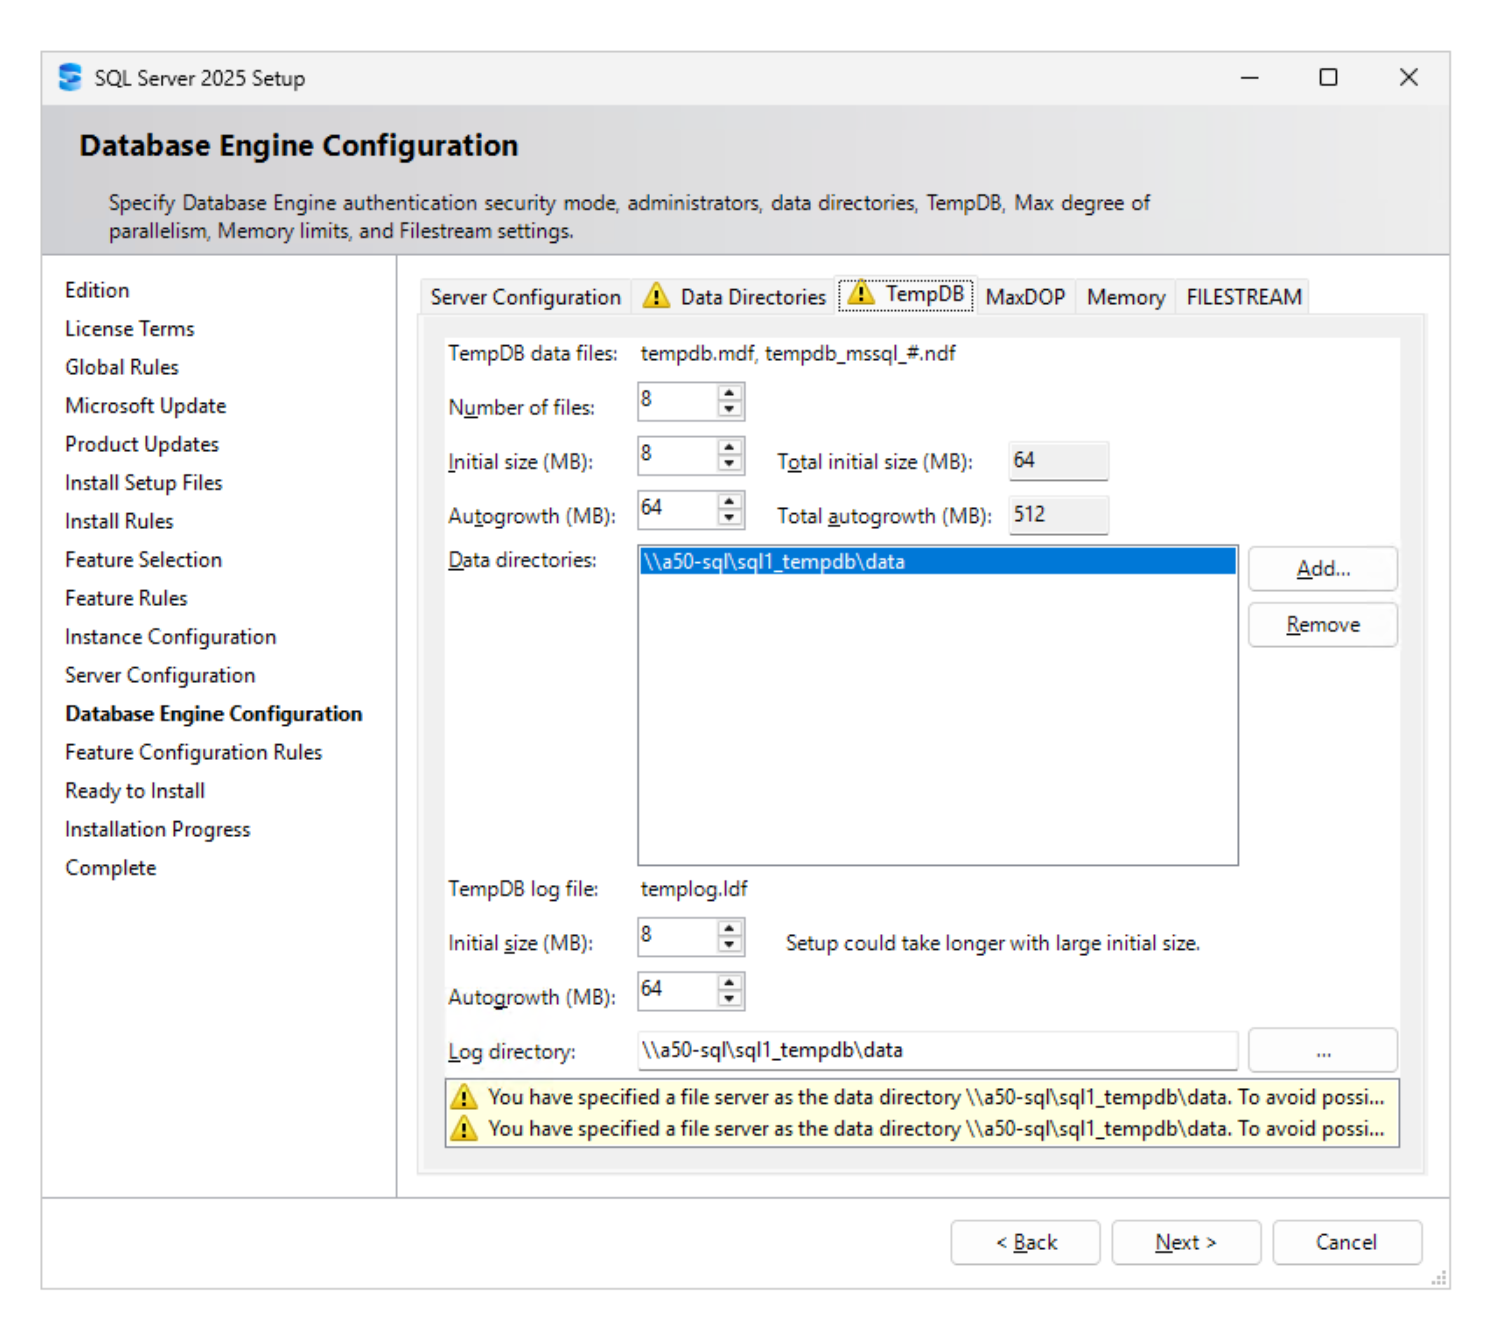
Click Add…. In the Browse For Folder dialog, type the UNC path
\\a50-sql\sql1_tempdb\datainto the Folder field and click OK.Show example
-
Set the Log directory to the same share (click …). The lab uses
\\a50-sql\sql1_tempdb\datafor both TempDB data files and the TempDB log file. The yellow warnings, which say that a file server was specified as the data directory, are expected.
Use one TempDB data file per logical CPU core, up to 8 files. Set the initial sizes to the expected TempDB working set so that TempDB doesn't need to grow during operation. All data files must have the same size and autogrowth.
You need to use a folder for the TempDB data and log files as otherwise the installation will fail. Show example
-
Configure the MaxDOP and Memory tabs according to your sizing (the recommended defaults are a good starting point) and click Next.
-
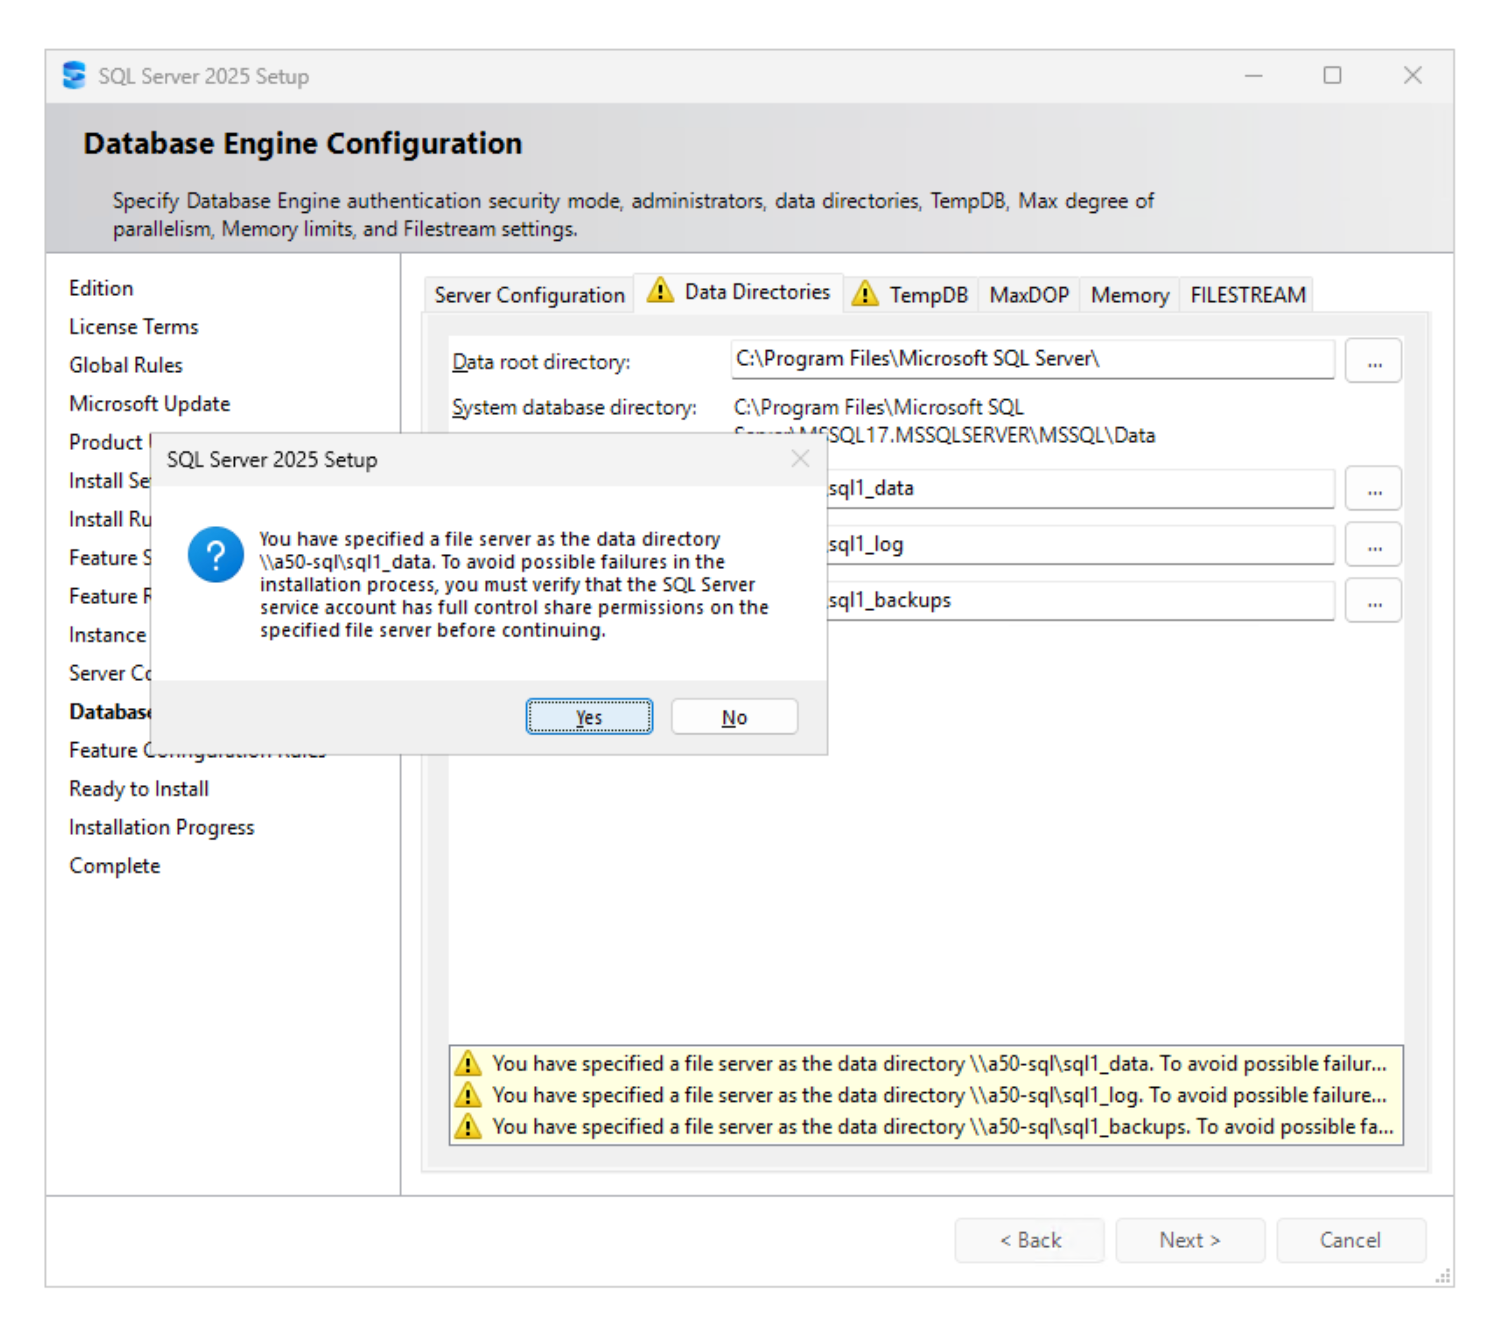
For each UNC path, Setup displays a dialog asking you to verify that the SQL Server service account has Full Control share permissions on the file server. After you have verified the permissions (see Step 3: Create the SQL Server volumes and SMB shares and Step 6: Prepare Windows Server 2025), click Yes.
Show example
-
-
Review the installation summary, run the installation, and confirm that all features installed successfully.
-
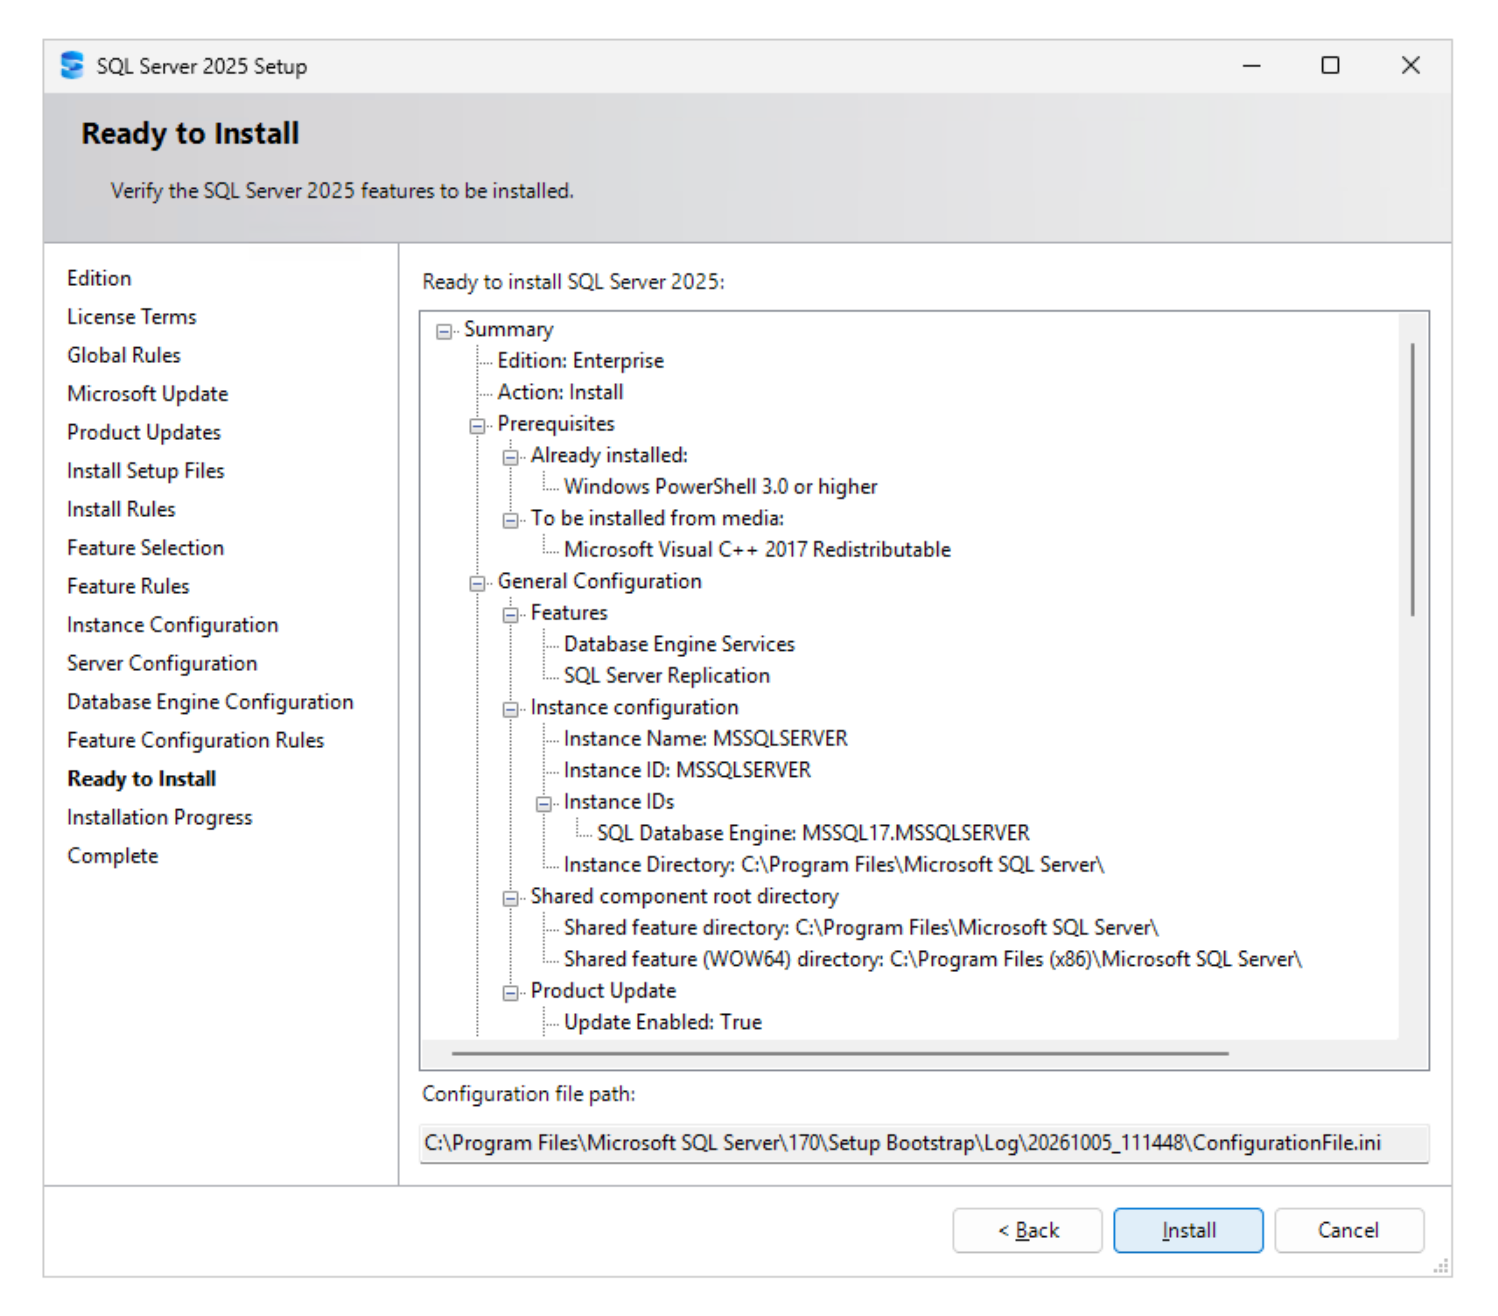
On the Ready to Install page, review the summary and click Install.
Copy the ConfigurationFile.inishown under Configuration file path. You can use it for unattended installations of additional SQL Server hosts (setup.exe /ConfigurationFile=<path>).Show example
-
Wait while the installation runs.
Show example
-
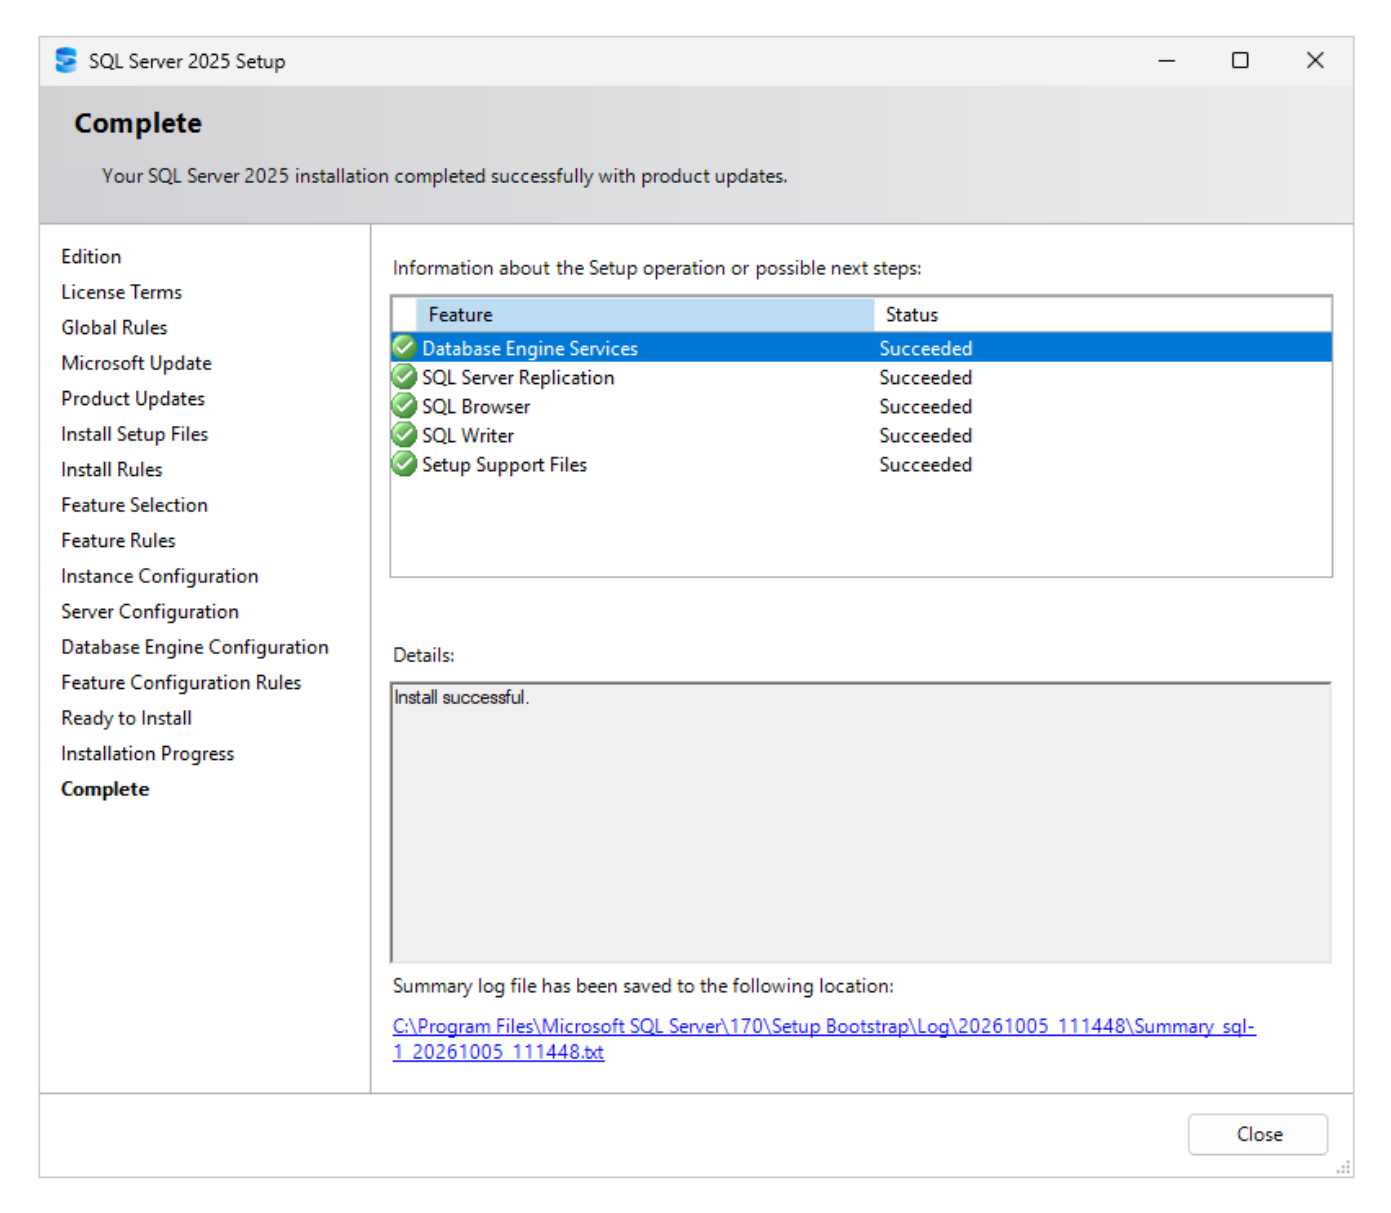
When the installation is finished, verify that all features show Succeeded and click Close.
Show example
-
Step 8: Verify the installation and create a database
Create a test database with SQL Server Management Studio (SSMS) and verify that its data and log files are on the SMB shares. Optionally, confirm on ONTAP that the open files use continuous availability.
-
Install SQL Server Management Studio (SSMS) from the Install SQL Server Management Tools link in the Installation Center, or from the Microsoft website.
-
Start SSMS and connect to the instance (
sql-1) with Windows authentication. -
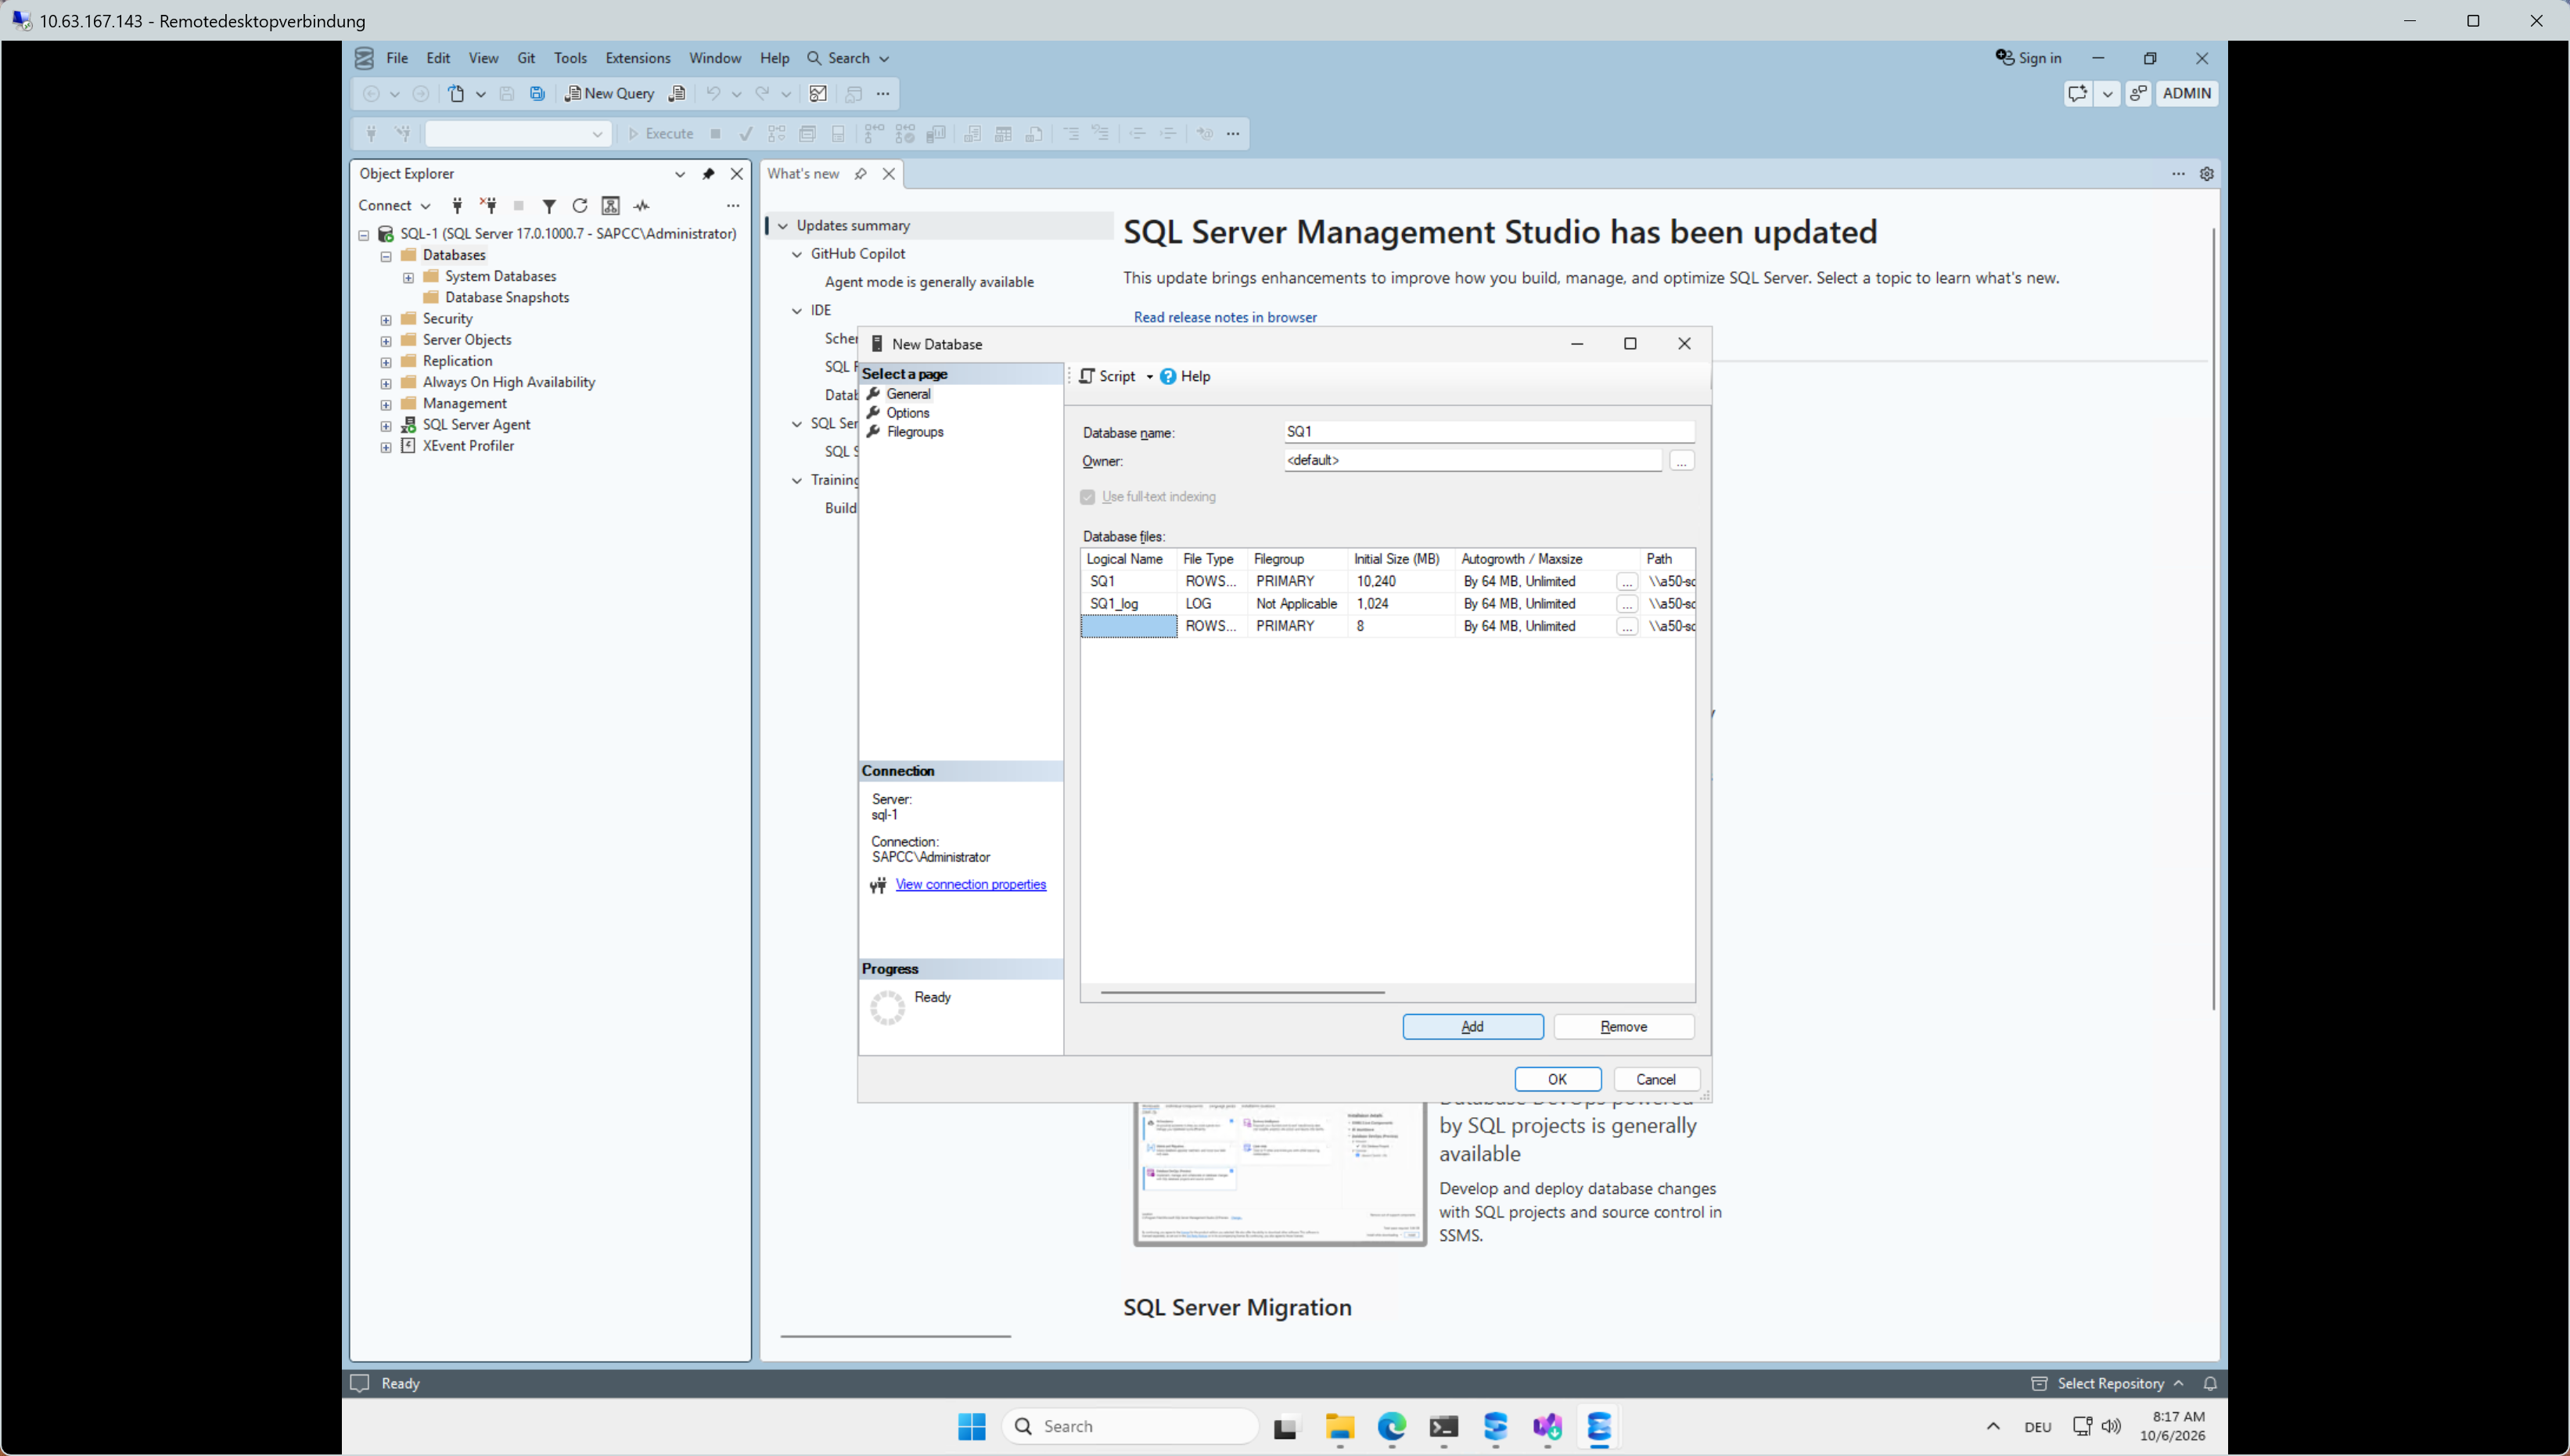
Right-click Databases and select New Database…. Enter a database name (
SQ1in the lab), set the initial file sizes, and click OK. The data and log file paths default to\\a50-sql\sql1_dataand\\a50-sql\sql1_log.Show example
-
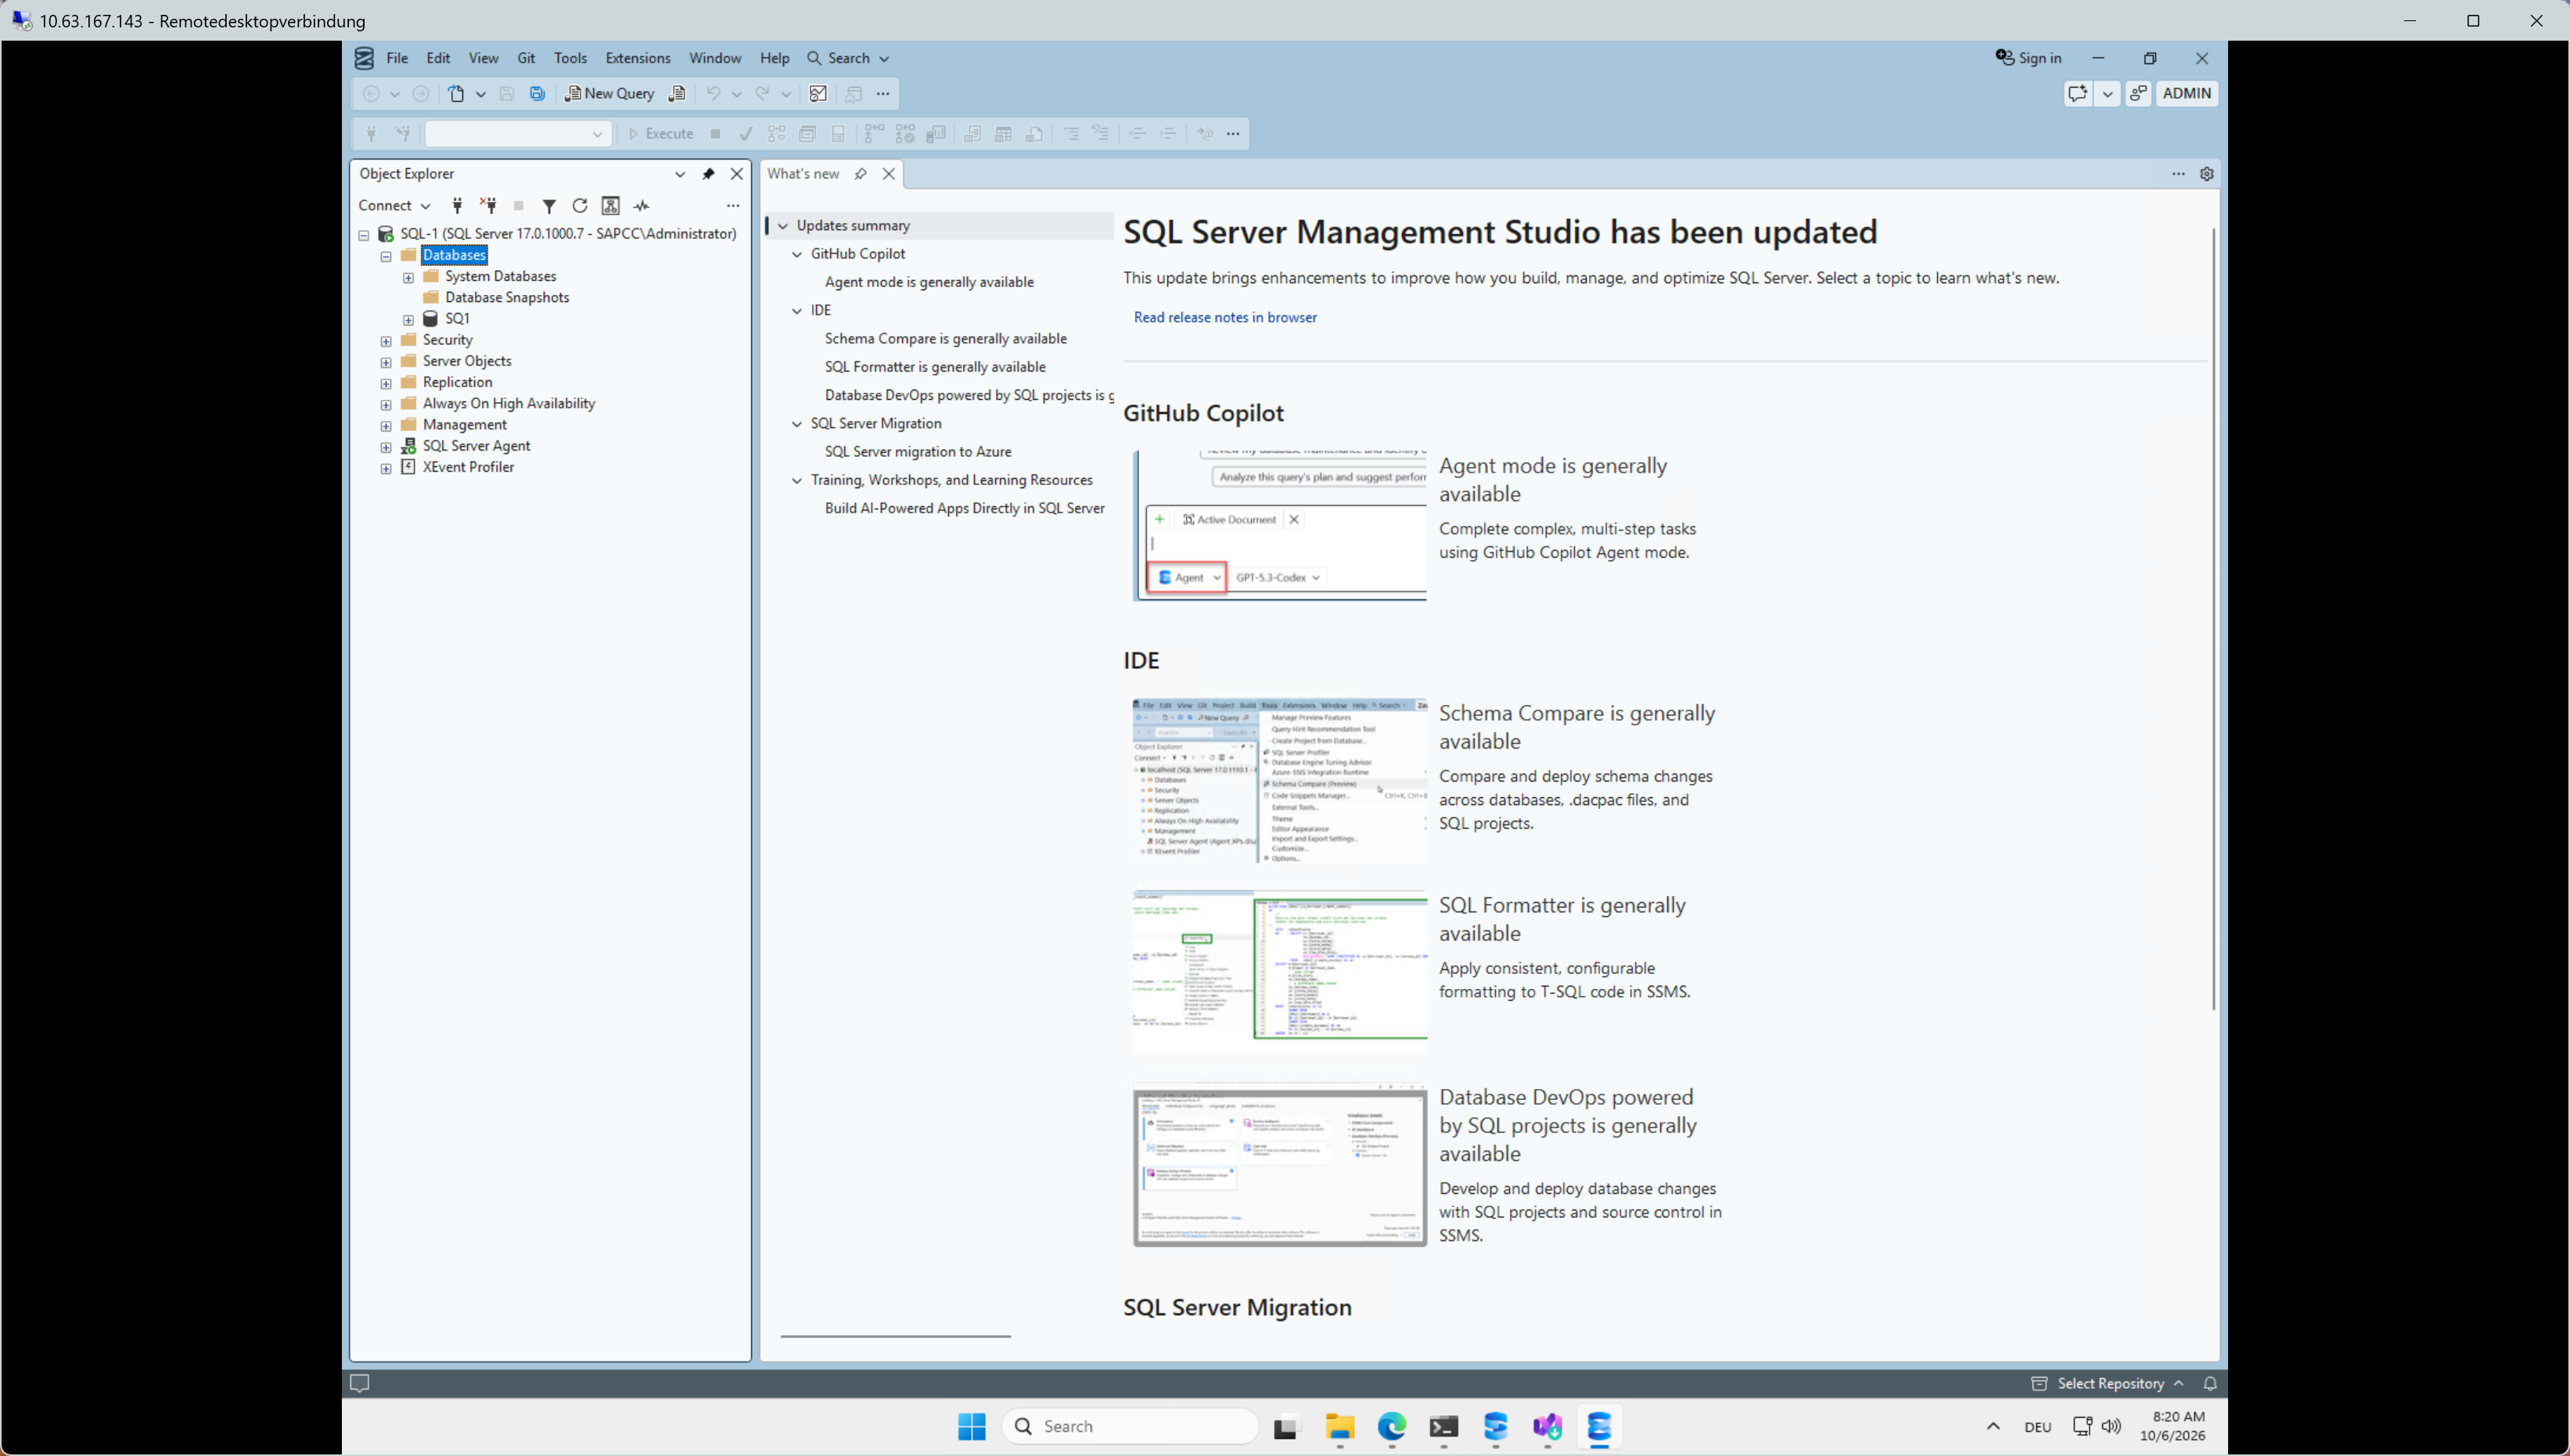
The new database appears in Object Explorer.
Show example
-
Verify the file locations with T-SQL:
SELECT DB_NAME(database_id) AS database_name, type_desc, name AS logical_name, physical_name, size * 8 / 1024 AS size_mb FROM sys.master_files ORDER BY database_id, type_desc; -
Optional: verify the continuous availability of the open files on ONTAP:
cluster::> vserver cifs session show -vserver a50-sql
cluster::> vserver cifs session file show -vserver a50-sql -fields share,path,continuously-available
All SQL Server files must show
continuously-available: Yes.
Use an ONTAP CLI script to configure the storage in one pass
The following script contains the complete storage configuration from this procedure. Replace the values in angle brackets before you run it.
# --- SVM -----------------------------------------------------------------
vserver create -vserver a50-sql -rootvolume a50_sql_root -aggregate <aggr_node1> -rootvolume-security-style ntfs
vserver modify -vserver a50-sql -allowed-protocols cifs

network interface create -vserver a50-sql -lif a50-sql_smb_n1 -service-policy default-data-files -home-node <node1> -home-port <port> -address 192.168.175.138 -netmask <netmask>
network interface create -vserver a50-sql -lif a50-sql_smb_n2 -service-policy default-data-files -home-node <node2> -home-port <port> -address 192.168.175.139 -netmask <netmask>

vserver services name-service dns create -vserver a50-sql -domains sapcc.stl.netapp.com -name-servers <dns1>,<dns2>
vserver cifs create -vserver a50-sql -cifs-server A50-SQL -domain sapcc.stl.netapp.com -ou CN=Computers

set -privilege advanced
vserver cifs options modify -vserver a50-sql -smb3-enabled true -is-multichannel-enabled true -is-large-mtu-enabled true -copy-offload-enabled true -shadowcopy-enabled true
set -privilege admin

# --- Volumes -------------------------------------------------------------
volume create -vserver a50-sql -volume sql1_data    -aggregate <aggr_node1> -size 1TB   -security-style ntfs -junction-path /sql1_data    -space-guarantee none -fractional-reserve 0 -percent-snapshot-space 5 -snapshot-policy none -autosize-mode grow -max-autosize 1.3TB
volume create -vserver a50-sql -volume sql1_log     -aggregate <aggr_node2> -size 512GB -security-style ntfs -junction-path /sql1_log     -space-guarantee none -fractional-reserve 0 -percent-snapshot-space 5 -snapshot-policy none -autosize-mode grow -max-autosize 650GB
volume create -vserver a50-sql -volume sql1_tempdb  -aggregate <aggr_node2> -size 500GB -security-style ntfs -junction-path /sql1_tempdb  -space-guarantee none -fractional-reserve 0 -percent-snapshot-space 0 -snapshot-policy none -autosize-mode grow -max-autosize 650GB
volume create -vserver a50-sql -volume sql1_backups -aggregate <aggr_node1> -size 2000GB -security-style ntfs -junction-path /sql1_backups -space-guarantee none -fractional-reserve 0 -percent-snapshot-space 5 -snapshot-policy none -autosize-mode grow -max-autosize 2600GB

# --- CA shares -----------------------------------------------------------
vserver cifs share create -vserver a50-sql -share-name sql1_data    -path /sql1_data    -share-properties oplocks,browsable,changenotify,continuously-available
vserver cifs share create -vserver a50-sql -share-name sql1_log     -path /sql1_log     -share-properties oplocks,browsable,changenotify,continuously-available
vserver cifs share create -vserver a50-sql -share-name sql1_tempdb  -path /sql1_tempdb  -share-properties oplocks,browsable,changenotify,continuously-available
vserver cifs share create -vserver a50-sql -share-name sql1_backups -path /sql1_backups -share-properties oplocks,browsable,changenotify,continuously-available

# --- Share permissions (repeat for each share) ----------------------------
vserver cifs share access-control create -vserver a50-sql -share sql1_data -user-or-group SAPCC\sql1admin -permission Full_Control
vserver cifs share access-control delete -vserver a50-sql -share sql1_data -user-or-group Everyone

# --- Verification ----------------------------------------------------------
vserver cifs show -vserver a50-sql
vserver cifs share show -vserver a50-sql -fields share-name,path,share-properties
vserver cifs session file show -vserver a50-sql -fields share,path,continuously-available|
|
Distribute the volumes across the aggregates of both nodes, for example data and backups on node 1, and log and TempDB on node 2. This uses the resources of both controllers. |
Additional information
For more information about the topics in this procedure, see the following resources: