

SnapCenter Integration for IBM DB2 Database
 Suggest changes
This document describes the SnapCenter integration specifics for IBM DB2 Database used in an SAP environment.
Introduction
The document is not intended to be a step-by-step description of how to setup the complete environment but will cover concepts and relevant details related to:
-
Example configuration overview
-
Sample Layout
-
Protect DB2 database
-
Restore and Recover DB2 database
Author: Michael Schlosser, NetApp
Example configuration overview
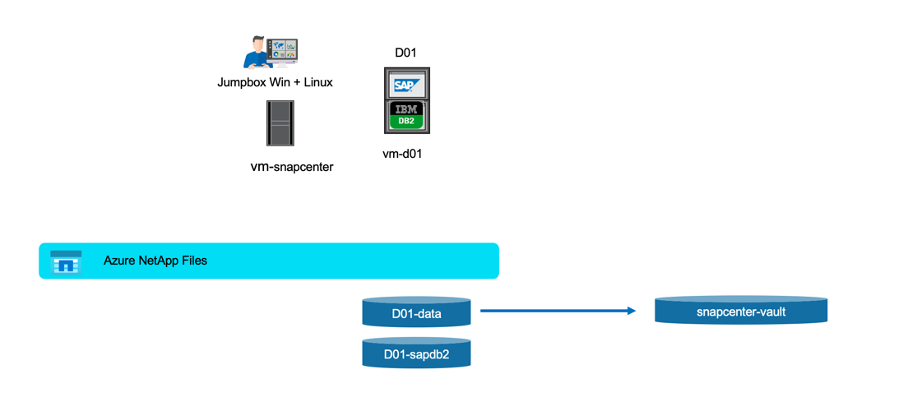
Example Implementation for SnapCenter DB2 Plugin for an SAP System running on the Azure Platform.

|
This implementation describes the minimal required volume configuration. |
Alternatively, the volume structure described in this MS Technical Community blog could be used.
Demo Environment
Software versions
| Software | Version |
|---|---|
Linux OS |
SLES for SAP 15 SP5 |
SAP |
SAP NetWeaver 7.5 |
DB2 |
10.5.0.7 |
SnapCenter |
6.1 |
DB2 Volume Design
Following least volume Layout must be used to enable backup / recovery and clone use-cases for the DB2 database. The example configuration use <SID>: D01.
| Volume Name | Directory (qtree) on Volume | Mount Point on Server | Comment |
|---|---|---|---|
<SID>-sapdb2 |
db2 |
/db2 |
|
/db2/<SID> |
Parent directory for DB2 related files |
||
/db2/db2<sid> |
Home directory of user db2<sid> and DB2 Software |
||
/db2/<SID>/db2dump |
DB2 diagnostic log and dump files |
||
/db2/<SID>/backup |
Backup dlocation (might be placed on a different volume) |
||
/db2/<SID>/log_arch |
Offline Redo Logs (might be placed on a different volume – snapshot will be triggered) |
||
/db2/<SID>/log_dir |
Online Redo Logs (might be placed on a different volume – snapshot will be triggered) |
||
<sid>adm |
/home/<sid>adm |
Home directory of user <sid>adm |
|
sap<sid> |
/home/sap<sid> |
Home directory of user sap<sid> |
|
usrsaptrans |
/usr/sap/trans |
Transport directory |
|
usrsap<SID> |
/usr/sap/<SID> |
Usr sap |
|
sapmnt<SID> |
/sapmnt/<SID> |
SAP GlobalHost Dir |
|
<SID>-data |
sapdata1 |
/db2/<SID>/sapdata1 |
DB Data |
sapdata2 |
/db2/<SID>/sapdata2 |
DB Data |
|
sapdata3 |
/db2/<SID>/sapdata3 |
DB Data |
|
sapdata4 |
/db2/<SID>/sapdata4 |
DB Data |
|
saptmp1 |
/db2/<SID>/saptmp1 |
DB Temp Files |
|
saptmp2 |
/db2/<SID>/saptmp2 |
DB Temp Files |
|
saptmp3 |
/db2/<SID>/saptmp3 |
DB Temp Files |
|
saptmp4 |
/db2/<SID>/saptmp4 |
DB Temp Files |
|
db2<sid> |
/db2/<SID>/db2<sid> |
Instance Files |
Because auto-discovery is enabled by default for the DB2 plug-in, a snapshot is created for volumes that match the following file paths.

Steps to Protect Database D01
-
Check File distribution, according to the sample Layout
-
Check Prerequisites for the Host (vm-d01)
-
Check Prerequisites for the Database (D01)
-
Deploy / Install SnapCenter Agent on Host (vm-d01)
-
Create SnapCenter Instance Resource Configuration
Prerequisites on Host
More current information might be available here:
Before you add a host and install the plug-ins package for Linux, you must complete all the requirements.
-
If you are using iSCSI, the iSCSI service must be running.
-
You can either use the password-based authentication for the root or non-root user or SSH key based authentication.
-
SnapCenter Plug-in for Unix File Systems can be installed by a non-root user. However, you should configure the sudo privileges for the non-root user to install and start the plug-in process. After installing the plug-in, the processes will be running as an effective non-root user.
-
Create credentials with authentication mode as Linux for the install user.
-
You must have installed Java 11 on your Linux host.
-
Ensure that you have installed only the certified edition of JAVA 11 on the Linux host
-
For information to download JAVA, see: Java Downloads for All Operating Systems
-
You should have bash as the default shell for plug-in installation.
Prerequisites for the Database – Enable Logging and Backups
|
|
to enable offline logs a offline full backup of the database is required. Typically it is already enabled for productive systems. |
-
Create Directories for backup and log_arch (/db2/D01/backup, /sybase/D01/log_arch)
-
Enable logarchmeth1 (as OS-user db2d01)
-
db2 update db cfg for D01 using logarchmeth1 DISK:/db2/D01/log_arch/
-
-
Create offline backup (as OS-user db2d01)
-
db2stop force
-
db2start admin mode restricted access
-
db2 backup db D01 to /db2/D01/backup
-
db2 activate db D01
-
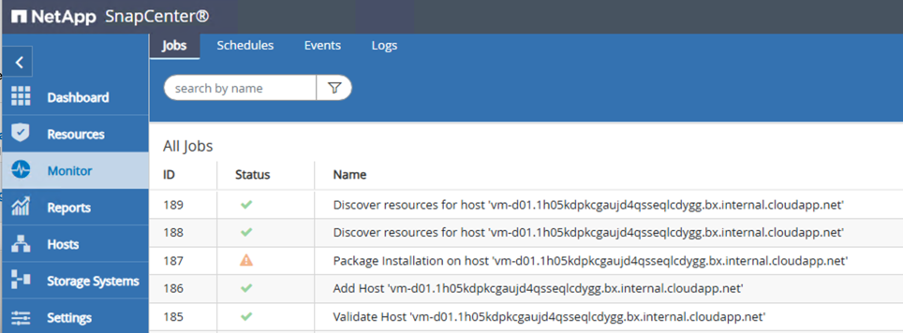
Deploy SnapCenter Agent to Host vm-d01
Further information could be found in the SnapCenter documentation.
Select IBM DB2 and Unix File Systems Plugins.

|
|
After the installation a discovery of the Databases on the host is triggered. |
Create Resource Configuration for Database D01
Select discovered Resource D01

Configure Snapshot Name
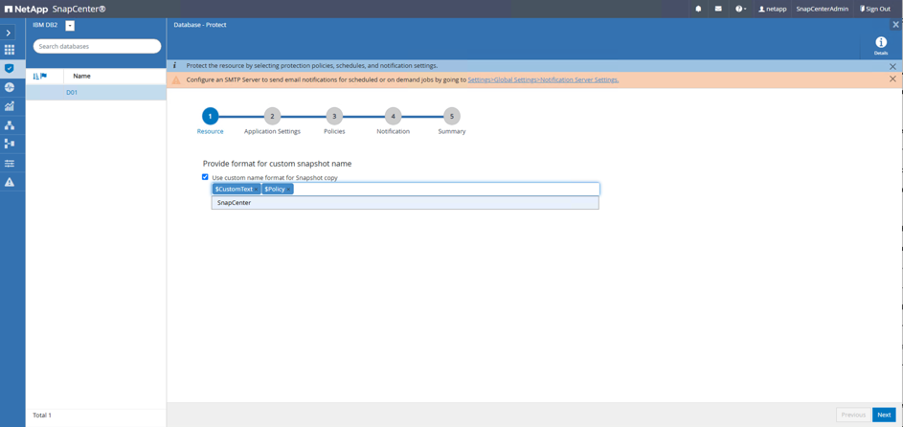
No specific application settings required, configure policy and notification settings as required.
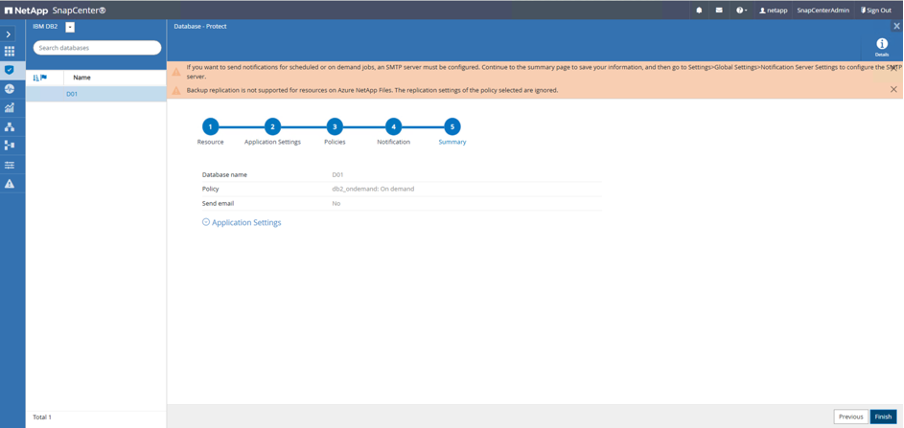
And finish the configuration.
Sequence to Recover System D01
-
Stop SAP System D01 (including database)
-
Restore SnapCenter Backup (Volume D01-data)
-
Unmount Filesystems
-
Restore Volume
-
Mount Filesystems
-
Init database as mirror db
-
-
Recover Database D01 (using db2 rollforward)
-
Start SAP System D01
Recover Database D01
-
Stop SAP System + DB D01 on host vm-d01
-
User d01adm: stopsap
-
-
Restore Backup
-
SnapCenter GUI: Select required Backup for Restore
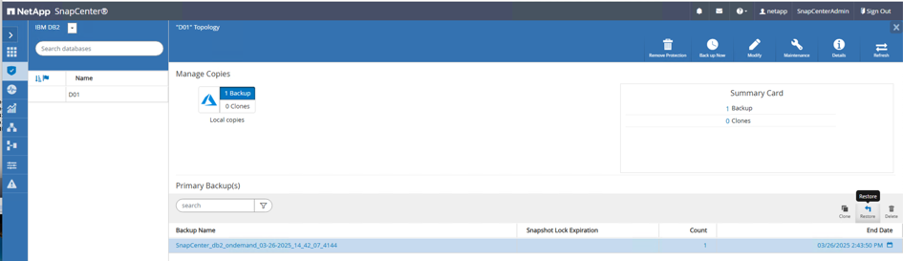
-
For ANF Deployment – only Complete Resource is available
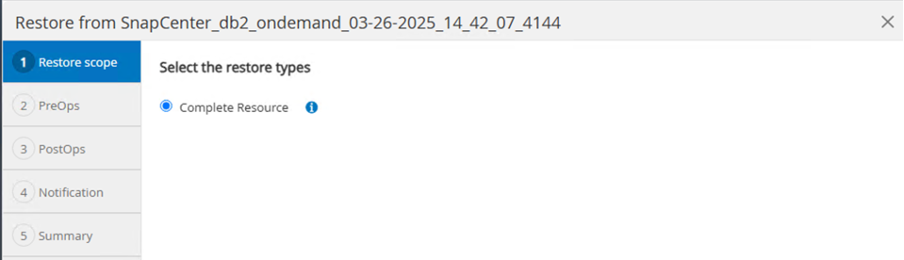
-
Summary would be displayed and with Finish the actual restore is started.
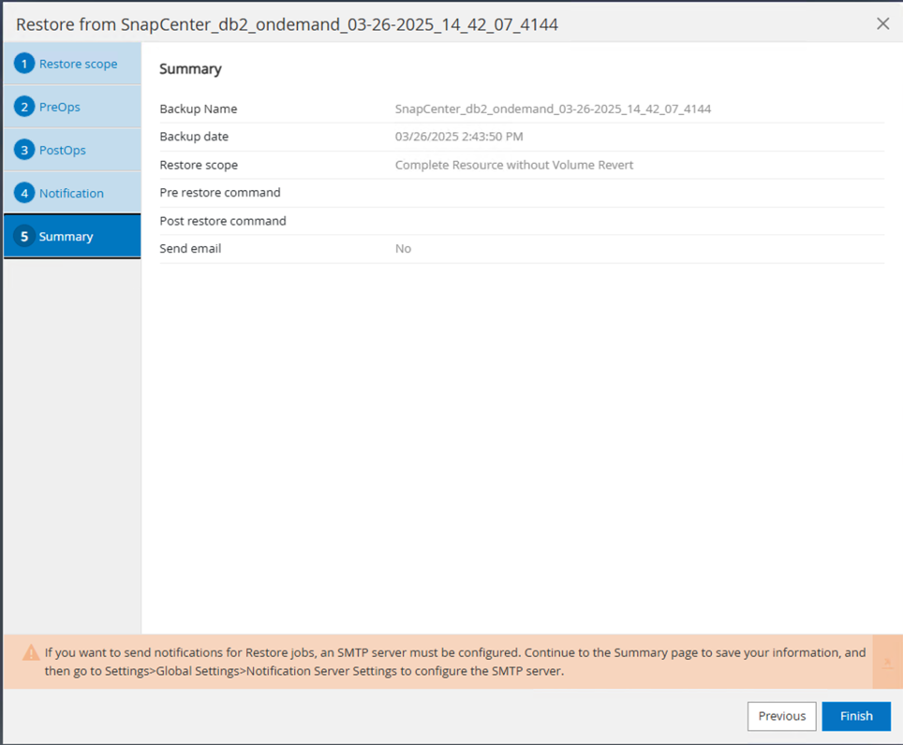
|
|
“db2inidb D01 as mirror” is done as part of SnapCenter Restore Workflow. |
-
Check recover status Database D01 (as user db2d01)
-
db2 rollforward db D01 query status
-
-
Recover database as needed – here an losless recovery is initated (as user db2d01)
-
db2 rollforward db D01 to end of logs
-
-
Stop database recovery and online database D01 (as user db2d01)
-
db2 rollforward db D01 stop
-
-
Start SAP System (as user d01adm)
-
startsap
-
Additional information and version history
Following recoded Demos are available to support the documentation.
To learn more about the information that is described in this document, review the following documents and/or websites:
-
SAP Notes (login required)
-
83000 - DB2/390: Backup and Recovery Options: https://me.sap.com/notes/83000
-
594301 - DB6: Admin Tools and Split Mirror: https://me.sap.com/notes/594301
-
-
NetApp Product Documentation: https://www.netapp.com/support-and-training/documentation/
-
NetApp SAP Solutions – Information about Use-Cases, Best-Practices and Benefits
Version history
| Version | Date | Document version history |
|---|---|---|
Version 1.0 |
April 2025 |
Initial version – backup / recovery DB2 database |