

Convert VMs using the Shift Toolkit
 Suggest changes
Use the Shift Toolkit to convert VMware ESX virtual machine disks (VMDK) to Microsoft Hyper-V (VHDX) disk format or to RAW/ QCOW2 disk formats. This process includes setting up resource groups, creating conversion blueprints, and scheduling conversions.
Overview
Shift Toolkit supports disk-level conversion of virtual disks between hypervisors for the following formats, with support for both FlexVol and FlexGroup volumes on ONTAP:
-
VMware ESX to Microsoft Hyper-V (VMDK to VHDX)
-
Microsoft Hyper-V to VMware ESX (VHDX to VMDK)
-
VMware ESX to Red Hat KVM (VMDK to QCOW2)
-
VMware ESX to Red Hat KVM (VMDK to RAW)
The converted qcow2 files are compatible with any KVM hypervisors. For example, a qcow2 file can be utilized with RHEL-based KVM using virt-manager to create a VM, as well as with ubuntu KVM Rocky Linux based KVM and others. The same can be used with Oracle Linux virtualization manager, Proxmox, OpenNebula, HP VME and with OpenShift virtualization after importing using NetApp Trident. The goal is to provide the disk (converted in secs to mins) which can then be integrated into existing automation scripts used by organizations to provision the VM and assign the network. This approach helps reduce overall migration times, with disk conversion handled by Shift toolkit APIs and the remaining script bringing up the VMs.
The NetApp Shift Toolkit also supports converting VMware VMDK disks stored on FlexGroup volumes into RAW disk format, enabling seamless migration to KVM-based platforms such as Proxmox or OLVM.

|
When using FlexGroup storage, only RAW format conversions are supported. Additionally, Shift toolkit injects the VirtIO drivers during preparation when performing KVM-only conversions. |
Shift toolkit supports end-to-end migration from VMware to other compatible KVM hypervisors. However, convert option provides ability to migration administrators to run these conversion and migration APIs.
Convert to QCOW2 format
To convert the virtual disks to QCOW2 format with NetApp Shift toolkit, follow these high-level steps:
-
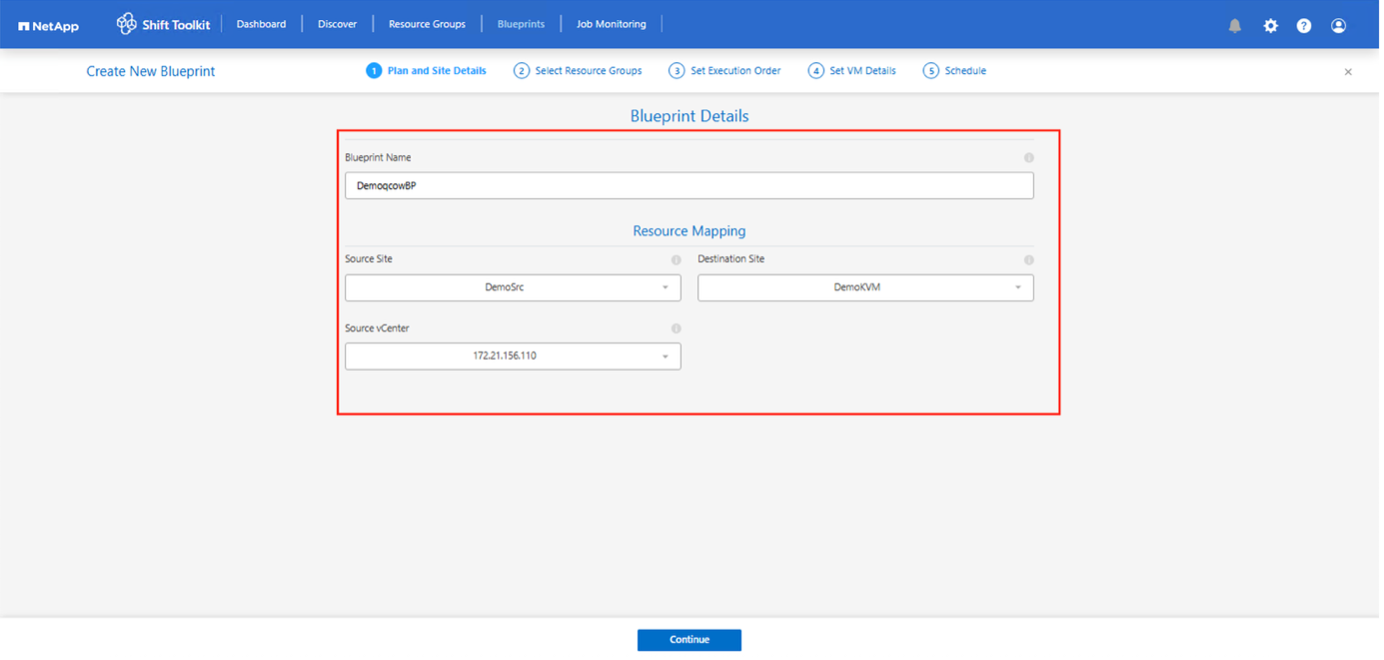
Create a destination site type specifying KVM (conversion only) as the hypervisor.
Hypervisor details are not required for KVM. 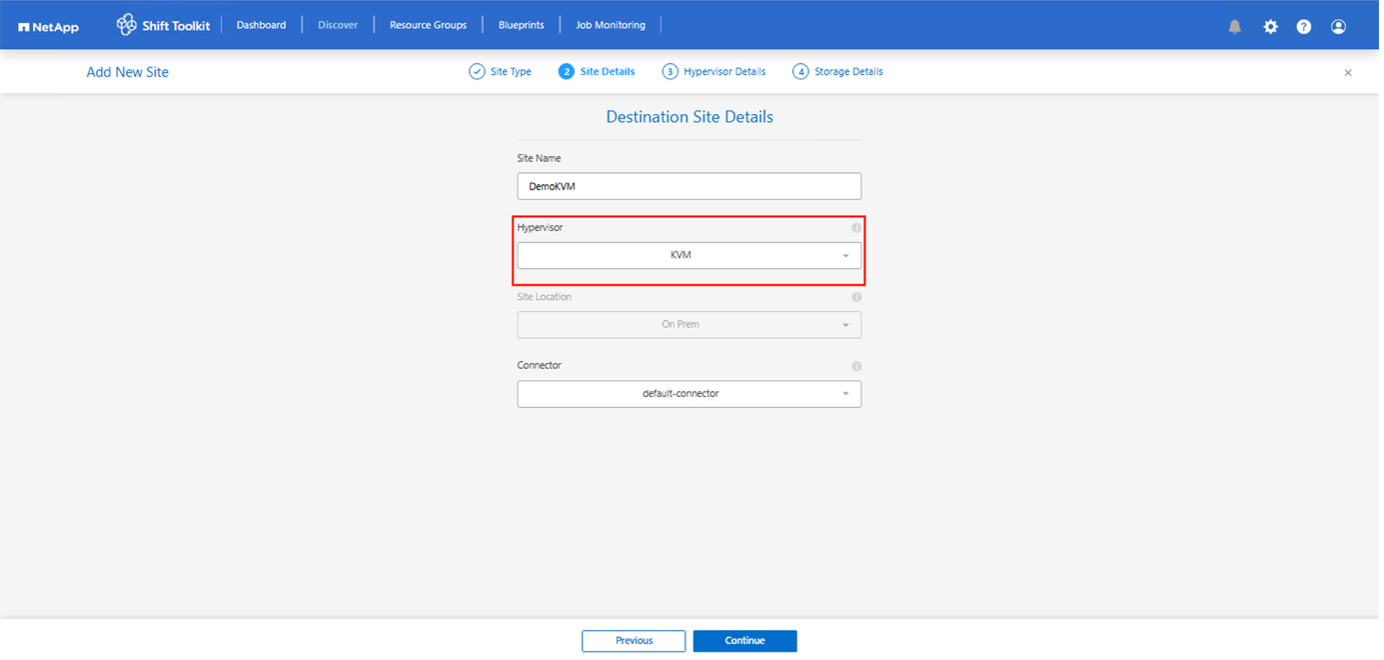
-
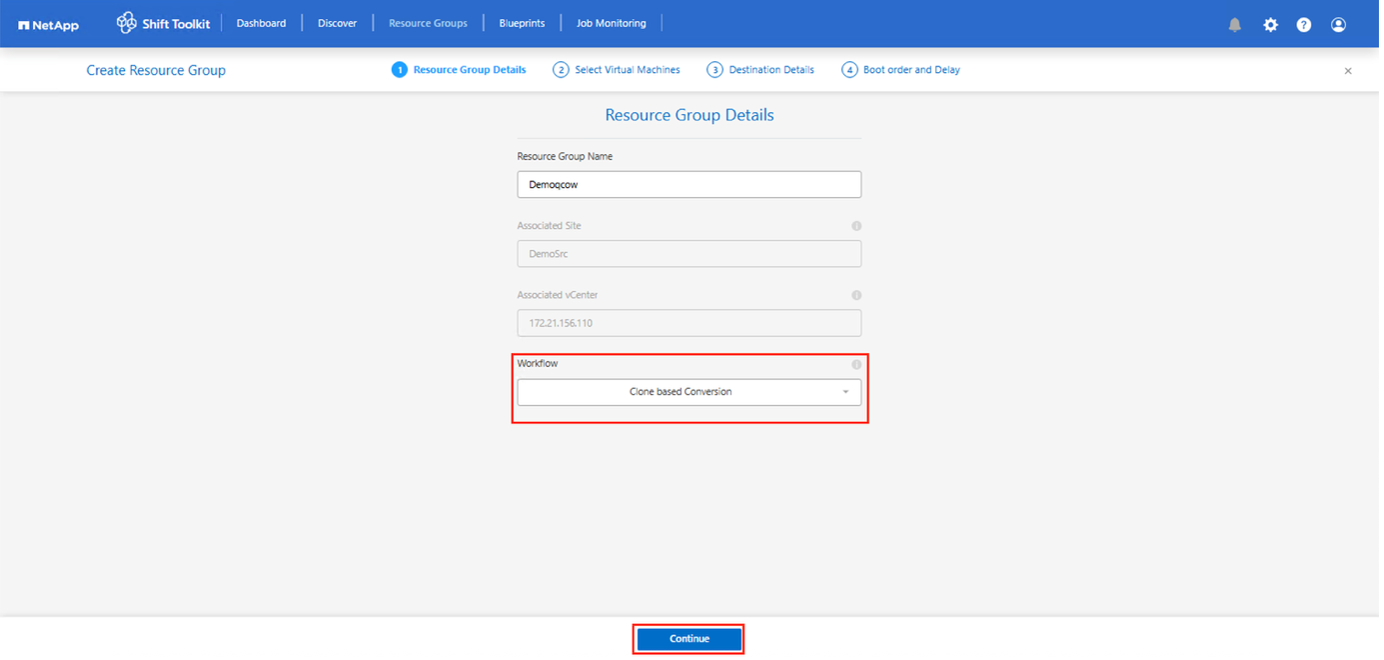
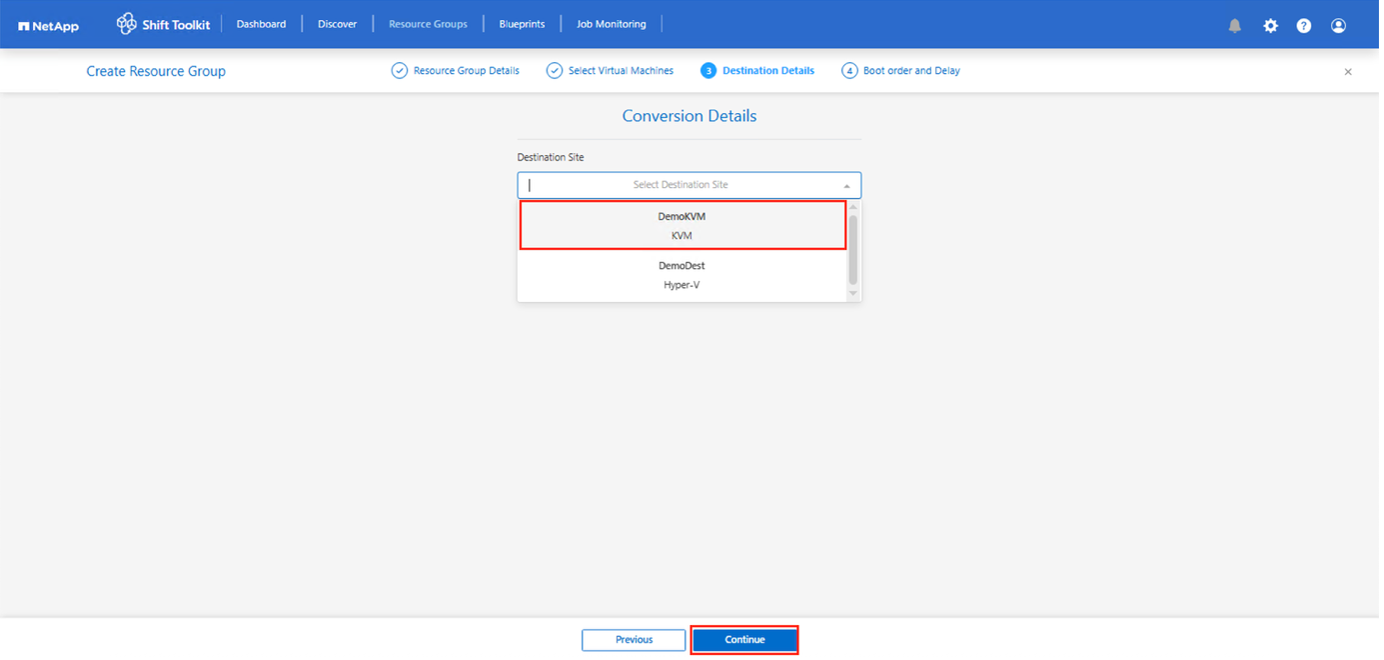
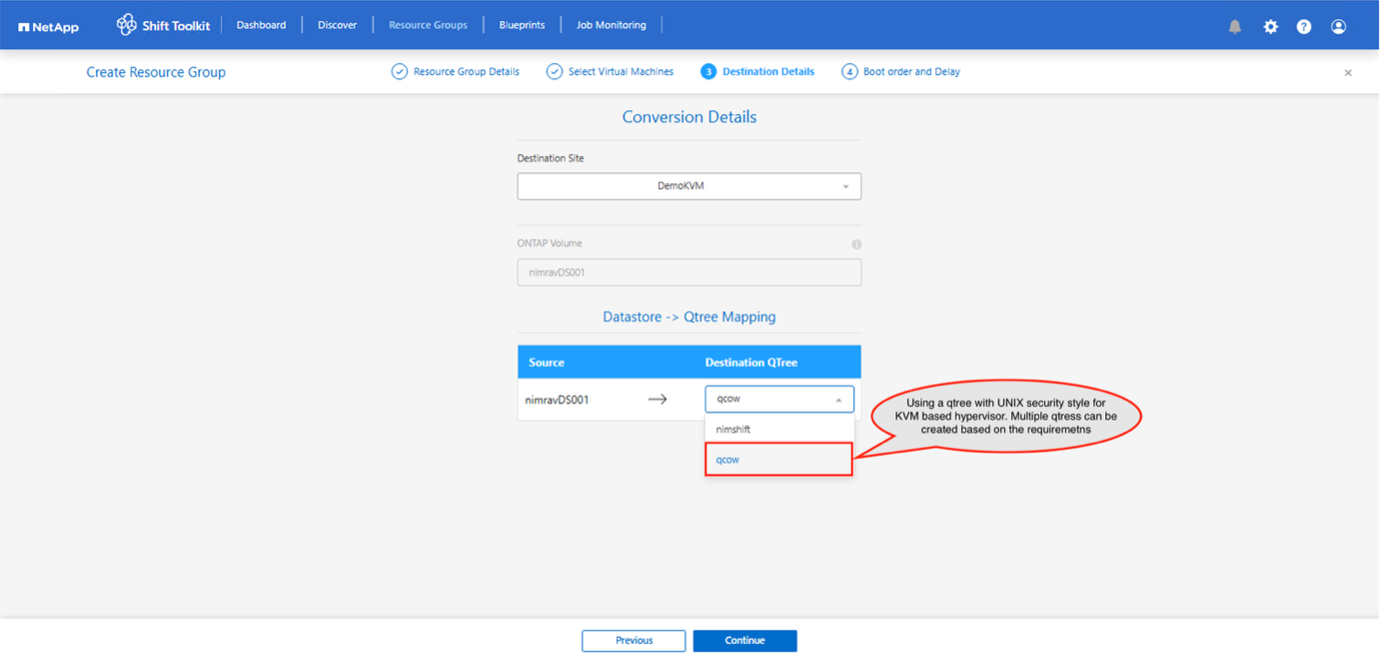
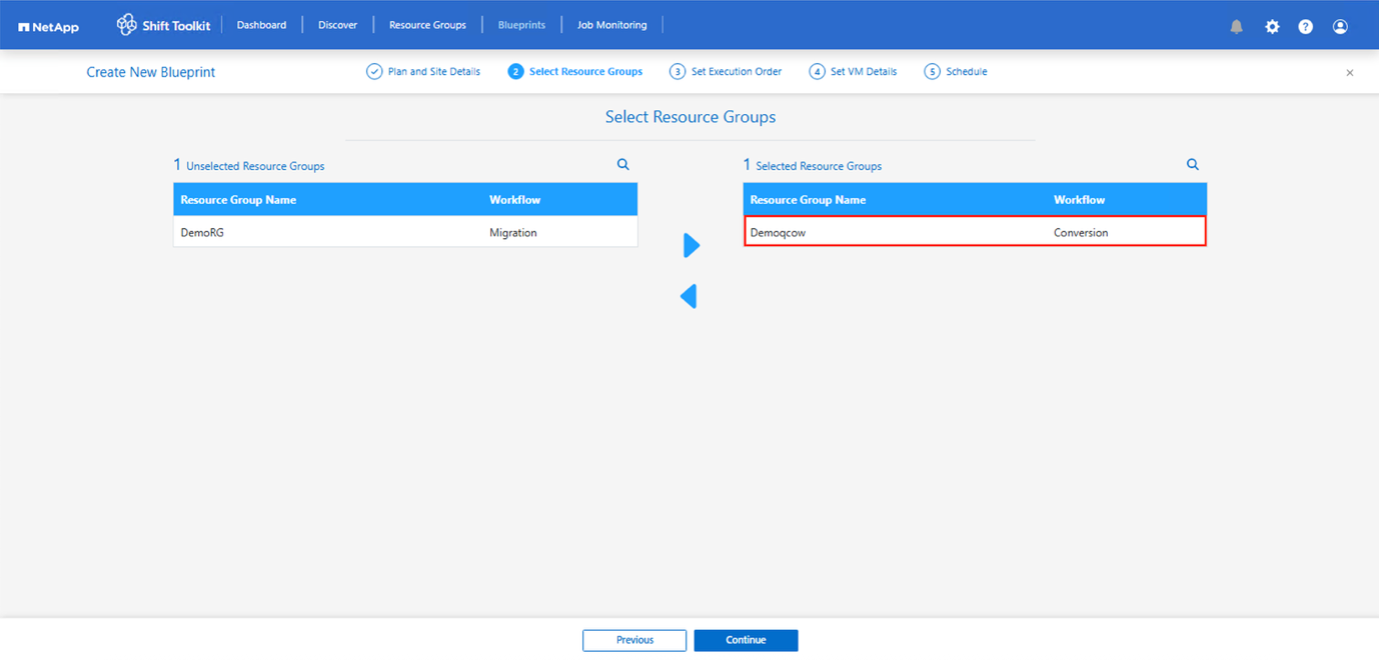
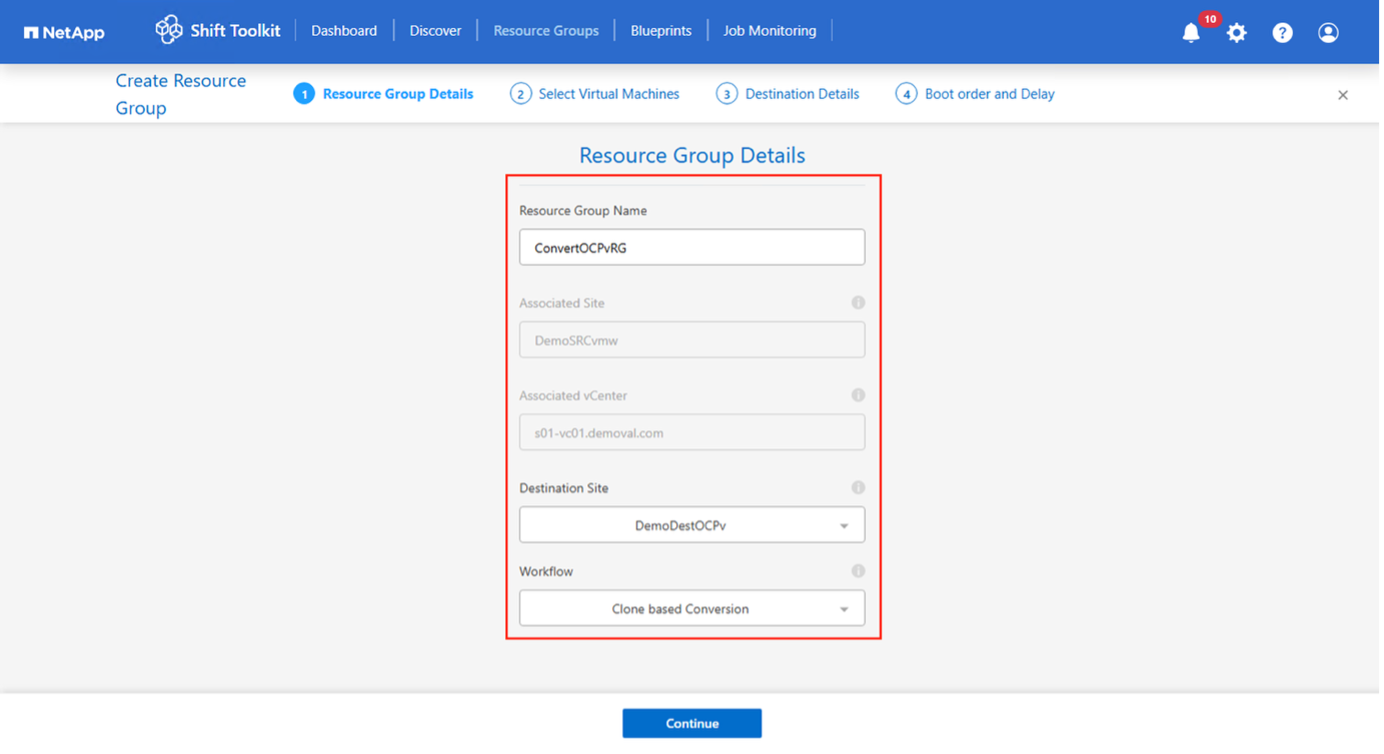
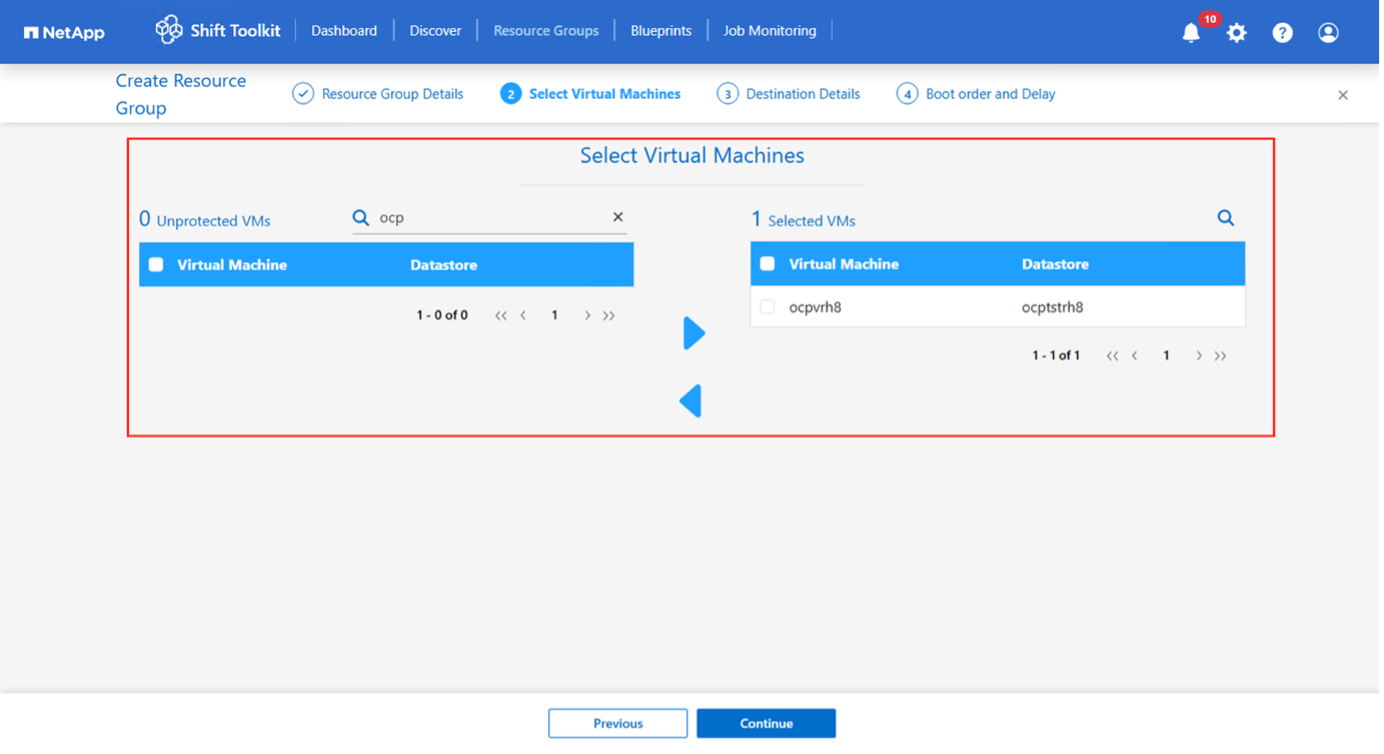
Create a resource group with the VMs for which the disk conversion is required
-
Create the blueprint to convert the virtual disk to QCOW2 format.
-
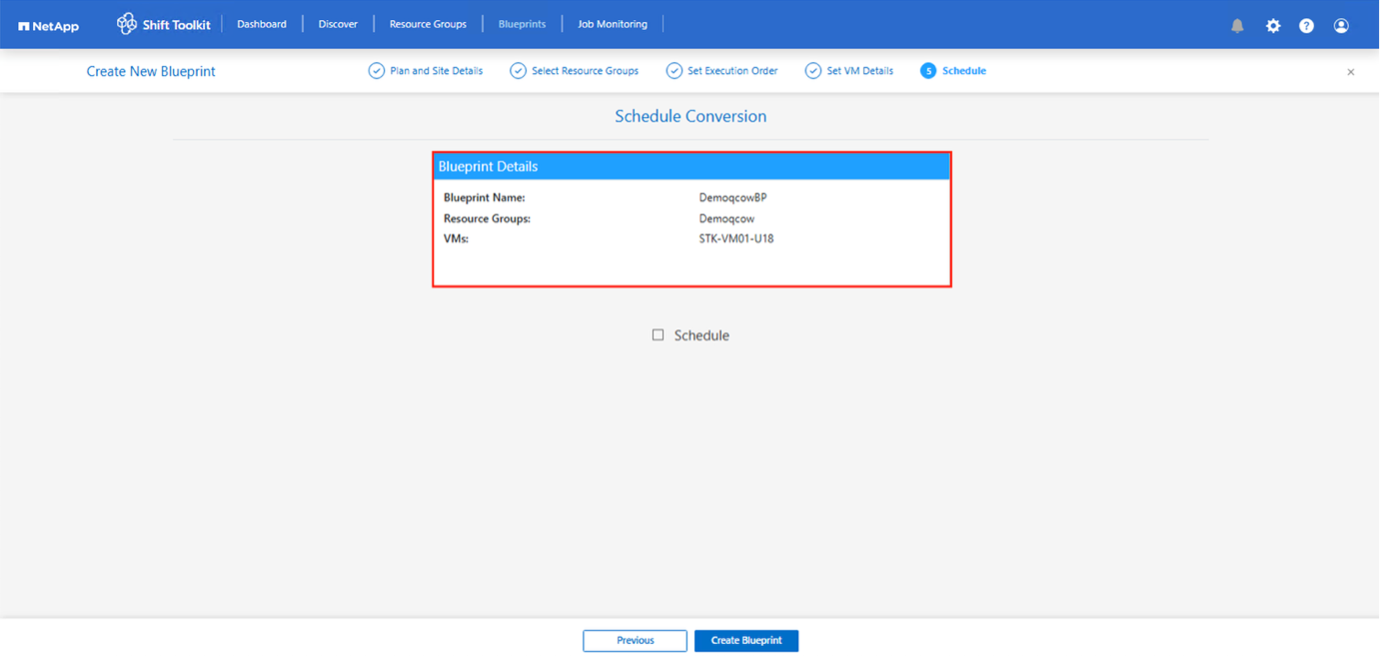
Designate a slot using the scheduling option. If the conversion is to be performed on an ad-hoc basis, leave the scheduling option unchecked.
-
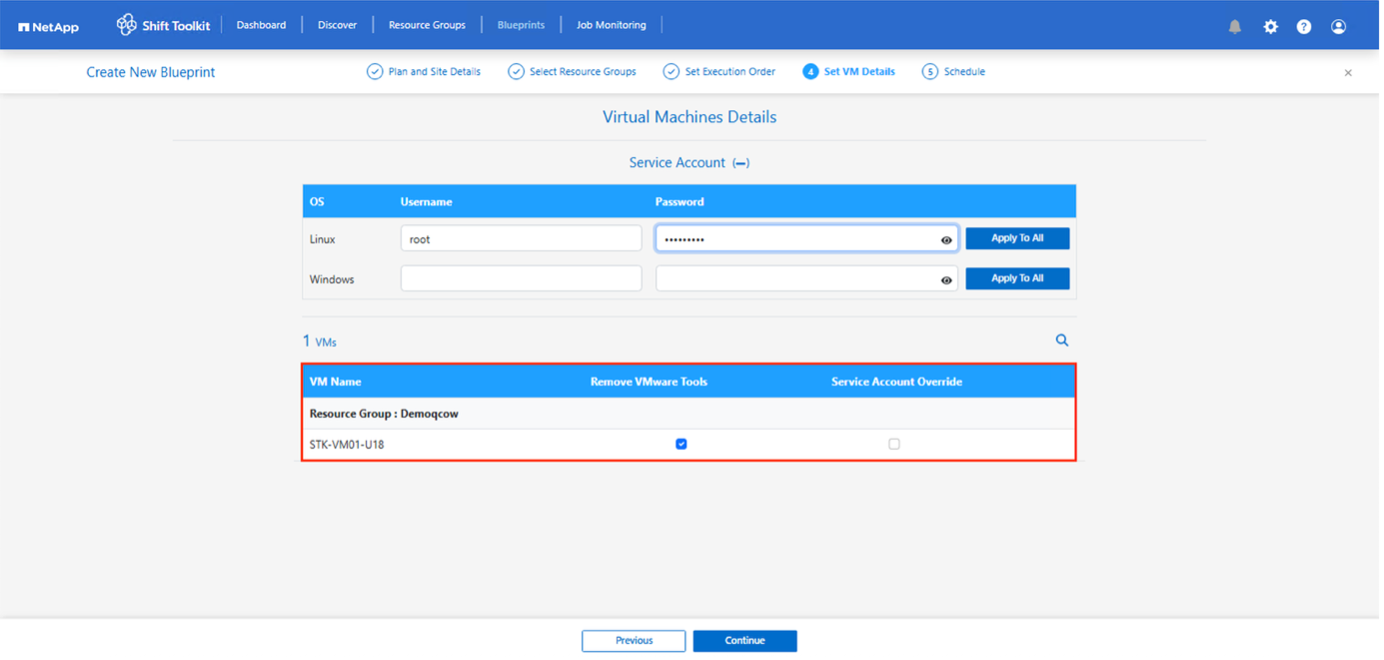
After the blueprint is created, a prepareVM job is triggered. This job automatically executes scripts on the source VMs to ready them for conversion. These scripts remove VMware Tools and update drivers to match the target hypervisor requirements.

-
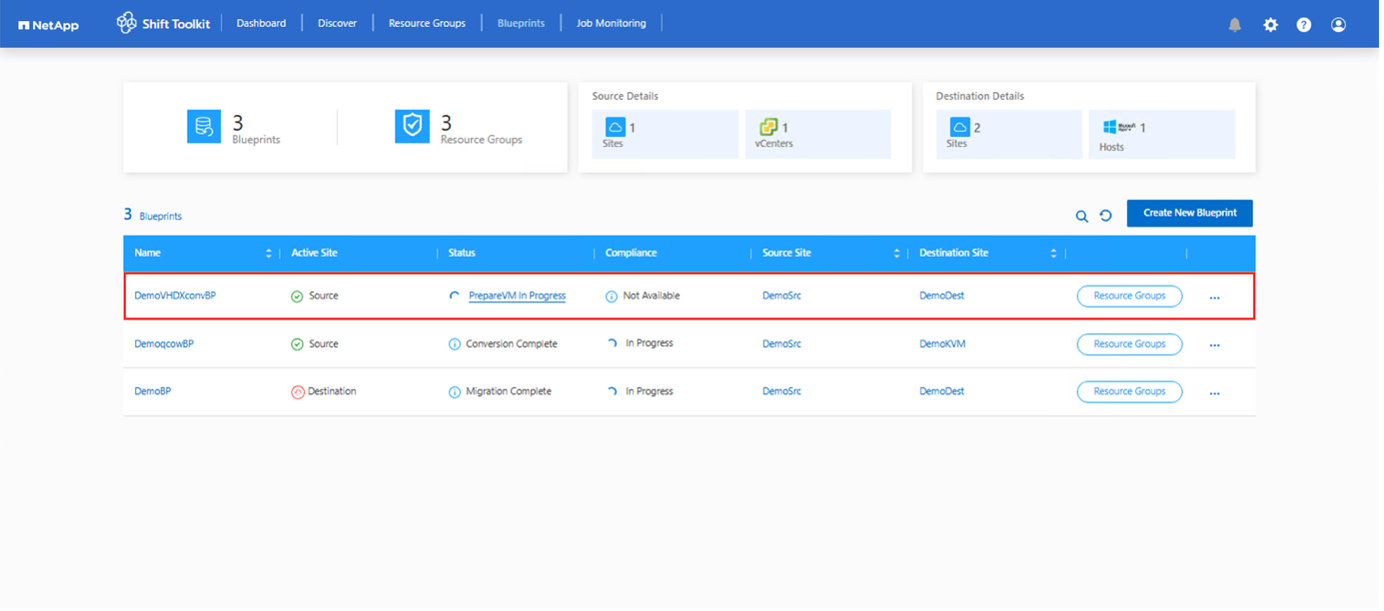
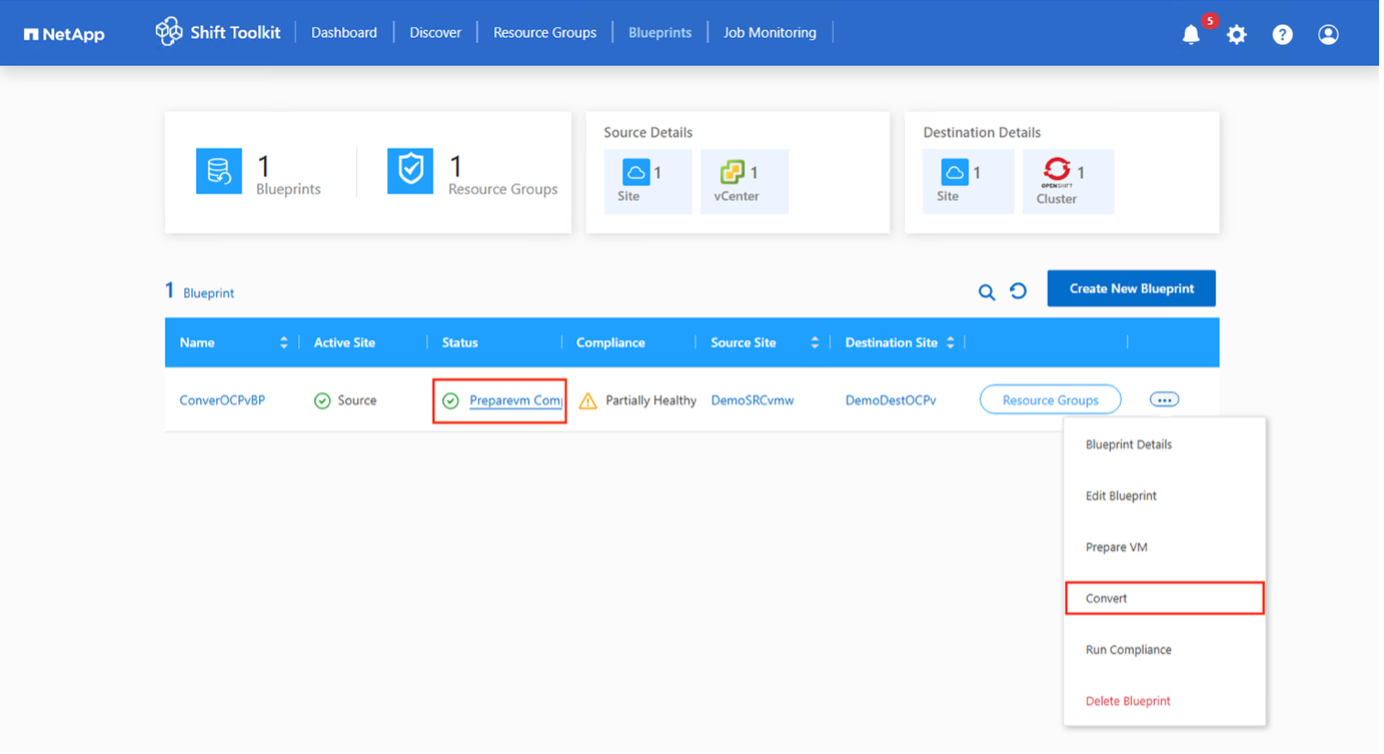
Once the prepareVM job completes successfully (as shown in the screenshot below), the VM disks associated with the VMs are ready for conversion, and the blueprint status will update to "Active."
-
Click "Convert" after scheduling the required downtime for the VMs.
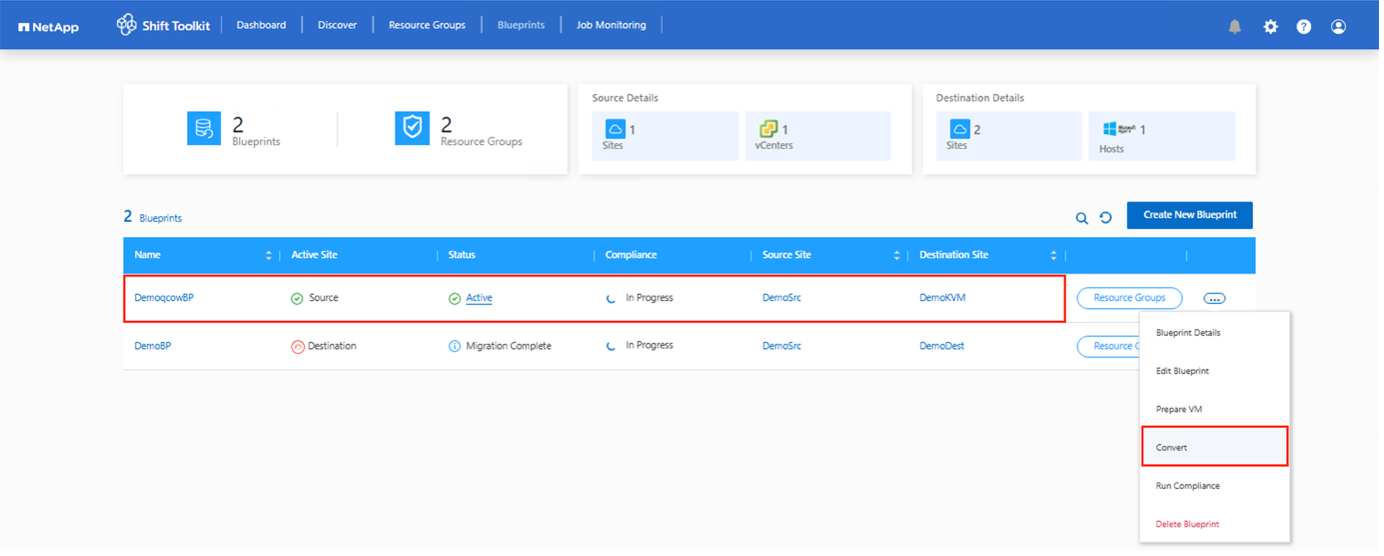
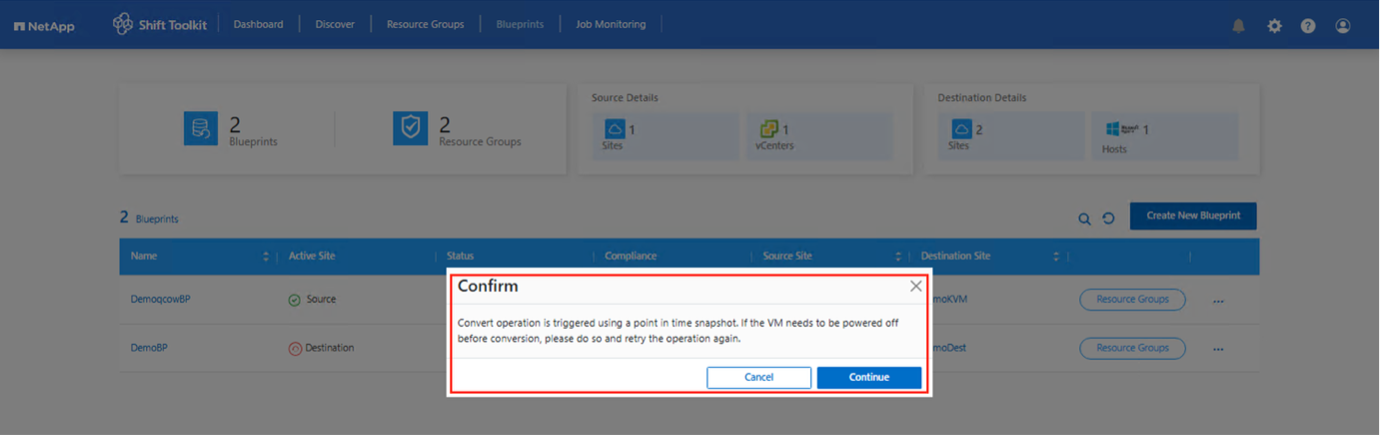
-
The convert operation uses a point-in-time snapshot. Power off the VM if needed and then retrigger the operation.
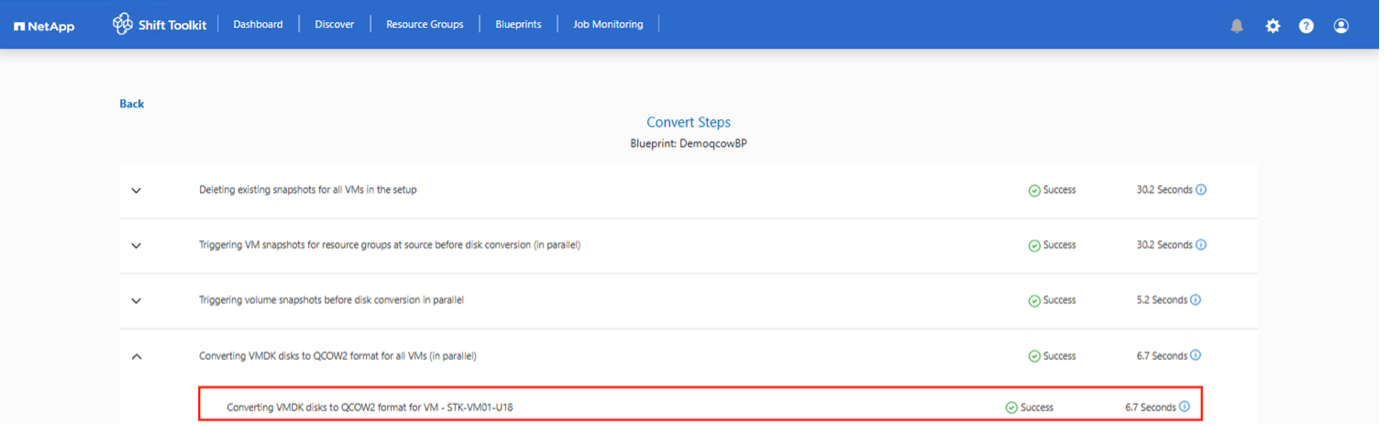
-
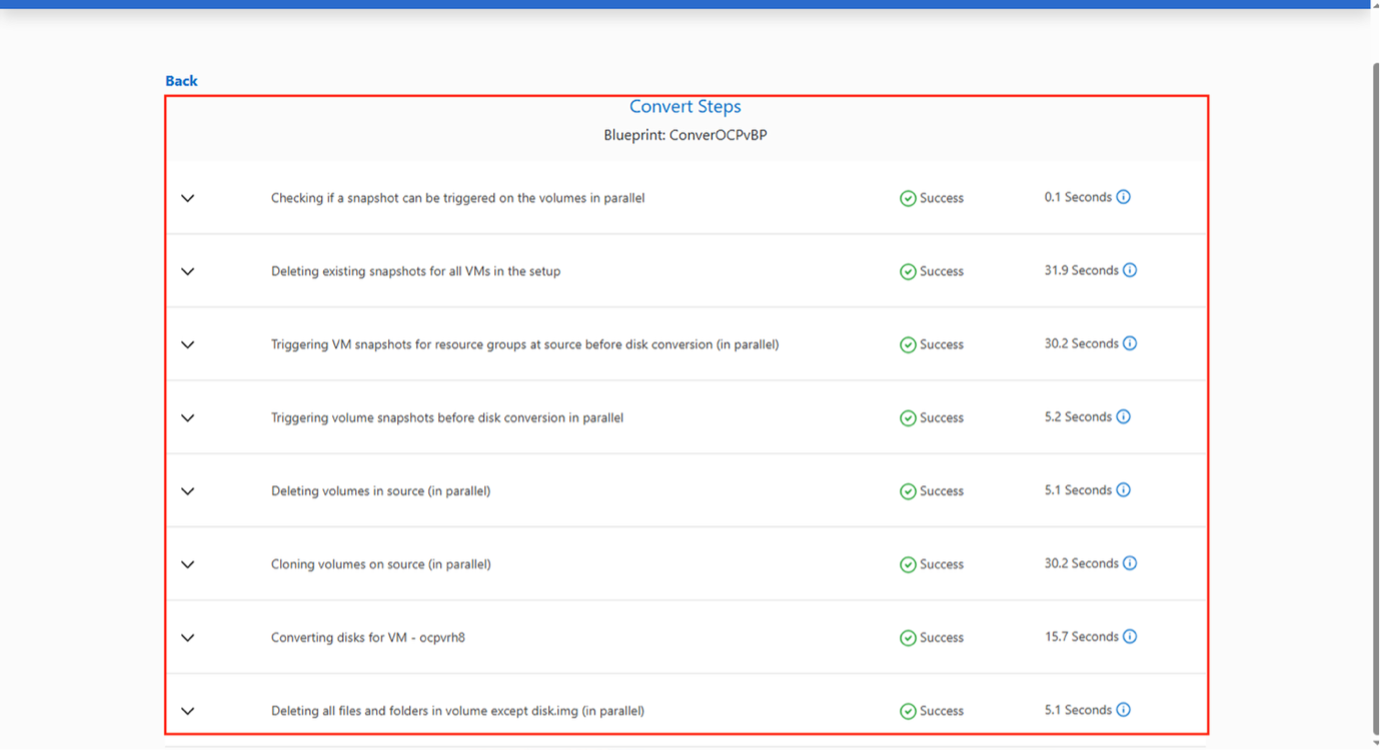
The convert operation executes each operation against the VM and respective disk to generate the appropriate format.
-
Use the converted disk by manually creating the VM and attaching the disk to it.

|
|
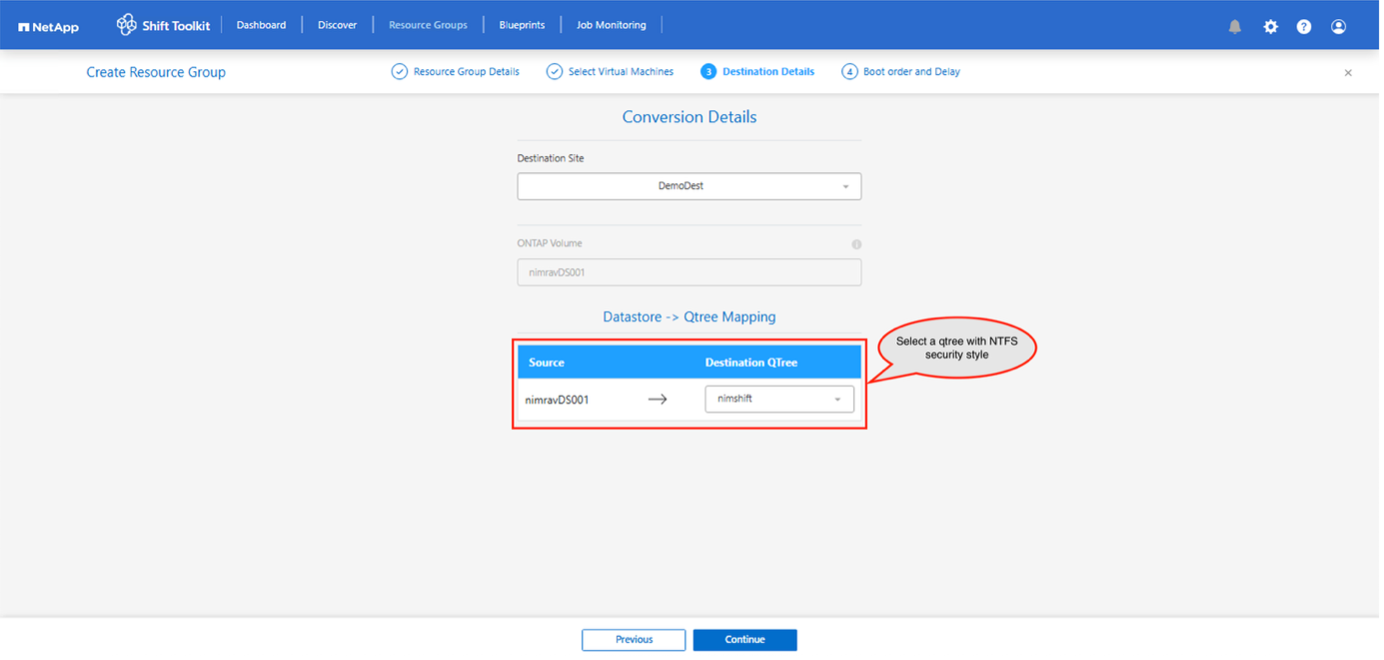
The Shift toolkit supports disk conversions only for the qcow2 format. It doesn't support VM creation or registration. To use the converted disk, manually create the VM and attach the disk. |
Convert to VHDX format
To convert the virtual disks to VHDX format with NetApp Shift toolkit, follow these high-level steps:
-
Create a destination site type specifying Hyper-V as the hypervisor.
-
Create a resource group with the VMs for which the disk conversion is required
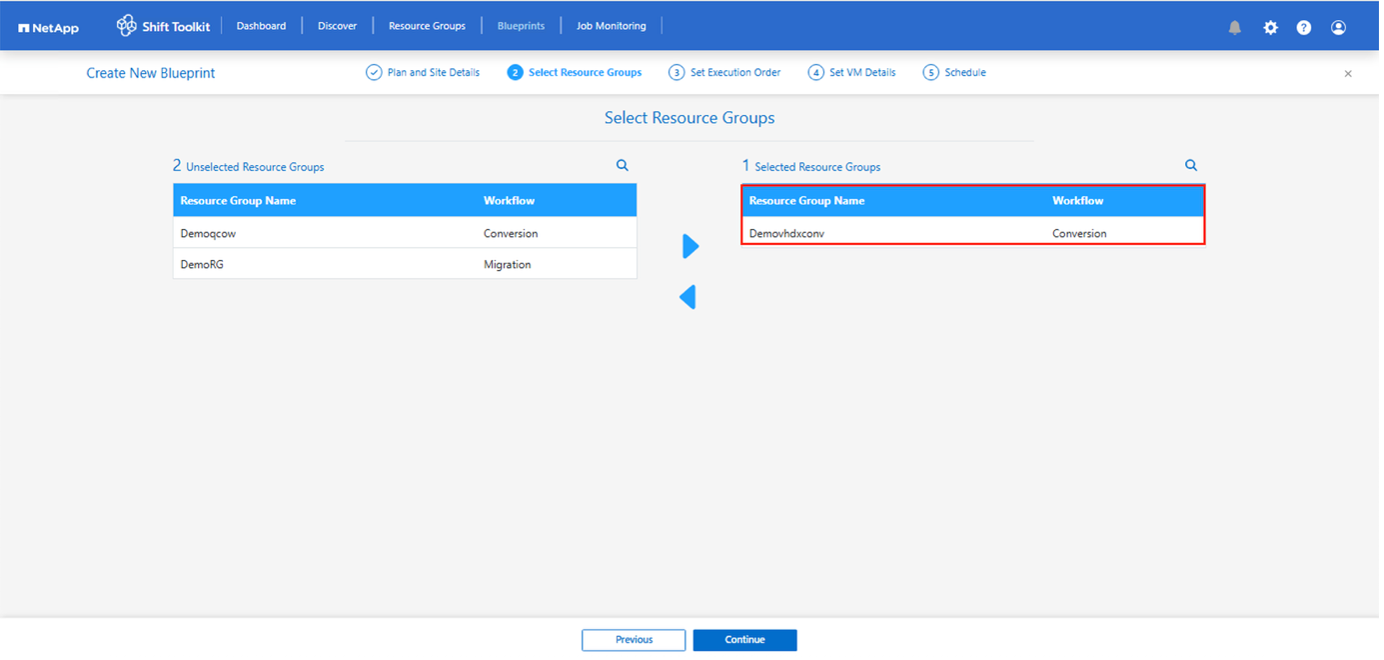
-
Create the blueprint to convert the virtual disk to VHDX format. Once the blueprint is created, the preparation jobs will be automatically initiated.
-
Choose "Convert" once the required downtime for the VMs has been scheduled.
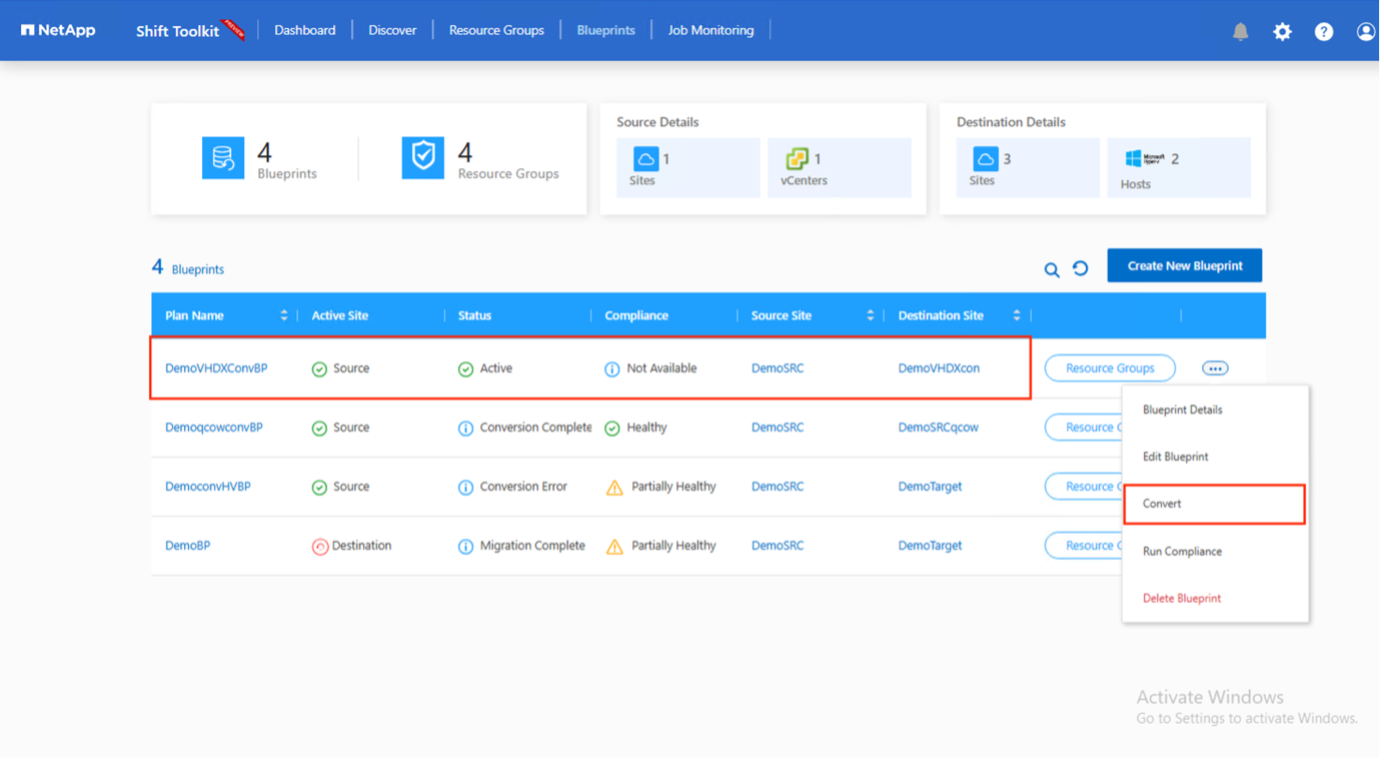
-
The convert operation executes each operation against the VM and respective disk to generate the appropriate VHDX format.
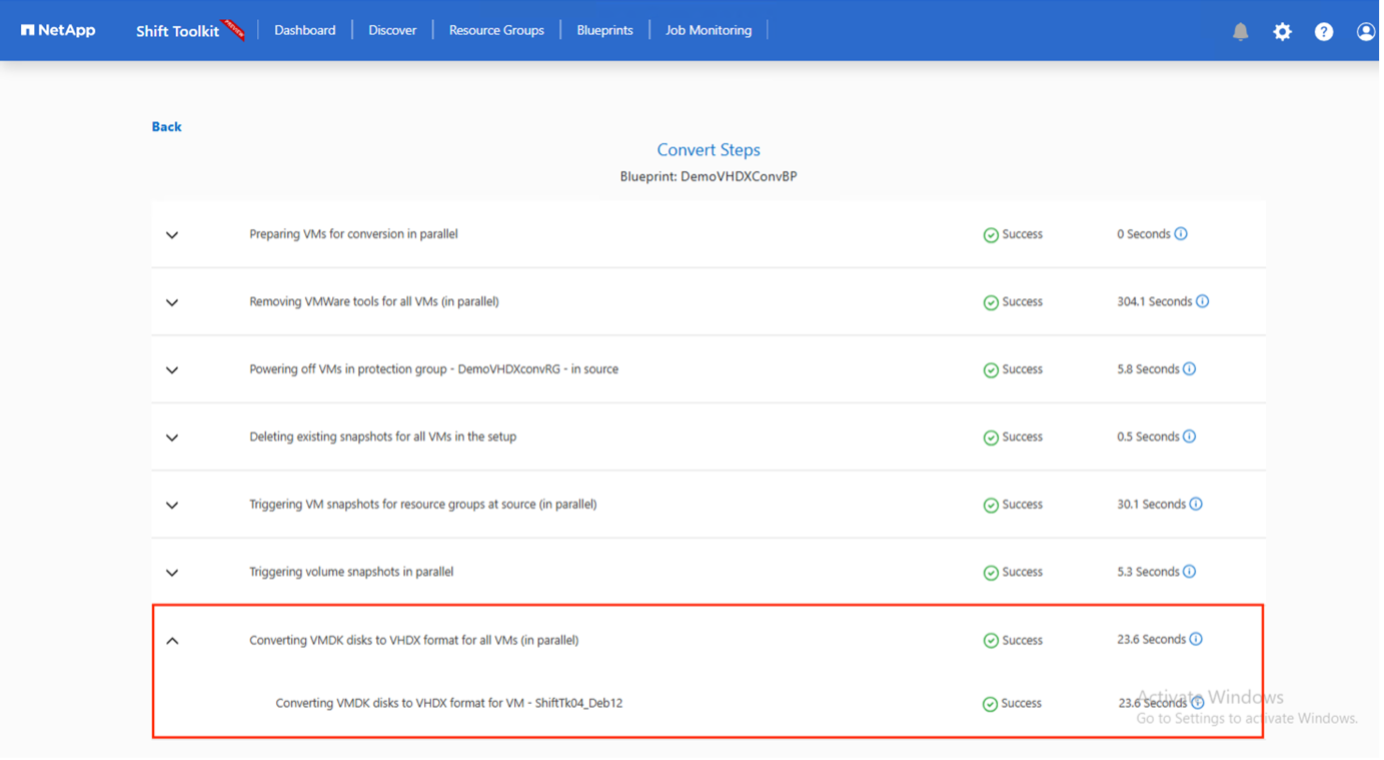
-
Use the converted disk by manually creating the VM and attaching the disk to it.

|
|
To use the converted VHDX disk in a VM, the VM must be created manually via Hyper-V manager or PowerShell commands, and the disk must be attached to it. Along with this, network should also be mapped manually. |
Convert to RAW format
To convert the virtual disks to RAW format with NetApp Shift toolkit, follow these high-level steps:
-
Create a destination site type specifying OpenShift or OLVM as the hypervisor.
-
Create a resource group with the VMs for which the disk conversion is required
-
Create the blueprint to convert the virtual disk to RAW format. Once the blueprint is created, the preparation jobs will be automatically initiated.

-
Choose "Convert" once the required downtime for the VMs has been scheduled.
-
The convert operation executes each operation against the VM and respective disk to generate the appropriate RAW format.
-
Use the converted disk by manually creating a VM.
-
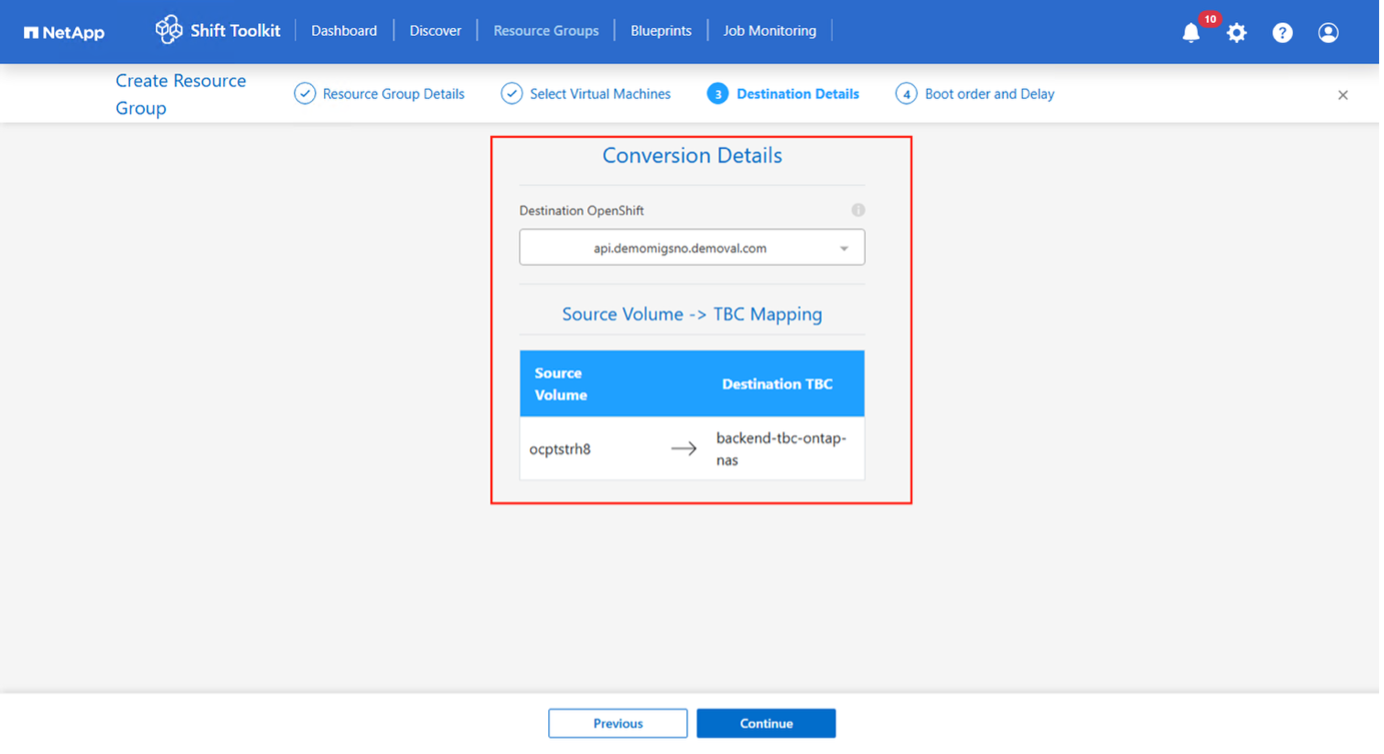
For OpenShift, import the volume as PVC using the tridentctl and then create the VM using the imported disks.
-
For OLVM, head to ovirt engine URL and create a new VM by attaching the Shift toolkit converted RAW file as the OS disk. Ensure to select the appropriate interface.
For OLVM, qcow2 file format can also be used. This selection can be made during the creation of blueprint. 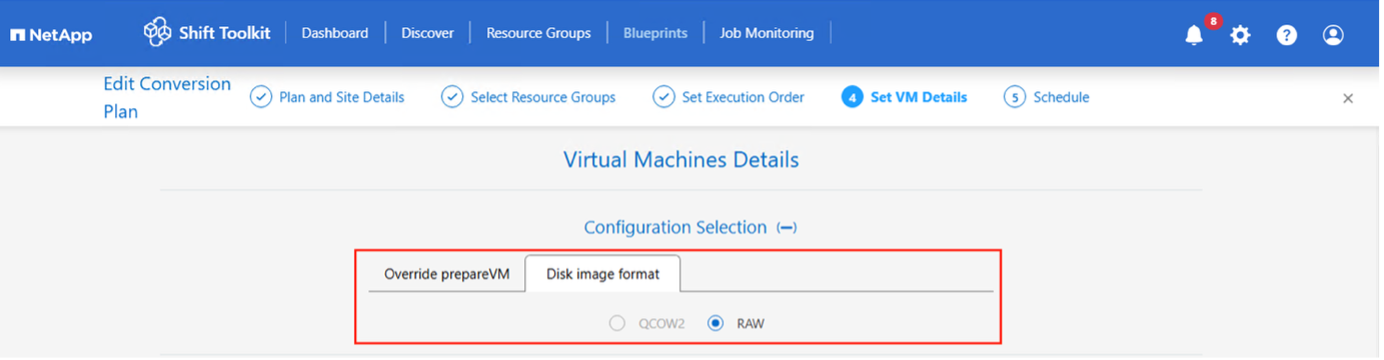
To use the converted RAW disk image in a VM, the VM must be created manually via OpenShift console or OC commands via YAML for OpenShift or using OLVM REST APIs/UI for OLVM, and the disk must be attached to it. Along with this, network should also be mapped
manually.
Ensure the appropriate Boot type (EFI or BIOS) is specified when manually creating the VM.
-