


Create a VM with Red Hat OpenShift Virtualization using ONTAP storage through alternative methods

 Suggest changes

 PDFs
PDFs
In addition to the method of creating a VM using the OpenShift Virtualization UI, there are other methods to create VMs on OpenShift Virtualization. This section provides an overview of some of those methods.
Create a VM from a YAML file with Red Hat OpenShift Virtualization
A VM can also be created by applying a YAML file with the oc apply command. This method is useful for users who prefer using CLI or want to automate VM creation using scripts. To create a VM using this method, you can create a YAML file that defines the VM and its associated resources, such as PVCs for the VM disks. Then, you can apply the YAML file using the oc apply -f <yaml-file> command to create the VM on the OpenShift cluster.
Show example
apiVersion: kubevirt.io/v1
kind: VirtualMachine
metadata:
  name: test-vms-vm
  namespace: test-5vms
  labels:
    app: test-vms-vm
    vm.kubevirt.io/template: centos-stream9-server-small
spec:
  dataVolumeTemplates:
    - apiVersion: cdi.kubevirt.io/v1beta1
      kind: DataVolume
      metadata:
        name: test-vms-vm-rootdisk
      spec:
        sourceRef:
          kind: DataSource
          name: centos-stream9
          namespace: openshift-virtualization-os-images
        storage:
          resources:
            requests:
              storage: 30Gi
  runStrategy: Always
  template:
    metadata:
      labels:
        kubevirt.io/domain: test-vms-vm
    spec:
      domain:
        cpu:
          cores: 1
          sockets: 1
          threads: 1
        devices:
          disks:
            - bootOrder: 1
              disk:
                bus: virtio
              name: rootdisk
            - disk:
                bus: virtio
              name: cloudinitdisk
          interfaces:
            - masquerade: {}
              model: virtio
              name: default
        resources:
          requests:
            memory: 2Gi
      networks:
        - name: default
          pod: {}
      terminationGracePeriodSeconds: 180
      volumes:
        - dataVolume:
            name: test-vms-vm-rootdisk
          name: rootdisk
        - cloudInitNoCloud:
            userData: |-
              #cloud-config
              user: admin
              password: <replace with your password>
              chpasswd: { expire: False }
          name: cloudinitdisk
Create a VM from a snapshot copy with Red Hat OpenShift Virtualization
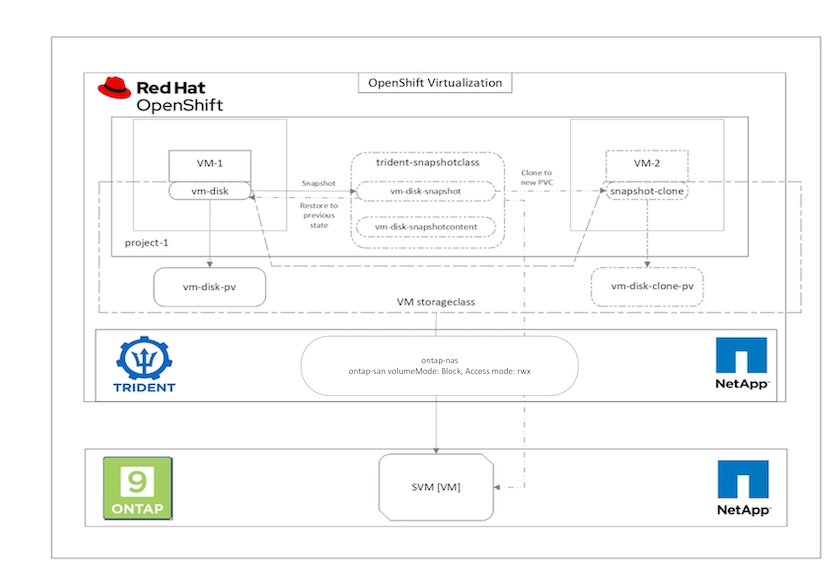
You can create a VM from a snapshot with OpenShift Virtualization. This procedure includes creating a VolumeSnapshotClass, taking a snapshot of the VM's persistent volume claim (PVC), restoring the snapshot to a new PVC, and deploying a new VM that uses the restored PVC as the root disk.
With Trident and Red Hat OpenShift, users can take a snapshot of a persistent volume on Storage Classes provisioned by it. With this feature, users can take a point-in-time copy of a volume and use it to create a new volume or restore the same volume back to a previous state. This enables or supports a variety of use-cases, from rollback to clones to data restore.
For Snapshot operations in OpenShift, the resources VolumeSnapshotClass, VolumeSnapshot, and VolumeSnapshotContent must be defined.
-
A VolumeSnapshotContent is the actual snapshot taken from a volume in the cluster. It is cluster-wide resource analogous to PersistentVolume for storage.
-
A VolumeSnapshot is a request for creating the snapshot of a volume. It is analogous to a PersistentVolumeClaim.
-
VolumeSnapshotClass lets the administrator specify different attributes for a VolumeSnapshot. It allows you to have different attributes for different snapshots taken from the same volume.
Show example
Prerequisite
You must have an existing VM with a PVC attached to it that is provisioned on a Trident Storage Class, and the VM must be in a running state before you can take a snapshot of the PVC.
You must have a VolumeSnapshotClass created that can then be used to create a VolumeSnapshot. This would have been created as part of the prerequisites for installing OpenShift Virtualization. You can refer to the Step 3 to create a VolumeSnapshotClass configuration for details.
To create Snapshot of a VM, complete the following steps:
-
Identify the PVC that is attached to the source VM and then create a Snapshot of that PVC. Navigate to
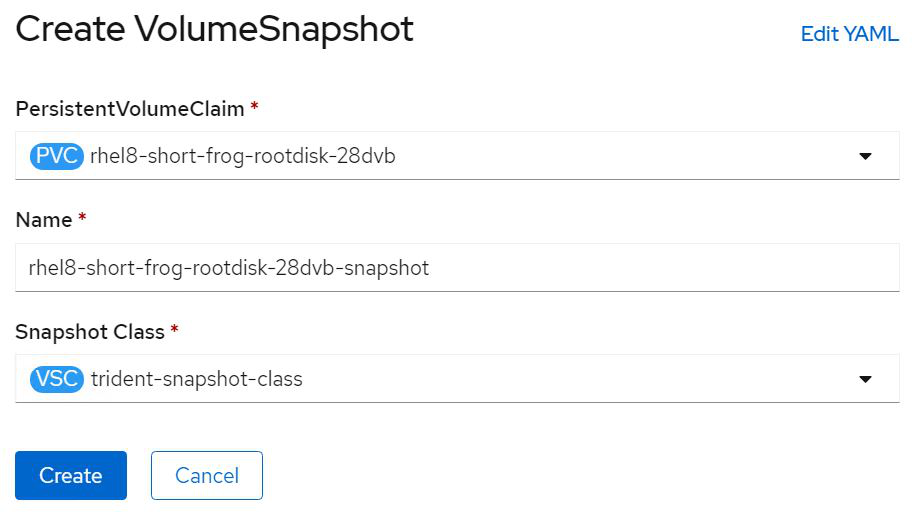
Storage > VolumeSnapshotsand click Create VolumeSnapshots. -
Select the PVC that you want to create the Snapshot for, enter the name of the Snapshot or accept the default, and select the appropriate VolumeSnapshotClass. Then click Create.
-
This creates the snapshot of the PVC at that point in time.
Create a new VM from the snapshot
-
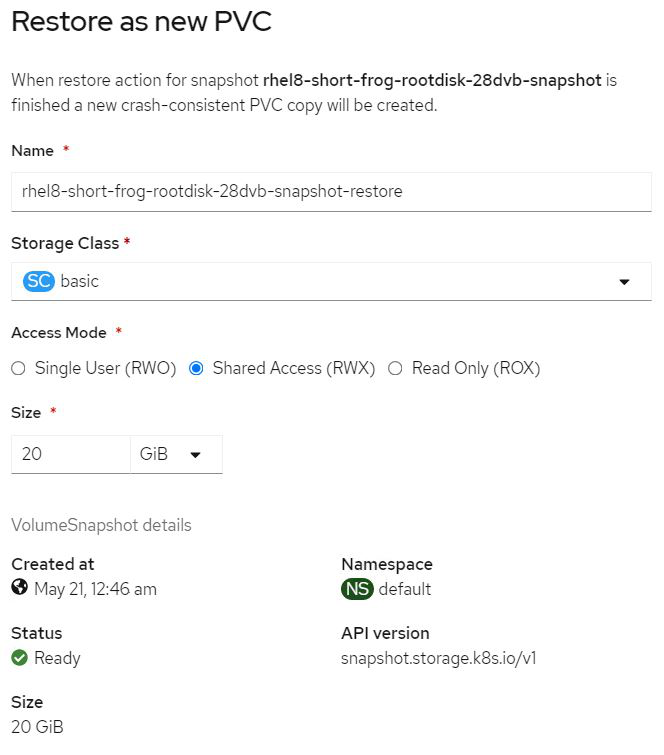
First, restore the Snapshot into a new PVC. Navigate to Storage > VolumeSnapshots, click the ellipsis next to the Snapshot that you wish to restore, and click Restore as new PVC.
-
Enter the details of the new PVC and click Restore. This creates a new PVC.
-
Next, create a new VM from this PVC. Navigate to Virtualization > Virtual Machines and click Create > With YAML.
-
In the spec > template > spec > volumes section, specify the new PVC created from Snapshot instead of from the container disk. Provide all other details for the new VM according to your requirements.
- name: rootdisk
  persistentVolumeClaim:
claimName: rhel8-short-frog-rootdisk-28dvb-snapshot-restore-
Click Create to create the new VM.
-
After the VM is created successfully, access and verify that the new VM has the same state as that of the VM whose PVC was used to create the snapshot at the time when the snapshot was created.
Clone a VM in OpenShift Virtualization using Trident
This procedure includes leveraging Trident CSI volume cloning, allowing you to create a new VM by shutting down the source VM or keep it running.
Show example
VM cloning
Cloning an existing VM in OpenShift is achieved with the support of Trident's Volume CSI cloning feature. CSI volume cloning allows for creation of a new PVC using an existing PVC as the data source by duplicating its PV. After the new PVC is created, it functions as a separate entity and without any link to or dependency on the source PVC.
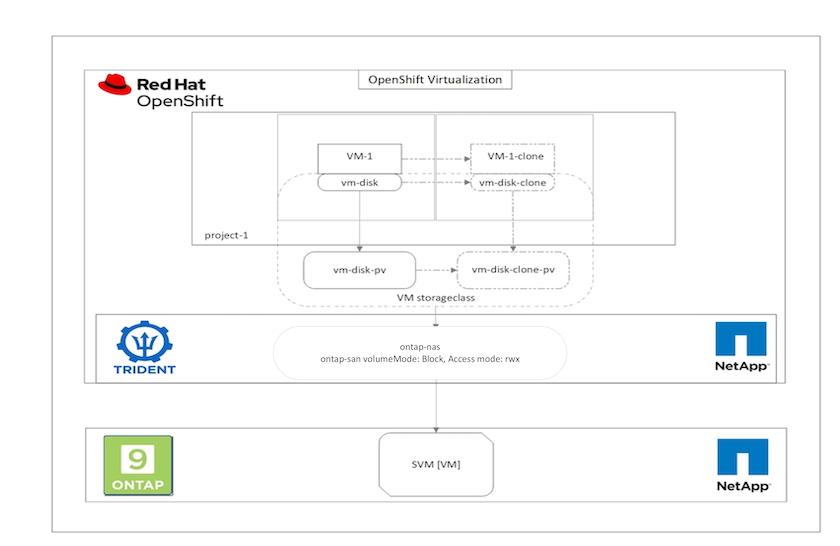
There are certain restrictions with CSI volume cloning to consider:
-
Source PVC and destination PVC must be in the same project.
-
Cloning is supported within the same storage class.
-
Cloning can be performed only when source and destination volumes use the same VolumeMode setting; for example, a block volume can only be cloned to another block volume.
VMs in an OpenShift cluster can be cloned in two ways:
-
By shutting down the source VM
-
By keeping the source VM live
By Shutting down the source VM
Cloning an existing VM by shutting down the VM is a native OpenShift feature that is implemented with support from Trident. Complete the following steps to clone a VM.
-
Navigate to Workloads > Virtualization > Virtual Machines and click the ellipsis next to the virtual machine you wish to clone.
-
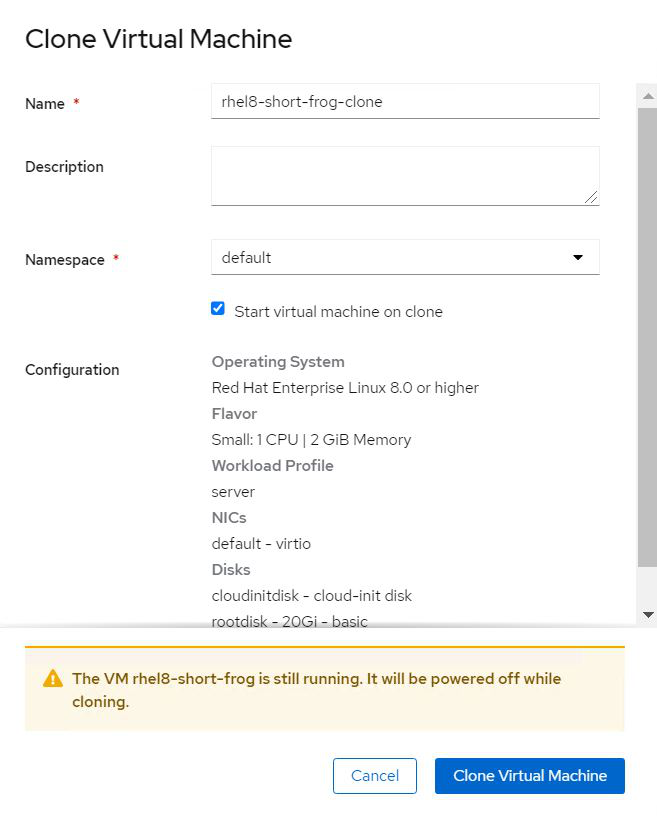
Click Clone Virtual Machine and provide the details for the new VM.
-
Click Clone Virtual Machine; this shuts down the source VM and initiates the creation of the clone VM.
-
After this step is completed, you can access and verify the content of the cloned VM.
By keeping the source VM live
An existing VM can also be cloned by cloning the existing PVC of the source VM and then creating a new VM using the cloned PVC. This method does not require you to shut down the source VM. Complete the following steps to clone a VM without shutting it down.
-
Navigate to Storage > PersistentVolumeClaims and click the ellipsis next to the PVC that is attached to the source VM.
-
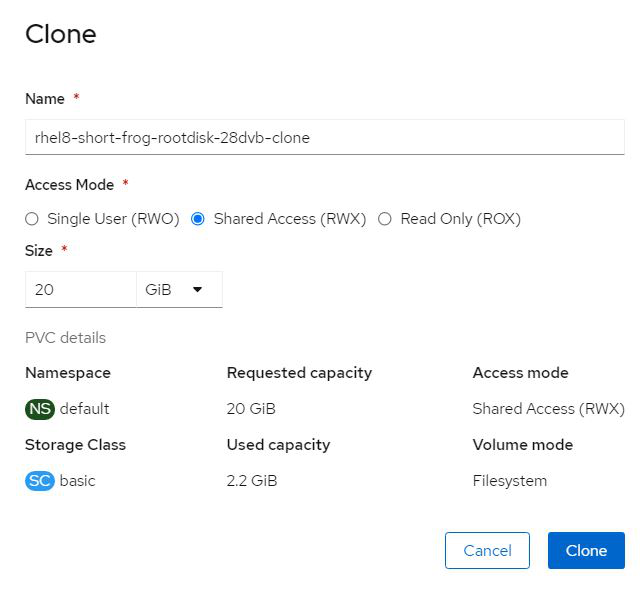
Click Clone PVC and furnish the details for the new PVC.
-
Then click Clone. This creates a PVC for the new VM.
-
Navigate to Workloads > Virtualization > Virtual Machines and click Create > With YAML.
-
In the spec > template > spec > volumes section, attach the cloned PVC instead of the container disk. Provide all other details for the new VM according to your requirements.
- name: rootdisk
  persistentVolumeClaim:
    claimName: rhel8-short-frog-rootdisk-28dvb-clone
-
Click Create to create the new VM.
-
After the VM is created successfully, access and verify that the new VM is a clone of the source VM.