Protect VMs in Red Hat OpenShift Virtualization with Trident Volume Group Snapshots
 Suggest changes
Configure Volume Group Snapshots to protect VMs in Red Hat OpenShift Virtualization using Trident 25.06 and NetApp ONTAP storage. This procedure includes installing Trident with iSCSI support, configuring ONTAP backends and storage classes, creating a VM with multiple persistent disks, and implementing volume group snapshot that ensures snapshots of all VM disks are captured simultaneously for reliable recovery operations.
Volume Group Snapshots is a Kubernetes feature that addresses consistency issues when taking snapshots of multiple PersistentVolumeClaims (PVCs) of containers or VMs.
This feature allows you to create crash-consistent snapshots of multiple PVCs
simultaneously. This feature is Beta in Kubernetes version v1.32. Trident supports this Beta feature from Trident version 25.06 onwards (for iSCSI protocol only at this time).
To support Volume Group Snapshots feature, Kubernetes introduces three new API objects:
-
VolumeGroupSnapshotClass: Created by cluster administrators to describe how volume group snapshots should be created.
-
VolumeGroupSnapshot: Requested by Kubernetes users to create a volume group snapshot for multiple PVCs.
-
VolumeGroupSnapshotContent: Created by the snapshot controller for dynamically created VolumeGroupSnapshots.
Trident 25.06 automatically detects new CRDs (specified for the Volume Group Snapshot feature) to enable the relevant feature gates in the Trident CSI sidecars.

|
Trident supports Volume Group Snapshots only for the iSCSI protocol in the 25.06 version. |
Step 1: Install OpenShift 4.19 and enable FeatureGate for Volume Group Snapshots
Install OpenShift 4.19 cluster with Kubernetes version 1.32. This version elevates the Volume Group Snapshot feature to Beta status. Later releases of OpenShift may include Kubernetes versions beyond v1.32, which also support this feature.
-
Install OpenShift Cluster version 4.19 by following the instructions in the Red Hat documentation: Installing OpenShift Container Platform.
-
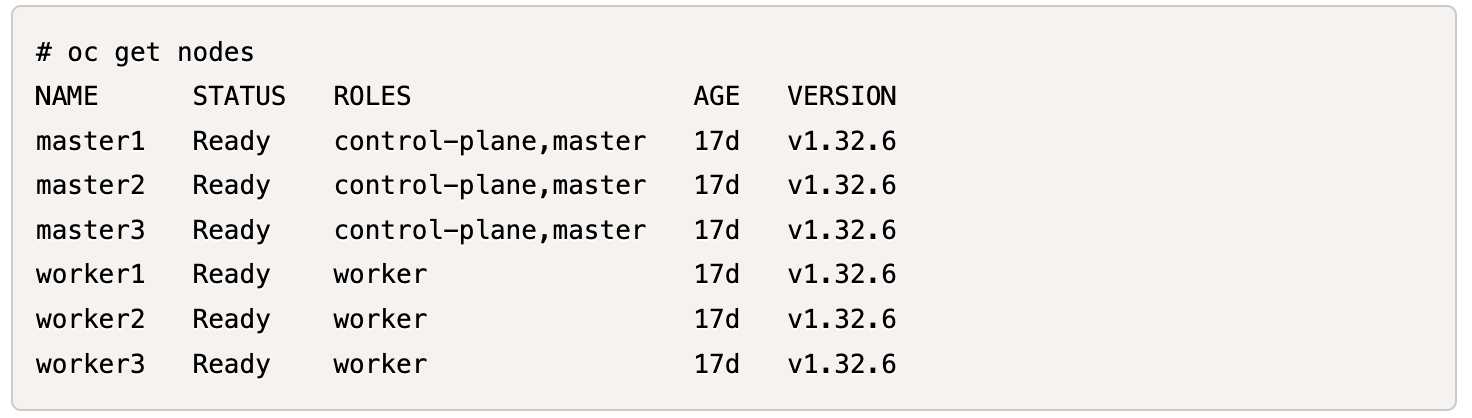
Verify the Kubernetes version in the OpenShift cluster.
The following image shows OpenShift Cluster v4.19 installed with Kubernetes v1.32.
-
Turn FeatureGate on for VolumeGroupSnapshot using the OpenShift web console: Navigate to Administration → Custom Resource Definitions.
-
Search for and click FeatureGate.
-
Click the Instances tab and select the Cluster instance.
-
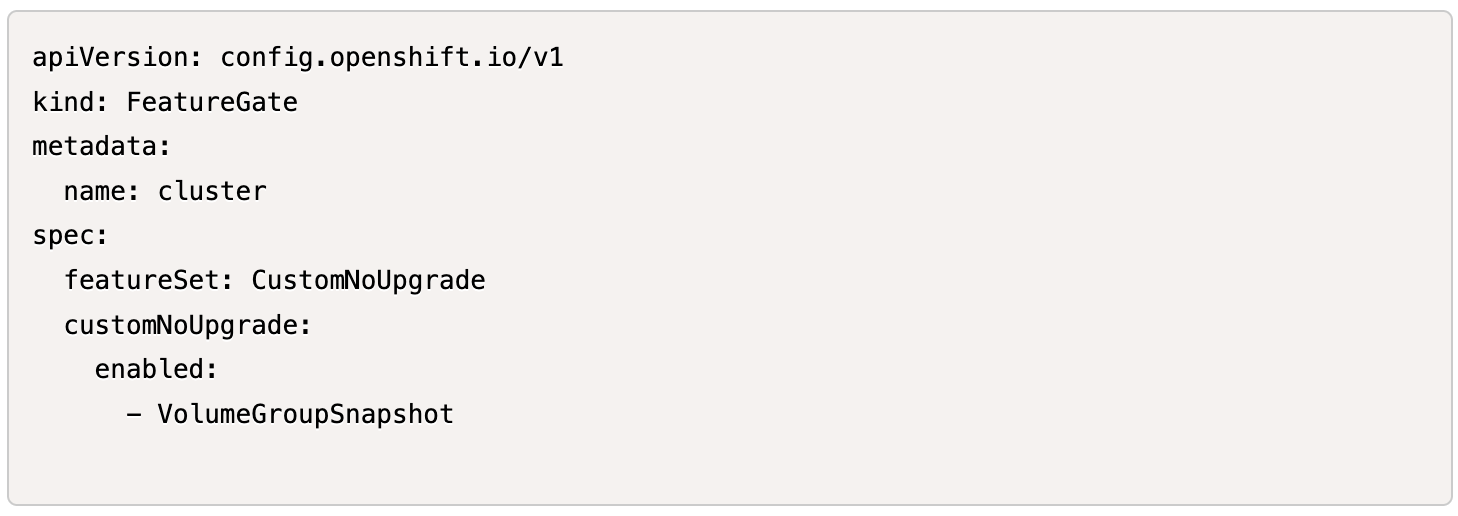
Select the YAML tab, and edit the FeatureGate/cluster object to include VolumeGroupSnapshot in the enabled list under customNoUpgrade.
Step 2: Install and configure Trident 25.06 for Volume Group Snapshots
The Volume Group Snapshot feature is supported by Trident only for the iSCSI protocol in Trident 25.06.
NOTE: You need to install Trident version 25.06.1 to enable iSCSI protocol on OpenShift Cluster 4.19.
Install Trident and configure the necessary storage infrastructure to enable volume group snapshots for your VMs. This includes setting up an iSCSI backend connection to ONTAP, defining storage classes for VM persistent volumes, and configuring both individual and group snapshot classes.
|
|
It is best practice to have both the Trident storage class and the snapshot class set as default so that you can take advantage of fast FlexCloning mechanism from the snapshots of the golden image when creating new VMs. |
-
Make sure the Feature Gate is on for VolumeGroupSnapshots.
-
Use node-prep for installing iSCSI tools.
-
Install Trident using the following command:

-
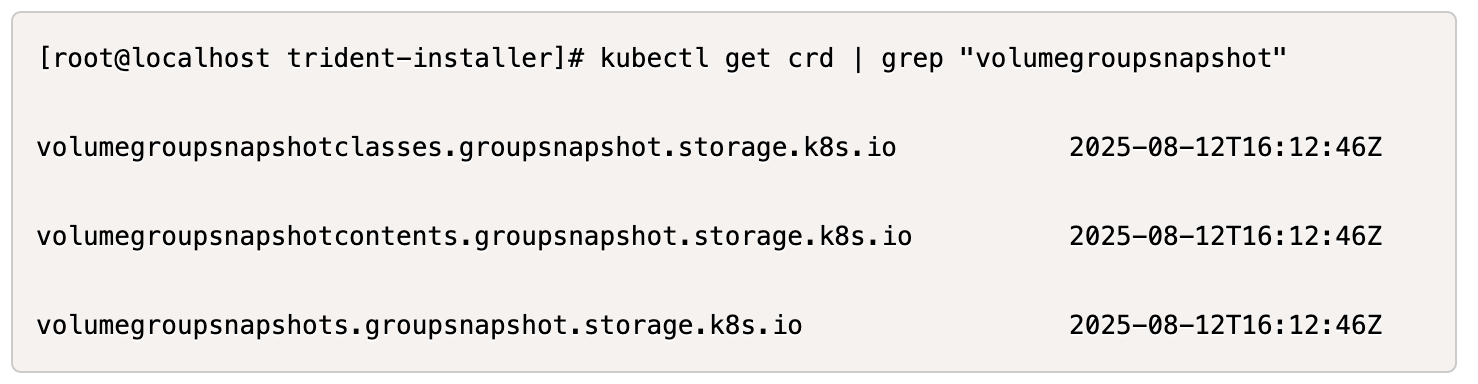
Verify that the required CRDs for VolumeGroupSnapshots are installed.
-
Create the Trident iSCSI backend using the following YAML definition.
#tbc-iscsi.yaml apiVersion: v1 kind: Secret metadata: name: tbc-iscsi-secret type: Opaque stringData: username: admin password: <passwd to log into ONTAP ClI> --- apiVersion: trident.netapp.io/v1 kind: TridentBackendConfig metadata: name: tbc-iscsi spec: version: 1 storageDriverName: ontap-san managementLIF: <mgmt-lif> backendName: tbc-iscsi svm: openshift storagePrefix: openshift-iscsi defaults: formatOptions: "-E nodiscard" nameTemplate: "{{ .config.StoragePrefix }}_{{ .volume.Namespace }}_{{ .volume.RequestName }}" credentials: name: tbc-iscsi-secret -
Create the iSCSI storage class using the following YAML definition.
# sc-iscsi.yaml apiVersion: storage.k8s.io/v1 kind: StorageClass metadata: name: sc-iscsi provisioner: csi.trident.netapp.io parameters: backendType: "ontap-san" provisioningType: "thin" fsType: ext4 snapshots: "true" reclaimPolicy: "Delete" allowVolumeExpansion: true -
Create the VolumeSnapshotClass object using the following YAML definition.
# snapshotclass.yaml
apiVersion: snapshot.storage.k8s.io/v1
kind: VolumeSnapshotClass
metadata:
  name: trident-snapshotclass
driver: csi.trident.netapp.io
deletionPolicy: Retain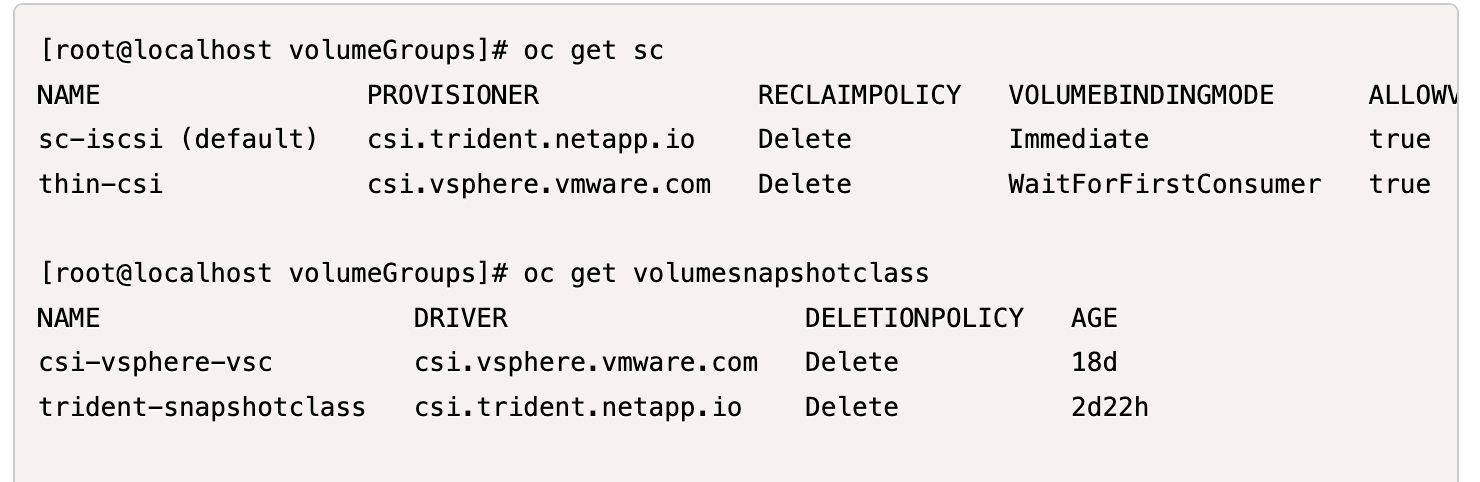
-
Set the defaults for the storage class and the VolumeSnapshotClass in the cluster.
kubectl patch storageclass <storage-class-name> -p '{"metadata": {"annotations":{"storageclass.kubernetes.io/is-default-class":"true"}}}'kubectl patch volumesnapshotclass <volumesnapshotclass-name> --type=merge -p '{"metadata":{"annotations":{"snapshot.storage.kubernetes.io/is-default-class":"true"}}}' -
Create a VolumeGroupSnapshotClass object using the following YAML definition.
apiVersion: groupsnapshot.storage.k8s.io/v1beta1
kind: VolumeGroupSnapshotClass
metadata:
  name: trident-groupsnapshotclass
  annotations:
    kubernetes.io/description: "Trident group snapshot class"
driver: csi.trident.netapp.io
deletionPolicy: Delete
Step 3: Install OpenShift Virtualization and create a test VM with multiple disks
Install the OpenShift Virtualization Operator to enable VM management capabilities in your cluster. After installation, create a test VM with multiple persistent disks to demonstrate volume group snapshot functionality.
-
Install OpenShift Virtualization Operator.
This needs to be done after setting up the default storage class and Snapshot class using Trident so that the golden images are made available as VolumeSnapshots in the cluster using Trident CSI. -
Verify that the golden images are in the volume snapshots.

-
Create a VM from default template. Add 2 additional disks for the VM. (One root disk and 2 additional disks).
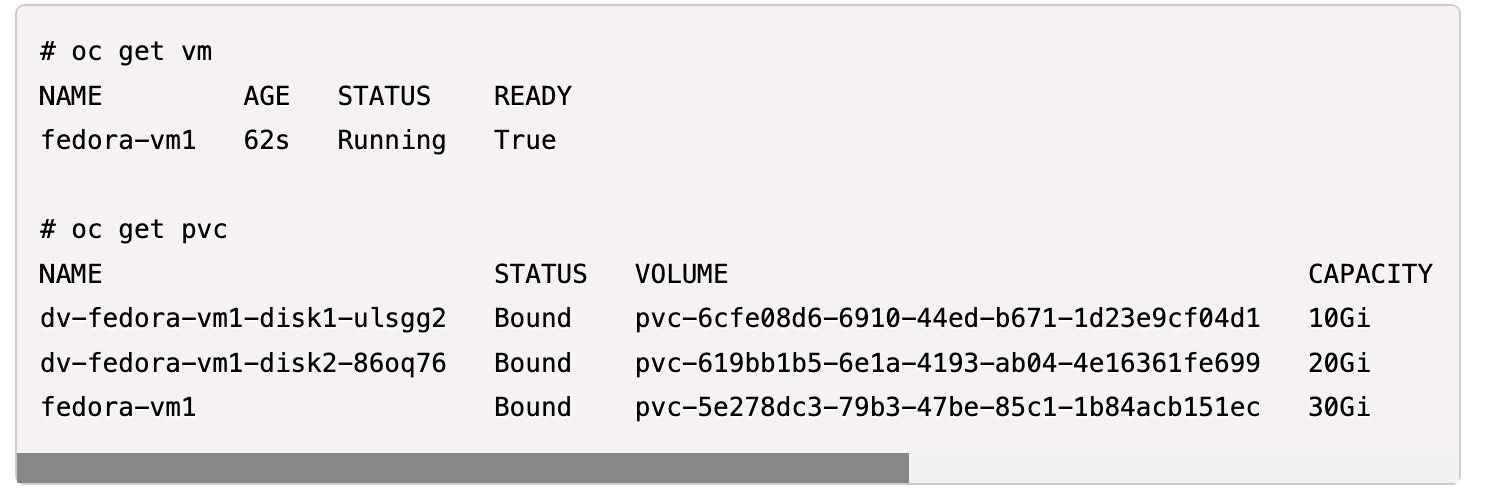
-
Check the corresponding volumes in the ONTAP backend.
The root disk volume is a flex-clone volume of the snapshot with the golden image. The other 2 volumes for the additional 2 disks of the VMs are FlexVol volumes.
-
Log into the VM using virtctl tool.
-
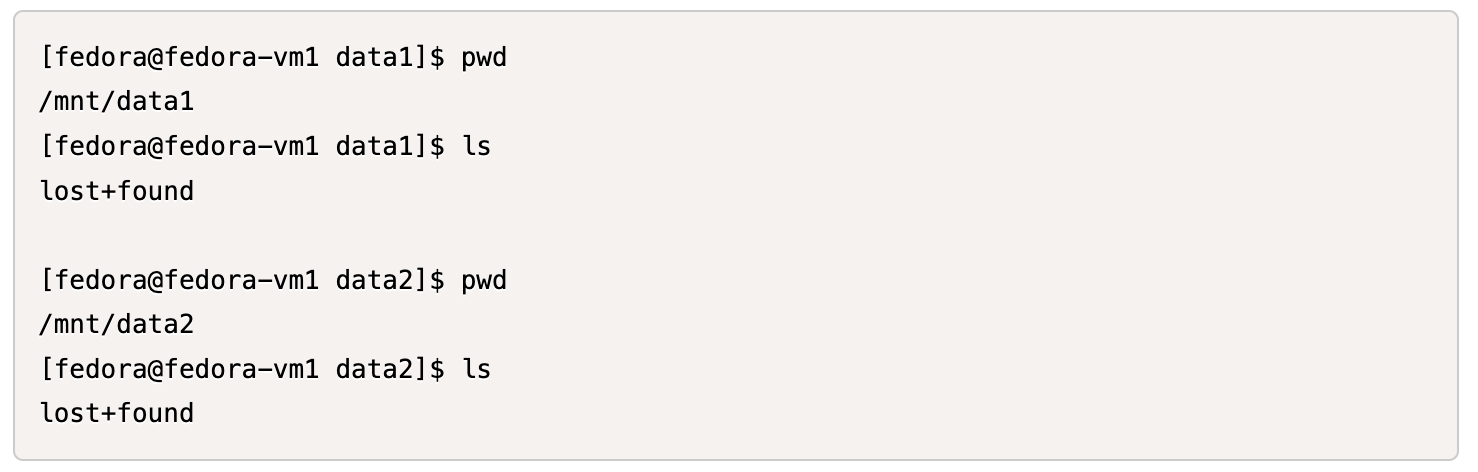
Format and mount the 2 disks as shown below:

Step 4: Label VM disks for group snapshot protection
Volume group snapshots use label selectors to identify which PVCs belong together, ensuring all related VM disks are captured simultaneously at the same point-in-time.
-
Label the PVCs using the same key/value and verify.
#oc label pvc fedora-vm1 consistencygroup=group1 persistentvolumeclaim/fedora-vm1 labeled # oc label pvc dv-fedora-vm1-disk1-ulsgg2 consistencygroup=group1 persistentvolumeclaim/dv-fedora-vm1-disk1-ulsgg2 labeled # oc label pvc dv-fedora-vm1-disk2-86oq76 consistencygroup=group1 persistentvolumeclaim/dv-fedora-vm1-disk2-86oq76 labeled -
Check the labels of the PVCs.
# oc get pvc fedora-vm1 -o jsonpath='{.metadata.labels.consistencygroup'} group1 # oc get pvc dv-fedora-vm1-disk1-ulsgg2 -o jsonpath='{.metadata.labels.consistencygroup'} group1 # oc get pvc dv-fedora-vm1-disk2-86oq76 -o jsonpath='{.metadata.labels.consistencygroup'} group1 -
Create a VolumeGroupSnapshot that automatically discovers all labeled PVCs using the following YAML definition.
#vgs.yaml
apiVersion: groupsnapshot.storage.k8s.io/v1beta1
kind: VolumeGroupSnapshot
metadata:
  name: vgs1
spec:
  volumeGroupSnapshotClassName: trident-groupsnapshotclass
  source:
    selector:
      matchLabels:
        consistencygroup: group1
# oc create -f vgs1.yaml volumegroupsnapshot.groupsnapshot.storage.k8s.io/vgs1 created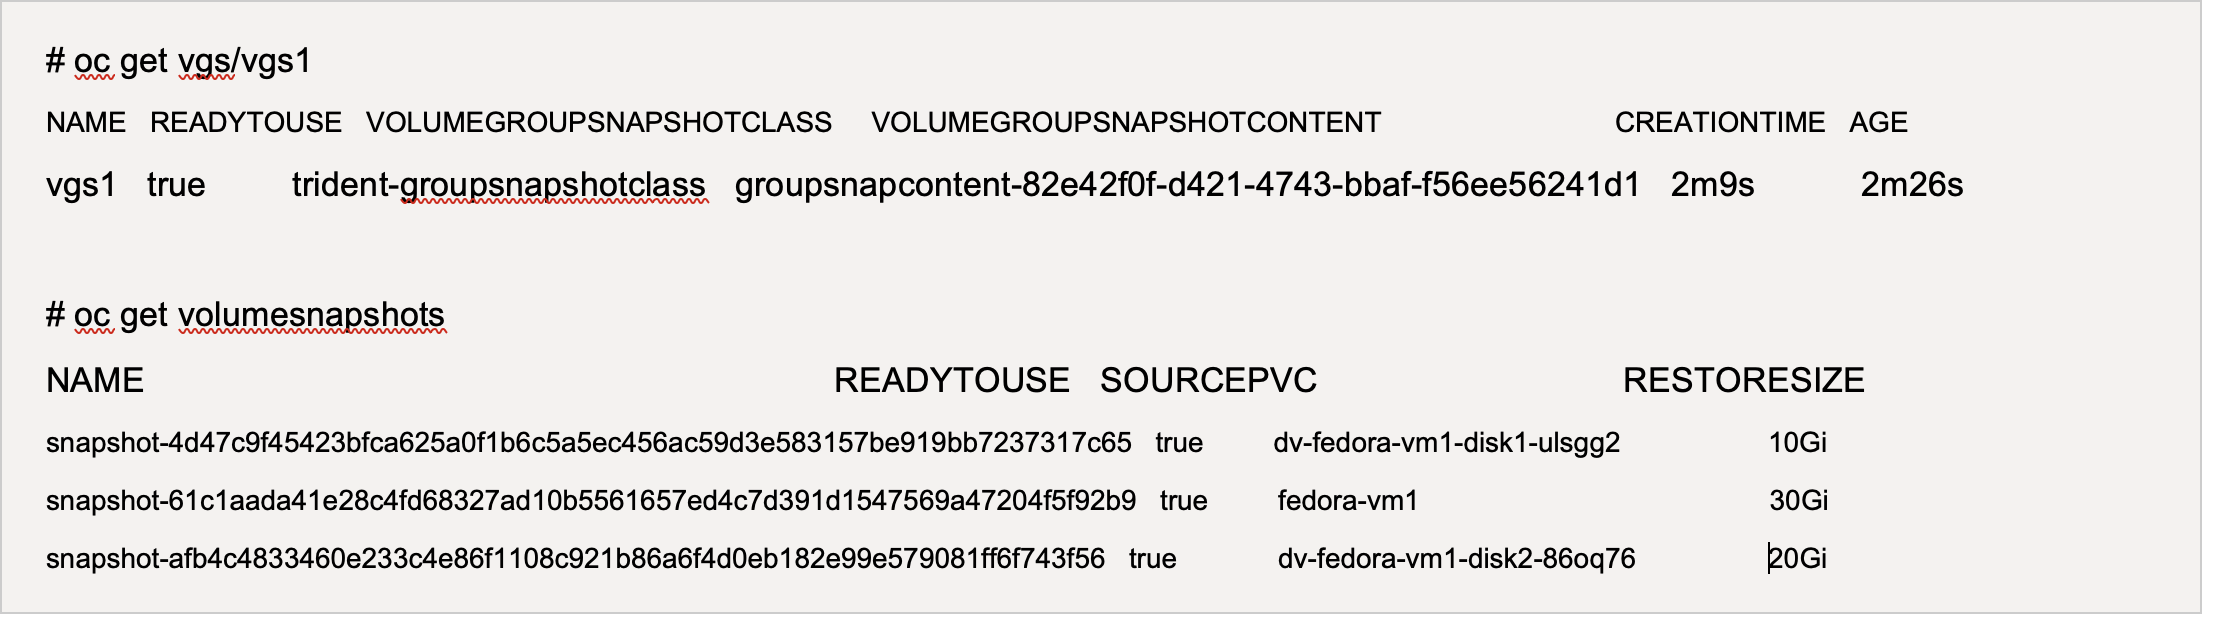 Result
A snapshot of all the PVCs with the label key/value pair consistencygroup: group1 will be created. Trident VolumeGroupSnapshots uses the ONTAP consistency group in the ONTAP backend.
|
|
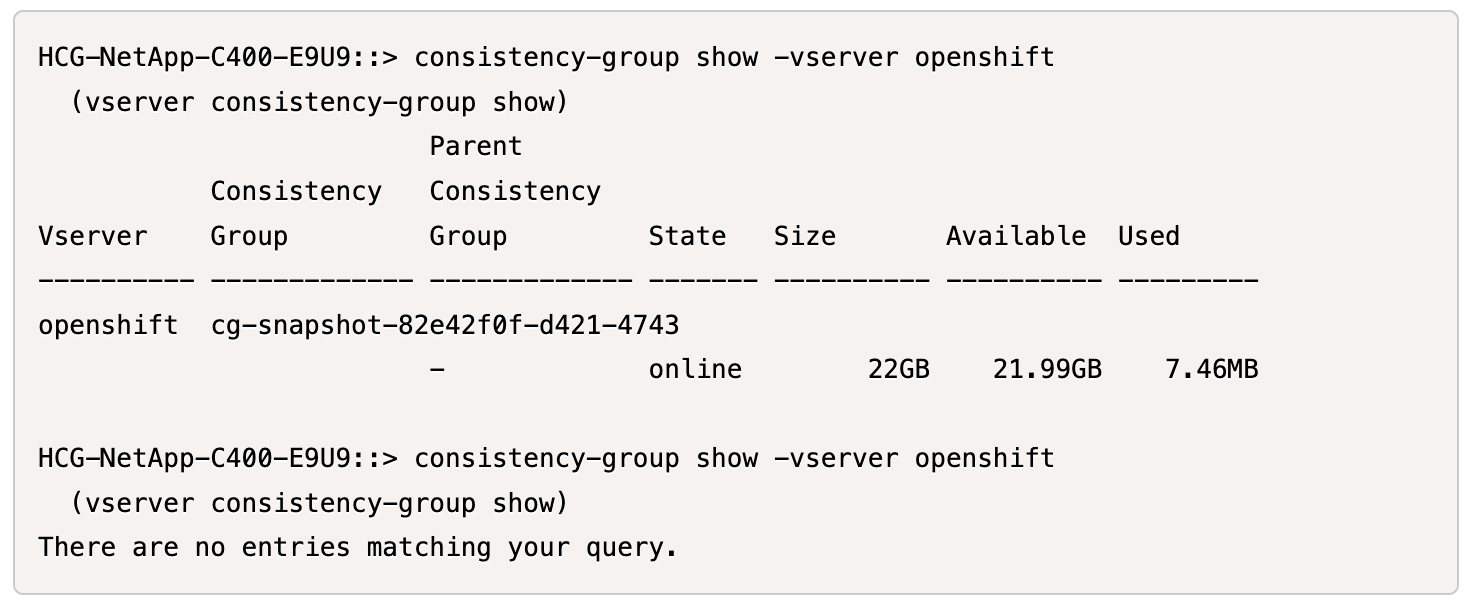
Trident VolumeGroupSnapshots uses ONTAP consistency group (CG) in the ONTAP backend. If you use REST API, a CG is created with all the volumes belonging to the VM (as grouped by the labels), a snapshot of each volume is taken in a consistent way, and then the CG is deleted. You may or may not be able to see the consistency group being created and deleted in ONTAP, depending on the timing. |
The following image shows the consistency group created and then deleted in ONTAP:
Step 5: Restore VM disks from snapshots
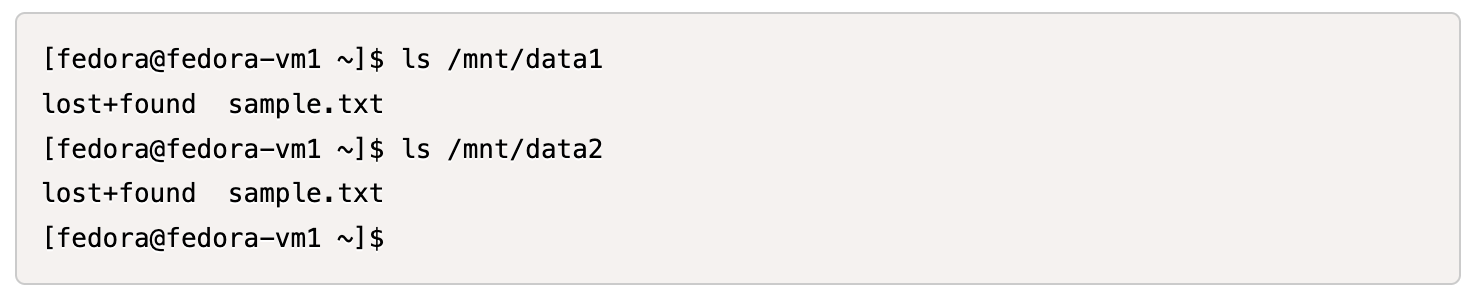
This step validates that the snapshots can successfully recover VM data when needed. Assume that we have lost the sample.txt file from each of the two data disks.
|
|
Although we created a snapshot of a group of volumes as a single unit, we can only restore from an individual snapshot. |
Trident provides rapid, in-place volume restoration from a snapshot using the TridentActionSnapshotRestore (TASR) CR. This CR functions as an imperative Kubernetes action and does not persist after the operation completes.
-
Stop the VM.
-
Restore the content of the first disk/PVC with its corresponding snapshot using the YAML as shown below.
# cat tasr1.yaml
apiVersion: trident.netapp.io/v1
kind: TridentActionSnapshotRestore
metadata:
  name: trident-snap-disk1
  namespace: default
spec:
  pvcName: dv-fedora-vm1-disk1-ulsgg2
  volumeSnapshotName: snapshot-4d47c9f45423bfca625a0f1b6c5a5ec456ac59d3e583157be919bb7237317c65
# oc create -f tasr1.yaml tridentactionsnapshotrestore.trident.netapp.io/trident-snap created -
Similarly, create another TASR object for the second disk using the PVC and its corresponding snapshot.
# cat tasr2.yaml
apiVersion: trident.netapp.io/v1
kind: TridentActionSnapshotRestore
metadata:
  name: trident-snap-disk2
  namespace: default
spec:
  pvcName: dv-fedora-vm1-disk2-86oq76
  volumeSnapshotName: snapshot-afb4c4833460e233c4e86f1108c921b86a6f4d0eb182e99e579081ff6f743f56
# oc create -f tasr2.yaml -
Verify that the restore operation is showing succeeded state.

-
Now start the VM, login to it and verify that the sample.txt file is back on the disks.