

Configure LVM with FC for Proxmox VE
 Suggest changes
Configure Logical Volume Manager (LVM) for shared storage across Proxmox Virtual Environment (VE) hosts using Fibre Channel protocol with NetApp ONTAP. This configuration enables block-level storage access with high performance and low latency.
Initial virtualization administrator tasks
Complete these initial tasks to prepare Proxmox VE hosts for FC connectivity and collect the necessary information for the storage administrator.
-
Verify two HBA interfaces are available.
-
Ensure multipath-tools is installed on all Proxmox VE hosts and starts on boot.
apt list | grep multipath-tools
# If need to install, execute the following line.
apt-get install multipath-tools
systemctl enable --now multipathd
The desired configuration for ONTAP devices multipath is already included in package. For more information, refer to the ONTAP 9 documentation on Proxmox VE 9.x for FCP and iSCSI with ONTAP storage -
Collect the WWPN for all Proxmox VE hosts and provide it to the storage administrator.
cat /sys/class/fc_host/host*/port_name
Storage administrator tasks
If you are new to ONTAP, use System Manager for a better experience.
-
Ensure the SVM is available with FC protocol enabled. Follow ONTAP 9 documentation.
-
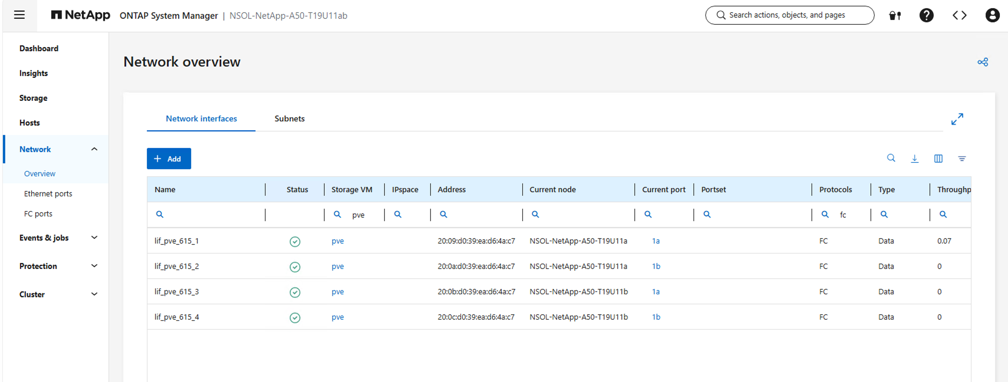
Create two LIFs per controller dedicated for FC.
-
Create an igroup and populate the host FC initiators.
-
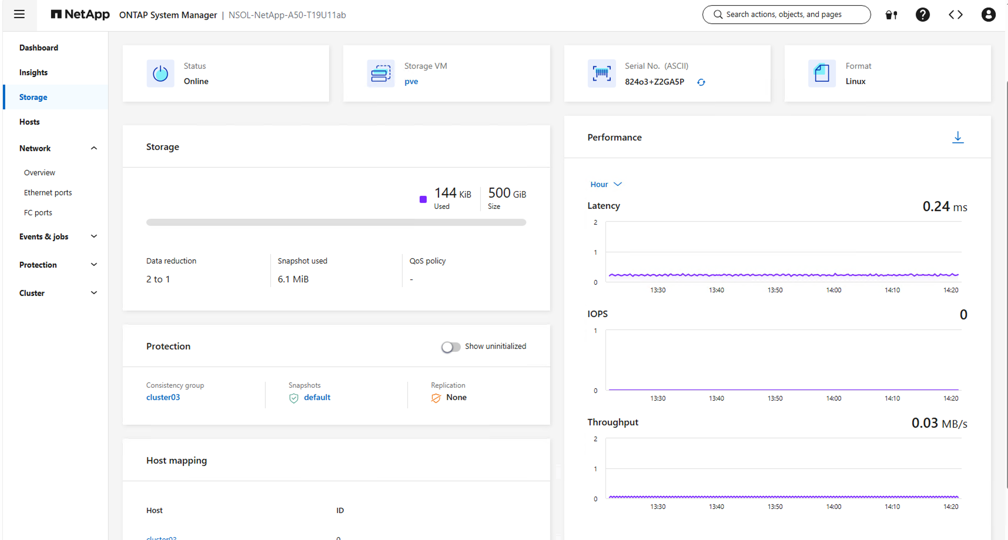
Create the LUN with the desired size on the SVM and present it to the igroup created in the previous step. Ensure Anti-Ransomware protection is enabled on the security tab for ASA systems and on the volume security tab for AFF/FAS systems.
-
Notify the virtualization administrator that the LUN is created.
Final virtualization administrator tasks
Complete these tasks to configure the LUN as shared LVM storage in Proxmox VE.
-
Navigate to a shell on each Proxmox VE host in the cluster and verify the disk is visible.
lsblk -S rescan-scsi-bus.sh lsblk -S -
Verify the device appears in the multipath list.
multipath -ll multipath -a /dev/sdX # replace sdX with the device name multipath -r multipath -ll -
Create the volume group.
vgcreate <volume group name> /dev/mapper/<device id> # Where <volume group name> is the desired name for the volume group and <device id> is the multipath device id. pvs # Verify the physical volume is part of the volume group. vgs # Verify the volume group is created. -
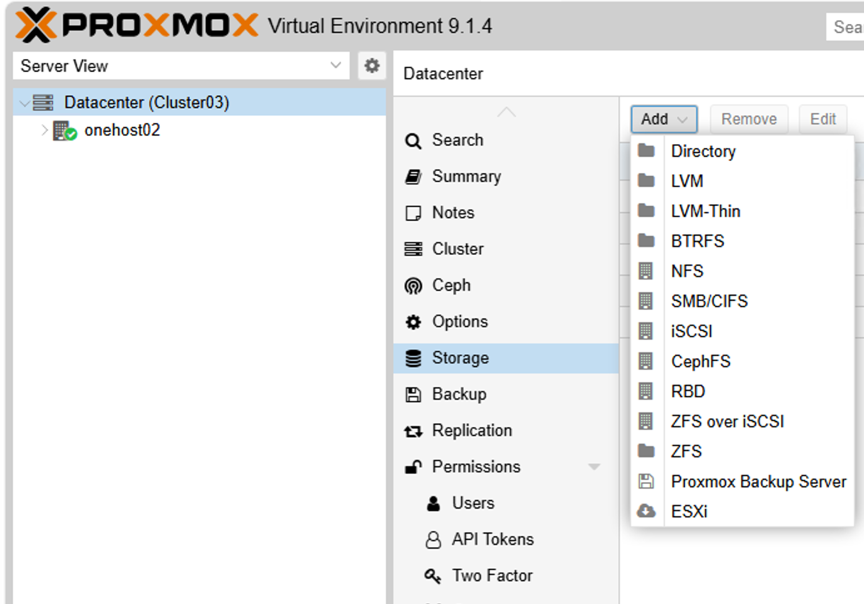
Using the Management UI at
https:<proxmox node>:8006, click Datacenter, select Storage, click Add, and select LVM.Show example
-
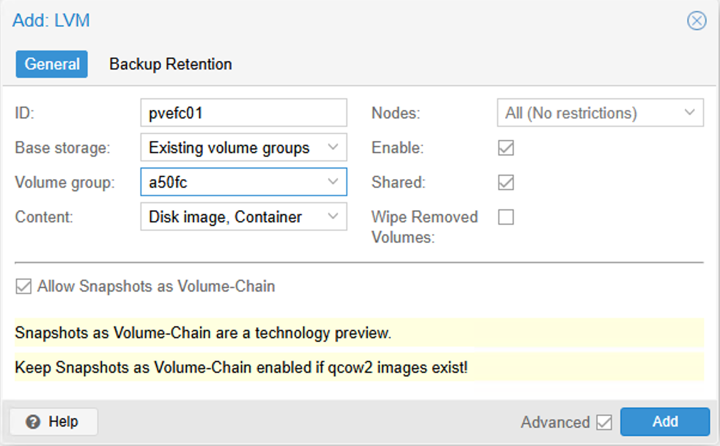
Provide the storage ID name, choose the existing volume group, and select the volume group that was just created with the CLI. Check the shared option. With Proxmox VE 9 and above, enable the
Allow Snapshots as Volume-Chainoption, which is visible when the Advanced check box is enabled.Show example
-
The following shows the sample storage configuration file for LVM using FC:
Show example
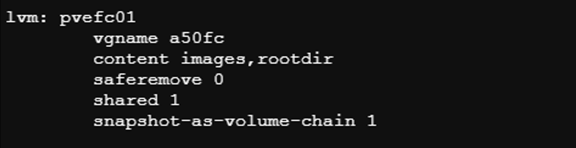
With Proxmox VE 9 and above, the storage configuration file includes the additional option
snapshot-as-volume-chain 1whenAllow Snapshots as Volume-Chainis enabled.