

Perform a granular-level restore for Microsoft Exchange Online
 Suggest changes
Within Microsoft Exchange Online, you can restore granular-level items for a single user, such as individual emails, tasks, contacts, and calendar events. You can also restore granular-level items for a Microsoft 365 group mailbox.
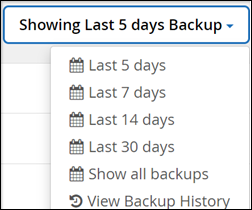
By default, only the most recent backup is available for restore. Other available options include:
The table indicates the restore options that are supported for granular-level items for Exchange Online.
| Type of item | Restore to the same mailbox | Restore to another mailbox | Export to PST/Export to HTML | Where to find it in SaaS Backup |
|---|---|---|---|---|
Mail/Task/Contacts/etc. |
Yes |
Yes |
Yes |
Exchange Online > Mailboxes - Users |
Single/Multiple mailbox folders (Inbox, Archive, etc.) Note: Excludes conversation history. |
Yes |
Yes |
Yes |
Exchange Online > Mailboxes - Users > <User Name> |
Folder level under Inbox |
Yes |
Yes |
Yes |
Exchange Online > Mailboxes - Users > <User Name> |
Subfolder level under Inbox |
Yes |
Yes |
Yes |
Exchange Online > Mailboxes - Users > <User Name> |
Conversation history under Mail folder |
No |
No |
Yes |
Exchange Online > Mailboxes - Users > <User Name> |
Single/Multiple item-level restores |
Yes |
Yes |
No |
Exchange Online > Mailboxes - Users > <User Name> |
Single/Multiple restore items for "Replace the existing content" |
Yes |
No |
No |
Exchange Online > Mailboxes - Users > <User Name> |
-
From the Dashboard, click the number above PROTECTED in the Exchange box.

-
Select your restore option.
-
For shared mailboxes, click the SHARED tab.
-
For archive mailboxes, click the ARCHIVE tab.
-
For regular mailboxes, remain on the USER tab.
-
-
Click the mailbox for which you need to perform the granular-level restore.
-
Restore an entire Microsoft Office Exchange category or restore a specific item within a category.
For a Microsoft 365 Groups mailbox, you only have the option to restore from the mail category or the calendar category. -
Select the category (Mail, Tasks, Contacts, or Other) that you need to restore.

If you want to restore a single item inside the category, click the category, and then select the items that you want to restore. -
Click Restore.
-
Select a restore option.
-
Restore to the same mailbox
If you restore to the same mailbox, by default, a restore folder with the current date and time stamp is created in the original content location containing the backup copy. If you select Replace the existing content, then your current data is completely replaced by the backup.
For Microsoft 365 Groups, you only have the option to restore to the same mailbox. The existing content is replaced by default. For Microsoft Exchange Online, you can restore to the same mailbox and replace the existing content or you can restore to another mailbox.
-
Restore to another mailbox
If you restore to another mailbox, you must enter the destination mailbox in the search field. You can type in a portion of the destination email address in the search field to initiate an automatic search for matching destination mailboxes.
-
Export to PST
You can select to include all the category subfolders.
If you export to PST, you will receive a notification email with the location of the PST file when the export is completed.
This option is not available for Microsoft 365 Groups.
If you select the Export to PST restore option, the provided link is valid for seven days and is pre-authenticated. -
Export to Data (Available for Microsoft 365 groups only):
If you export, two zip files are created, one zip file for Microsoft 365 Groups mailbox and another zip file for Microsoft 365 Groups SharePoint sites. You will receive a notification email containing the location of the PST file and an authenticated URL to the location of the .zip file.
If you select the Export to Data restore option, the provided link is valid for seven days and is pre-authenticated.
-
-
Click Confirm.
A message is displayed indicating that the restore job was created.
-
Click View the job progress to monitor the progress of the restore.