

Manage clusters that were discovered with a Console agent
 Suggest changes
If you discovered an on-premises ONTAP cluster using a Console agent, you can create volumes directly from the NetApp Console, access ONTAP System Manager (directly from the Console) for advanced management, and enable NetApp data services.
Storage admin or System health specialist. Learn about Console access roles.
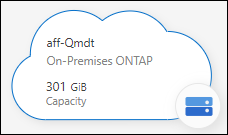
On the Systems page, the system icon for a cluster that you discovered with a Console agent looks similar to the following:
If you discover a system directly, the system icon shows the word "Direct."
Create FlexVol volumes from the NetApp Console
After you add your on-premises ONTAP cluster to the Console using a Console agent, you can provision and manage FlexVol volumes directly from the Console.
The Console enables you to create NFS or CIFS volumes on existing aggregates. You can't create new aggregates on an on-premises ONTAP cluster from the native Console pages; however, you can access the respective ONTAP System Manager from the Console to create aggregates.
-
From the navigation menu, select Storage > Management.
-
On the Systems page, select the on-premises ONTAP cluster on which you want to provision volumes.
-
Select Volumes > Add Volume.
-
Follow the steps in the wizard to create the volume.
-
Details, Protection, & Tags: Enter details about the volume like its name and size and choose a Snapshot policy.
Some of the fields on this page are self-explanatory. The following list describes fields for which you might need guidance:
Field Description Size
The maximum size depends on whether you enable thin provisioning, allowing you to create a volume larger than the available physical storage.
Snapshot Policy
A Snapshot copy policy defines how often and how many NetApp Snapshot copies are created. A NetApp Snapshot copy is a point-in-time file system image that has no performance impact and requires minimal storage. You can choose the default policy or none. You may choose none for transient data, such as the temporary database (tempdb) for Microsoft SQL Server.
-
Protocol: Choose the protocol for the volume (NFS, CIFS, or iSCSI) and then set the access control or permissions for the volume.
If you choose CIFS without a server, the system prompts you to configure one using Active Directory or a workgroup.
The following list describes fields for which you might need guidance:
Field Description Access Control
An NFS export policy defines the clients in the subnet that can access the volume. By default, the Console enters a value that provides access to all instances in the subnet.
Permissions and Users/Groups
These fields enable you to control the level of access to an SMB share for users and groups (also called access control lists or ACLs). You can specify local or domain Windows users or groups, or UNIX users or groups. If you specify a domain Windows user name, you must include the user's domain using the format domain\username.
-
Usage Profile: Choose whether to enable or disable storage efficiency features on the volume in order to reduce the total amount of storage that you need.
-
Review: Review details about the volume and then select Add.
-
Create FlexGroup volumes with the NetApp Console API
You can use the NetApp Console API to create FlexGroup volumes. A FlexGroup volume is a scale-out volume that provides high performance along with automatic load distribution.
Access ONTAP System Manager from NetApp Console
You can access the ONTAP System Manager interface directly inside the Console.
Features
When you access ONTAP System Manager from the Console you have access to additional management features:
-
Advanced storage management
Manage consistency groups, shares, qtrees, quotas, and Storage VMs.
-
Networking management
Manage IPspaces, network interfaces, portsets, and Ethernet ports.
-
Events and jobs
View event logs, system alerts, jobs, and audit logs.
-
Advanced data protection
Protect storage VMs, LUNs, and consistency groups.
-
Host management
Set up SAN initiator groups and NFS clients.
Supported configurations
Advanced management through System Manager is supported with on-premises ONTAP clusters running 9.10.0 or later.
System Manager integration is not supported in GovCloud regions or in regions that have no outbound internet access.
Limitations
A few System Manager features are not supported with on-premises ONTAP clusters when accessing ONTAP System Manager through the Console.
Access ONTAP System Manager from NetApp Console
Open the System Manager for the system.
-
On the Systems page, select the on-premises ONTAP cluster on which you want to provision volumes.
-
From the right panel, under Services, find System Manager and select Open.
-
If you see the confirmation message, read through it and select Close.
-
Use System Manager to manage ONTAP.
-
If needed, select Go back to return to standard management through the Console.
Get help with System Manager
If you need help using System Manager with ONTAP, you can refer to ONTAP documentation for step-by-step instructions. Here are a few links that might help:
Enable NetApp data services
Enable NetApp data services on your systems to replicate data, back up data, tier data, and more.
- Replicate data
-
Replicate data between Cloud Volumes ONTAP systems, Amazon FSx for ONTAP file systems, and ONTAP clusters. Choose a one-time data replication, which can help you move data to and from the cloud, or a recurring schedule, which can help with disaster recovery or long-term data retention.
- Back up data
-
Back up data from your on-premises ONTAP system to low-cost object storage in the cloud.
- Scan, map, and classify your data
-
Scan your corporate on-premises clusters to map and classify data, and to identify private information. This can help reduce your security and compliance risk, decrease storage costs, and assist with your data migration projects.
- Tier data to the cloud
-
Extend your data center to the cloud by automatically tiering inactive data from ONTAP clusters to object storage.
- Identify clusters with low capacity
-
Identify clusters with low capacity and review their current and forecasted capacity.