Examples for simulating ILM policies
 Suggest changes
These examples show how you can verify ILM rules by simulating the ILM policy before activating it.
Example 1: Verifying rules when simulating a proposed ILM policy
This example shows how to verify rules when simulating a proposed policy.
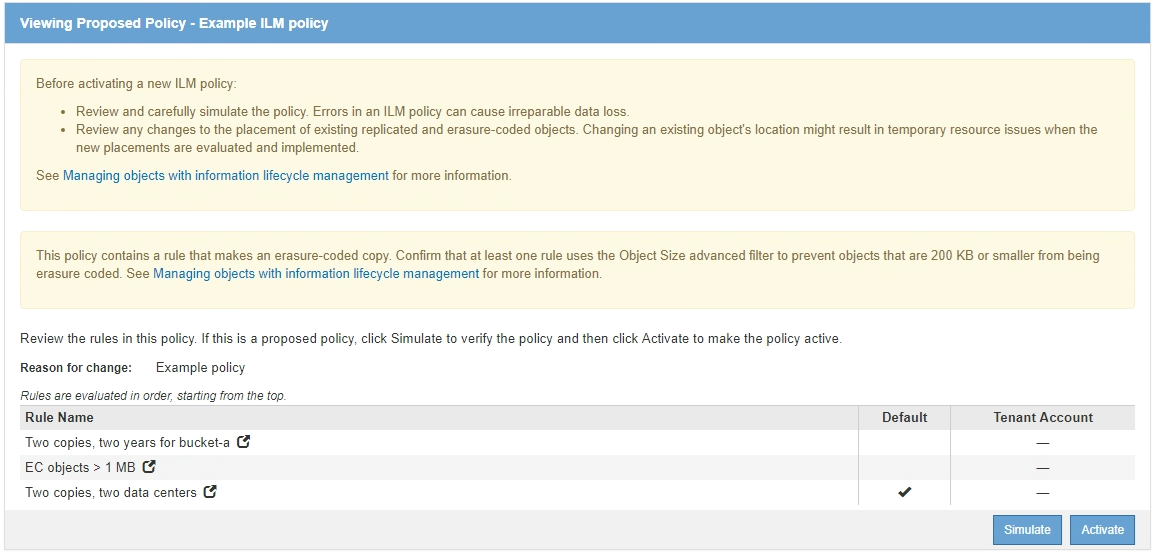
In this example, the Example ILM policy is being simulated against the ingested objects in two buckets. The policy includes three rules, as follows:
-
The first rule, Two copies, two years for bucket-a, applies only to objects in bucket-a.
-
The second rule, menu:EC objects[1 MB], applies to all buckets but filters on objects greater than 1 MB.
-
The third rule is the default rule and does not include any filters.
-
After adding the rules and saving the policy, click Simulate.
The Simulate ILM Policy dialog box appears.
-
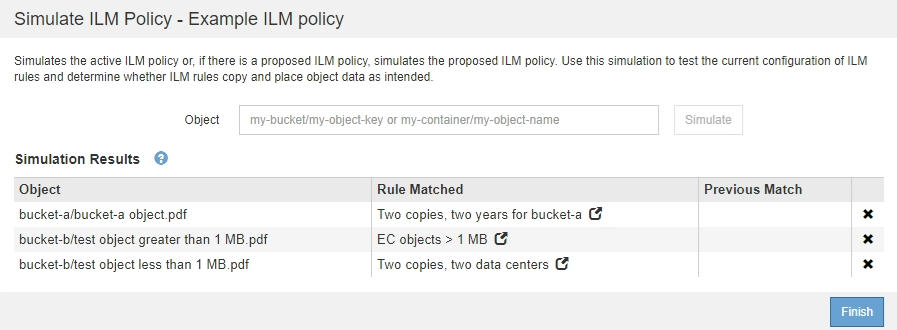
In the Object field, enter the S3 bucket/object-key or the Swift container/object-name for a test object, and click Simulate.
The Simulation Results appear, showing which rule in the policy matched each object you tested.
-
Confirm that each object was matched by the correct rule.
In this example:
-
bucket-a/bucket-a object.pdfcorrectly matched the first rule, which filters on objects inbucket-a. -
bucket-b/test object greater than 1 MB.pdfis inbucket-b, so it did not match the first rule. Instead, it was correctly matched by the second rule, which filters on objects greater than 1 MB. -
bucket-b/test object less than 1 MB.pdfdid not match the filters in the first two rules, so it will be placed by the default rule, which includes no filters.
-
Example 2: Reordering rules when simulating a proposed ILM policy
This example shows how you can reorder rules to change the results when simulating a policy.
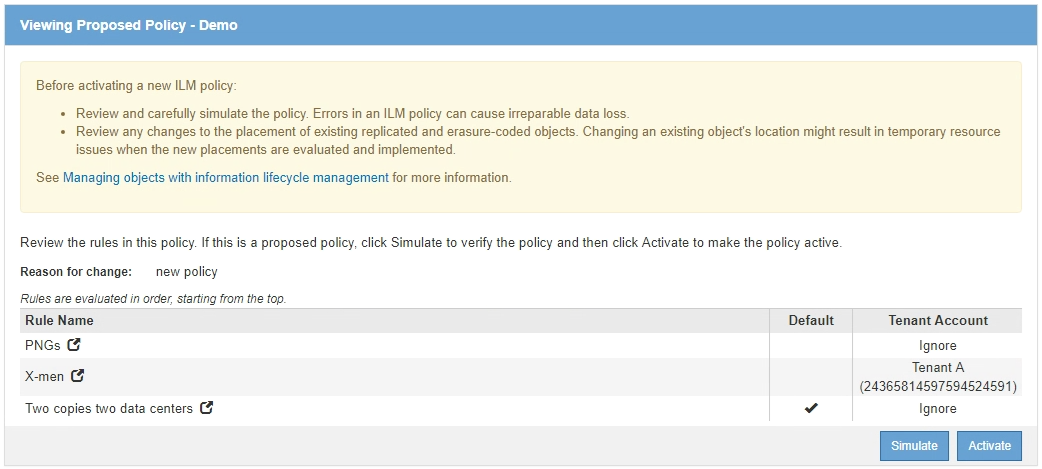
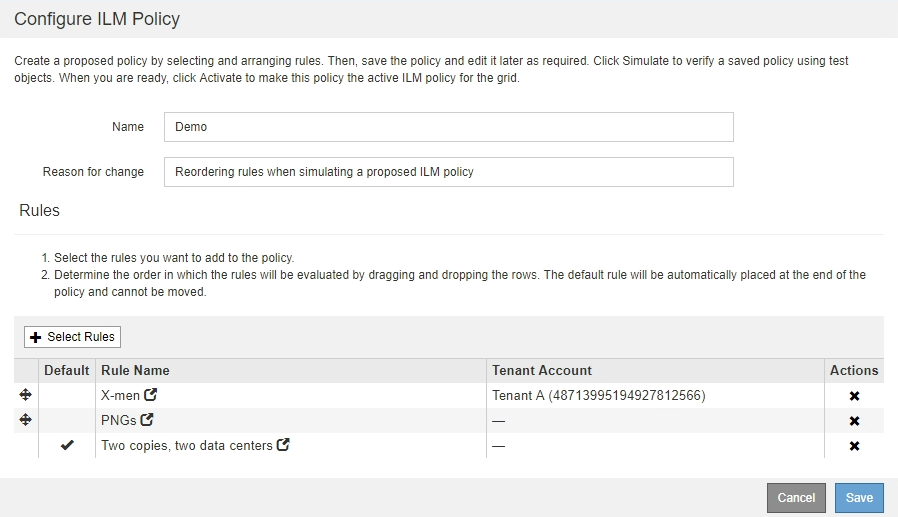
In this example, the Demo policy is being simulated. This policy, which is intended to find objects that have series=x-men user metadata, includes three rules, as follows:
-
The first rule, PNGs, filters for key names that end in
.png. -
The second rule, X-men, applies only to objects for Tenant A and filters for
series=x-menuser metadata. -
The last rule, Two copies two data centers, is the default rule, which matches any objects that do not match the first two rules.
-
After adding the rules and saving the policy, click Simulate.
-
In the Object field, enter the S3 bucket/object-key or the Swift container/object-name for a test object, and click Simulate.
The Simulation Results appear, showing that the
Havok.pngobject was matched by the PNGs rule.
However, the rule that the
Havok.pngobject was meant to test was the X-men rule. -
To resolve the issue, reorder the rules.
-
Click Finish to close the Simulate ILM Policy page.
-
Click Edit to edit the policy.
-
Drag the X-men rule to the top of the list.
-
Click Save.
-
-
Click Simulate.
The objects you previously tested are re-evaluated against the updated policy, and the new simulation results are shown. In the example, the Rule Matched column shows that the
Havok.pngobject now matches the X-men metadata rule, as expected. The Previous Match column shows that the PNGs rule matched the object in the previous simulation.

If you stay on the Configure Policies page, you can re-simulate a policy after making changes without needing to re-enter the names of the test objects.
Example 3: Correcting a rule when simulating a proposed ILM policy
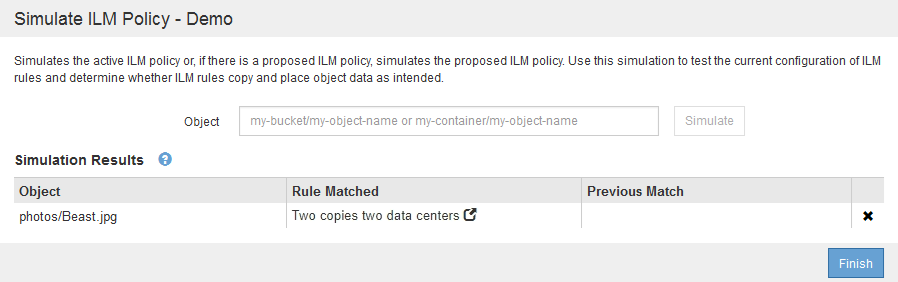
This example shows how to simulate a policy, correct a rule in the policy, and continue the simulation.
In this example, the Demo policy is being simulated. This policy is intended to find objects that have series=x-men user metadata. However, unexpected results occurred when simulating this policy against the Beast.jpg object. Instead of matching the X-men metadata rule, the object matched the default rule, Two copies two data centers.
When a test object is not matched by the expected rule in the policy, you must examine each rule in the policy and correct any errors.
-
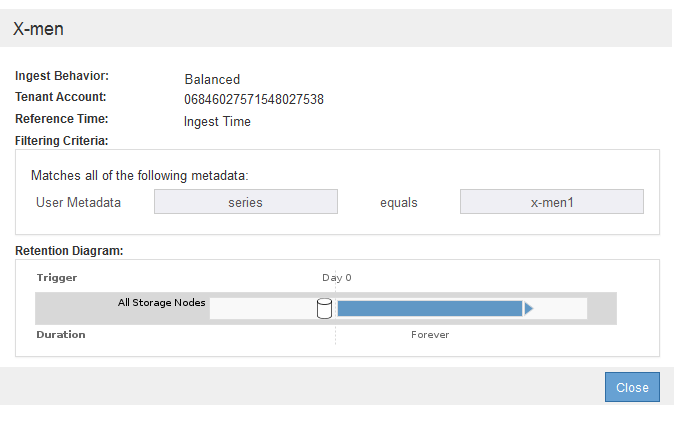
For each rule in the policy, view the rule settings by clicking the rule name or the more details icon
 on any dialog box where the rule is displayed.
 -
Review the rule's tenant account, reference time, and filtering criteria.
In this example, the metadata for the X-men rule includes an error. The metadata value was entered as “x-men1” instead of “x-men.”
-
To resolve the error, correct the rule, as follows:
-
If the rule is part of the proposed policy, you can either clone the rule or remove the rule from the policy and then edit it.
-
If the rule is part of the active policy, you must clone the rule. You cannot edit or remove a rule from the active policy.
Option Description Cloning the rule
-
Select ILM > Rules.
-
Select the incorrect rule, and click Clone.
-
Change the incorrect information, and click Save.
-
Select ILM > Policies.
-
Select the proposed policy, and click Edit.
-
Click Select Rules.
-
Select the check box for the new rule, uncheck the check box for the original rule, and click Apply.
-
Click Save.
Editing the rule
-
Select the proposed policy, and click Edit.
-
Click the delete icon
 to remove the incorrect rule, and click Save.
 -
Select ILM > Rules.
-
Select the incorrect rule, and click Edit.
-
Change the incorrect information, and click Save.
-
Select ILM > Policies.
-
Select the proposed policy, and click Edit.
-
Select the corrected rule, click Apply, and click Save.
-
-
-
Perform the simulation again.
Because you navigated away from the ILM Policies page to edit the rule, the objects you previously entered for simulation are no longer displayed. You must re-enter the names of the objects. In this example, the corrected X-men rule now matches the
Beast.jpgobject based on theseries=x-menuser metadata, as expected.