Run a data protection job
 Suggest changes
To configure StorageGRID with Commvault Complete Backup and Recovery for NetApp, the following steps were performed to add StorageGRID as a cloud library within the Commvault software.
Step 1: Configure Commvault with StorageGRID
-
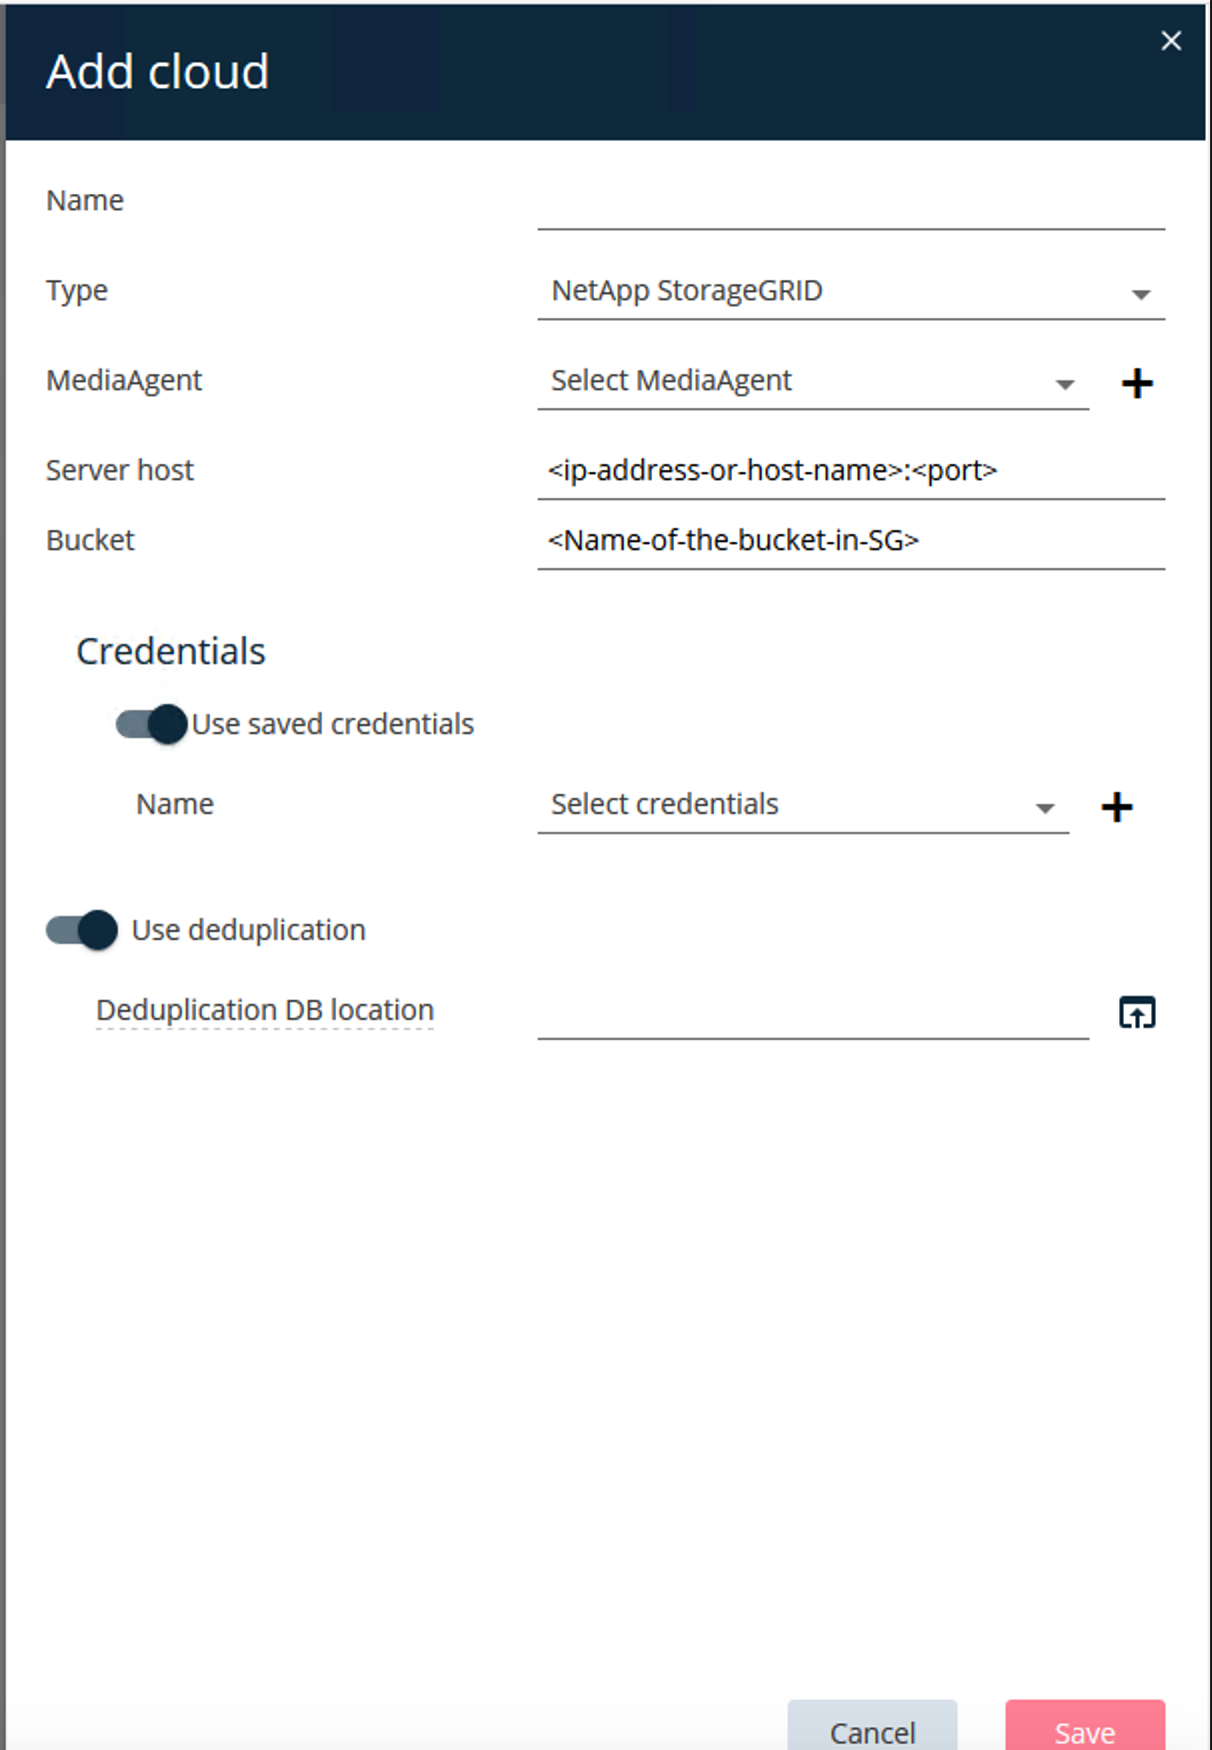
Log in to the Commvault Command Center. On the left panel, click Storage > Cloud > Add to see and respond to the Add Cloud dialog box:
-
For Type, select NetApp StorageGRID.
-
For MediaAgent, select all that are associated with the cloud library.
-
For Server Host, enter the IP address or the host name of the StorageGRID endpoint and the port number.
Follow the steps in StorageGRID documentation on how to configure a load balancer endpoint (port). Make sure you have an HTTPS port with a self-signed certificate and the IP address or the domain name of the StorageGRID endpoint.
-
If you want to use deduplication, turn on this option and provide the path to the deduplication database location.
-
Click Save.
Step 2: Create a backup plan with StorageGRID as the primary target
-
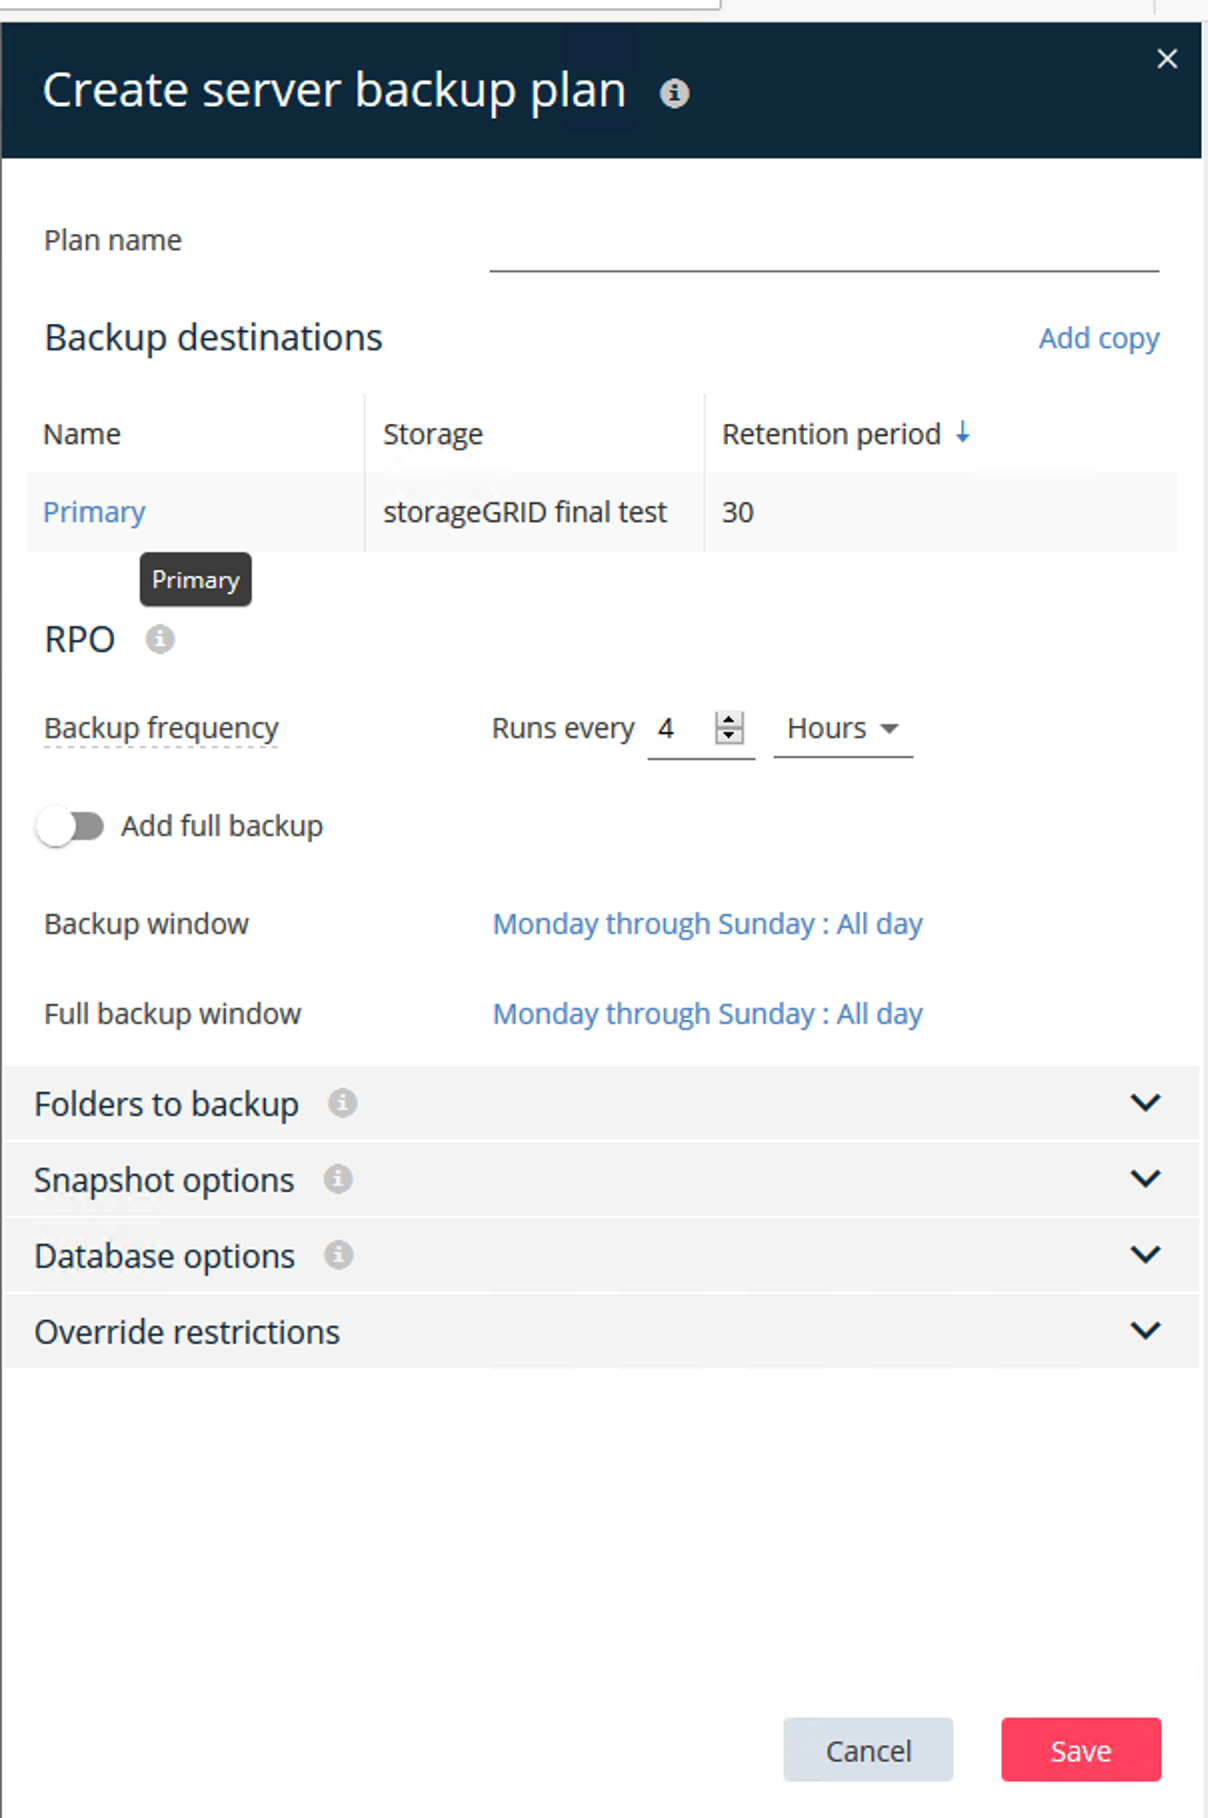
On the left panel, select Manage > Plans to see and respond to the Create Server Backup Plan dialog box.
-
Enter a plan name.
-
Select the StorageGRID Simple Storage Service (S3) storage backup destination that you created earlier.
-
Enter the backup retention period and recovery point objective (RPO) that you want.
-
Click Save.
Step 3: Start a backup job to protect your workloads
-
On the Commvault Command Center, navigate to Protect > Virtualization.
-
Add a VMware vCenter Server hypervisor.
-
Click the hypervisor that you just added.
-
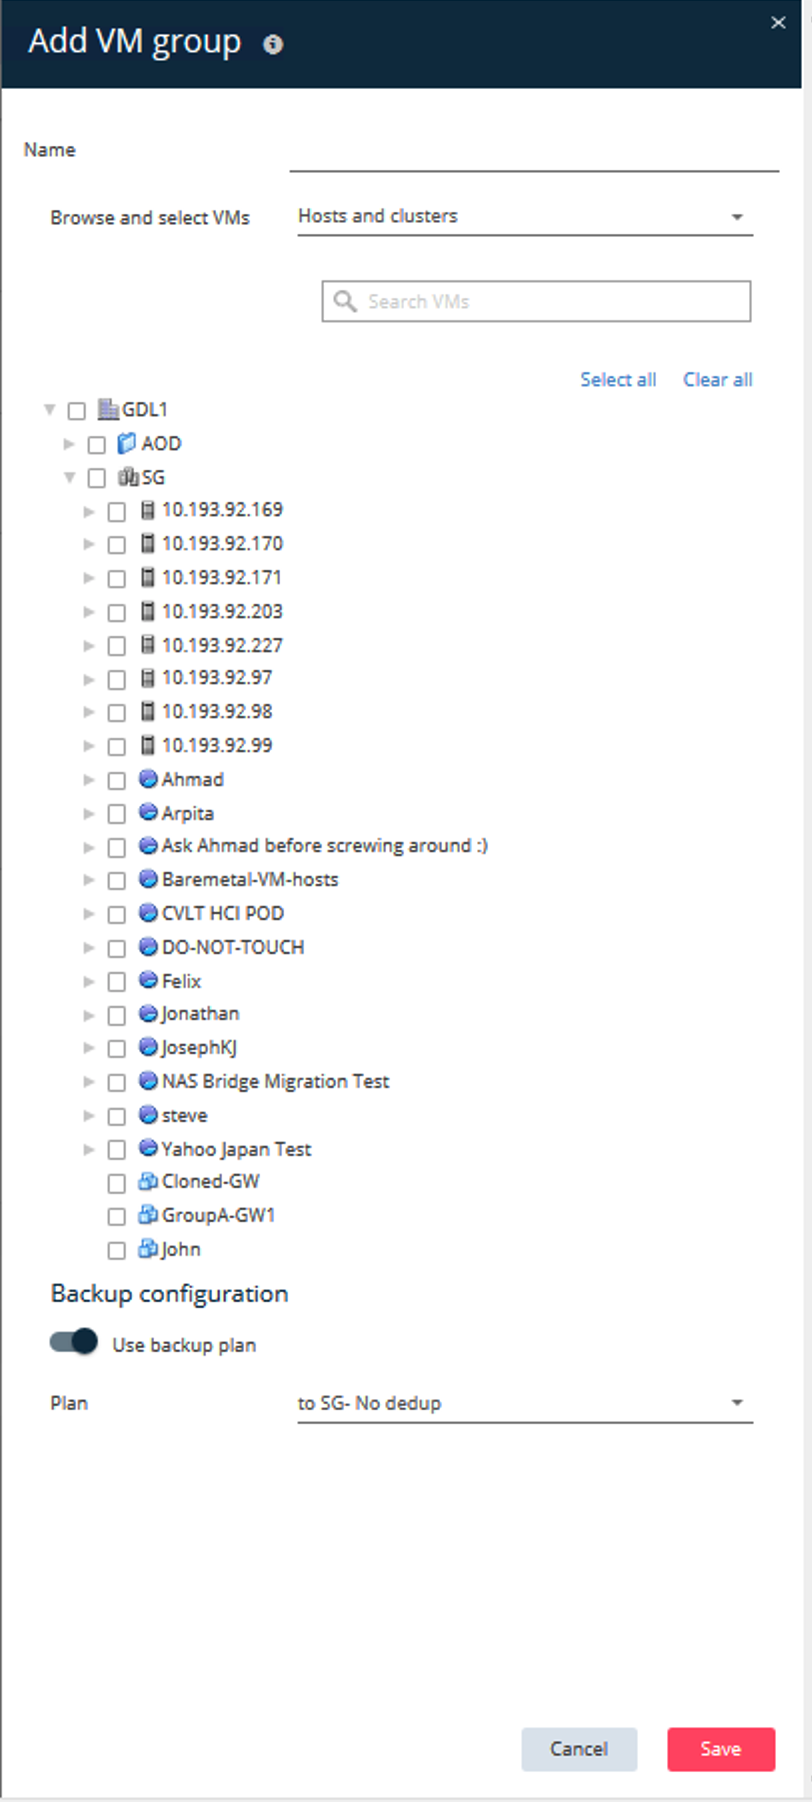
Click Add VM group to respond to the Add VM Group dialog box so that you can see the vCenter environment that you plan to protect.
-
Select a datastore, a VM, or a collection of VMs, and enter a name for it.
-
Select the backup plan that you created in the previous task.
-
Click Save to see the VM group you created.
-
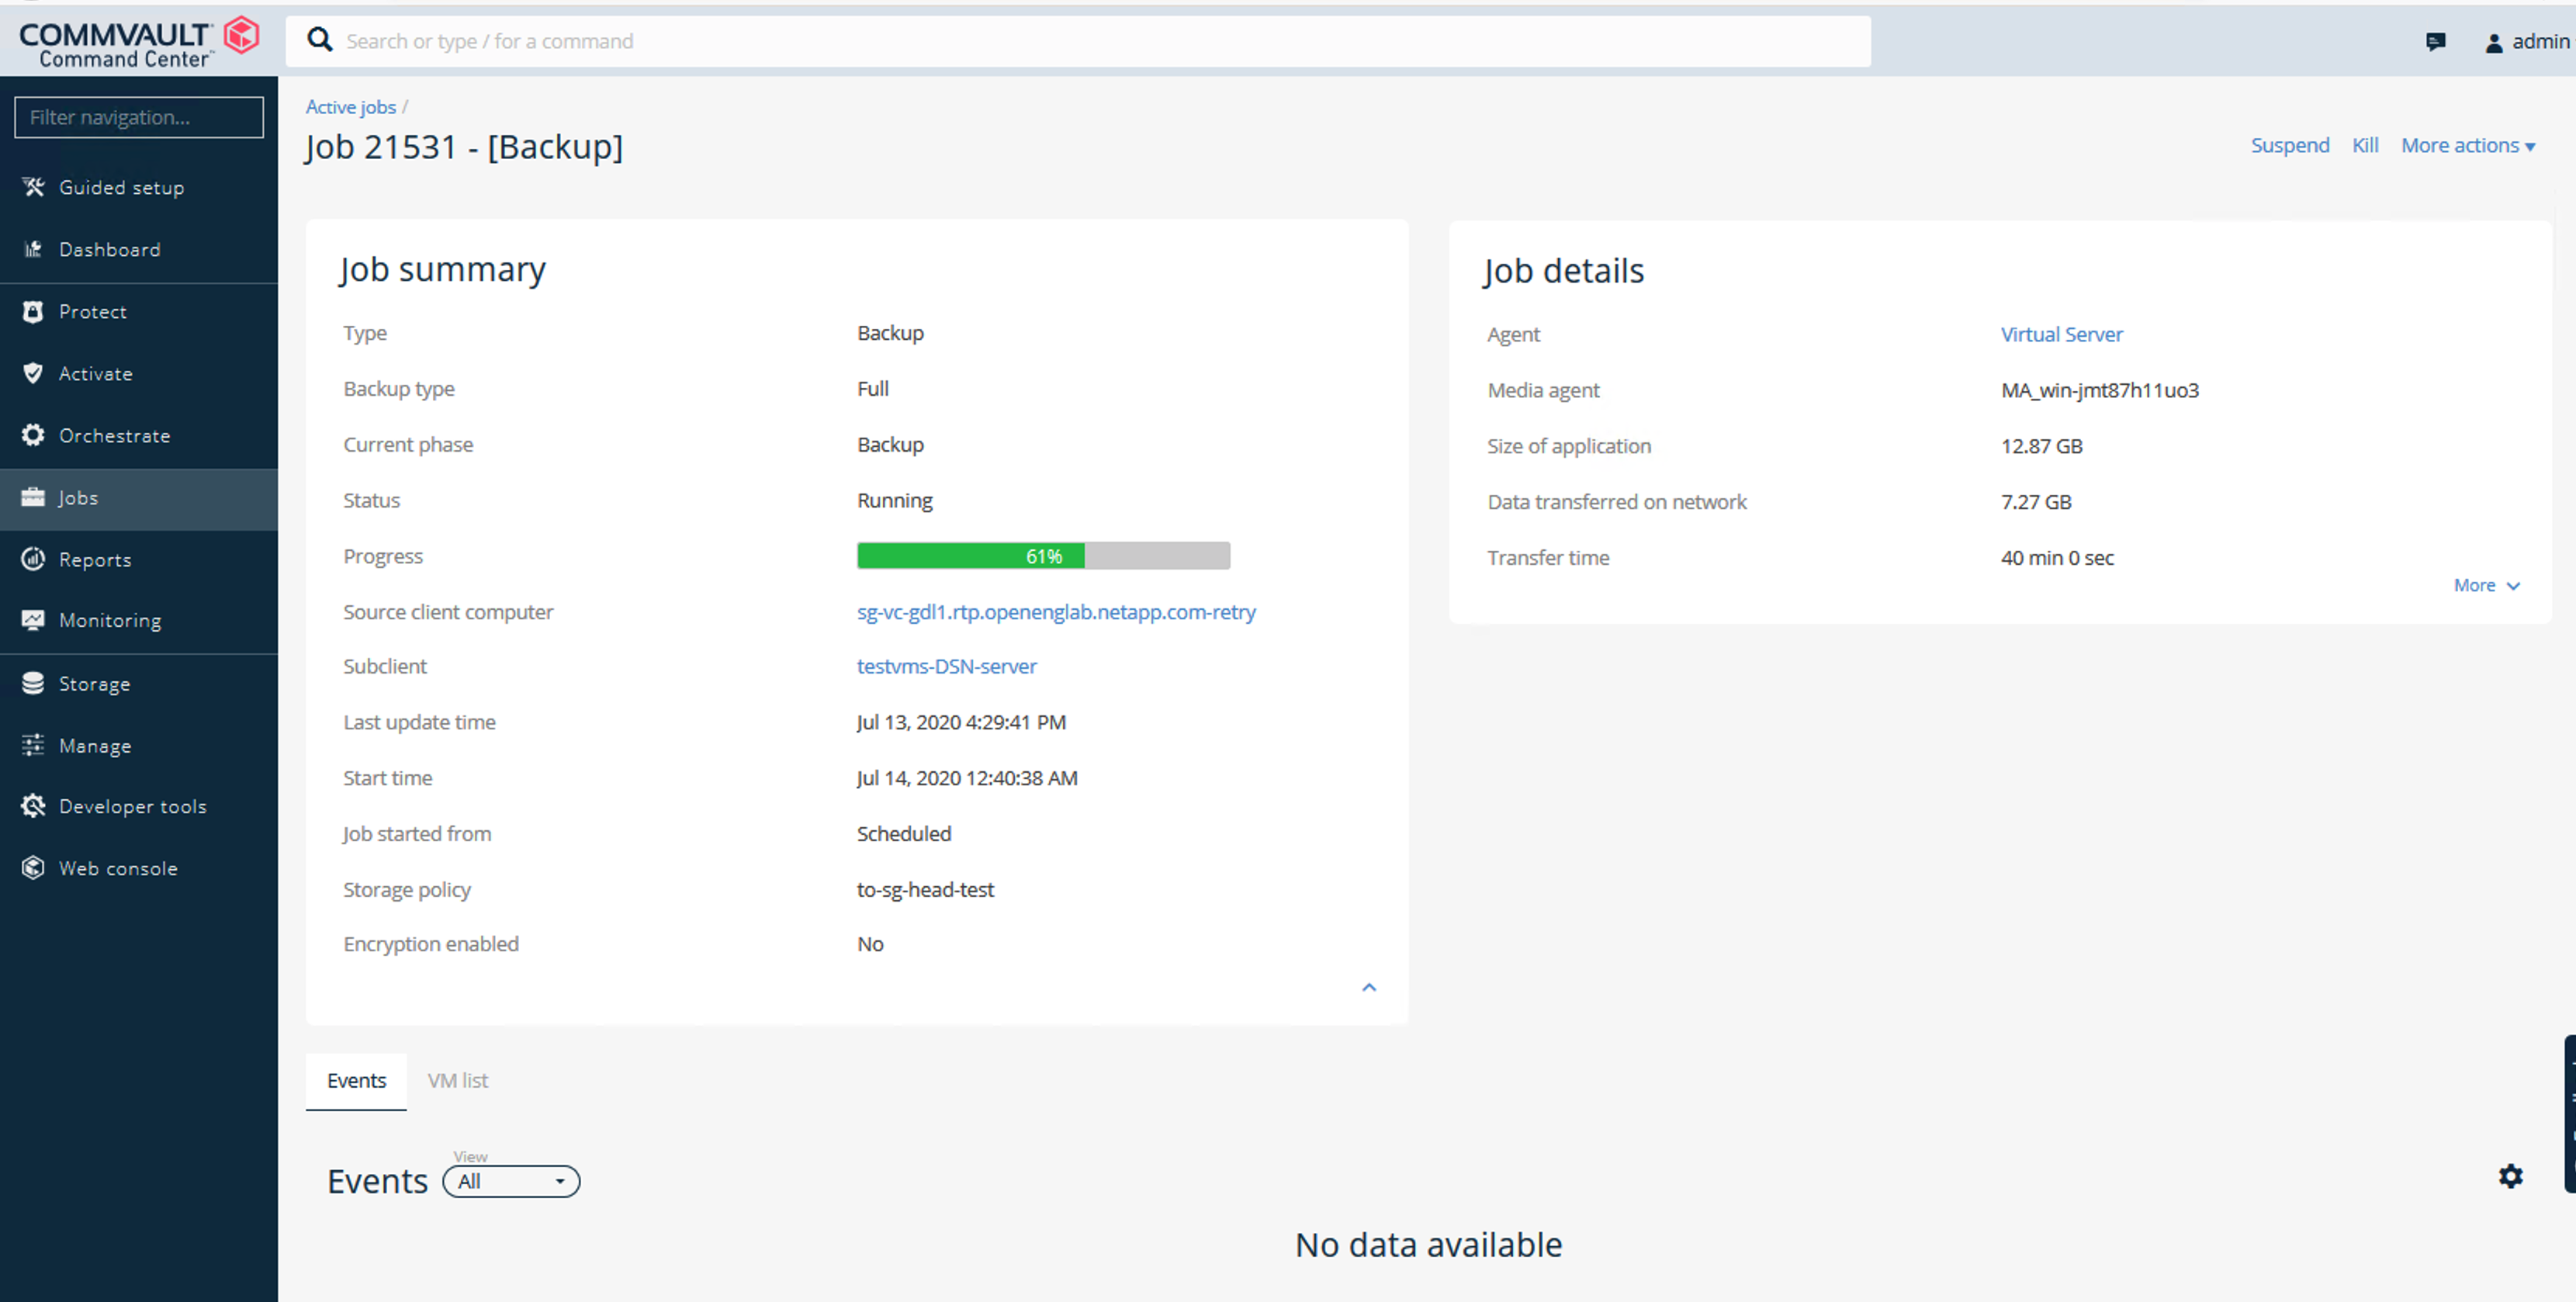
In the upper-right corner of the VM group window, select Backup:
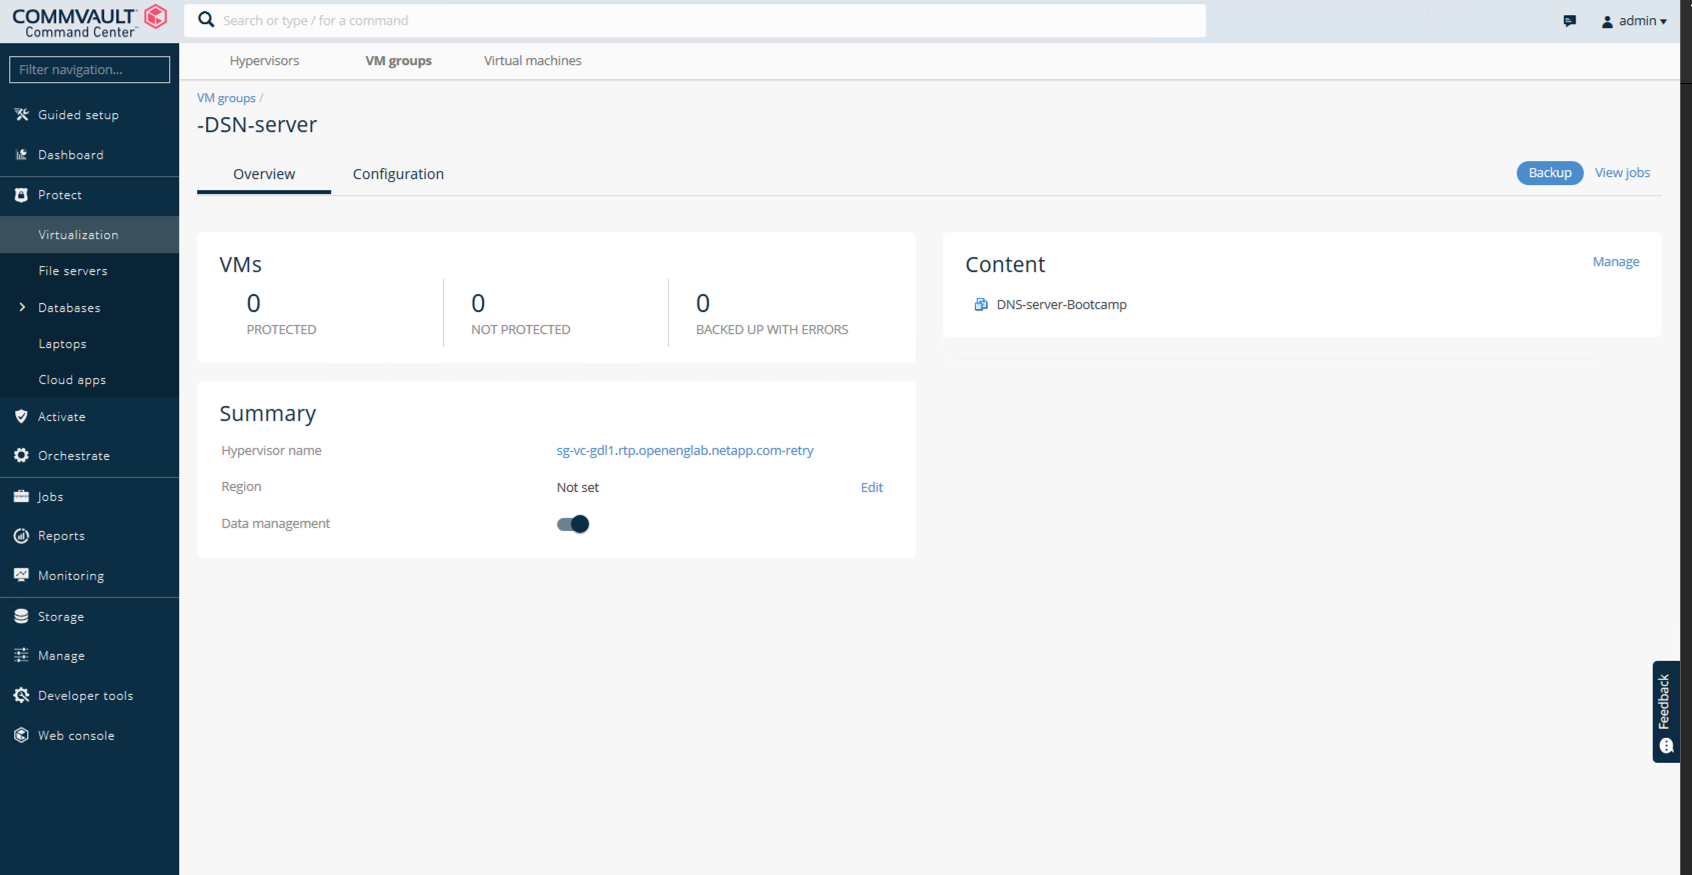
-
Select Full as the backup level, (optionally) request an email when the backup is finished, then click OK to have your backup job start:
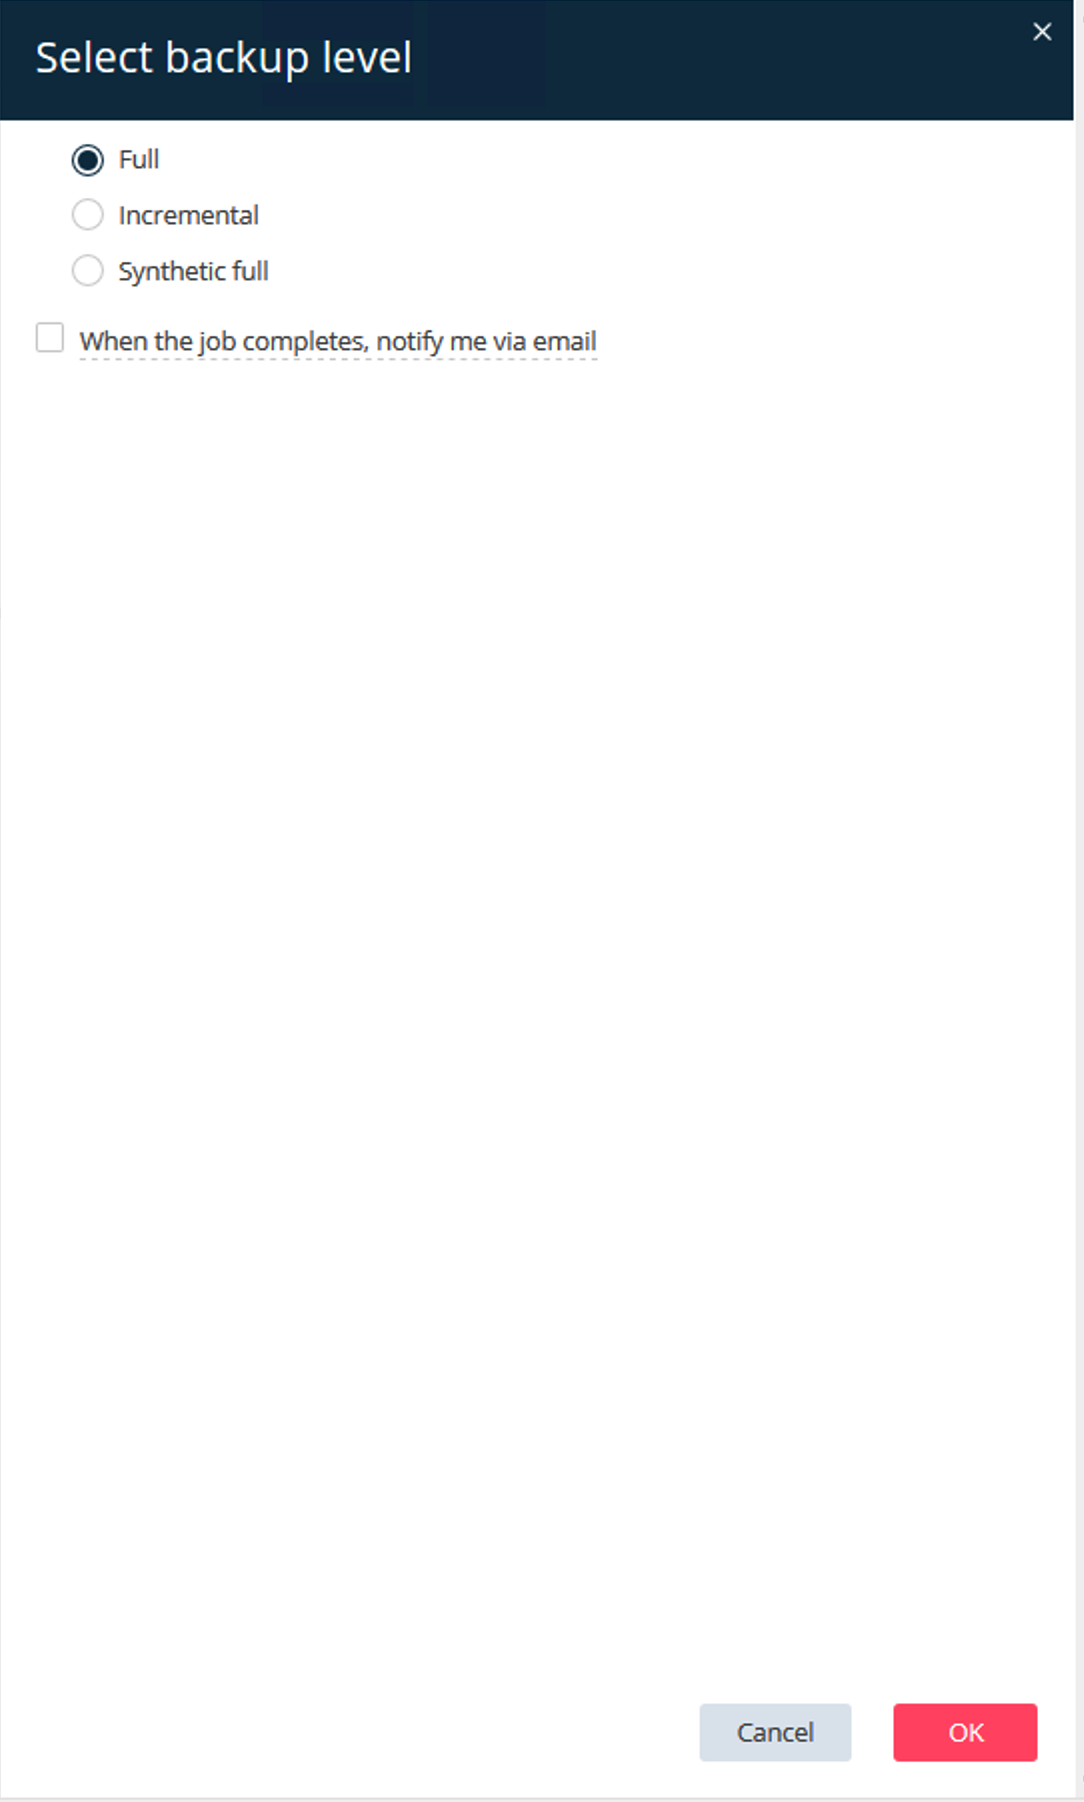
-
Navigate to the job summary page to view the job metrics: