


Manage FSx for ONTAP file system settings in NetApp Workload Factory


 Suggest changes

 PDFs
PDFs
Manage the settings of an FSx for ONTAP file system in NetApp Workload Factory to keep your file system organized, secure, and appropriately sized for your workload. You can add or edit tags, manage ONTAP credentials, reset the fsxadmin password, and update throughput capacity at any time.
The file system overview shows SSD capacity and throughput usage trends, AI-generated summaries of the top workloads, and expandable file system configuration details.
Manage FSx for ONTAP file system tags
Tags can help you categorize your resources. You can add, edit, and remove tags for a file system at any time in NetApp Workload Factory.
-
Log in using one of the console experiences.
-
Select the menu
 and then select Storage.
 -
From the Storage menu, select FSx for ONTAP.
-
From FSx for ONTAP, select the actions menu of the file system to update and then select Manage file system tags.
-
In the Manage file system tags dialog, add, edit, or remove tags as needed.
The maximum number of tags you can apply to a file system is 50.
-
Select Apply.
Manage ONTAP credentials
Manage ONTAP credentials for an FSx for ONTAP file system in NetApp Workload Factory. Workload Factory has two types of credentials: primary and restricted. By default, the file system uses the primary ONTAP credentials. Restricted credentials are used only for AI operations (AIOps) like Ask Me, Rule builder, and Custom dashboards. You can optionally add a restricted credential set, and you can update either credential set at any time.
You can perform the following tasks:
-
Opt in to add a restricted credential set, using either a username and password or a secret ARN.
-
Change existing credentials, including the username and password, the password only, or the secret ARN.
Workload Factory supports transitioning between the Workload Factory credentials service (username and password) and AWS Secrets Manager.
Workload Factory handles restricted credentials as follows:
-
If you have not provided restricted credentials for a file system and then you create custom rules or dashboards or ask Ask Me questions, Workload Factory creates read-only ONTAP credentials to use as the restricted credential set.
-
If you have already provided restricted credentials for a file system, those credentials are used for AIOps.
You must associate a link to manage ONTAP credentials. Learn how to associate an existing link or to create and associate a new link. After the link associates, return to this operation.
-
Log in using one of the console experiences.
-
Select the menu
and then select Storage. -
From the Storage menu, select FSx for ONTAP.
-
From FSx for ONTAP, select the actions menu of the file system to reset the fsxadmin password for and then select Manage.
-
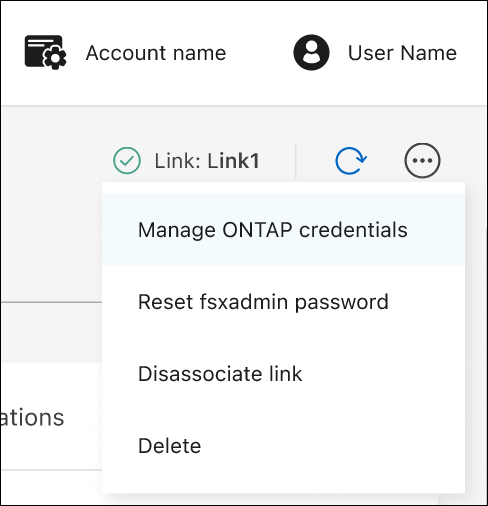
From the file system overview, select the actions menu.
-
Select Manage ONTAP credentials.
-
Update the primary or restricted ONTAP credentials.
-
Select Apply.
Reset the fsxadmin password of an FSx for ONTAP file system
Reset the fsxadmin password in NetApp Workload Factory when necessary.
If you provided an alternate user during file system creation, you can only reset the fsxadmin password in the AWS console.
-
Log in using one of the console experiences.
-
Select the menu
and then select Storage. -
From the Storage menu, select FSx for ONTAP.
-
From FSx for ONTAP, select the actions menu of the file system to reset the fsxadmin password for and then select Manage.
-
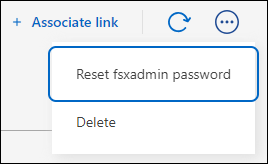
From the file system overview, select the actions menu.
-
Select Reset fsxadmin password.
-
In the Reset fsxadmin password dialog, enter a new fsxadmin password and re-enter it to confirm.
-
Select Apply.
Update throughput capacity for an FSx for ONTAP file system
Update throughput capacity for an FSx for ONTAP file system in NetApp Workload Factory as needed.
For throughput capacity limits, refer to Quotas in AWS FSx for NetApp ONTAP documentation.
-
Log in using one of the console experiences.
-
Select the menu
and then select Storage. -
From the Storage menu, select FSx for ONTAP.
-
From FSx for ONTAP, select the actions menu of the file system to update throughput capacity for and then select Manage.
-
Under Information, select the pencil icon next to Throughput capacity. The pencil icon appears next to the drop down arrow when the mouse hovers over the Throughput capacity row.
-
In the Throughput capacity dialog, select the throughput capacity you need.
-
Select Apply to save the changes