


在 NetApp Ransomware Resilience 中配置 Microsoft Sentinel SIEM

 建议更改
建议更改

 PDF
PDF
NetApp Ransomware Resilience 通过 Microsoft Sentinel 为安全信息和事件管理 (SIEM) 提供本机支持。通过将 Ransomware Resilience 连接到 Microsoft Sentinel,您可以自动发送事件数据以进行威胁分析和检测,从而简化勒索软件保护和事件管理。
配置 Microsoft Sentinel 进行威胁检测
连接 Microsoft Sentinel 需要在 Azure 门户中执行某些步骤。
启用 Microsoft Sentinel
-
在 Microsoft Sentinel 中,创建*日志分析工作区*。
在 Microsoft Sentinel 中创建自定义角色
-
在 Azure 门户中,导航到 订阅 > 访问控制 (IAM)。
-
创建自定义角色。对于*自定义角色名称*,输入"NetApp Ransomware Resilience Sentinel Configurator"。
-
复制以下 JSON 并将其粘贴到 JSON 选项卡中,将 `{subscription_id}`替换为将分配角色的 Azure 订阅 ID。
{ "properties": { "roleName": "NetApp Ransomware Resilience Sentinel Configurator", "description": "", "assignableScopes": [ "/subscriptions/{subscription_id}" ], "permissions": [ { "actions": [ "Microsoft.Insights/dataCollectionEndpoints/write", "Microsoft.Insights/dataCollectionEndpoints/read", "Microsoft.OperationalInsights/workspaces/sharedKeys/action", "Microsoft.Insights/dataCollectionRules/write", "Microsoft.Insights/dataCollectionRules/read", "Microsoft.OperationalInsights/workspaces/tables/operationresults/read", "Microsoft.OperationalInsights/workspaces/tables/read", "Microsoft.OperationalInsights/workspaces/tables/write", "Microsoft.OperationalInsights/workspaces/read", "Microsoft.OperationalInsights/workspaces/write", "Microsoft.OperationalInsights/workspaces/listKeys/action", "Microsoft.Resources/subscriptions/read", "Microsoft.Resources/subscriptions/resourceGroups/read", "Microsoft.Resources/subscriptions/resourceGroups/write", "Microsoft.Resources/deployments/write", "Microsoft.Resources/deployments/read", "Microsoft.Resources/deployments/operationStatuses/read", "Microsoft.Resources/subscriptions/resourceGroups/deployments/write", "Microsoft.Resources/subscriptions/resourceGroups/deployments/read", "Microsoft.Resources/subscriptions/resourceGroups/deployments/operationStatuses/read", "Microsoft.Authorization/roleAssignments/read", "Microsoft.Authorization/roleAssignments/write", "Microsoft.Authorization/roleAssignments/delete", "Microsoft.Authorization/roleDefinitions/read", "Microsoft.Resources/deployments/operations/read", "Microsoft.Resources/deployments/read", "Microsoft.Resources/deployments/write", "Microsoft.Resources/resources/read", "Microsoft.Resources/subscriptions/operationresults/read", "Microsoft.Resources/subscriptions/resourceGroups/delete", "Microsoft.Resources/subscriptions/resourceGroups/read", "Microsoft.Resources/subscriptions/resourcegroups/resources/read", "Microsoft.Resources/subscriptions/resourceGroups/write", "Microsoft.Resources/subscriptions/resourcegroups/deployments/read", "Microsoft.Resources/subscriptions/resourcegroups/deployments/write", "Microsoft.Resources/subscriptions/resourcegroups/deployments/operations/read", "Microsoft.Resources/subscriptions/resourcegroups/deployments/operationstatuses/read", "Microsoft.Resources/subscriptions/locations/read", "Microsoft.SecurityInsights/alertRules/write", "Microsoft.SecurityInsights/alertRules/read", "Microsoft.SecurityInsights/alertRules/actions/write", "Microsoft.SecurityInsights/alertRules/actions/read", "Microsoft.OperationalInsights/workspaces/search/action", "Microsoft.OperationalInsights/workspaces/rules/read", "Microsoft.OperationalInsights/workspaces/sharedkeys/action", "Microsoft.OperationalInsights/workspaces/customfields/action", "Microsoft.OperationalInsights/workspaces/analytics/query/action", "Microsoft.OperationalInsights/workspaces/api/query/schema/read", "Microsoft.OperationalInsights/workspaces/datasources/read", "Microsoft.OperationalInsights/workspaces/metricDefinitions/read", "Microsoft.OperationalInsights/workspaces/schema/read", "Microsoft.OperationalInsights/workspaces/tables/query/read", "Microsoft.OperationalInsights/workspaces/providers/Microsoft.Insights/logDefinitions/read", "Microsoft.OperationalInsights/workspaces/sharedkeys/read", "Microsoft.OperationalInsights/workspaces/operations/read", "Microsoft.OperationalInsights/workspaces/query/read" ], "notActions": [], "dataActions": [], "notDataActions": [] } ] } } -
检查并保存您的设置。
在 Microsoft Entra ID 中注册 Ransomware Resilience
-
在 Azure 门户中,选择 Entra ID > Applications > App registrations。
-
对于应用程序的*显示名称*,输入"NetApp Ransomware Resilience"。
-
在 支持的帐户类型 字段中,选择 仅限此组织目录中的帐户。
-
选择*审核*。
-
选择*注册*来保存您的设置。
注册后,Microsoft Entra 管理中心将显示应用程序概述窗格。
-
在 Azure 门户中,选择 Certificates & secrets > Client secrets > New client secret。
-
为您的应用程序机密添加描述。
-
为密钥选择*过期*时间,或指定自定义生命周期。

客户端密钥的有效期限制为两年(24 个月)或更短。Microsoft 建议您将到期值设置为小于 12 个月。 -
选择“添加”来创建您的秘密。
-
记录要在后续身份验证步骤中使用的密钥。这是您查看密钥的唯一机会;离开此页面后,密钥将不再显示。
在 Azure 中添加角色,并在 Ransomware Resilience 中验证 Microsoft Sentinel
对于 Microsoft Sentinel SIEM,您可以选择自动部署,其中 Ransomware Resilience 根据您提供的权限部署资源。或者,您可以执行手动部署,其中根据提供的 ARM 模板部署资源。这两个选项都要求您在 Azure 门户中设置权限,然后在 Ransomware Resilience 中验证连接,尽管步骤有所不同。请选择最适合您需求的工作流程。
-
在 Azure 门户中,选择*订阅* > 访问控制 (IAM)。
-
选择*添加* > 添加角色分配。
-
对于 特权管理员角色 字段,选择您之前创建的 NetApp Ransomware Resilience Sentinel Configurator 角色。
-
选择“下一步”。
-
在*分配访问权限*字段中,选择*用户、组或服务主体*。
-
选择 选择成员,然后选择 NetApp Ransomware Resilience。
-
选择“下一步”。
-
在*用户可以做什么*字段中,选择*允许用户分配除特权管理员角色所有者、UAA、RBAC(推荐)之外的所有角色*。
-
选择“下一步”。
-
选择*审核并分配*来分配权限。
-
在 Ransomware Resilience 中,选择侧边栏中的 Settings。
-
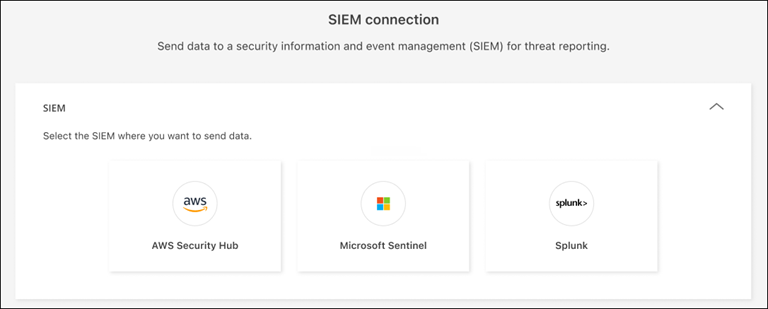
在设置页面中,在 SIEM 连接图块中选择*连接*,然后从下拉菜单中选择 Microsoft Sentinel。
-
选择*自动*作为部署方法。
-
查看*先决条件*、*注册*和*权限*部分,以确保您已成功完成每个步骤。
-
展开 Authentication 部分。
-
输入*目录(租户)ID*、应用程序(租户)ID*和*客户端密钥。选择*身份验证*,然后等待 UI 确认凭据已通过身份验证后再继续。
-
选择要将 SIEM 数据发送到的 Subscription ID、Resource group 和 Log Analytics workspace。
-
-
选择 Connect 以开始发送 SIEM 数据。
-
在 Ransomware Resilience 中,选择侧边栏中的 Settings。
-
在设置页面中,在 SIEM 连接图块中选择*连接*,然后从下拉菜单中选择 Microsoft Sentinel。
-
选择*手动*作为部署方法。
-
查看*先决条件*、*注册*和*ARM 模板部署*部分,以确保您已成功完成每个步骤。
-
展开 ARM Template Deployments 部分。
-
分配 Monitoring Metrics Publisher 角色。
-
在 Azure 订阅中,转到*访问控制 (IAM)*。
-
选择*添加角色分配*。
-
搜索并选择 Monitoring Metrics Publisher。
-
将角色分配添加到在注册步骤中创建的应用程序注册的服务主体。
-
Review + assign。
-
-
返回勒索软件弹性。复制 ARM 模板的 JSON,以在 Azure 环境中创建 Log Analytics 自定义表、数据收集端点 (DCE)、数据收集规则 (DCR) 和 Sentinel 分析规则。
-
在 Azure 门户中,搜索 Deploy a custom template。
-
在编辑器中选择 Build your own template。
-
将复制的 JSON 粘贴到编辑器中。选择 保存。
-
输入*工作区名称*,即您的 Log Analytics 工作区的名称。您可以从 Azure 门户中的工作区概览页面检索此内容。
-
选择 Review + create。查看选择内容,然后选择 Create 进行部署。
-
部署后,在 Ransomware Resilience 中收集以下信息以进行身份验证:
-
Log Ingestion Endpoint:打开数据收集端点资源(
rps-alerts-dce)并复制概述页面上显示的 Logs Ingestion 值。 -
DCR Immutable ID:打开数据收集规则资源(
rps-alerts-dcr),然后在概述页面上复制 Immutable ID。
-
-
返回 Ransomware Resilience SIEM 配置窗口。
-
展开 Authentication 部分。
-
输入*目录(租户)ID*、应用程序(租户)ID*和*客户端密钥。选择*身份验证*,然后等待 UI 确认凭据已通过身份验证。
-
请输入您之前复制的 Log Ingestion Endpoint 和 DCR immutable ID。
-
-
选择*Connect*以创建连接。