使用 Trident Protect 备份和还原 vSphere Kubernetes Service 集群中的容器应用程序

 建议更改
建议更改

 PDF
PDF
使用 Trident Protect 快照和备份在 vSphere Kubernetes Service (VKS) 集群中备份和还原容器应用程序。此过程包括使用 ONTAP S3 对象存储创建 AppVault、配置 Trident Protect 以捕获包括 Kubernetes 资源对象和持久卷在内的应用程序数据,以及在必要时还原数据。
在 VKS 集群中运行的容器应用程序作为工作节点命名空间中的 Kubernetes 工作负载进行管理。必须同时保护应用程序元数据和永久卷,以便在它们丢失或损坏时能够恢复。
VKS 应用程序的持久卷可由使用 "Trident CSI" 与 VKS 集群集成的 ONTAP 存储提供支持。此过程使用 "Trident Protect" 来创建应用程序快照(其元数据存储在 ONTAP 对象存储中,而卷快照数据仍保留在存储后端)和备份(其数据将复制到 ONTAP 对象存储中)。您可以在需要时从快照或备份进行恢复。
Trident Protect 支持 Kubernetes 集群上的应用程序的快照、备份、恢复和灾难恢复。可以使用 Trident Protect 保护的数据包括与应用程序及其持久卷关联的 Kubernetes 资源对象。
以下是本节示例中使用的各种组件的版本
-
VMware Cloud Foundation (VCF) 9.1 与 vSphere Kubernetes 服务
在 vSphere Kubernetes 集群上安装 Trident Protect
安装 Trident Protect
使用 Helm 在 vSphere Kubernetes Service 集群上安装 Trident Protect。本节中的示例使用 tridentctl-protect,即 Trident Protect CLI。请按照 "Trident Protect CLI 文档" 中的说明进行安装。安装 Trident Protect 的其他方法记录在 "Trident Protect 文档" 中。
首先,创建并标记 `trident-protect`命名空间。 `enforce=privileged`标签是必需的,因为 Trident Protect 运行特权工作负载。如果没有它,Kubernetes Pod 安全许可控制器将阻止 Trident Protect Pod 启动。
kubectl create namespace trident-protect
kubectl label namespace trident-protect pod-security.kubernetes.io/enforce=privileged
然后添加 Helm 存储库,并将 Trident Protect 安装到命名空间中。
helm repo add netapp-trident-protect https://netapp.github.io/trident-protect-helm-chart
helm install trident-protect netapp-trident-protect/trident-protect --set clusterName=<name-of-cluster> --version 100.2606.0 --namespace trident-protect

|
如果 Trident Protect Pod 启动失败并出现 `PodSecurity`准入错误,则 Pod 安全标签可能未在安装前应用于 `trident-protect`命名空间。使用 `--overwrite`重新应用它们,然后验证 Pod 是否正常启动。 |
kubectl label namespace trident-protect pod-security.kubernetes.io/enforce=privileged --overwritekubectl get pods -n trident-protect

为对象存储创建应用程序保管库
创建 AppVault
在为应用程序创建快照和备份之前,必须在 Trident Protect 中配置对象存储。这是通过创建 AppVault CR 来完成的。只有管理员可以创建和配置 AppVault CR。
AppVault 对象是存储桶的 Kubernetes 自定义资源表示形式。AppVault CR 包含在保护操作(如备份、快照、还原操作和 SnapMirror 复制)中使用存储桶所需的配置。
以下步骤创建为 ONTAP S3 配置的 AppVault CR:。在 ONTAP 集群的 SVM 中创建 S3 对象存储服务器。。在对象存储服务器中创建存储桶。。在 SVM 中创建 S3 用户。请将访问密钥和密钥保存在安全的位置。
+ 注意:Trident Protect 要求 S3 用户至少具有 PutObject、 GetObject、 `ListBucket`和 `DeleteObject`权限。如果没有这些权限,AppVault 备份和还原操作将失败并出现访问被拒绝错误。有关详细信息,请参见"Trident Protect AppVault 文档"。.在 VKS 集群中,创建一个密钥来存储 ONTAP S3 凭据。.为 ONTAP S3 创建一个 AppVault 对象。
配置 Trident Protect AppVault for ONTAP S3

|
下面的清单使用启用了证书验证的 HTTPS,这是生产环境所必需的。如果您的 ONTAP S3 端点使用由集群已信任的公共 CA 签名的证书,则无需进行其他证书配置。如果使用自签名或内部 CA 证书,请使用清单中显示的 `rootCA`字段提供自定义根 CA 证书。如果需要用于隔离非生产测试的 HTTP 配置,请参阅本节末尾的仅限实验室变体。 |
# alias tp='tridentctl-protect'

# cat appvault-secret.yaml
apiVersion: v1
data:
  accessKeyID: <base64 encoded access key>
  secretAccessKey: <base64 encoded secret access key>
# Alternatively, remove the data section above and use:
# stringData:
#   accessKeyID: "<access key of S3>"
#   secretAccessKey: "<secret access key of S3>"
kind: Secret
metadata:
  name: ontap-s3-appvault-secret1
  namespace: trident-protect
type: Opaque

# cat appvault.yaml
apiVersion: protect.trident.netapp.io/v1
kind: AppVault
metadata:
  name: ontap-s3-appvault1
  namespace: trident-protect
spec:
  providerConfig:
    azure:
      accountName: ""
      bucketName: ""
      endpoint: ""
    gcp:
      bucketName: ""
      projectID: ""
    s3:
      bucketName: trident-protect
      endpoint: <lif for S3 access>
      secure: "true"
      skipCertValidation: "false"
      # If your ONTAP S3 endpoint uses a certificate signed by a public CA
      # already trusted by the cluster, no additional certificate config is needed.
      # If it uses a self-signed or internal CA certificate, provide the
      # root CA certificate:
      # rootCA: <root CA certificate>
  providerCredentials:
    accessKeyID:
      valueFromSecret:
        key: accessKeyID
        name: ontap-s3-appvault-secret1
    secretAccessKey:
      valueFromSecret:
        key: secretAccessKey
        name: ontap-s3-appvault-secret1
  providerType: OntapS3

# kubectl create -f appvault-secret.yaml -n trident-protect
# kubectl create -f appvault.yaml -n trident-protect
仅实验室变体(HTTP,无证书验证)
仅在没有敏感数据的隔离实验室环境中使用以下 `s3`设置。请勿在生产环境中使用这些设置。
    s3:
      bucketName: trident-protect
      endpoint: <lif for S3 access>
      secure: "false"
      skipCertValidation: "true"
创建 Trident Protect 应用程序
创建 Trident Protect 应用程序
此示例涵盖了安装在 `postgres`命名空间中的示例 PostgreSQL 应用程序的数据保护。有关安装的详细信息,请参见"使用 NetApp 存储部署 VKS 工作负载"。
|
|
示例 PostgreSQL PVC 请求 RWO 访问模式。访问模式必须在 PVC 清单中明确指定;Trident 不会根据存储协议自动选择访问模式。RWX 支持基于 NAS 的 PVC,基于 SAN 的 PVC 可以通过额外配置支持 RWX。有关详细信息,请参见 "Trident Protect 文档"。 |
在示例中,postgres 命名空间具有一个应用程序,并且在创建 Trident Protect 应用程序时包含命名空间的所有资源。
# alias tp='tridentctl-protect'
# tp create app postgres-app --namespaces postgres -n postgres --dry-run > postgres-app.yaml

# cat postgres-app.yaml
apiVersion: protect.trident.netapp.io/v1
kind: Application
metadata:
  name: postgres-app
spec:
  includedNamespaces:
  - namespace: postgres
  resourceFilter: {}
# kubectl create -f postgres-app.yaml -n postgres
通过创建备份来保护应用
创建备份
创建按需备份
为先前创建的 postgres-app 创建备份,其中包括 postgres 命名空间中的所有资源。提供存储备份的 appvault 名称。
# cat postgres-backup-on-demand.yaml
apiVersion: protect.trident.netapp.io/v1
kind: Backup
metadata:
  name: postgres-backup-on-demand
spec:
  appVaultRef: ontap-s3-appvault1
  applicationRef: postgres-app
  cleanupSnapshot: true
  replicateSnapshot: false
kubectl create -f postgres-backup-on-demand.yaml -n postgres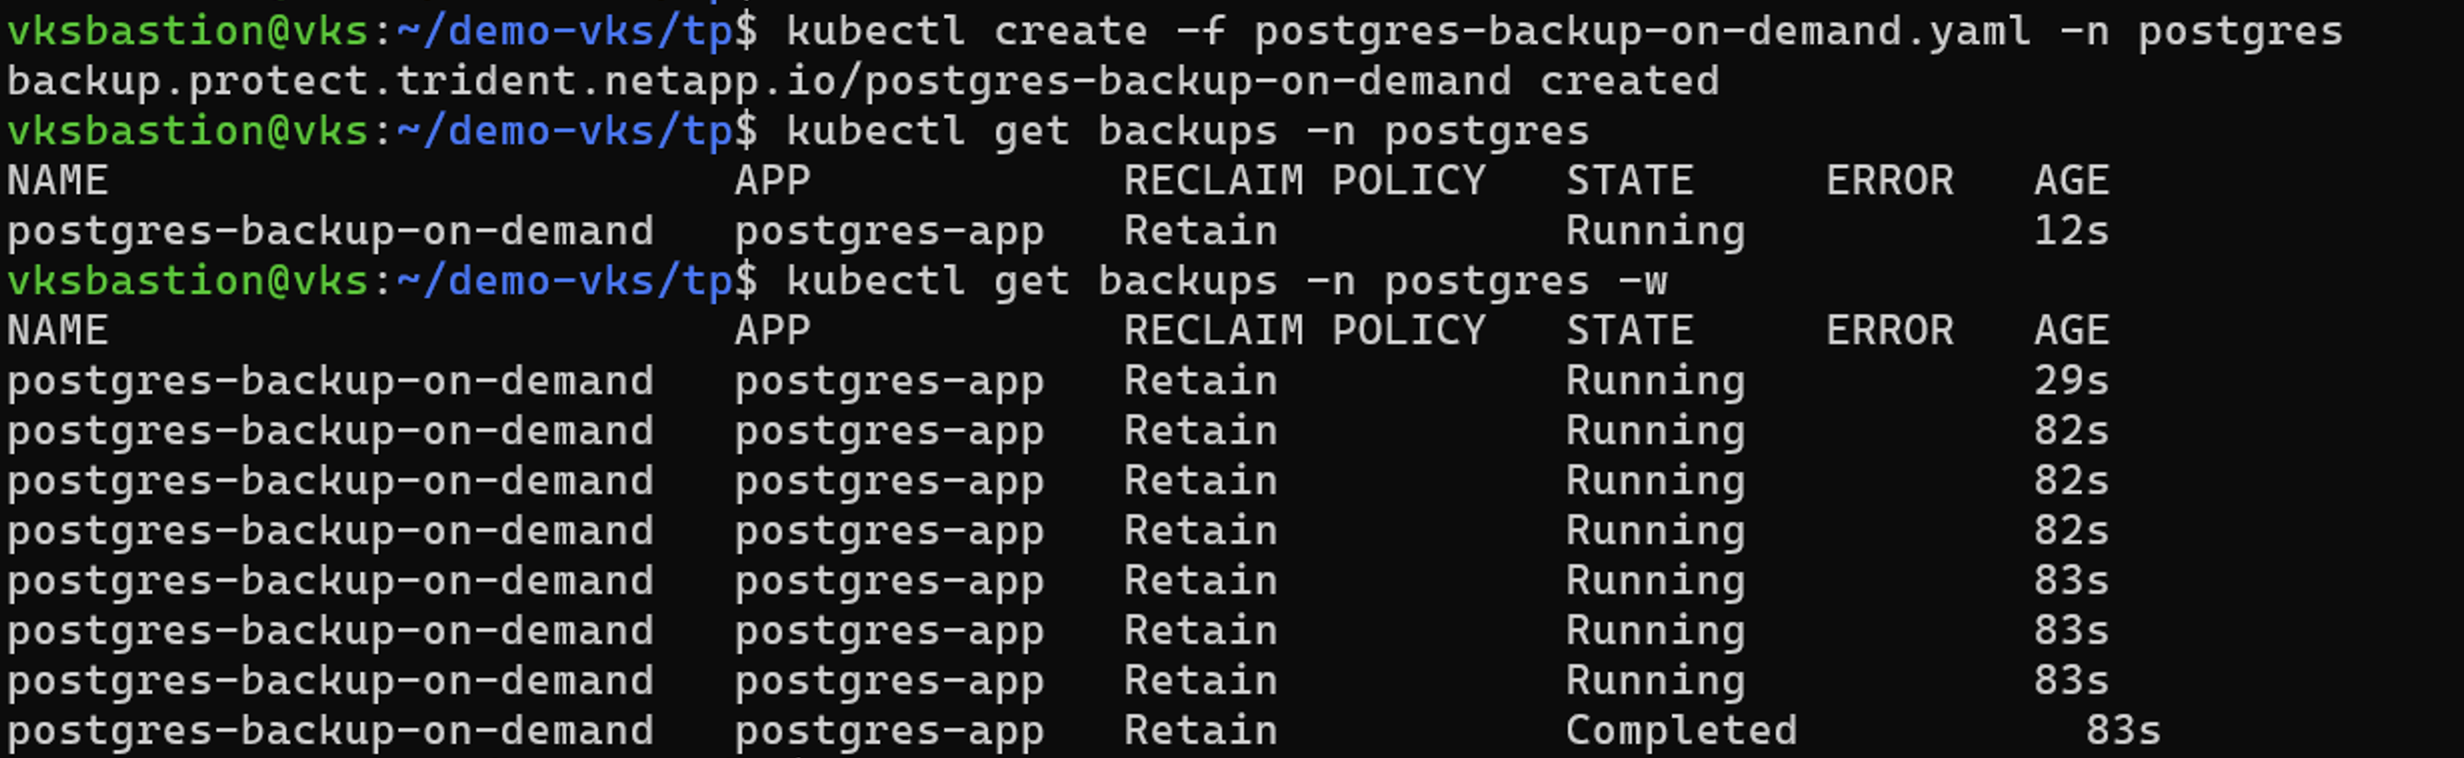

按计划创建备份
创建备份计划,指定粒度和要保留的备份数量。
# tp create schedule backup-schedule1 --app postgres-app --appvault ontap-s3-appvault1 --granularity Hourly --minute 45 --backup-retention 1 -n postgres --dry-run>postgres-backup-schedule1.yaml

#cat postgres-backup-schedule1.yaml
apiVersion: protect.trident.netapp.io/v1
kind: Schedule
metadata:
  name: backup-schedule1
  namespace: postgres
spec:
  appVaultRef: ontap-s3-appvault1
  applicationRef: postgres-app
  backupRetention: "1"
  dayOfMonth: ""
  dayOfWeek: ""
  enabled: true
  granularity: Hourly
  hour: ""
  minute: "45"
  recurrenceRule: ""
  replicationRetention: "0"
  runImmediately: false
  snapshotRetention: "0"
# kubectl create -f postgres-backup-schedule1.yaml -n postgres

从备份还原
从备份还原
将应用程序还原到同一命名空间
在此示例中,备份 postgres-backup-on-demand 包含 postgres-app 的备份。
在删除应用程序之前,请验证计划用于还原的备份处于 `Completed`状态。正在进行中或失败的备份不能用于还原应用程序。
kubectl get backup -n postgres确认备份状态为 `Completed`后,删除 postgres 应用程序,并确保从命名空间"postgres"中删除 PVC 和 pod 对象。
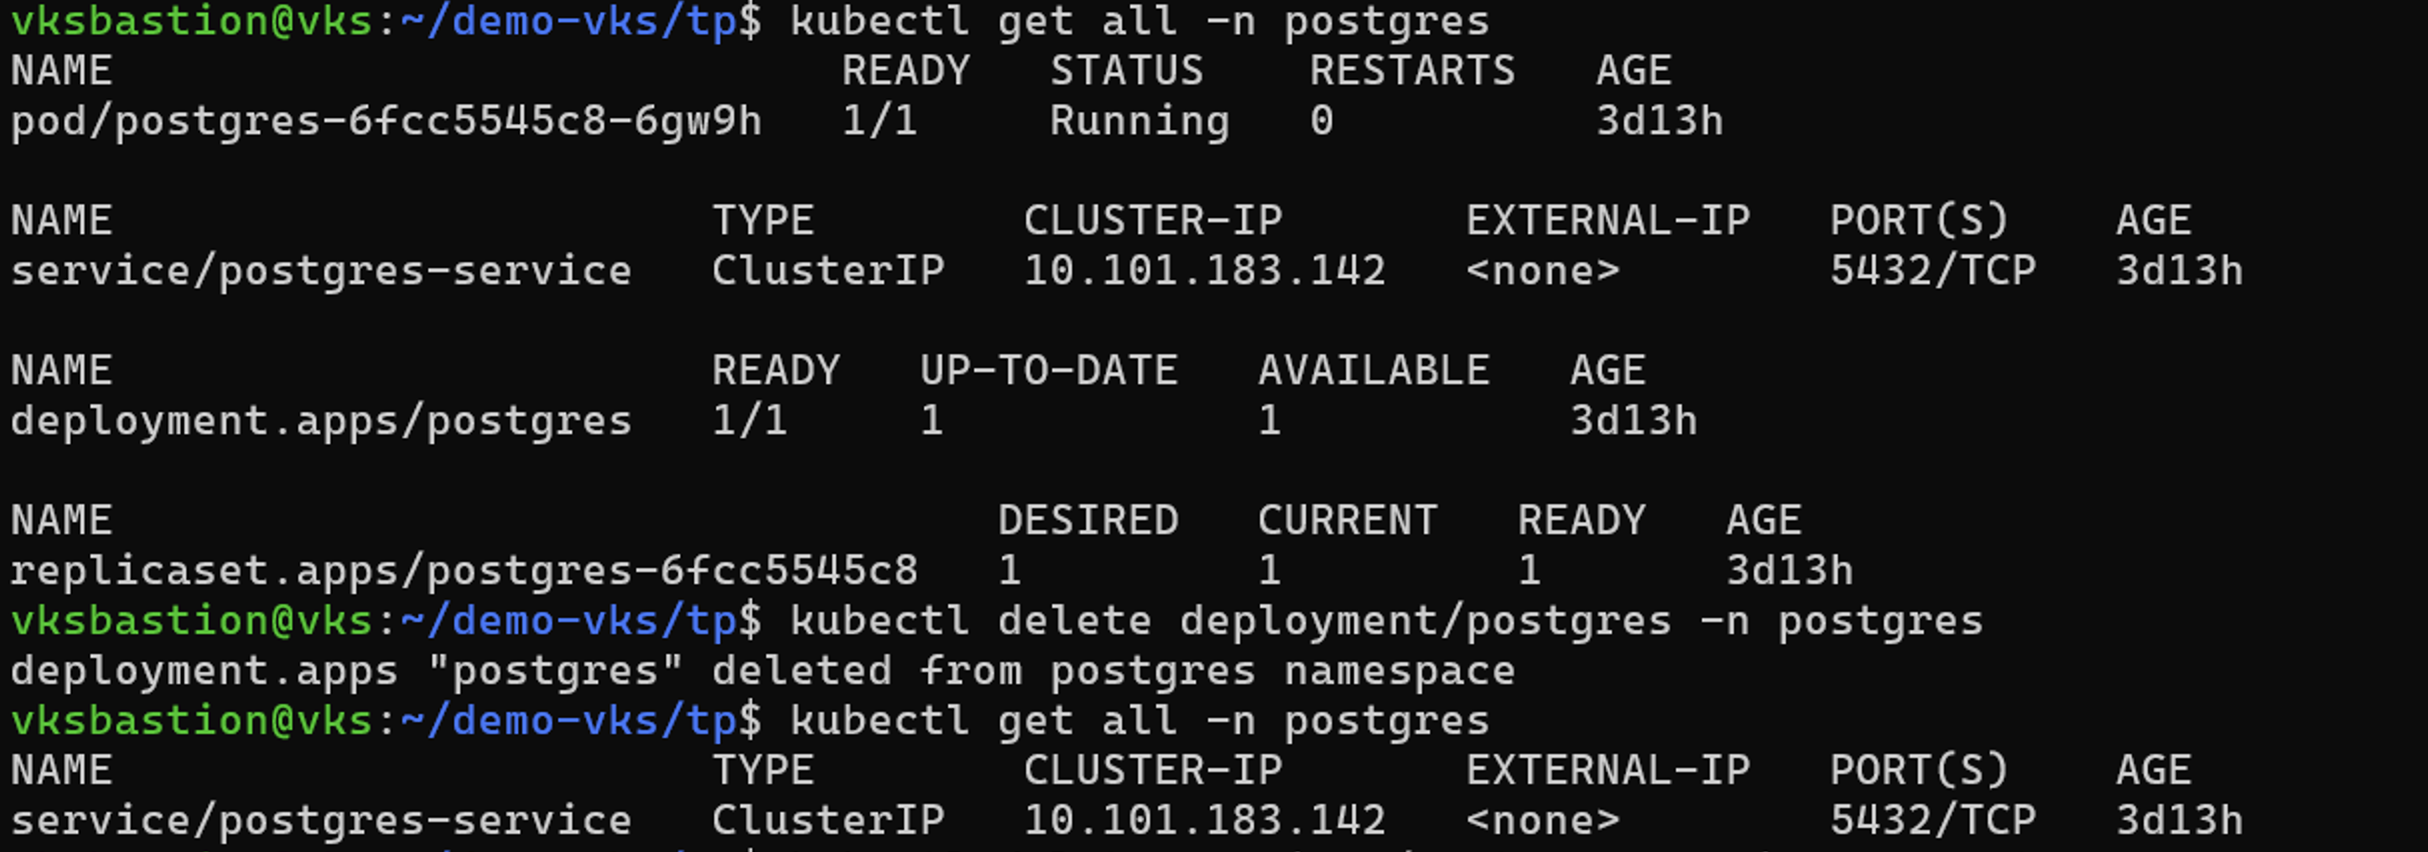


现在,创建一个就地备份还原对象。
# tp create bir postgres-app-restore --backup postgres/postgres-backup-on-demand -n postgres --dry-run>postgres-app-bir.yaml

# cat postgres-app-bir.yaml
apiVersion: protect.trident.netapp.io/v1
kind: BackupInplaceRestore
metadata:
  annotations:
    protect.trident.netapp.io/max-parallel-restore-jobs: "25"
  name: postgres-app-restore
  namespace: postgres
spec:
  appArchivePath: postgres-app_314bbaf6-2ce3-4065-b3c1-ab85c7bb7c7c/backups/postgres-backup-on-demand_63efc9d1-92d7-45ce-84fe-846ce7db7b29
  appVaultRef: ontap-s3-appvault1
  cleanUpAdditionalExecHooks: true
  cleanUpArchivedExecHooks: false
  resourceFilter: {}
  runArchivedExecHooks: true

# kubectl create -f postgres-app-bir.yaml -n postgres
验证 postgres 应用程序部署、服务、Pod 和 PVC 是否已还原。
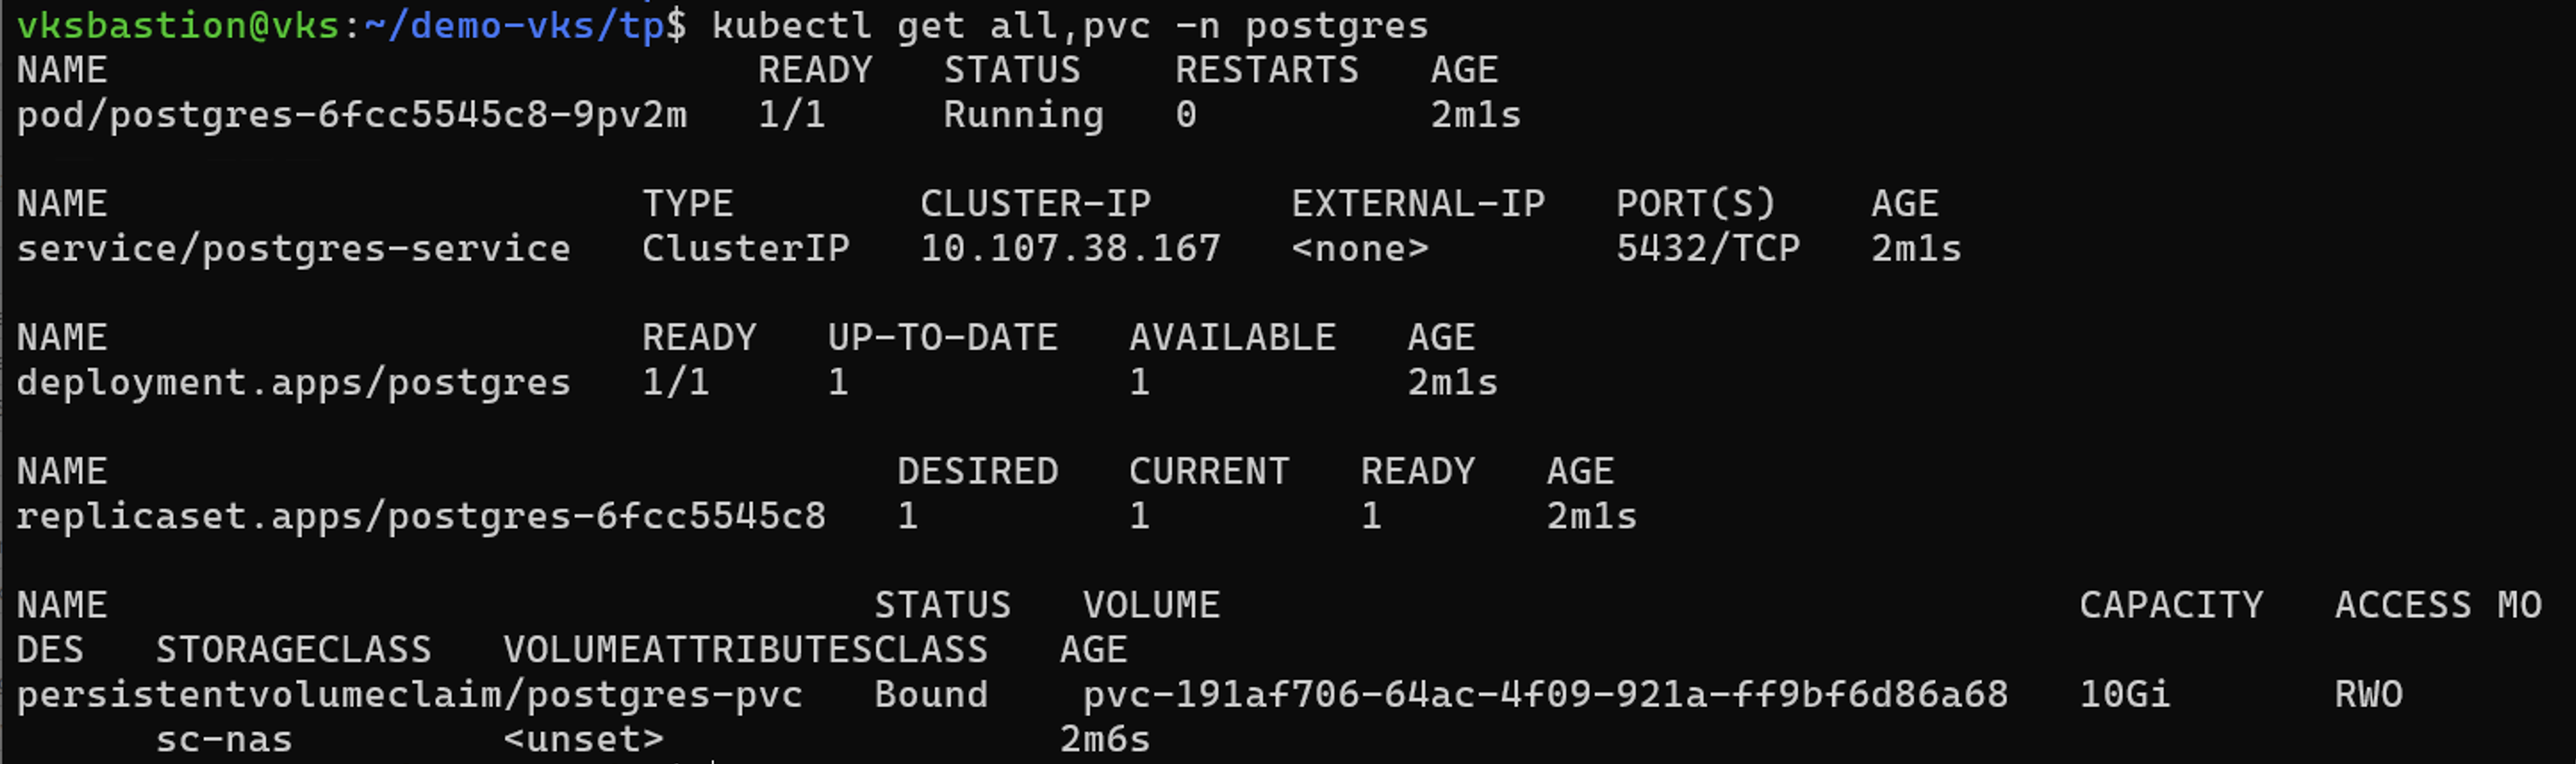
将应用程序还原到其他命名空间
首先,创建一个要将应用还原到的新命名空间,在此示例中为 postgres2。由计划创建的每小时备份现在可用于 postgres-app。使用此备份将应用程序还原到新的命名空间 postgres2。

# tp create backuprestore --appvault ontap-s3-appvault1 --path postgres-app_314bbaf6-2ce3-4065-b3c1-ab85c7bb7c7c/backups/hourly-cbd11-20260831124500_2b57bda9-5cb0-4c8f-ae7a-20f94c23c3b9 --namespace-mapping postgres:postgres2 -n postgres2 --dry-run>postgres-app-postgres2-br.yaml|
|
要获取备份的路径,请使用命令 kubectl get backups <backup-name> -n postgres -o jsonpath='{.status.appArchivePath}'。
|

apiVersion: protect.trident.netapp.io/v1
kind: BackupRestore
metadata:
  annotations:
    protect.trident.netapp.io/max-parallel-restore-jobs: "25"
  name: postgres-app-z2woek
  namespace: postgres2
spec:
  appArchivePath: postgres-app_314bbaf6-2ce3-4065-b3c1-ab85c7bb7c7c/backups/hourly-cbd11-20260831124500_2b57bda9-5cb0-4c8f-ae7a-20f94c23c3b9
  appVaultRef: ontap-s3-appvault1
  cleanUpAdditionalExecHooks: true
  cleanUpArchivedExecHooks: false
  namespaceMapping:
  - destination: postgres2
    source: postgres
  resourceFilter: {}
  runArchivedExecHooks: true
  skipApplicationCreation: false

# kubectl create -f postgres-app-postgres2-br.yaml -n postgres2
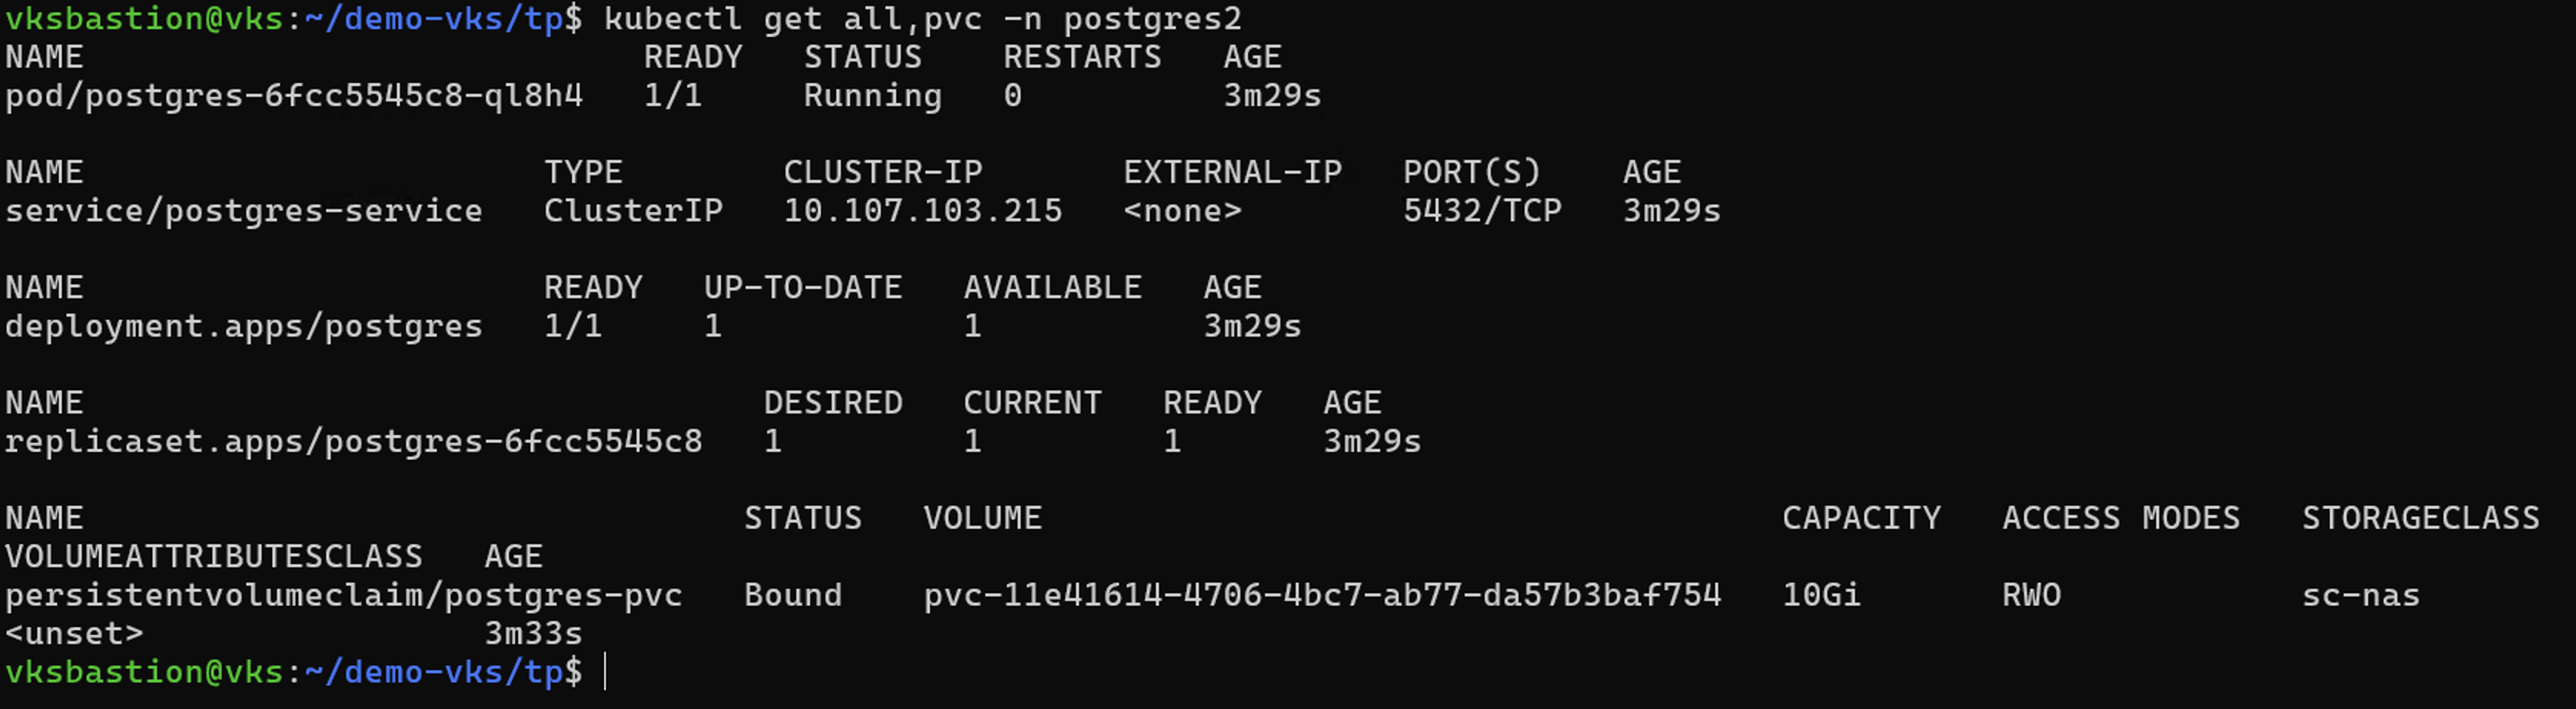
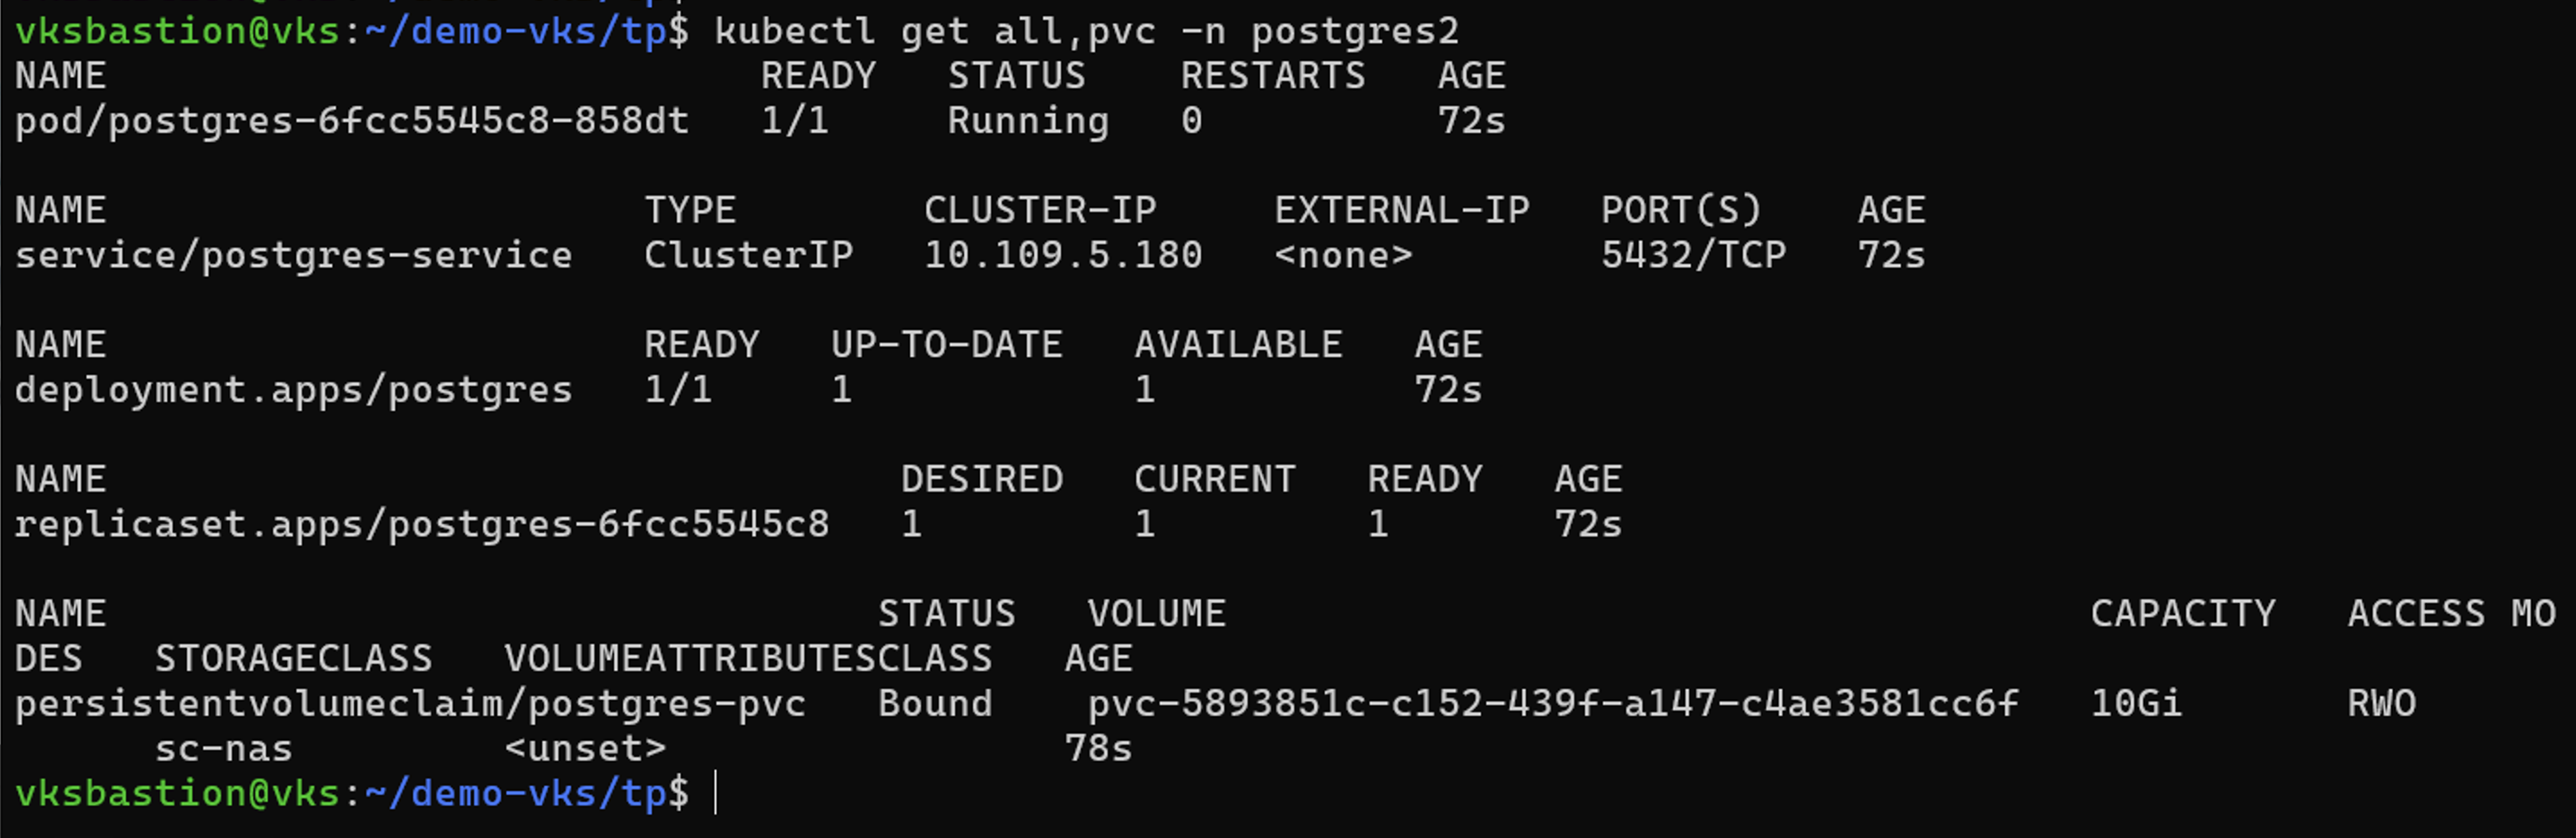
验证 postgres 应用程序对象和 PVC 是否在新的命名空间 postgres2 中创建。
使用快照保护应用
创建快照
创建按需快照 为应用程序创建快照,并指定存储快照元数据的 AppVault。卷快照数据本身不会复制到对象存储——它仍保留在存储后端。
# tp create snapshot postgres-app-snapshot-ondemand --app postgres-app --appvault ontap-s3-appvault1 -n postgres --dry-run>postgres-app-snapshot-ondemand.yaml

# cat postgres-app-snapshot-ondemand.yaml
apiVersion: protect.trident.netapp.io/v1
kind: Snapshot
metadata:
  name: postgres-app-snapshot-ondemand
  namespace: postgres
spec:
  appVaultRef: ontap-s3-appvault1
  applicationRef: postgres-app
  cleanupSnapshot: false
  completionTimeout: 0s
  volumeSnapshotsCreatedTimeout: 0s
  volumeSnapshotsReadyToUseTimeout: 0s

# kubectl create -f postgres-app-snapshot-ondemand.yaml
snapshot.protect.trident.netapp.io/postgres-app-snapshot-ondemand created
为快照创建计划 为快照创建计划。指定要保留的粒度和快照数量。
# tp create schedule snapshot-schedule1 --app postgres-app --appvault ontap-s3-appvault1 --granularity Hourly --minute 55 --snapshot-retention 1 -n postgres --dry-run>postgres-app-snapshot-schedule1.yaml

# cat postgres-app-snapshot-schedule1.yaml
apiVersion: protect.trident.netapp.io/v1
kind: Schedule
metadata:
  name: snapshot-schedule1
  namespace: postgres
spec:
  appVaultRef: ontap-s3-appvault1
  applicationRef: postgres-app
  backupRetention: "0"
  dayOfMonth: ""
  dayOfWeek: ""
  enabled: true
  granularity: Hourly
  hour: ""
  minute: "55"
  recurrenceRule: ""
  replicationRetention: "0"
  runImmediately: false
  snapshotRetention: "1"

# kubectl create -f postgres-app-snapshot-schedule1.yaml
schedule.protect.trident.netapp.io/snapshot-schedule1 created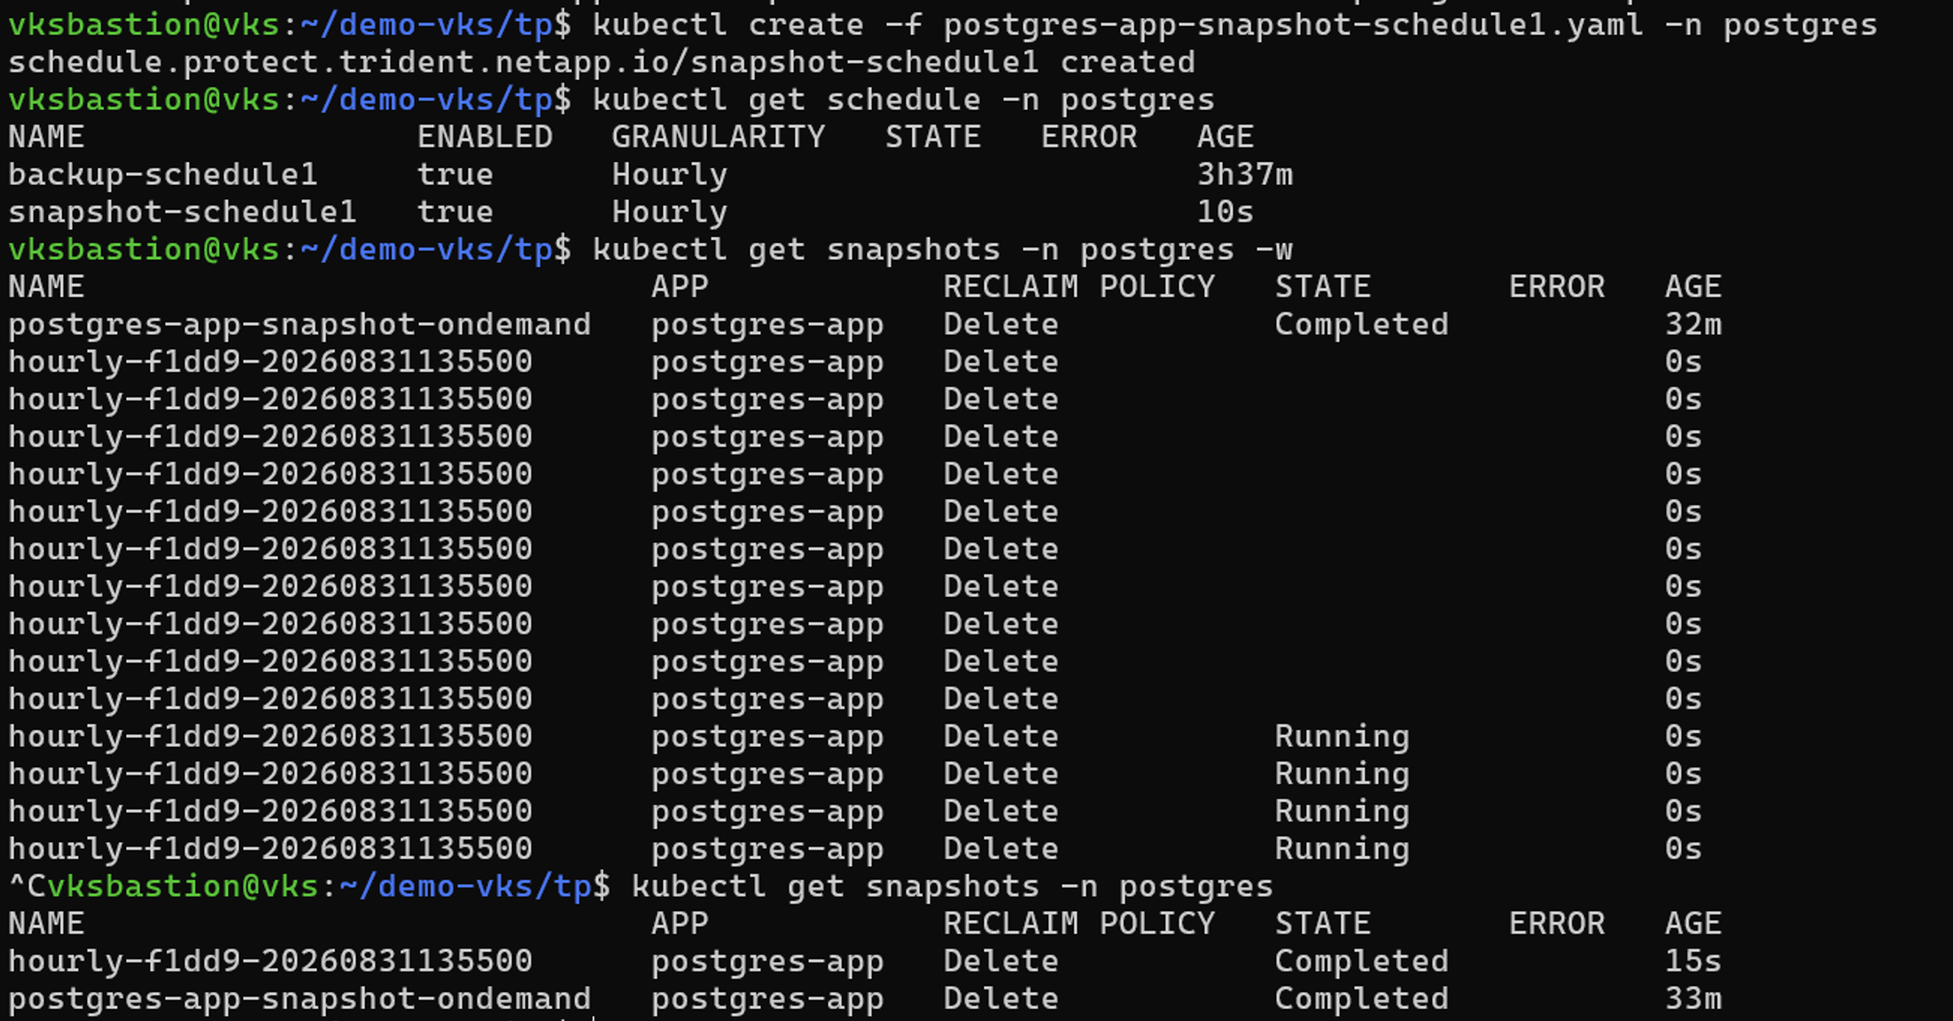
从 Snapshot 恢复
从 Snapshot 恢复
将应用程序从快照还原到同一命名空间
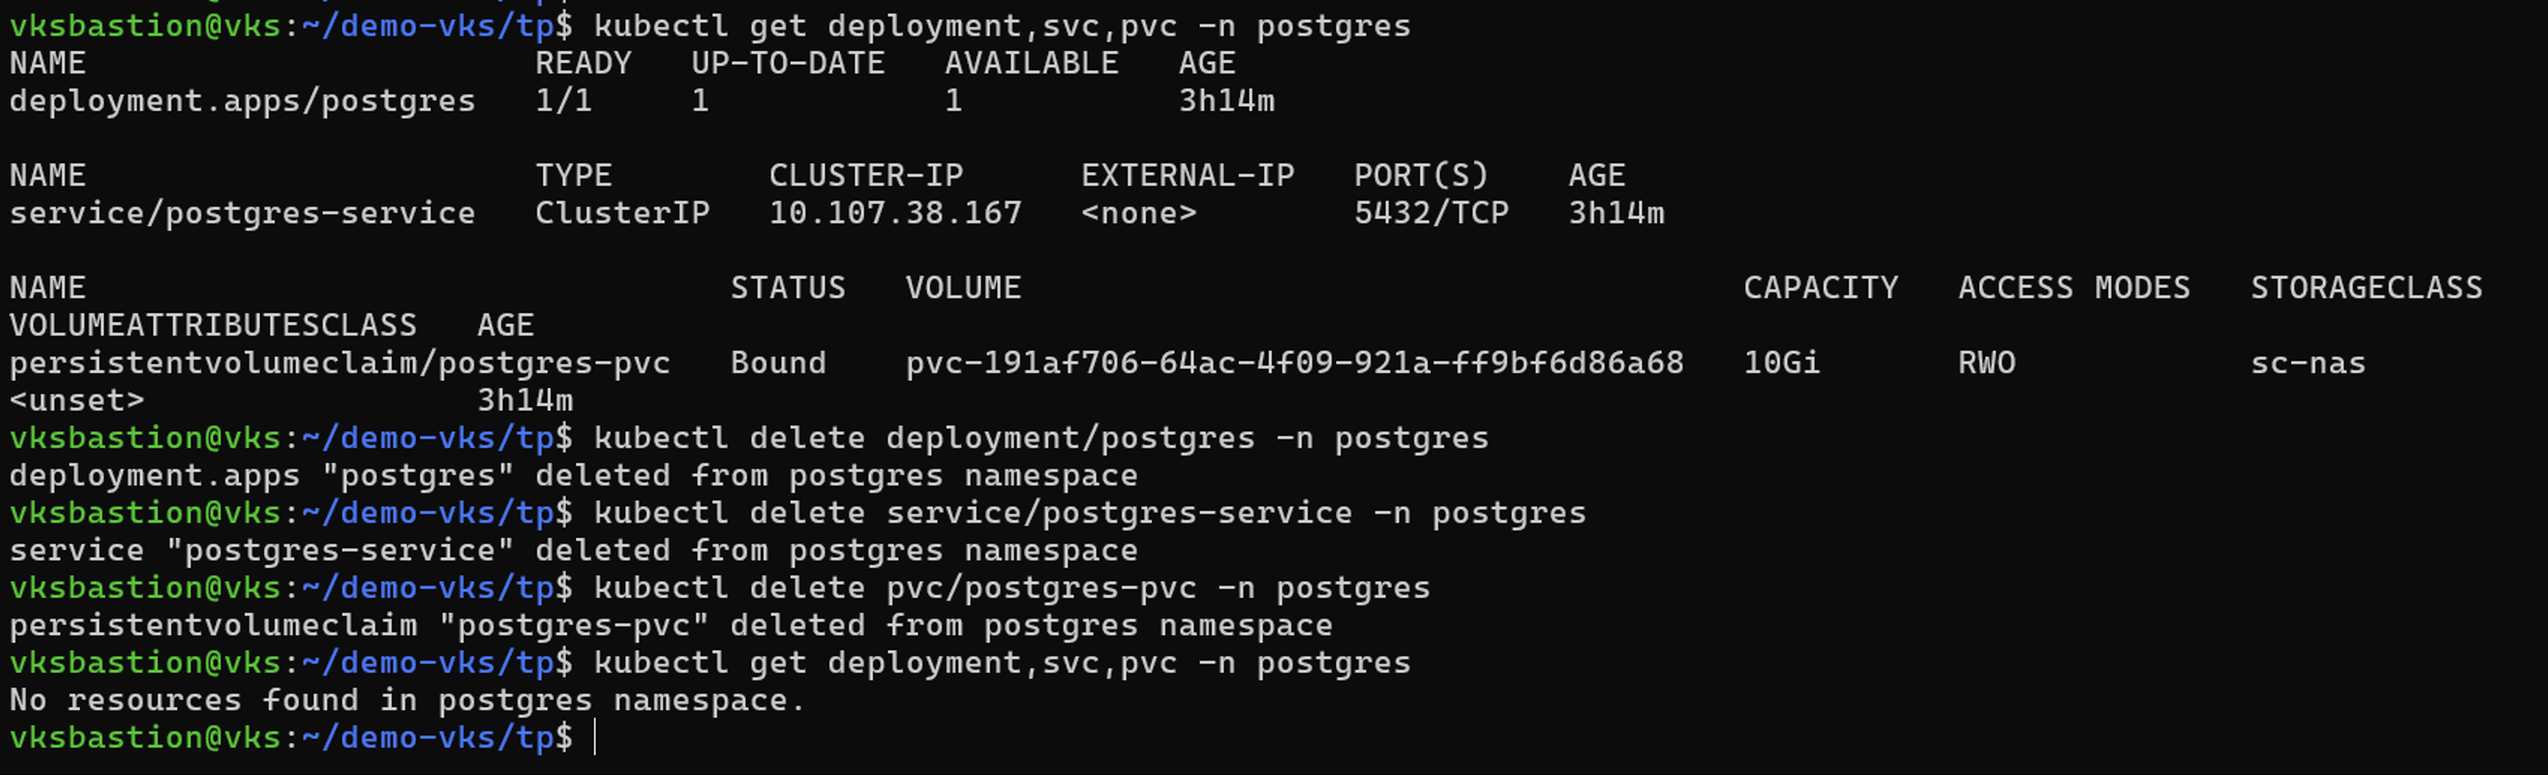
在删除应用程序之前,请验证计划从中还原的快照是否处于 `Completed`状态。正在进行或失败的快照不能用于还原应用程序。
kubectl get snapshot -n postgres确认快照状态为 `Completed`后,从 postgres 命名空间中删除 postgres 的应用程序对象和 PVC。
从快照创建快照就地还原对象。
# tp create sir postgres-restore-from-snapshot --snapshot postgres/hourly-f1dd9-20260831135500 -n postgres --dry-run > postgres-sir.yaml

# cat postgres-sir.yaml
apiVersion: protect.trident.netapp.io/v1
kind: SnapshotInplaceRestore
metadata:
  name: postgres-restore-from-snapshot
  namespace: postgres
spec:
  appArchivePath: postgres-app_314bbaf6-2ce3-4065-b3c1-ab85c7bb7c7c/snapshots/20260831135500_hourly-f1dd9-20260831135500_36c2bd2a-9405-4424-88a7-75e6bbc5b315
  appVaultRef: ontap-s3-appvault1
  cleanUpAdditionalExecHooks: true
  cleanUpArchivedExecHooks: false
  resourceFilter: {}
  runArchivedExecHooks: true

# kubectl create -f postgres-sir.yaml
snapshotinplacerestore.protect.trident.netapp.io/postgres-restore-from-snapshot created
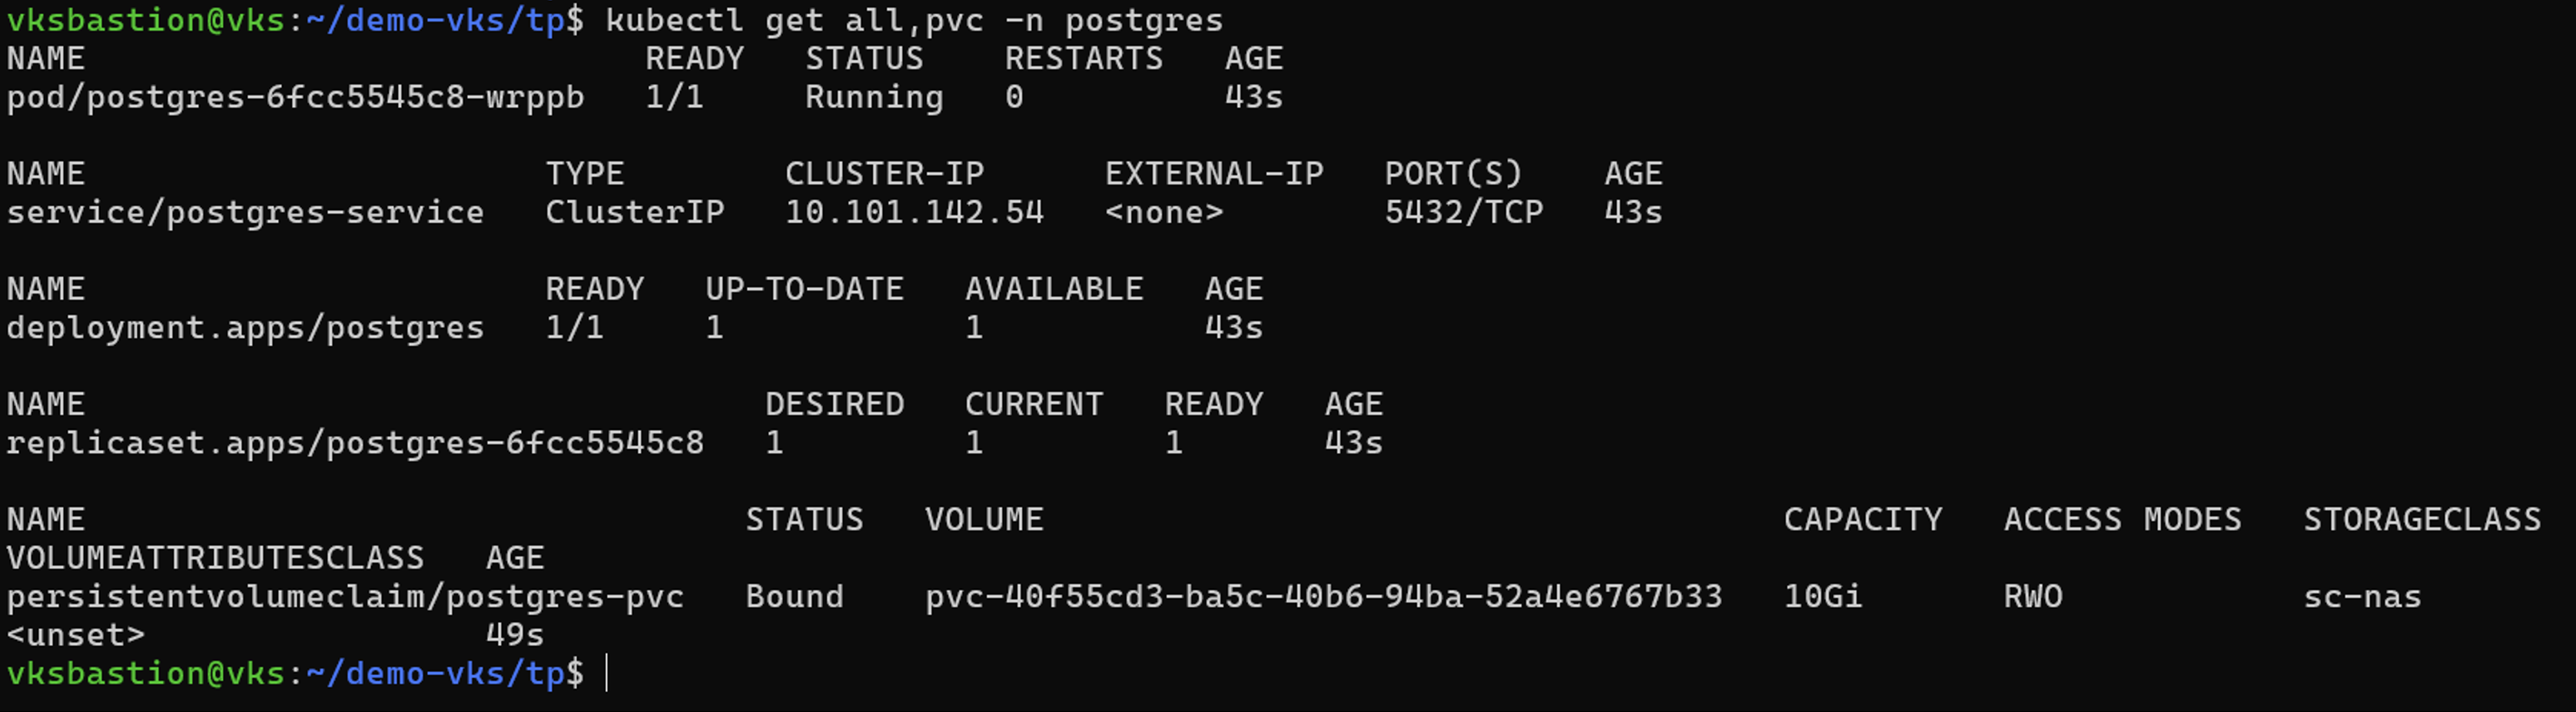
验证应用程序的对象和 PVC 是否在 postgres 命名空间中创建。
将应用程序从快照还原到其他命名空间
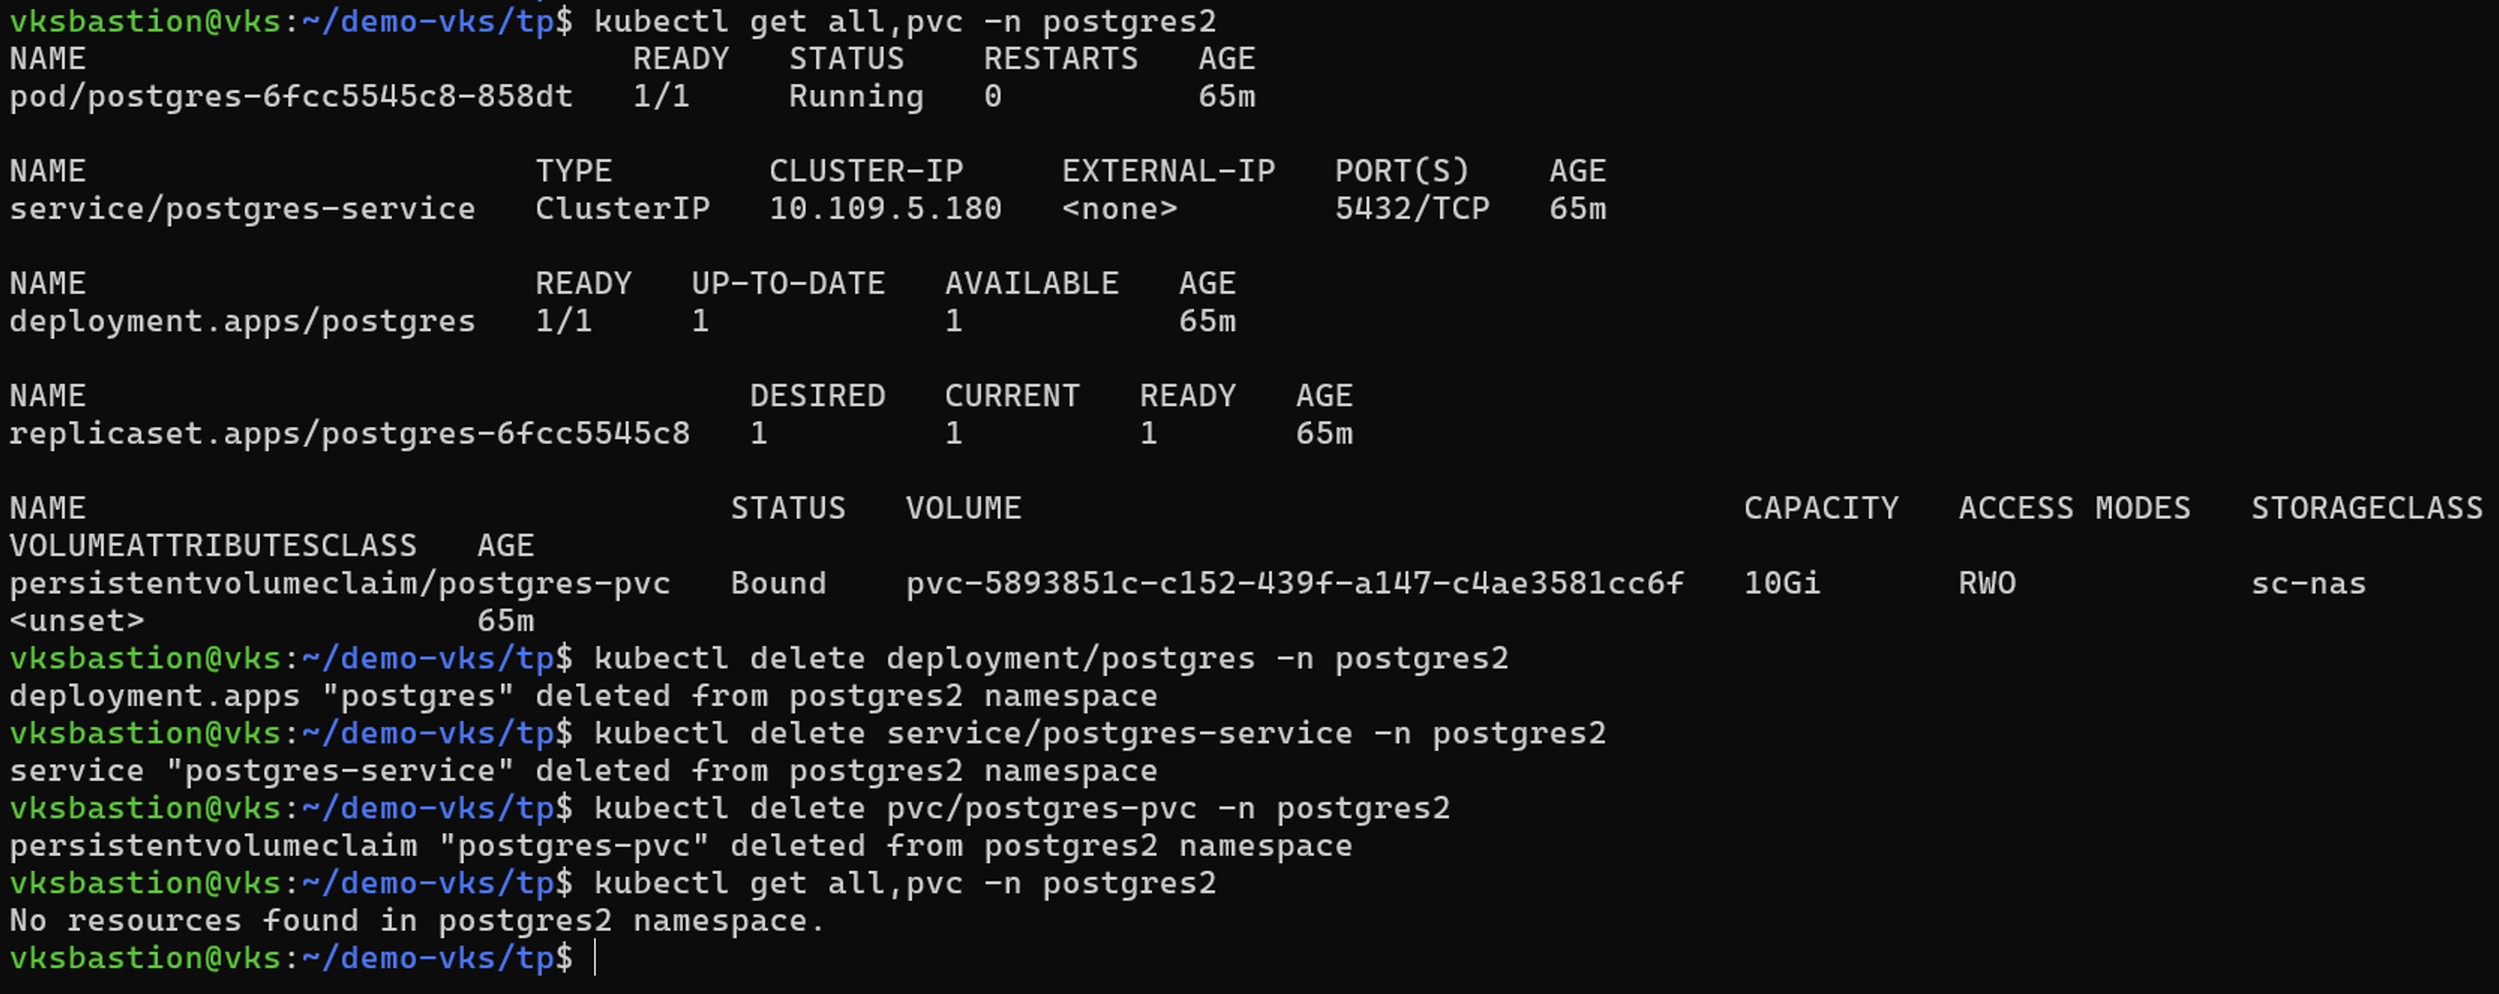
删除以前从备份还原的 postgres2 命名空间中的应用程序。
从快照创建快照还原对象,并提供命名空间映射。
# tp create sr postgres-sr --snapshot postgres/hourly-f1dd9-20260831135500 --namespace-mapping postgres:postgres2 -n postgres2 --dry-run>postgres-sr.yaml

# cat postgres-sr.yaml
apiVersion: protect.trident.netapp.io/v1
kind: SnapshotRestore
metadata:
  name: postgres-sr
  namespace: postgres2
spec:
  appArchivePath: postgres-app_314bbaf6-2ce3-4065-b3c1-ab85c7bb7c7c/snapshots/20260831135500_hourly-f1dd9-20260831135500_36c2bd2a-9405-4424-88a7-75e6bbc5b315
  appVaultRef: ontap-s3-appvault1
  cleanUpAdditionalExecHooks: true
  cleanUpArchivedExecHooks: false
  namespaceMapping:
  - destination: postgres2
    source: postgres
  resourceFilter: {}
  runArchivedExecHooks: true
  skipApplicationCreation: false

# kubectl create -f postgres-sr.yaml
snapshotrestore.protect.trident.netapp.io/postgres-sr created
验证应用程序的对象和 PVC 是否已在命名空间 postgres2 中还原。