使用Trident Protect在OpenShift虚拟化中为VM实施故障转移和故障恢复
 建议更改
建议更改


概述
本节详细介绍了如何使用Trident Protect在OpenShift虚拟化中实施虚拟机故障转移和故障恢复。无论VM是内部OpenShift集群还是ROSA集群、这些过程都是相同的。本节介绍了创建ONTAP S3对象存储以用作Trident Protect的应用存储以及为应用程序镜像创建计划的过程。之后、将介绍如何创建应用程序镜像关系。最后、本指南将介绍如何更改应用程序镜像关系的状态以执行故障转移和故障恢复。
前提条件
-
必须安装Trident。在使用OpenShift虚拟化运算符在集群上安装OpenShift虚拟化之前、必须先创建后端和存储类。
-
要对OpenShift VM实施故障转移和故障恢复操作、必须安装Trident Protect。请参阅此处的说明"安装Trident Protect"

VM必须在OpenShift虚拟化中可用。有关部署新VM或将现有VM迁移到OpenShift虚拟化的详细信息、请参见文档中相应的章节。

使用ONTAP S3创建应用存储
本节介绍如何使用ONTAP S3对象存储在Trident Protect中设置应用程序存储。
使用oc命令和下面显示的yaml文件为ONTAP S3创建密钥和appvaults自定义资源。请确保在Trident Protect命名空间中创建它们。
oc create -f app-vault-secret.yaml -n trident-protect
oc create -f app-vault.yaml -n trident-protect
apiVersion: v1
# You can provide the keys either as stringData or base 64 encoded data
stringData:
accessKeyID: "<access key id as obtained from ONTAP>"
secretAccessKey: "<secret access key as obtained from ONTAP>"
#data:
#accessKeyID: <base 64 encoded value of access key>
#secretAccessKey: <base 64 encoded value of secret access key>
kind: Secret
metadata:
name: appvault-secret
namespace: trident-protect
type: OpaqueapiVersion: protect.trident.netapp.io/v1
kind: AppVault
metadata:
name: ontap-s3-appvault
namespace: trident-protect
spec:
providerConfig:
azure:
accountName: ""
bucketName: ""
endpoint: ""
gcp:
bucketName: ""
projectID: ""
s3:
bucketName: trident-protect
endpoint: <data lif to use to access S3>
secure: "false"
skipCertValidation: "true"
providerCredentials:
accessKeyID:
valueFromSecret:
key: accessKeyID
name: appvault-secret
secretAccessKey:
valueFromSecret:
key: secretAccessKey
name: appvault-secret
providerType: OntapS3确保已创建ONTAP S3存储并处于可用状态

为虚拟机创建Trident Protect应用程序
在VM所在的命名空间中创建应用程序自定义资源。

tridentctl-protect create app source-vm -n source-ns --namespaces source-ns
在新命名空间中为灾难恢复虚拟机创建Trident Protect应用程序
oc create ns dr-ns
tridentctl-protect create app dr-vm -n dr-ns --namespaces dr-ns
在源命名空间中创建AppMirror计划
使用YAML为AppMirror创建计划、如图所示。此操作将使用计划创建快照(每5分钟创建一次)并保留2个快照
oc create -f appmirror-schedule.yaml -n source-nsapiVersion: protect.trident.netapp.io/v1
kind: Schedule
metadata:
name: appmirror-sched1
spec:
appVaultRef: ontap-s3-appvault
applicationRef: source-vm
backupRetention: "0"
enabled: true
granularity: Custom
recurrenceRule: |-
DTSTART:20240901T000200Z
RRULE:FREQ=MINUTELY;INTERVAL=5
snapshotRetention: "2"

在DR命名空间中创建appMirror关系
在Disaster Recovery命名空间中创建AppMirror关系。将此希望状态设置为已建立。
apiVersion: protect.trident.netapp.io/v1
kind: AppMirrorRelationship
metadata:
  name: amr1
spec:
  desiredState: Established
  destinationAppVaultRef: ontap-s3-appvault
  destinationApplicationRef: dr-vm
  namespaceMapping:
  - destination: dr-ns
    source: source-ns
  recurrenceRule: |-
    DTSTART:20240901T000200Z
    RRULE:FREQ=MINUTELY;INTERVAL=5
  sourceAppVaultRef: ontap-s3-appvault
  sourceApplicationName: source-vm
  sourceApplicationUID: "<application UID of the source VM>"
  storageClassName: "ontap-nas"

|
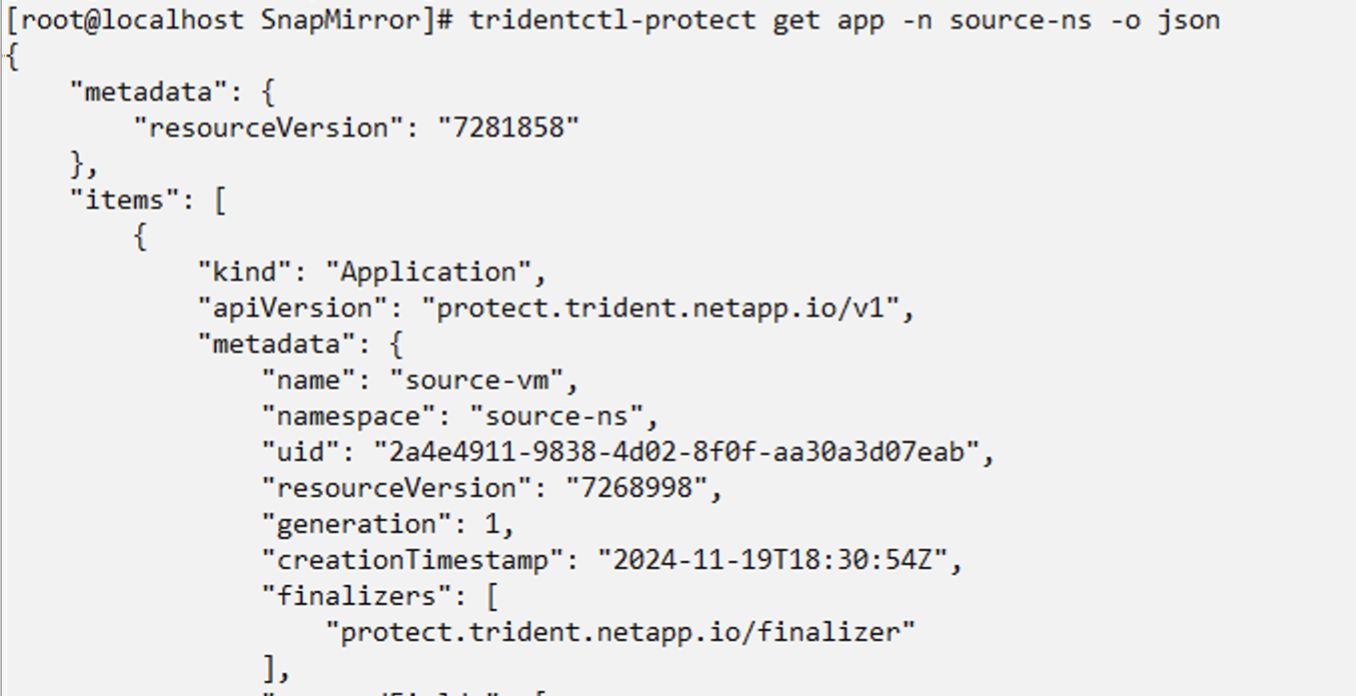
您可以从源应用程序的json输出中获取源VM的应用程序UID、如下所示 |


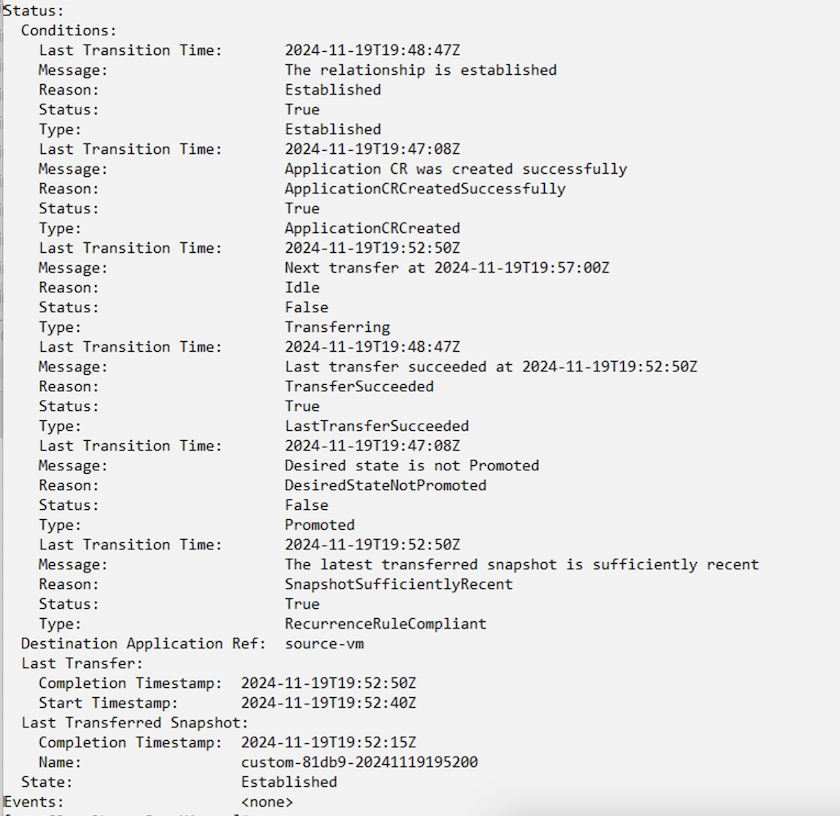
建立AppMirror关系后、最新的快照将传输到目标命名空间。已在DR命名空间中为VM创建PVC、但尚未在DR命名空间中创建VM Pod。


将关系提升为故障转移
将关系的所需状态更改为"promoted"、以便在DR命名空间中创建VM。虚拟机仍在源命名空间中运行。
oc patch amr amr1 -n dr-ns --type=merge -p '{"spec":{"desiredState":"Promoted"}}'


重新建立此关系以进行故障恢复
将关系的所需状态更改为"关系 已建立"。此时将在灾难恢复命名空间中删除此VM。此PVC仍存在于DR命名空间中。虚拟机仍在源命名空间中运行。此时将建立从源命名空间到灾难恢复ns的初始关系。。
oc patch amr amr1 -n dr-ns --type=merge -p '{"spec":{"desiredState":"Established"}}'


