


在 NetApp Ransomware Resilience 中設定 Microsoft Sentinel SIEM

 建議變更
建議變更

 PDF
PDF
NetApp Ransomware Resilience 透過 Microsoft Sentinel 為安全性資訊和事件管理(SIEM)提供原生支援。透過將 Ransomware Resilience 連接到 Microsoft Sentinel,您可以自動傳送事件資料以進行威脅分析和偵測,從而精簡勒索軟體保護和事件管理。
設定 Microsoft Sentinel 進行威脅偵測
連接 Microsoft Sentinel 需要在 Azure 入口網站中執行某些步驟。
啟用 Microsoft Sentinel
-
在 Microsoft Sentinel 中,建立一個 Log Analytics 工作區。
在 Microsoft Sentinel 中建立自訂角色
-
在 Azure 入口網站中,導覽至 訂閱 > 存取控制 (IAM)。
-
建立自訂角色。針對 自訂角色名稱,輸入 "NetApp Ransomware Resilience Sentinel Configurator"。
-
複製以下 JSON 並將其貼上到 JSON 標籤中,將
{subscription_id}替換為要指派角色的 Azure 訂閱 ID。{ "properties": { "roleName": "NetApp Ransomware Resilience Sentinel Configurator", "description": "", "assignableScopes": [ "/subscriptions/{subscription_id}" ], "permissions": [ { "actions": [ "Microsoft.Insights/dataCollectionEndpoints/write", "Microsoft.Insights/dataCollectionEndpoints/read", "Microsoft.OperationalInsights/workspaces/sharedKeys/action", "Microsoft.Insights/dataCollectionRules/write", "Microsoft.Insights/dataCollectionRules/read", "Microsoft.OperationalInsights/workspaces/tables/operationresults/read", "Microsoft.OperationalInsights/workspaces/tables/read", "Microsoft.OperationalInsights/workspaces/tables/write", "Microsoft.OperationalInsights/workspaces/read", "Microsoft.OperationalInsights/workspaces/write", "Microsoft.OperationalInsights/workspaces/listKeys/action", "Microsoft.Resources/subscriptions/read", "Microsoft.Resources/subscriptions/resourceGroups/read", "Microsoft.Resources/subscriptions/resourceGroups/write", "Microsoft.Resources/deployments/write", "Microsoft.Resources/deployments/read", "Microsoft.Resources/deployments/operationStatuses/read", "Microsoft.Resources/subscriptions/resourceGroups/deployments/write", "Microsoft.Resources/subscriptions/resourceGroups/deployments/read", "Microsoft.Resources/subscriptions/resourceGroups/deployments/operationStatuses/read", "Microsoft.Authorization/roleAssignments/read", "Microsoft.Authorization/roleAssignments/write", "Microsoft.Authorization/roleAssignments/delete", "Microsoft.Authorization/roleDefinitions/read", "Microsoft.Resources/deployments/operations/read", "Microsoft.Resources/deployments/read", "Microsoft.Resources/deployments/write", "Microsoft.Resources/resources/read", "Microsoft.Resources/subscriptions/operationresults/read", "Microsoft.Resources/subscriptions/resourceGroups/delete", "Microsoft.Resources/subscriptions/resourceGroups/read", "Microsoft.Resources/subscriptions/resourcegroups/resources/read", "Microsoft.Resources/subscriptions/resourceGroups/write", "Microsoft.Resources/subscriptions/resourcegroups/deployments/read", "Microsoft.Resources/subscriptions/resourcegroups/deployments/write", "Microsoft.Resources/subscriptions/resourcegroups/deployments/operations/read", "Microsoft.Resources/subscriptions/resourcegroups/deployments/operationstatuses/read", "Microsoft.Resources/subscriptions/locations/read", "Microsoft.SecurityInsights/alertRules/write", "Microsoft.SecurityInsights/alertRules/read", "Microsoft.SecurityInsights/alertRules/actions/write", "Microsoft.SecurityInsights/alertRules/actions/read", "Microsoft.OperationalInsights/workspaces/search/action", "Microsoft.OperationalInsights/workspaces/rules/read", "Microsoft.OperationalInsights/workspaces/sharedkeys/action", "Microsoft.OperationalInsights/workspaces/customfields/action", "Microsoft.OperationalInsights/workspaces/analytics/query/action", "Microsoft.OperationalInsights/workspaces/api/query/schema/read", "Microsoft.OperationalInsights/workspaces/datasources/read", "Microsoft.OperationalInsights/workspaces/metricDefinitions/read", "Microsoft.OperationalInsights/workspaces/schema/read", "Microsoft.OperationalInsights/workspaces/tables/query/read", "Microsoft.OperationalInsights/workspaces/providers/Microsoft.Insights/logDefinitions/read", "Microsoft.OperationalInsights/workspaces/sharedkeys/read", "Microsoft.OperationalInsights/workspaces/operations/read", "Microsoft.OperationalInsights/workspaces/query/read" ], "notActions": [], "dataActions": [], "notDataActions": [] } ] } } -
檢查並儲存您的設定。
在 Microsoft Entra ID 中註冊 Ransomware Resilience
-
在 Azure 入口網站中,選取 Entra ID > 應用程式 > 應用程式註冊。
-
在應用程式的*顯示名稱*中,輸入 "NetApp ransomware resilience"。
-
在 支援的帳戶類型 欄位中,選擇 僅限此組織目錄中的帳戶。
-
選擇*審核*。
-
選擇*註冊*來儲存您的設定。
註冊後,Microsoft Entra 管理中心將顯示應用程式概述窗格。
-
在 Azure 入口網站中,選擇 憑證和機密 > 用戶端機密 > 新增用戶端機密。
-
為您的應用程式機密新增描述。
-
為機密選擇 過期時間,或指定自訂有效期限。

用戶端機密的有效期限限制為兩年(24 個月)或更短。Microsoft 建議您將過期時間設定為小於 12 個月。 -
選擇“新增”來建立您的秘密。
-
記錄密鑰,以便在後續驗證步驟中使用。這是您檢視密鑰的唯一商機;離開此頁面後,密鑰將不再顯示。
在 Azure 中新增角色,並在 Ransomware Resilience 中驗證 Microsoft Sentinel
對於 Microsoft Sentinel SIEM,您可以選擇自動部署,由 Ransomware Resilience 根據您提供的權限部署資源。或者,您可以執行手冊部署,根據提供的 ARM 範本部署資源。兩種選項都需要您在 Azure 入口網站中設定權限,然後在 Ransomware Resilience 中驗證連線,雖然步驟有所不同。選擇最適合您需求的工作流程。
-
在 Azure 入口網站中,選取 訂閱 > 存取控制(IAM)。
-
選擇*新增* > 新增角色分配。
-
對於 特權系統管理員角色 欄位,選取您先前建立的 NetApp Ransomware Resilience Sentinel Configurator 角色。
-
選擇“下一步”。
-
在*指派存取權限*欄位中,選擇*使用者、群組或服務主體*。
-
選擇 選擇成員,然後選擇 NetApp Ransomware Resilience。
-
選擇“下一步”。
-
在*使用者可以做什麼*欄位中,選擇*允許使用者指派除特權管理員角色擁有者、UAA、RBAC(建議)之外的所有角色*。
-
選擇“下一步”。
-
選擇*審核並分配*來分配權限。
-
在 Ransomware Resilience 中,選取側邊欄中的 Settings 。
-
在「設定」頁面中,在 SIEM 連線磁貼中選擇 Connect ,然後從下拉式選單中選擇 Microsoft Sentinel 。
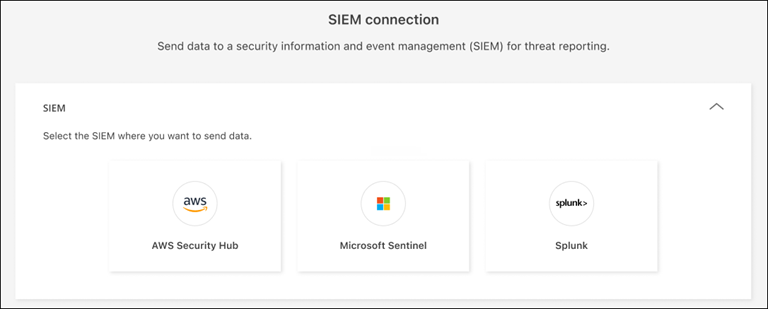
-
選擇 Automatic 作為部署方法。
-
請查看 Prerequisites、Registration 和 Permissions 部分,確保您已成功完成每個步驟。
-
展開 Authentication 部分。
-
輸入 目錄(租戶)ID、應用程式(租戶)ID 和 用戶端機密。選擇 驗證,然後等待 UI 確認憑證已通過驗證後再繼續。
-
選擇您要將 SIEM 資料傳送至的 訂閱 ID、資源群組 和 Log Analytics 工作區。
-
-
選擇 Connect 開始傳送 SIEM 資料。
-
在 Ransomware Resilience 中,選取側邊欄中的 Settings 。
-
在「設定」頁面中,在 SIEM 連線磁貼中選擇 Connect ,然後從下拉式選單中選擇 Microsoft Sentinel 。
-
選擇 Manual 作為部署方法。
-
請檢閱 先決條件、註冊 和 ARM 範本部署 部分,以確保您已成功完成每個步驟。
-
展開 ARM 範本部署 區段。
-
指派監控計量發行者角色。
-
在您的 Azure 訂閱中,前往「存取控制 (IAM)」。
-
選擇 新增角色指派。
-
搜尋並選擇 Monitoring Metrics Publisher。
-
將角色指派新增至註冊步驟中所建立的應用程式註冊的服務主體。
-
檢閱 + 指派。
-
-
返回勒索軟體恢復頁面。複製 ARM 範本的 JSON 程式碼,在 Azure 環境中建立 Log Analytics 自訂表、資料收集端點 (DCE)、資料收集規則 (DCR) 和 Sentinel 分析規則。
-
在 Azure 入口網站中,搜尋「部署自訂範本」。
-
在編輯器中選擇 Build your own template。
-
將複製的 JSON 貼到編輯器中。選擇 Save。
-
輸入 Workspace name,即您的 Log Analytics 工作區的名稱。您可以從 Azure 入口網站的工作區總覽頁面中擷取此名稱。
-
選取 檢閱 + 建立。檢閱選取項目,然後選取 建立 進行部署。
-
部署完成後,請收集以下資訊以在 Ransomware Resilience 中進行驗證:
-
日誌擷取端點:開啟資料收集端點資源(
rps-alerts-dce),並複製總覽頁面上顯示的日誌擷取值。 -
DCR Immutable ID:開啟資料收集規則資源(
rps-alerts-dcr)並複製總覽頁面上的 Immutable ID。
-
-
返回 Ransomware Resilience SIEM 組態視窗。
-
展開 Authentication 部分。
-
輸入 目錄(租戶)ID、應用程式(租戶)ID 和 用戶端密碼。選取 驗證,然後等待 UI 確認憑證已通過驗證。
-
輸入您先前複製的 Log Ingestion Endpoint 和 DCR immutable ID。
-
-
選擇 Connect 以建立連線。