使用 Trident Protect 為 OpenShift 虛擬化中的 VM 實作容錯移轉和容錯回復
 建議變更
建議變更


總覽
本節提供使用 Trident Protect 在 OpenShift 虛擬化中實作 VM 容錯移轉和容錯回復的詳細資料。無論 VM 是內部部署的 OpenShift 叢集,還是在 ROSA 叢集上,程序都一樣。本節說明建立 ONTAP S3 物件儲存設備作為 Trident Protect 應用程式資料保險箱的程序,並建立應用程式鏡射排程。之後,它會示範如何建立應用程式鏡射關係。最後,它說明如何變更應用程式鏡射關係的狀態,以執行容錯移轉和容錯回復。
先決條件
-
必須安裝 Trident 。必須先建立後端和儲存類別,然後才能使用 OpenShift 虛擬化運算子在叢集上安裝 OpenShift 虛擬化。
-
必須安裝 Trident Protect ,才能為 OpenShift VM 實作容錯移轉和容錯回復作業。請參閱此處的指示"安裝 Trident Protect"

VM 必須可用於 OpenShift 虛擬化。如需部署新 VM 或將現有 VM 移轉至 OpenShift 虛擬化的詳細資訊,請參閱文件中的適當章節。

使用 ONTAP S3 建立 App Vault
本節說明如何使用 ONTAP S3 物件儲存設備,在 Trident Protect 中設定應用程式資料保險箱。
使用以下所示的 oc 命令和 yaml 檔案,為 ONTAP S3 建立秘密和 appVault 自訂資源。請務必在 Trident Protect 命名空間中建立這些項目。
oc create -f app-vault-secret.yaml -n trident-protect
oc create -f app-vault.yaml -n trident-protect
apiVersion: v1
# You can provide the keys either as stringData or base 64 encoded data
stringData:
accessKeyID: "<access key id as obtained from ONTAP>"
secretAccessKey: "<secret access key as obtained from ONTAP>"
#data:
#accessKeyID: <base 64 encoded value of access key>
#secretAccessKey: <base 64 encoded value of secret access key>
kind: Secret
metadata:
name: appvault-secret
namespace: trident-protect
type: OpaqueapiVersion: protect.trident.netapp.io/v1
kind: AppVault
metadata:
name: ontap-s3-appvault
namespace: trident-protect
spec:
providerConfig:
azure:
accountName: ""
bucketName: ""
endpoint: ""
gcp:
bucketName: ""
projectID: ""
s3:
bucketName: trident-protect
endpoint: <data lif to use to access S3>
secure: "false"
skipCertValidation: "true"
providerCredentials:
accessKeyID:
valueFromSecret:
key: accessKeyID
name: appvault-secret
secretAccessKey:
valueFromSecret:
key: secretAccessKey
name: appvault-secret
providerType: OntapS3確定已建立 ONTAP S3 資料保險箱,且處於可用狀態

為 VM 建立 Trident Protect 應用程式
在 VM 所在的命名空間中建立應用程式自訂資源。

tridentctl-protect create app source-vm -n source-ns --namespaces source-ns
在新命名空間中為災難恢復 VM 建立 Trident Protect 應用程式
oc create ns dr-ns
tridentctl-protect create app dr-vm -n dr-ns --namespaces dr-ns
在來源命名空間中建立 AppMirror 排程
如圖所示,使用 yaml 建立 AppMirror 排程。這會使用排程(每 5 分鐘)建立快照,並保留 2 個快照
oc create -f appmirror-schedule.yaml -n source-nsapiVersion: protect.trident.netapp.io/v1
kind: Schedule
metadata:
name: appmirror-sched1
spec:
appVaultRef: ontap-s3-appvault
applicationRef: source-vm
backupRetention: "0"
enabled: true
granularity: Custom
recurrenceRule: |-
DTSTART:20240901T000200Z
RRULE:FREQ=MINUTELY;INTERVAL=5
snapshotRetention: "2"

在 DR 命名空間中建立 appMirror 關係
在 Disaster Recovery 命名空間中建立 Appmirror 關係。將 desiredState 設為 ested 。
apiVersion: protect.trident.netapp.io/v1
kind: AppMirrorRelationship
metadata:
  name: amr1
spec:
  desiredState: Established
  destinationAppVaultRef: ontap-s3-appvault
  destinationApplicationRef: dr-vm
  namespaceMapping:
  - destination: dr-ns
    source: source-ns
  recurrenceRule: |-
    DTSTART:20240901T000200Z
    RRULE:FREQ=MINUTELY;INTERVAL=5
  sourceAppVaultRef: ontap-s3-appvault
  sourceApplicationName: source-vm
  sourceApplicationUID: "<application UID of the source VM>"
  storageClassName: "ontap-nas"

|
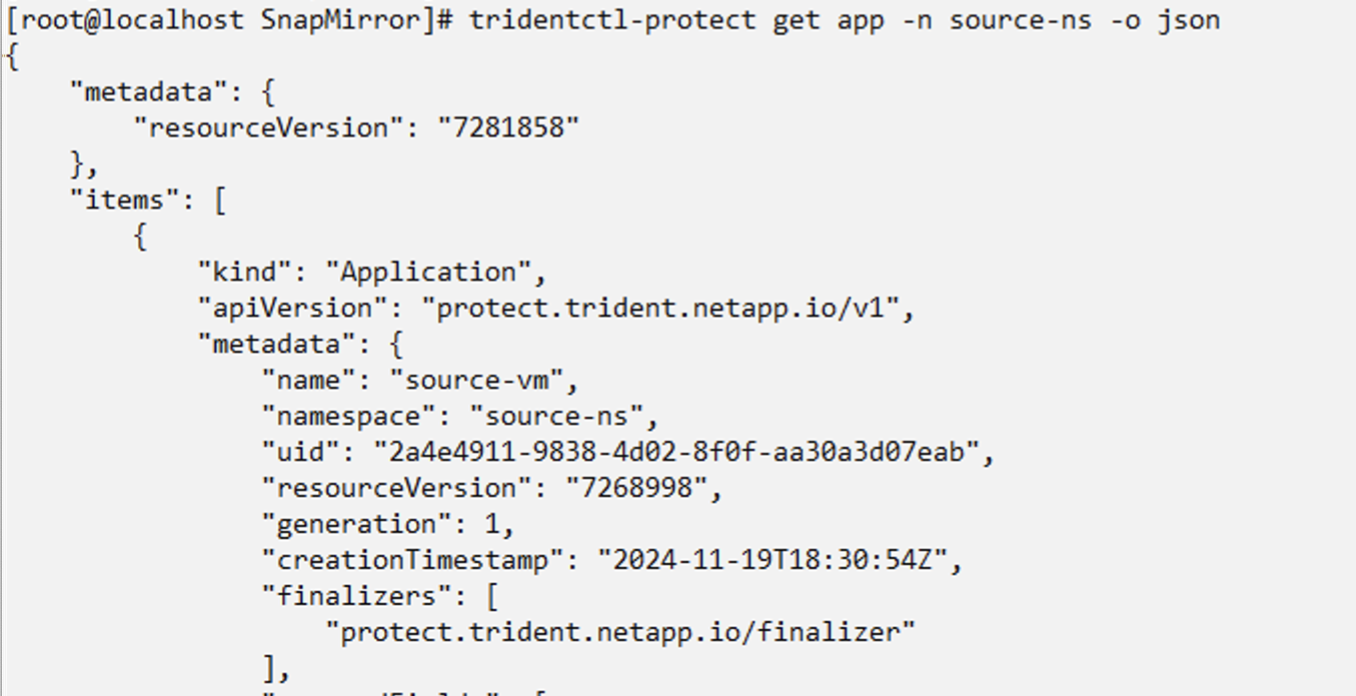
您可以從來源應用程式的 json 輸出取得來源 VM 的應用程式 UID ,如下所示 |


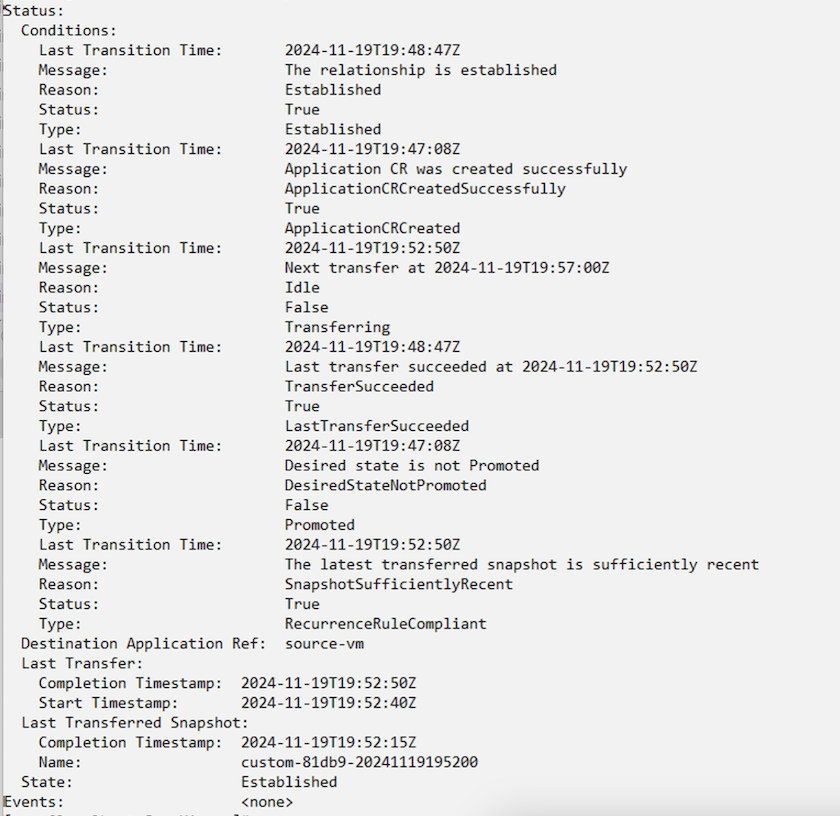
當建立 AppMirror 關係時,最新的快照會傳輸到目的地命名空間。PVC 是在 DR 命名空間中為 VM 建立,但尚未在 DR 命名空間中建立 VM Pod 。


將關係提升至容錯移轉
將所需的關係狀態變更為「已升級」,以便在 DR 命名空間中建立 VM 。VM 仍在來源命名空間中執行。
oc patch amr amr1 -n dr-ns --type=merge -p '{"spec":{"desiredState":"Promoted"}}'


再次與故障恢復建立關係
將所需關係狀態變更為「已建立」。VM 會在 DR 命名空間中刪除。DR 命名空間中仍存在 PVC 。VM 仍在來源命名空間中執行。原始來源命名空間與 DR ns 之間的關係已建立。。
oc patch amr amr1 -n dr-ns --type=merge -p '{"spec":{"desiredState":"Established"}}'


