Discover Microsoft SQL Server workloads and optionally import from SnapCenter in BlueXP backup and recovery
 Suggest changes
The BlueXP backup and recovery service needs to first discover Microsoft SQL Server workloads in order for you to use the service. You can optionally import backup data and policies from SnapCenter if you already have SnapCenter installed.
Required BlueXP role
This task requires the data services Backup and recovery super admin role. Learn about Backup and recovery data services roles and privileges. Learn about BlueXP access roles for all services.
Discover Microsoft SQL Server workloads and optionally import SnapCenter resources
During discovery, BlueXP backup and recovery analyzes Microsoft SQL Server instances and databases in working environments within your organization.
BlueXP backup and recovery assesses Microsoft SQL Server applications. The service assesses the existing protection level including the current backup protection policies, snapshot copies, and backup and recovery options.
Discovery occurs in the following ways:
-
If you already have SnapCenter, import SnapCenter resources into BlueXP backup and recovery by using the BlueXP backup and recovery UI.

If you already have SnapCenter, first check to be sure you've met the prerequisites before importing from SnapCenter. For example, you should create working environments in BlueXP Canvas for all on-premises SnapCenter cluster storage first before importing from SnapCenter. See Prerequisites for importing resources from SnapCenter. -
If you don't already have SnapCenter, you can still discover workloads within your working environments by adding a vCenter manually and performing discovery.
If SnapCenter is already installed, import SnapCenter resources into BlueXP backup and recovery
If you already have SnapCenter installed, import SnapCenter resources into BlueXP backup and recovery using these steps. The BlueXP service discovers resources, hosts, credentials, and schedules from SnapCenter; you don't have to recreate all that information.
You can do this in the following ways:
-
During discovery, select an option to import resources from SnapCenter.
-
After discovery, from the Inventory page, select an option to import SnapCenter resources.
-
After discovery, from the Settings menu, select an option to import SnapCenter resources. For details, see Configure BlueXP backup and recovery.
This is a two-part process:
-
Import SnapCenter Server application and host resources
-
Manage selected SnapCenter host resources
Import SnapCenter Server application and host resources
This first step imports host resources from SnapCenter and displays those resources in the BlueXP backup and recovery Inventory page. At that point, the resources are not yet managed by BlueXP backup and recovery.

|
After you import SnapCenter host resources, BlueXP backup and recovery does not take over protection management automatically. To do so, you must explicitly select to manage the imported resources in BlueXP backup and recovery. This ensures that you are ready to have those resources backed up by BlueXP backup and recovery. |
-
From the BlueXP left navigation, select Protection > Backup and recovery.
-
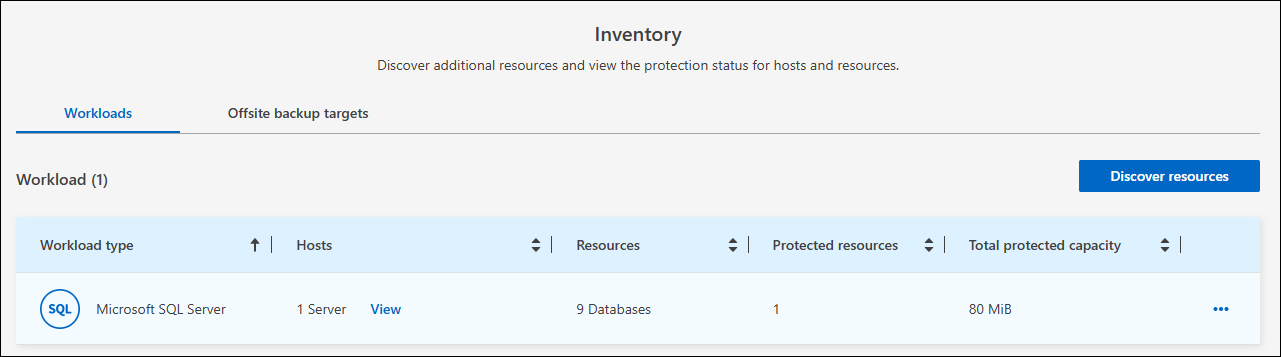
From the top menu, select Inventory.
-
From the top menu, select Discover resources.
-
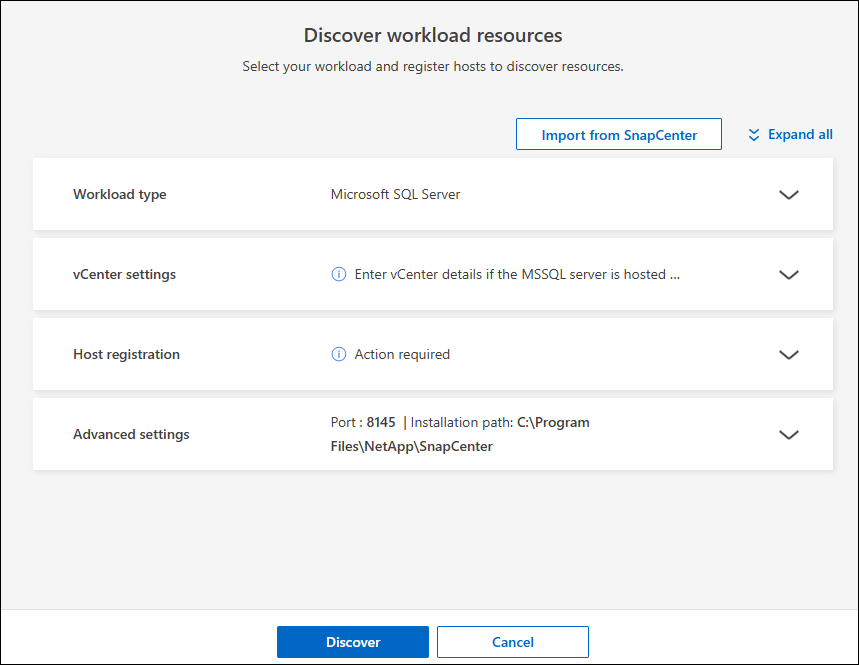
From the BlueXP backup and recovery Discover workload resources page, select Import from SnapCenter.
-
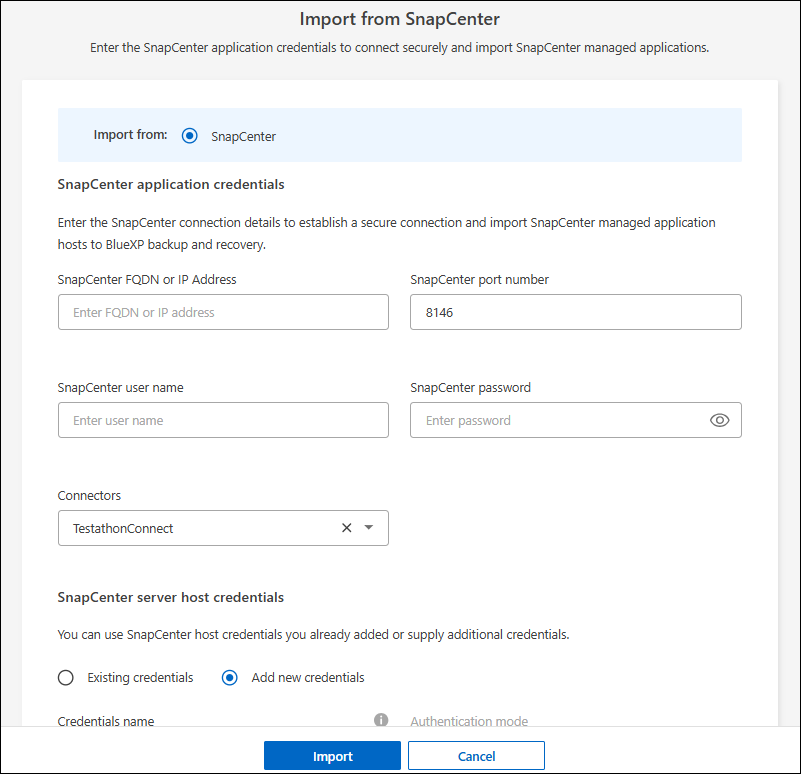
Enter SnapCenter application credentials:
-
SnapCenter FQDN or IP address: Enter the FQDN or IP address of the SnapCenter application itself.
-
Port: Enter the port number for the SnapCenter Server.
-
Username and Password: Enter the username and password for the SnapCenter Server.
-
Connector: Select the BlueXP Connector for SnapCenter.
-
-
Enter SnapCenter server host credentials:
-
Existing credentials: If you select this option, you can use the existing credentials that you have already added. Choose the credentials name.
-
Add new credentials: If you don't have existing SnapCenter host credentials, you can add new credentials. Enter the credentials name, authentication mode, user name, and password.
-
-
Select Import to validate your entries and register the SnapCenter Server.
If the SnapCenter Server is already registered, you can update the existing registration details.
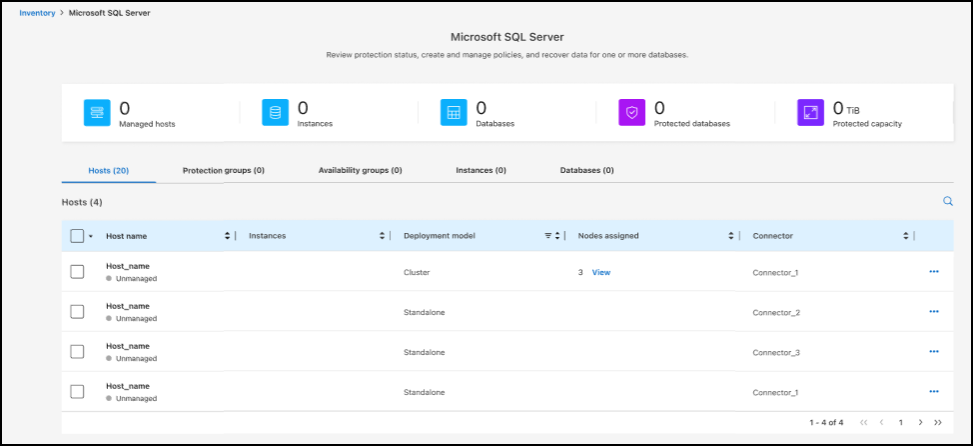
The Inventory page shows the imported SnapCenter resources that include MS SQL hosts, instances, and databases.
To see the details of the imported SnapCenter resources, select the View details option from the Actions menu.
Manage SnapCenter host resources
After you import the SnapCenter resources, manage those host resources in BlueXP backup and recovery. After you select to manage those resources, BlueXP backup and recovery is able to back up and recover the resources that you imported from SnapCenter. You no longer manage those resources in SnapCenter Server.
-
After you import the SnapCenter resources, from the top menu, select Inventory.
-
From the Inventory page, select the imported SnapCenter host that you want to have BlueXP backup and recovery to manage from now on.
-
Select the Actions icon
 > View details to display the workload details.
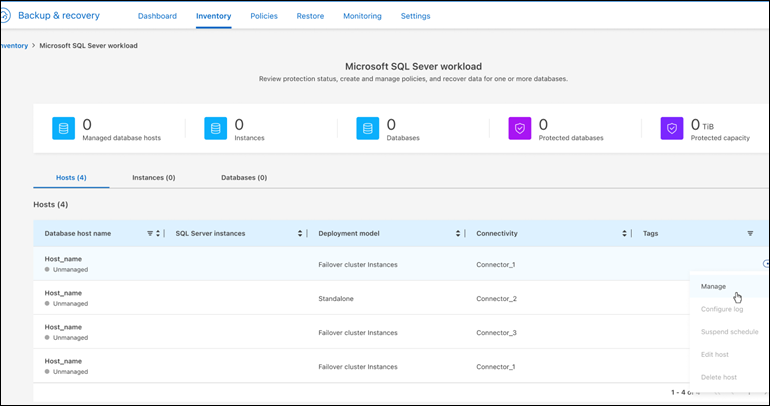
-
From the Inventory > workload page, select the Actions icon
> Manage to display the Manage host page. -
Select Manage.
-
In the Manage host page, select either to use an existing vCenter or add a new vCenter.
-
Select Manage.
The Inventory page shows the newly managed SnapCenter resources.
You can optionally create a report of the managed resources by selecting the Generate reports option from the Actions menu.
Import SnapCenter resources after discovery from the Inventory page
If you have already discovered resources, you can import SnapCenter resources from the Inventory page.
-
From the BlueXP left navigation, select Protection > Backup and recovery.
-
From the top menu, select Inventory.
-
From the Inventory page, select Import SnapCenter resources.
-
Follow the steps in the Import SnapCenter resources section above to import SnapCenter resources.
If you don't have SnapCenter installed, add a vCenter and discover resources
If you don't already have SnapCenter installed, you can add vCenter information and have BlueXP backup and recovery discover workloads. Within each BlueXP Connector, select the working environments where you want to discover workloads.
This is optional if you have a VMware environment.
-
From the BlueXP left navigation, select Protection > Backup and recovery.
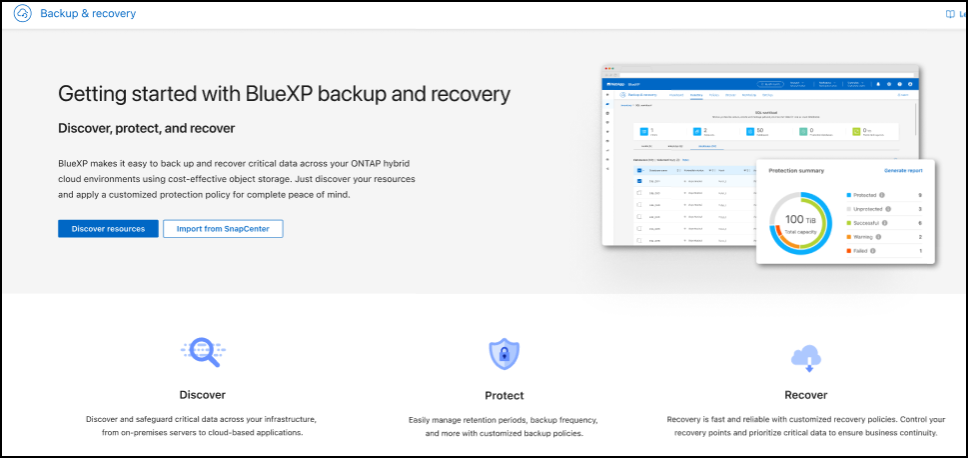
If this is your first time logging in to this service, you already have a working environment in BlueXP, but haven't discovered any resources, the "Welcome to the new BlueXP backup and recovery" landing page appears and shows an option to Discover resources.
-
Select Discover resources.
-
Enter the following information:
-
Workload type: For this version, only Microsoft SQL Server is available.
-
vCenter settings: Select an existing vCenter or add a new one. To add a new vCenter, enter the vCenter FQDN or IP address, user name, password, port, and protocol.
If you are entering vCenter information, enter information for both vCenter settings and Host registration. If you added or entered vCenter information here, you also need to add plugin information in Advanced Settings next. -
Host registration: Select Add credentials and enter information about the hosts containing the workloads you want to discover.
If you are adding a standalone server and not a vCenter server, enter only the host information.
-
-
Select Discover.
This process might take a few minutes. -
Continue with Advanced Settings.
Set Advanced settings options during discovery and install the plugin
With Advanced Settings, you can manually install the plugin agent on all servers being registered. This enables you to import all SnapCenter workloads into BlueXP backup and recovery so you can manage backups and restores there. BlueXP backup and recovery shows the steps needed to install the plugin.
-
From the Discover resources page, continue to Advanced Settings by clicking the down arrow on the right.
-
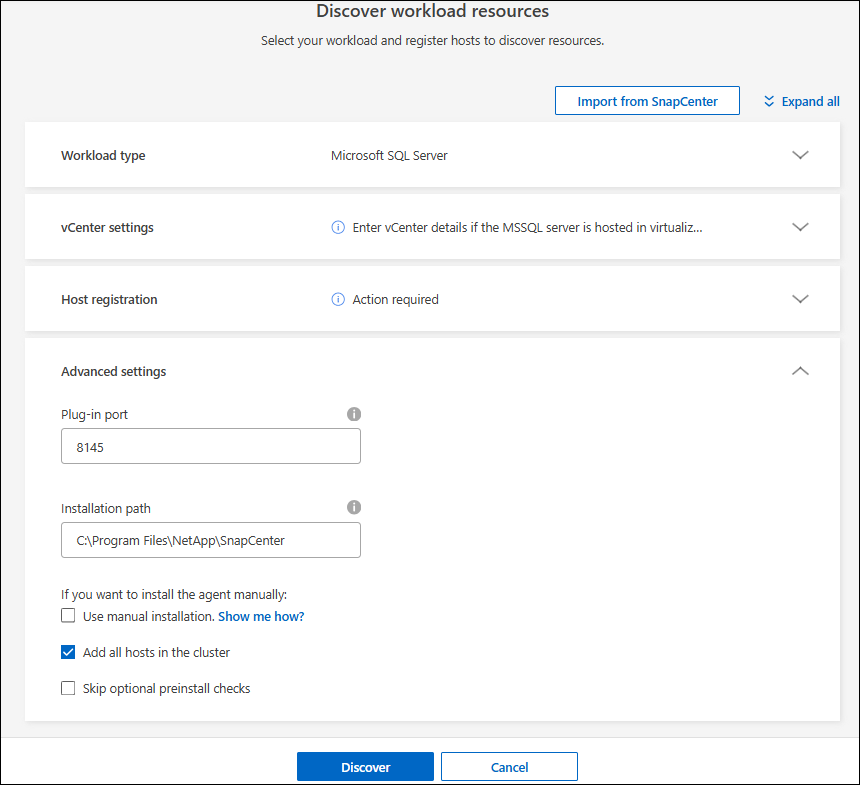
In the Discover workload resources page, enter the following information.
-
Enter plug-in port number: Enter the port number that the plugin uses.
-
Installation path: Enter the path where the plugin will be installed.
-
-
If you want to install the SnapCenter agent manually, check the boxes for the following options:
-
Use manual installation: Check this box to install the plugin manually.
-
Add all hosts in the cluster: Check this box to add all hosts in the cluster to BlueXP backup and recovery during discovery.
-
Skip optional preinstall checks: Check this box to skip optional preinstall checks. You might want to do this for example, if you know that memory or space considerations will be changed in the near future and you want to install the plugin now.
-
-
Select Discover.
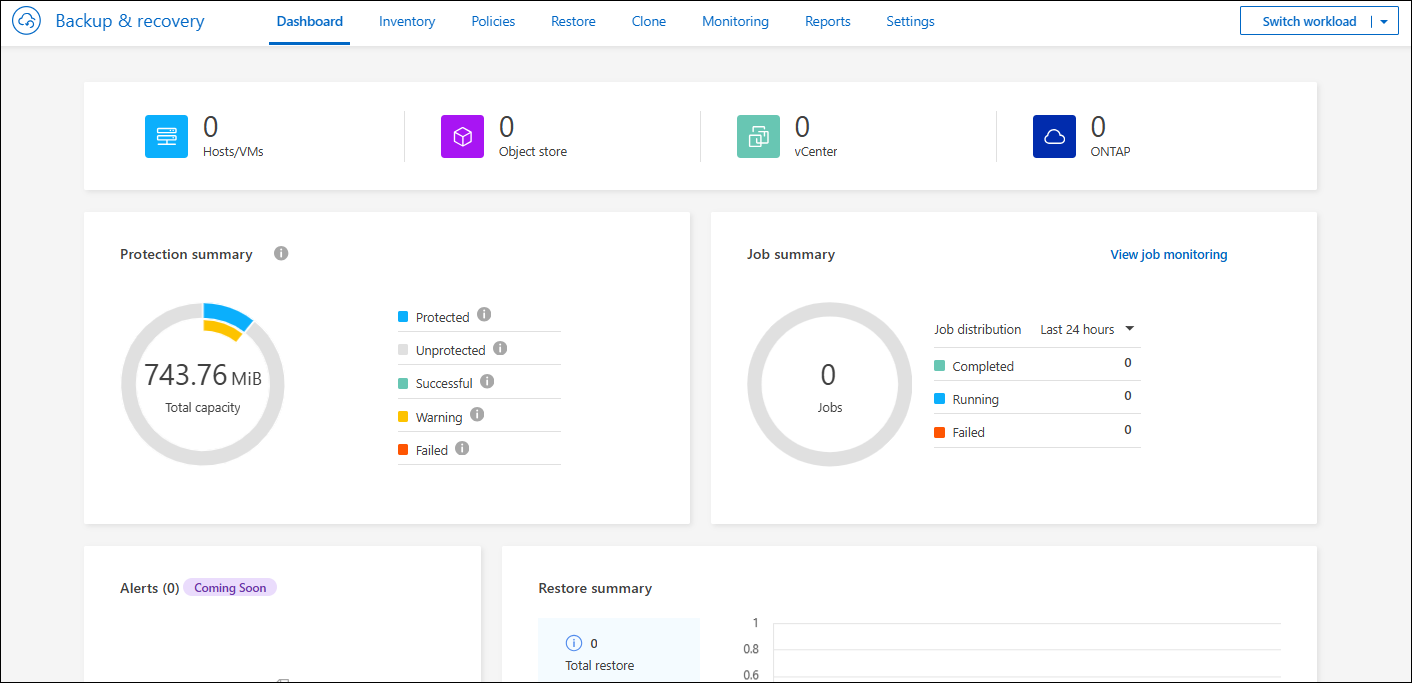
Continue to the BlueXP backup and recovery Dashboard
-
To display the BlueXP backup and recovery Dashboard, from the top menu, select Dashboard.
-
Review the health of data protection. The number of at risk or protected workloads increases based on the newly discovered, protected, and backed up workloads.