

Manage alerts in NetApp Ransomware Resilience
 Suggest changes
When NetApp Ransomware Resilience detects a possible attack, it displays an alert on the Dashboard and in the Notifications area. Ransomware Resilience immediately takes a snapshot. Review the potential risk in the Ransomware Resilience Alerts tab.
If Ransomware Resilience detects a possible attack, a notification appears in the Console Notification settings, and an email is sent to the configured addresses. The email includes information about the severity, the impacted workload, and a link to the alert in the Ransomware Resilience Alerts tab.
You can dismiss false positives or decide to recover your data immediately.

|
If you dismiss the alert, Ransomware Resilience learns this behavior, associates it with normal operations, and doesn't initiate an alert on it again. |
To begin to recover your data, mark the alert as ready for recovery so that your storage administrator can begin the recovery process.
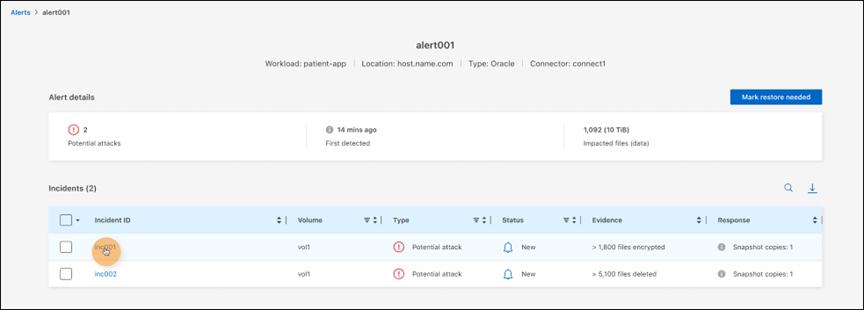
Each alert might include multiple incidents on different volumes and statuses. Review all incidents.
Ransomware Resilience provides information called evidence about what caused the alert to be issued, such as the following:
-
File extensions were created or changed
-
File creation with a comparison of detected versus expected rates
-
File deletion with a comparison of detected versus expected rates
-
When encryption is high, without file extension changes
An alert is classified as one of the following:
-
Potential attack: An alert occurs when Autonomous Ransomware Protection detects a new extension and the occurrence is repeated more than 20 times in the last 24 hours (default behavior).
-
Warning: A warning occurs based on the following behaviors:
-
Detection of a new extension has not been identified before and the same behavior does not repeat enough times to declare it as an attack.
-
High entropy is observed.
-
File read, write, rename, or delete activity doubled compared to normal levels.
-

|
For SAN environments, warnings are based on high entropy only. |
Evidence is based on information from Autonomous Ransomware Protection in ONTAP. For details, refer to Autonomous Ransomware Protection overview.
An alert can have one of the following statuses:
-
New
-
Inactive
An alert incident can have the following states:
-
New: All incidents are marked "new" when they are first identified.
-
In review: You can mark an incident as in review while you evaluate it.
-
Dismissed: If you suspect that the activity is not a ransomware attack, you can change the status to "Dismissed."

After you dismiss an attack, you can't revert its status. If you dismiss a workload, all snapshot copies taken automatically in response to the potential ransomware attack will be permanently deleted. -
Dismissing: The incident is in the process of being dismissed.
-
Resolved: The incident has been fixed.
-
Auto Resolved: For low priority alerts, the incident is automatically resolved if there has been no action taken on it within five days.
|
|
If you configured a security and event management system (SIEM) in Ransomware Resilience in the Settings page, Ransomware Resilience sends alert details to your SIEM system. |
View alerts
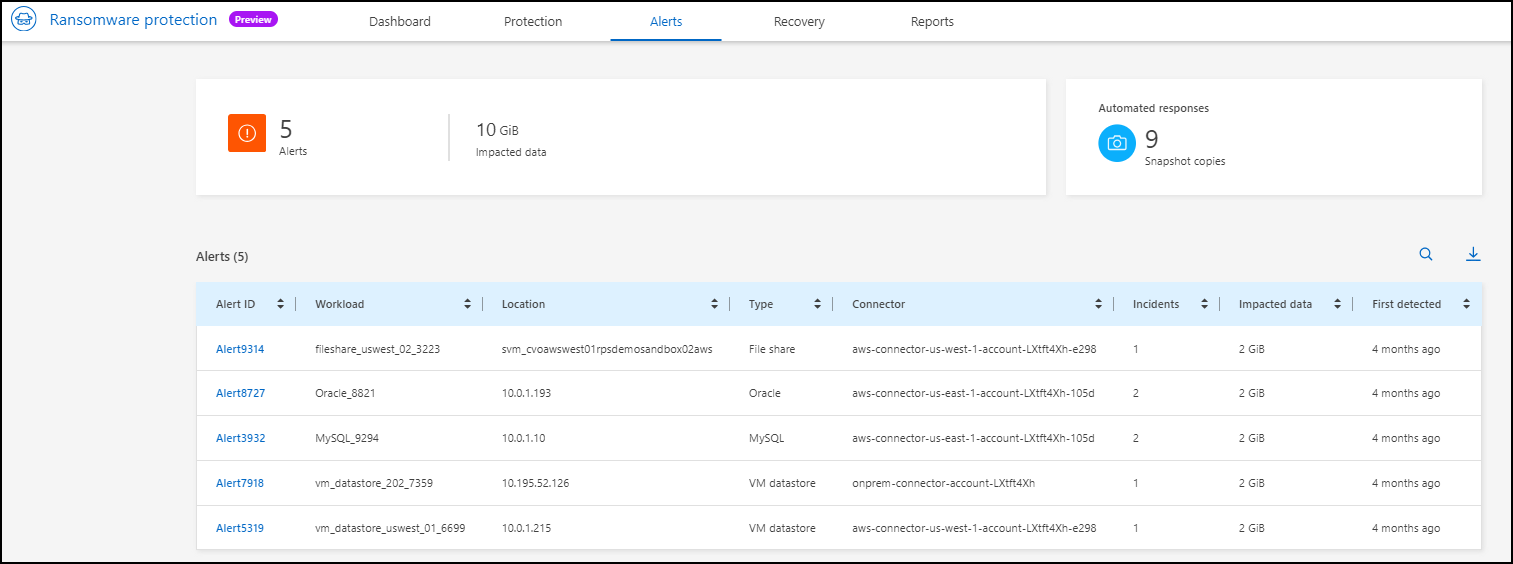
You can access alerts from the Ransomware Resilience Dashboard or from the Alerts tab.
Required Console role
To perform this task, you need the Organization admin, Folder or project admin, Ransomware Resilience admin, or Ransomware Resilience viewer role. Learn about Ransomware Resilience roles for NetApp Console.
-
In the Ransomware Resilience Dashboard, review the Alerts pane.
-
Select View all under one of the statuses.
-
Select an alert to review all incidents on each volume for each alert.
-
To review additional alerts, select Alert in the breadcrumbs at the upper left.
-
Review the alerts on the Alerts page.
-
Continue with one of the following:
Respond to an alert email
When Ransomware Resilience detects a potential attack, it sends an email notification to the subscribed users based on their subscription notification preferences configured in the NetApp Console settings. The email contains information about the alert, including the severity and resources impacted.
|
|
To set up email notifications in the Console, see Set email notification settings. |
Required Console role
To perform this task, you need the Organization admin, Folder or project admin, Ransomware Resilience admin, or Ransomware Resilience viewer role. Learn about Ransomware Resilience roles for NetApp Console.
-
View the email.
-
In the email, select View alert and log in to Ransomware Resilience .
The Alerts page appears.
-
Review all incidents on each volume for each alert.
-
To review additional alerts, click on Alert in the breadcrumbs at the upper left.
-
Continue with one of the following:
Detect malicious activity and anomalous user behavior
Looking at the Alerts tab, you can identify whether there is malicious activity or anomalous user behavior.
You must have configured a user activity agent and enabled a protection policy with user behavior detection to view user-level alerts. The Suspicious user column appears in the Alerts dashboard only when user behavior detection is enabled. To enable suspicious user detection, see Suspicious user activity.
View malicious activity
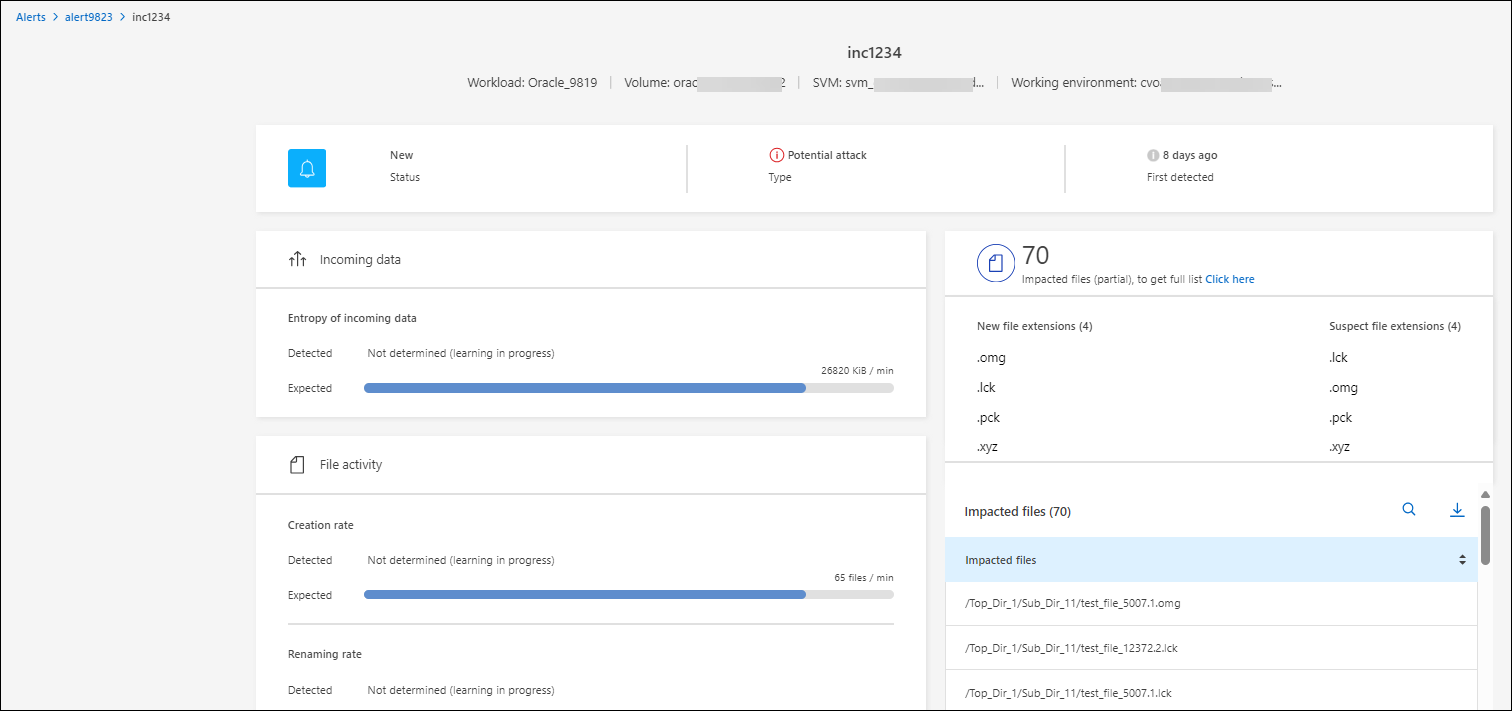
When Autonomous Ransomware Protection triggers an alert in Ransomware Resilience , you can view the following details:
-
Entropy of incoming data
-
Expected creation rate of new files compared to detected rate
-
Expected deletion rate of files compared to detected rate
-
Expected rename rate of files compared to detected rate
-
Impacted files and directories
|
|
These details are viewable for NAS workloads. For SAN environments, only the entropy data is available. |
-
From the Ransomware Resilience menu, select Alerts.
-
Select an alert.
-
Review the incidents in the alert.
-
Select an incident to review the details of the incident.
View anomalous user behavior
If you've configured suspicious user detection to view anomalous user behavior, you can view user-level data and block specific users. To enable suspicious user settings, see Configure Ransomware Resilience settings.
-
From the Ransomware Resilience menu, select Alerts.
-
Select an alert.
-
Review the incidents in the alert.
-
To block a suspected user in your environment, select Block under the user's name.
Mark ransomware incidents as ready for recovery (after incidents are neutralized)
After stopping the attack, notify your storage administrator that the data is ready so they can initiate the recovery process.
Required Console role
To perform this task, you need the Organization admin, Folder or project admin, or Ransomware Resilience admin role. Learn about Ransomware Resilience roles for NetApp Console.
-
From the Ransomware Resilience menu, select Alerts.
-
In the Alerts page, select the alert.
-
Review the incidents in the alert.
-
If you determine that the incidents are ready for recovery, select Mark restore needed.
-
Confirm the action and select Mark restore needed.
-
To initiate the workload recovery, select Recover workload in the message or select the Recovery tab.
After the alert is marked for restore, the alert moves from the Alerts tab to the Recovery tab.
Dismiss incidents that are not potential attacks
After you review incidents, you need to determine whether the incidents are potential attacks. If they aren't actual threats, they can be dismissed.
You can dismiss false positives or decide to recover your data immediately. If you dismiss the alert, Ransomware Resilience learns this behavior and associates it with normal operations, and doesn't initiate an alert on such a behavior again.
If you dismiss a workload, all snapshot copies taken automatically in response to a potential ransomware attack are permanently deleted.
|
|
If you dismiss an alert, you can't change its status or undo this change. |
Required Console role
To perform this task, you need the Organization admin, Folder or project admin, or Ransomware Resilience admin role. Learn about Ransomware Resilience roles for NetApp Console.
-
From the Ransomware Resilience menu, select Alerts.
-
In the Alerts page, select the alert.
-
Select one or more incidents. Alternately, select all incidents by selecting the Incident ID box at the top left of the table.
-
If you determine that the incident is not a threat, dismiss it as a false positive:
-
Select the incident.
-
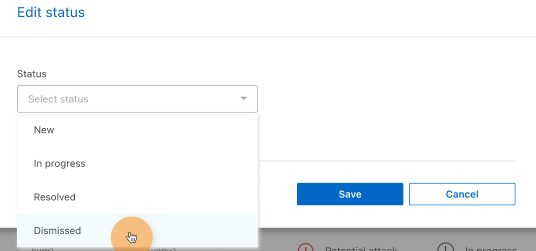
Select the Edit status button above the table.
-
-
From the Edit status box, choose the Dismissed status.
Additional information about the workload and the snapshot copies are deleted appears.
-
Select Save.
The status on the incident or incidents changes to "Dismissed."
View a list of impacted files
Before you restore an application workload at the file level, you can view a list of impacted files. You can access the Alerts page to download a list of impacted files. Then use the Recovery page to upload the list and choose which files to restore.
Required Console role
To perform this task, you need the Organization admin, Folder or project admin, or Ransomware Resilience admin role. Learn about Ransomware Resilience roles for NetApp Console.
Use the Alerts page to retrieve the list of impacted files.
|
|
If a volume has multiple alerts, you might need to download the CSV list of impacted files for each alert. |
-
From the Ransomware Resilience menu, select Alerts.
-
On the Alerts page, sort the results by workload to show the alerts for the application workload that you want to restore.
-
From the list of alerts for that workload, select an alert.
-
For that alert, select a single incident.
-
For that incident, select the download icon to download the list of impacted files in CSV format.