

Manage Azure credentials and marketplace subscriptions for NetApp Console
 Suggest changes
Add and manage Azure credentials so that the NetApp Console has the permissions that it needs to deploy and manage cloud resources in your Azure subscriptions. If you manage multiple Azure Marketplace subscriptions, you can assign each one of them to different Azure credentials from the Credentials page.
Overview
There are two ways to add additional Azure subscriptions and credentials in the Console.
-
Associate additional Azure subscriptions with the Azure managed identity.
-
To deploy Cloud Volumes ONTAP using different Azure credentials, grant Azure permissions using a service principal and add its credentials to the Console.
Associate additional Azure subscriptions with a managed identity
The Console enables you to choose the Azure credentials and Azure subscription in which you want to deploy Cloud Volumes ONTAP. You can't select a different Azure subscription for the managed identity profile unless you associate the managed identity with those subscriptions.
A managed identity is the initial Azure account when you deploy a Console agent from the Console. When you deploy the Console agent, the Console assigns the Console Operator role to the Console agent virtual machine.
-
Log in to the Azure portal.
-
Open the Subscriptions service and then select the subscription in which you want to deploy Cloud Volumes ONTAP.
-
Select Access control (IAM).
-
Select Add > Add role assignment and then add the permissions:
-
Select the Console Operator role.

Console Operator is the default name provided in a Console agent policy. If you chose a different name for the role, then select that name instead. -
Assign access to a Virtual Machine.
-
Select the subscription in which a Console agent virtual machine was created.
-
Select a Console agent virtual machine.
-
Select Save.
-
-
-
Repeat these steps for additional subscriptions.
When creating a new system, you can now select from multiple Azure subscriptions for the managed identity profile.
Add additional Azure credentials to NetApp Console
When you deploy a Console agent from the Console, the Console enables a system-assigned managed identity on the virtual machine that has the required permissions. The Console selects these Azure credentials by default when you create a new system for Cloud Volumes ONTAP.

|
An initial set of credentials isn't added if you manually installed a Console agent software on an existing system. Learn about Azure credentials and permissions. |
If you want to deploy Cloud Volumes ONTAP using different Azure credentials, then you must grant the required permissions by creating and setting up a service principal in Microsoft Entra ID for each Azure account. You can then add the new credentials to the Console.
Grant Azure permissions using a service principal
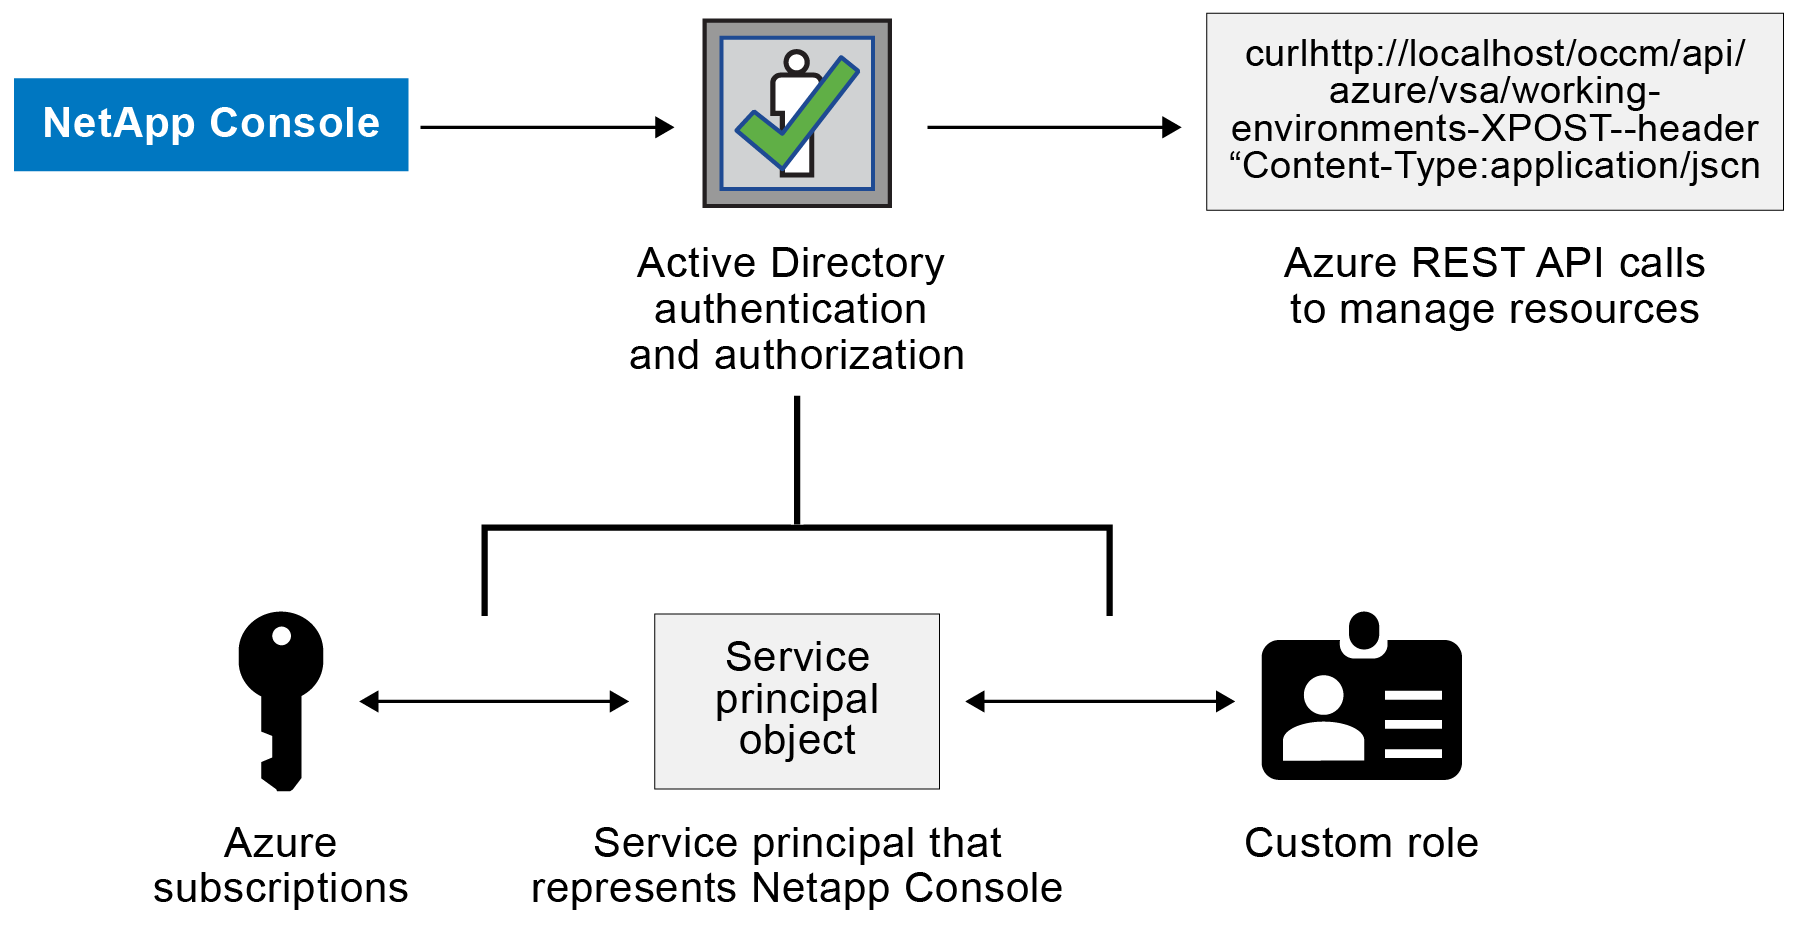
The Console needs permissions to perform actions in Azure. You can grant the required permissions to an Azure account by creating and setting up a service principal in Microsoft Entra ID and by obtaining the Azure credentials that the Console needs.
The following image depicts how the Console obtains permissions to perform operations in Azure. A service principal object, which is tied to one or more Azure subscriptions, represents the Console in Microsoft Entra ID and is assigned to a custom role that allows the required permissions.
Create a Microsoft Entra application
Create a Microsoft Entra application and service principal that the Console can use for role-based access control.
-
Ensure that you have permissions in Azure to create an Active Directory application and to assign the application to a role.
For details, refer to Microsoft Azure Documentation: Required permissions
-
From the Azure portal, open the Microsoft Entra ID service.

-
In the menu, select App registrations.
-
Select New registration.
-
Specify details about the application:
-
Name: Enter a name for the application.
-
Account type: Select an account type (any will work with the NetApp Console).
-
Redirect URI: You can leave this field blank.
-
-
Select Register.
You've created the AD application and service principal.
Assign the application to a role
You must bind the service principal to one or more Azure subscriptions and assign it the custom "Console Operator" role so the Console has permissions in Azure.
-
Create a custom role:
Note that you can create an Azure custom role using the Azure portal, Azure PowerShell, Azure CLI, or REST API. The following steps show how to create the role using the Azure CLI. If you would prefer to use a different method, refer to Azure documentation
-
Copy the contents of the custom role permissions for the Console agent and save them in a JSON file.
-
Modify the JSON file by adding Azure subscription IDs to the assignable scope.
You should add the ID for each Azure subscription from which users will create Cloud Volumes ONTAP systems.
Example
"AssignableScopes": [ "/subscriptions/d333af45-0d07-4154-943d-c25fbzzzzzzz", "/subscriptions/54b91999-b3e6-4599-908e-416e0zzzzzzz", "/subscriptions/398e471c-3b42-4ae7-9b59-ce5bbzzzzzzz" ] -
Use the JSON file to create a custom role in Azure.
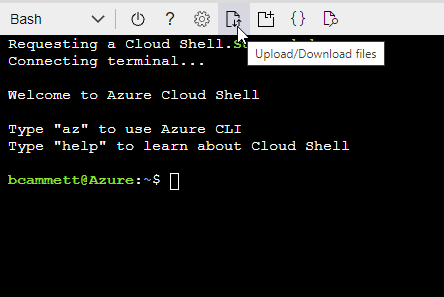
The following steps describe how to create the role by using Bash in Azure Cloud Shell.
-
Start Azure Cloud Shell and choose the Bash environment.
-
Upload the JSON file.
-
Use the Azure CLI to create the custom role:
az role definition create --role-definition agent_Policy.jsonYou should now have a custom role called Console Operator that you can assign to the Console agent virtual machine.
-
-
-
Assign the application to the role:
-
From the Azure portal, open the Subscriptions service.
-
Select the subscription.
-
Select Access control (IAM) > Add > Add role assignment.
-
In the Role tab, select the Console Operator role and select Next.
-
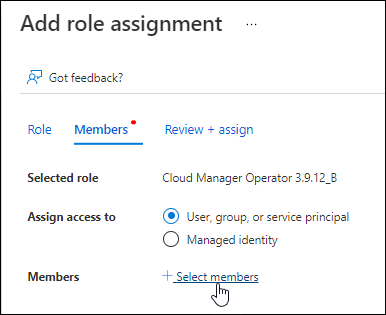
In the Members tab, complete the following steps:
-
Keep User, group, or service principal selected.
-
Select Select members.
-
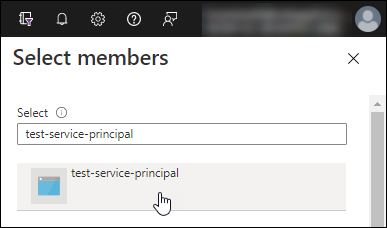
Search for the name of the application.
Here's an example:
-
Select the application and select Select.
-
Select Next.
-
-
Select Review + assign.
The service principal now has the required Azure permissions to deploy the Console agent.
If you want to deploy Cloud Volumes ONTAP from multiple Azure subscriptions, then you must bind the service principal to each of those subscriptions. In the NetApp Console, you can select the subscription that you want to use when deploying Cloud Volumes ONTAP.
-
Add Windows Azure Service Management API permissions
You must assign "Windows Azure Service Management API" permissions to the service principal.
-
In the Microsoft Entra ID service, select App registrations and select the application.
-
Select API permissions > Add a permission.
-
Under Microsoft APIs, select Azure Service Management.
-
Select Access Azure Service Management as organization users and then select Add permissions.
Get the application ID and directory ID
When you add the Azure account to the Console, you need to provide the application (client) ID and the directory (tenant) ID for the application. The Console uses the IDs to programmatically sign in.
-
In the Microsoft Entra ID service, select App registrations and select the application.
-
Copy the Application (client) ID and the Directory (tenant) ID.
When you add the Azure account to the Console, you need to provide the application (client) ID and the directory (tenant) ID for the application. The Console uses the IDs to programmatically sign in.
Create a client secret
Create a client secret and provide its value to the Console for authentication with Microsoft Entra ID.
-
Open the Microsoft Entra ID service.
-
Select App registrations and select your application.
-
Select Certificates & secrets > New client secret.
-
Provide a description of the secret and a duration.
-
Select Add.
-
Copy the value of the client secret.
Your service principal is now set up and you should have copied the application (client) ID, the directory (tenant) ID, and the value of the client secret. You need to enter this information in the Console when you add an Azure account.
Add the credentials to the Console
After you provide an Azure account with the required permissions, you can add the credentials for that account to the Console. Completing this step enables you to launch Cloud Volumes ONTAP using different Azure credentials.
-
If you just created these credentials in your cloud provider, it might take a few minutes until they are available for use. Wait a few minutes before you add the credentials to the Console.
-
You need to create a Console agent before you can configure a subscription. Learn how to create a Console agent.
-
Select Administration > Credentials.
-
Select Add Credentials and follow the steps in the wizard.
-
Credentials Location: Select Microsoft Azure > Agent.
-
Define Credentials: Enter information about the Microsoft Entra service principal that grants the required permissions:
-
Application (client) ID
-
Directory (tenant) ID
-
Client Secret
-
-
Marketplace Subscription: Associate a Marketplace subscription with these credentials by subscribing now or by selecting an existing subscription.
-
Review: Confirm the details about the new credentials and select Add.
-
You can switch to a different set of credentials from the Details and Credentials page when adding a system to the Console.
Manage existing credentials
Manage the Azure credentials that you've already added to the Console by associating a Marketplace subscription, editing credentials, and deleting them.
Associate an Azure Marketplace subscription to credentials
After you add your Azure credentials to the Console, you can associate an Azure Marketplace subscription to those credentials. You can use the subscription to create a pay-as-you-go Cloud Volumes ONTAP system and access NetApp data services.
There are two scenarios in which you might associate an Azure Marketplace subscription after you've already added the credentials to the Console:
-
You didn't associate a subscription when you initially added the credentials to the Console.
-
You want to change the Azure Marketplace subscription that is associated with Azure credentials.
Replacing the current marketplace subscription updates it for existing and new Cloud Volumes ONTAP systems.
-
Select Administration > Credentials.
-
Select Organization credentials.
-
Select the action menu for a set of credentials that are associated with a Console agent and then select Configure Subscription.
You must select credentials that are associated with a Console agent. You can't associate a marketplace subscription with credentials that are associated with the NetApp Console.
-
To associate the credentials with an existing subscription, select the subscription from the drop-down list and select Configure.
-
To associate the credentials with a new subscription, select Add Subscription > Continue and follow the steps in the Azure Marketplace:
-
If prompted, log in to your Azure account.
-
Select Subscribe.
-
Fill out the form and select Subscribe.
-
After the subscription process is complete, select Configure account now.
You'll be redirected to the NetApp Console.
-
From the Subscription Assignment page:
-
Select the Console organizations or accounts that you'd like to associate this subscription with.
-
In the Replace existing subscription field, choose whether you'd like to automatically replace the existing subscription for one organization or account with this new subscription.
The Console replaces the existing subscription for all credentials in the organization or account with this new subscription. If a set of credentials wasn't ever associated with a subscription, then this new subscription won't be associated with those credentials.
For all other organizations or accounts, you'll need to manually associate the subscription by repeating these steps.
-
Select Save.
-
-
Edit credentials
Edit your Azure credentials in the Console. For example, you can update the client secret if a new secret was created for the service principal application.
-
Select Administration > Credentials.
-
Select Organization credentials.
-
Select the action menu for a set of credentials and then select Edit Credentials.
-
Make the required changes and then select Apply.
Delete credentials
If you no longer need a set of credentials, you can delete them. You can only delete credentials that aren't associated with a system.
-
Select Administration > Credentials.
-
Select Organization credentials.
-
On the Organization credentials page, select the action menu for a set of credentials and then select Delete Credentials.
-
Select Delete to confirm.