

Deploy the Console agent in restricted mode
 Suggest changes
Deploy the Console agent in restricted mode so that you can use the NetApp Console with limited outbound connectivity. To get started, install the Console agent, set up the Console by accessing the user interface that's running on the Console agent, and then provide the cloud permissions that you previously set up.
Step 1: Install the Console agent
Install the Console agent from your cloud provider's marketplace or manually on a Linux host.
You need to have prepared your environment before you install the Console agent. You can install from the AWS Marketplace, from the Azure Marketplace, or manually on your own Linux host running in AWS, Azure, or Google Cloud.
Have the following:
-
A VPC and subnet that meets networking requirements.
-
An IAM role with an attached policy that includes the required permissions for the Console agent.
-
Permissions to subscribe and unsubscribe from the AWS Marketplace for your IAM user.
-
An understanding of CPU and RAM requirements for the agent.
-
A key pair for the EC2 instance.
-
Go to the NetApp Console agent listing on the AWS Marketplace.
-
On the Marketplace page, select Continue to Subscribe.
-
To subscribe to the software, select Accept Terms.
The subscription process can take a few minutes.
-
After the subscription process is complete, select Continue to Configuration.
-
On the Configure this software page, ensure that you've selected the correct region and then select Continue to Launch.
-
On the Launch this software page, under Choose Action, select Launch through EC2 and then select Launch.
Use the EC2 Console to launch the instance and attach an IAM role. This is not possible with the Launch from Website action.
-
Follow the prompts to configure and deploy the instance:
-
Name and tags: Enter a name and tags for the instance.
-
Application and OS Images: Skip this section. The Console agent AMI is already selected.
-
Instance type: Depending on region availability, choose an instance type that meets RAM and CPU requirements (t3.2xlarge is preselected and recommended).
-
Key pair (login): Select the key pair that you want to use to securely connect to the instance.
-
Network settings: Edit the network settings as needed:
-
Choose the desired VPC and subnet.
-
Specify whether the instance should have a public IP address.
-
Specify security group settings that enable the required connection methods for the Console agent instance: SSH, HTTP, and HTTPS.
-
-
Configure storage: Keep the default size and disk type for the root volume.
If you want to enable Amazon EBS encryption on the root volume, select Advanced, expand Volume 1, select Encrypted, and then choose a KMS key.
-
Advanced details: Under IAM instance profile, choose the IAM role that includes the required permissions for the Console agent.
-
Summary: Review the summary and select Launch instance.
-
AWS launches the software with the specified settings. The Console agent deploys in approximately five minutes.
Set up the NetApp Console.
Have the following:
-
A VPC and subnet that meets networking requirements.
-
An IAM role with an attached policy that includes the required permissions for the Console agent.
-
Permissions to subscribe and unsubscribe from the AWS Marketplace for your IAM user.
-
A key pair for the EC2 instance.
-
Go to the NetApp Console agent offering in the AWS Marketplace.
-
Open the EC2 service and select Launch instance.
-
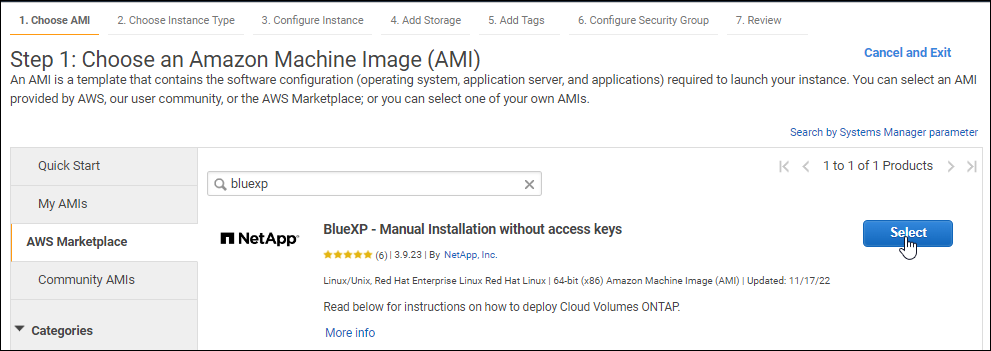
Select AWS Marketplace.
-
Search for NetApp Console and select the offering.
-
Select Continue.
-
-
Follow the prompts to set up and start the instance:
-
Choose an Instance Type: Depending on region availability, choose one of the supported instance types (t3.2xlarge is recommended).
-
Configure Instance Details: Select a VPC and subnet, choose the IAM role that you created in step 1, enable termination protection (recommended), and choose any other configuration options that meet your requirements.
-
Add Storage: Keep the default storage options.
-
Add Tags: Enter tags for the instance, if desired.
-
Configure Security Group: Specify the required connection methods for the Console agent instance: SSH, HTTP, and HTTPS.
-
Review: Review your selections and select Launch.
-
AWS launches the software with the specified settings. The Console agent deploys in approximately five minutes.
Set up the Console.
You should have the following:
-
A VNet and subnet that meets networking requirements.
-
An Azure custom role that includes the required permissions for the Console agent.
-
Go to the NetApp Console agent VM page in the Azure Marketplace.
-
Select Get it now and then select Continue.
-
From the Azure portal, select Create and follow the steps to configure the virtual machine.
Note the following as you configure the VM:
-
VM size: Choose a VM size that meets CPU and RAM requirements. We recommend Standard_D8s_v3.
-
Disks: The Console agent can perform optimally with either HDD or SSD disks.
-
Public IP: To use a public IP address with the Console agent VM, select a Basic SKU.
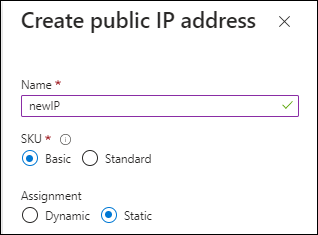
If you use a Standard SKU IP address instead, then the Console uses the private IP address of the Console agent, instead of the public IP. If the machine you use to access the Console cannot reach the private IP address, the Console does not work.
-
Network security group: The Console agent requires inbound connections using SSH, HTTP, and HTTPS.
-
Identity: Under Management, select Enable system assigned managed identity.
A managed identity lets the Console agent VM identify itself to Microsoft Entra ID without credentials. Learn more about managed identities for Azure resources.
-
-
On the Review + create page, review your selections and select Create to start the deployment.
Azure deploys the virtual machine with the specified settings. The virtual machine and Console agent software should be running in approximately five minutes.
Set up the NetApp Console.
You can install the Console agent manually on your own Linux host running in AWS, Azure, or Google Cloud.
You should have the following:
-
Root privileges to install the Console agent.
-
Details about a proxy server, if a proxy is required for internet access from the Console agent.
You have the option to configure a proxy server after installation, but doing so requires restarting the Console agent.
-
A CA-signed certificate, if the proxy server uses HTTPS or if the proxy is an intercepting proxy.

|
You cannot set a certificate for a transparent proxy server when manually installing the Console agent. If you need to set a certificate for a transparent proxy server, you must use the Maintenance Console after installation. Learn more about the Agent Maintenance Console. |
-
You need to disable the configuration check that verifies outbound connectivity during installation. The manual install fails if this check is not disabled. Learn how to disable configuration checks for manual installations.
-
Depending on your operating system, either Podman or Docker Engine is required before you install the Console agent.
After installation, the Console agent automatically updates itself if a new version is available.
-
If the http_proxy or https_proxy system variables are set on the host, remove them:
unset http_proxy
unset https_proxy
If you don't remove these system variables, the installation fails.
-
Download the Console agent software and then copy it to the Linux host. You can download it either from the NetApp Console or the NetApp Support site.
-
NetApp Console: Go to Agents > Management > Deploy agent > On-prem > Manual install.
Choose download the agent installer files or a URL to the files.
-
NetApp Support Site (needed if you don't already have access to the Console).
Download the "online" agent installer that's meant for use in your network or in the cloud. A separate "offline" installer is available for the Console agent, but it's only supported with private mode deployments. -
NetApp Support Site (needed if you don't already have access to the Console) NetApp Support Site.
-
-
Assign permissions to run the script.
chmod +x NetApp_Console_Agent_Cloud_<version>Where <version> is the version of the Console agent that you downloaded.
-
If installing in a Government Cloud environment, disable the configuration checks. Learn how to disable configuration checks for manual installations.
-
Run the installation script.
./NetApp_Console_Agent_Cloud_<version> --proxy <HTTP or HTTPS proxy server> --cacert <path and file name of a CA-signed certificate>You'll need to add proxy information if your network requires a proxy for internet access. You can add an explicit proxy during installation. The
--proxyand--cacertparameters are optional and you won't be prompted to add them. If you have an explicit proxy server, you will need to enter the parameters as shown.
If you want to configure a transparent proxy, you can do so after you've installed. Learn about the agent maintenance console. Here is an example of configuring an explicit proxy server with a CA-signed certificate:
./NetApp_Console_Agent_Cloud_v4.0.0 --proxy https://user:password@10.0.0.30:8080/ --cacert /tmp/cacert/certificate.cer ./NetApp_Console_Agent_Cloud_v4.0.0 --proxy https://user:password@10.0.0.30:8080/ --cacert /tmp/cacert/certificate.cer--proxyconfigures the Console agent to use an HTTP or HTTPS proxy server using one of the following formats:-
http://address:port
-
http://user-name:password@address:port
-
http://domain-name%92user-name:password@address:port
-
https://address:port
-
https://user-name:password@address:port
-
https://domain-name%92user-name:password@address:port
Note the following:
-
The user can be a local user or domain user.
-
For a domain user, you must use the ASCII code for a \ as shown above.
-
The Console agent doesn't support user names or passwords that include the @ character.
-
If the password includes any of the following special characters, you must escape that special character by prepending it with a backslash: & or !
For example:
http://bxpproxyuser:netapp1\!@address:3128
-
-
-
If you used Podman, you'll need to adjust the aardvark-dns port.
-
SSH to the Console agent virtual machine.
-
Open podman /usr/share/containers/containers.conf file and modify the chosen port for Aardvark DNS service. For example, change it to 54.
vi /usr/share/containers/containers.confFor example:
# Port to use for dns forwarding daemon with netavark in rootful bridge # mode and dns enabled. # Using an alternate port might be useful if other DNS services should # run on the machine. # dns_bind_port = 54 -
Reboot the Console agent virtual machine.
-
The Console agent is now installed. At the end of the installation, the Console agent service (occm) restarts twice if you specified a proxy server.
Set up the NetApp Console.
Step 2: Set up NetApp Console
When you access the console for the first time, you are prompted to choose an organization for the Console agent and need to enable restricted mode.
The person who sets up the Console agent must log in to the Console using a login that doesn't already belong to a Console organization.
If your login is associated with another organization, you need to sign up with a new login. Otherwise, you do not see the option to enable restricted mode on the setup screen.
-
Open a web browser from a host that has a connection to the Console agent instance and enter the following URL of the Console agent you installed.
-
Sign up or log in to the NetApp Console.
-
After you're logged in, set up the Console:
-
Enter a name for the Console agent.
-
Enter a name for a new Console organization.
-
Select Are you running in a secured environment?
-
Select Enable restricted mode on this account.
Note that you can't change this setting after the account is created. You can't enable restricted mode later and you can't disable it later.
If you deployed the Console agent in a Government region, the checkbox is already enabled and can't be changed. This is because restricted mode is the only mode supported in Government regions.
-
Select Let's start.
-
The Console agent is now installed and set up with your Console organization. All users need to access the Console using the IP address of the Console agent instance.
Provide the Console with the permissions that you previously set up.
Step 3: Provide permissions to the Console agent
If you installed the Console agent from the Azure Marketplace or manually, you need to give the permissions you set up earlier.
These steps don't apply if you deployed the Console agent from the AWS Marketplace because you chose the required IAM role during deployment.
Attach the IAM role that you previously created to the EC2 instance where you installed the Console agent.
These steps apply only if you manually installed the Console agent in AWS. For AWS Marketplace deployments, you already associated the Console agent instance with an IAM role that includes the required permissions.
-
Go to the Amazon EC2 console.
-
Select Instances.
-
Select the Console agent instance.
-
Select Actions > Security > Modify IAM role.
-
Select the IAM role and select Update IAM role.
Provide the NetApp Console with the AWS access key for an IAM user that has the required permissions.
-
Select Administration > Credentials.
-
Select Organization credentials.
-
Select Add Credentials and follow the steps in the wizard.
-
Credentials Location: Select Amazon Web Services > Agent.
-
Define Credentials: Enter an AWS access key and secret key.
-
Marketplace Subscription: Associate a Marketplace subscription with these credentials by subscribing now or by selecting an existing subscription.
-
Review: Confirm the details about the new credentials and select Add.
-
Go to the Azure portal and assign the Azure custom role to the Console agent virtual machine for one or more subscriptions.
-
From the Azure Portal, open the Subscriptions service and select your subscription.
It's important to assign the role from the Subscriptions service because this specifies the scope of the role assignment at the subscription level. The scope defines the set of resources that the access applies to. If you specify a scope at a different level (for example, at the virtual machine level), your ability to complete actions from within the NetApp Console will be affected.
-
Select Access control (IAM) > Add > Add role assignment.
-
In the Role tab, select the Console Operator role and select Next.
Console Operator is the default name provided in the policy. If you chose a different name for the role, then select that name instead. -
In the Members tab, complete the following steps:
-
Assign access to a Managed identity.
-
Select Select members, select the subscription in which the Console agent virtual machine was created, under Managed identity, choose Virtual machine, and then select the Console agent virtual machine.
-
Select Select.
-
Select Next.
-
Select Review + assign.
-
If you want to manage resources in additional Azure subscriptions, switch to that subscription and then repeat these steps.
-
Provide the NetApp Console with the credentials for the Azure service principal that you previously set up.
-
Select Administration > Credentials.
-
Select Add Credentials and follow the steps in the wizard.
-
Credentials Location: Select Microsoft Azure > Agent.
-
Define Credentials: Enter information about the Microsoft Entra service principal that grants the required permissions:
-
Application (client) ID
-
Directory (tenant) ID
-
Client Secret
-
-
Marketplace Subscription: Associate a Marketplace subscription with these credentials by subscribing now or by selecting an existing subscription.
-
Review: Confirm the details about the new credentials and select Add.
-
The NetApp Console now has the permissions that it needs to perform actions in Azure on your behalf.
Associate the service account with the Console agent VM.
-
Go to the Google Cloud portal and assign the service account to the Console agent VM instance.
-
If you want to manage resources in other projects, grant access by adding the service account with the Console agent role to that project. You'll need to repeat this step for each project.