

Configure user activity detection in NetApp Ransomware Resilience
 Suggest changes
NetApp Ransomware Resilience user behavior detection helps you prevent user-level ransomware events. To enable user behavior detection in Ransomware Resilience, you must install at least one user activity agent, which creates a data collection environment to monitor user behavior for aberrant patterns that resemble ransomware events.
A user activity agent hosts a data collector and user directory connector, which both send data to a SaaS location for analysis.
-
The data collector collects user activity data from ONTAP. The data collector is created automatically when you create a protection strategy with user behavior detection.
-
The user directory connector connects to your directory to map user IDs to usernames. You must configure the user directory connector.
The user activity agent, data collector, and user directory connector can all be managed from the Ransomware Resilience settings dashboard.

|
If you're already using NetApp Data Infrastructure Insights (DII) Workload Security, it's recommended you use the same Workload Security agents for Ransomware Resilience. You don't need to deploy separate Workload Security agents for Ransomware Resilience, however, using the same Workload Security agents requires a pairing relationship between the Ransomware Resilience Console organization and DII Storage Workload Security tenant. Contact your account representative to enable this pairing. |
If you're not using DII, proceed with the configuration instructions here.
Before you begin
-
Ensure you meet the operating system, server, and network requirements.
Required Console role
To activate user behavior detection, you need the Organization admin role. For subsequent user behavior detection configurations, you need the Ransomware Resilience user behavior admin role. Learn about Ransomware Resilience roles for NetApp Console.
Ensure each role is applied at the organization level.
Create a user activity agent
User activity agents are executable environments for data collectors; data collectors share user activity events with Ransomware Resilience. You must create at least one user activity agent to enable user activity detection.
-
If this is your first time creating a user activity agent, go to the Dashboard. In the User activity tile, select Activate.
If you're adding an additional user activity agent, go to Settings, locate the User activity tile, then select Manage. On the User activity screen, select the User activity agents tab then Add.
-
Select a Cloud provider then a Region. Select Next.
-
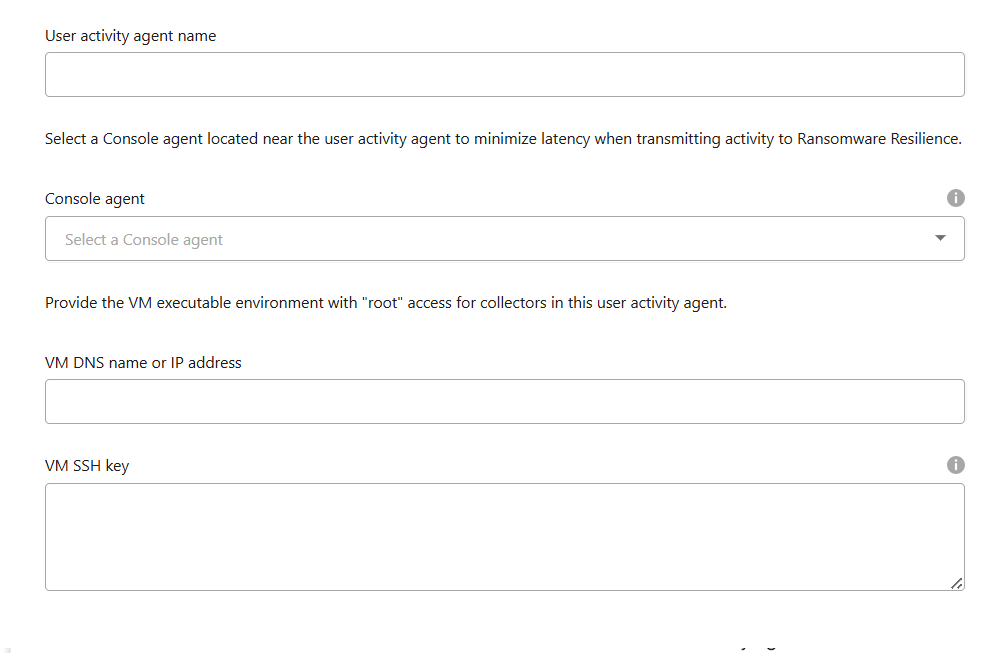
Provide the user activity agent details:
-
User activity agent name
-
Console agent - The Console agent should be in the same network as the user activity agent and have SSH connectivity to the user activity agent's IP address.
-
VM DNS name or IP address
-
VM SSH Key - Enter the SSH key using this format:
-----BEGIN OPENSSH PRIVATE KEY-----
private-key-contents
-----END OPENSSH PRIVATE KEY-----
-
-
Select Next.
-
Review your settings. Select Activate to complete adding the user activity agent.
-
Confirm the user activity agent was successfully created. In the User activity monitoring tile, a successful deployment displays as Running.
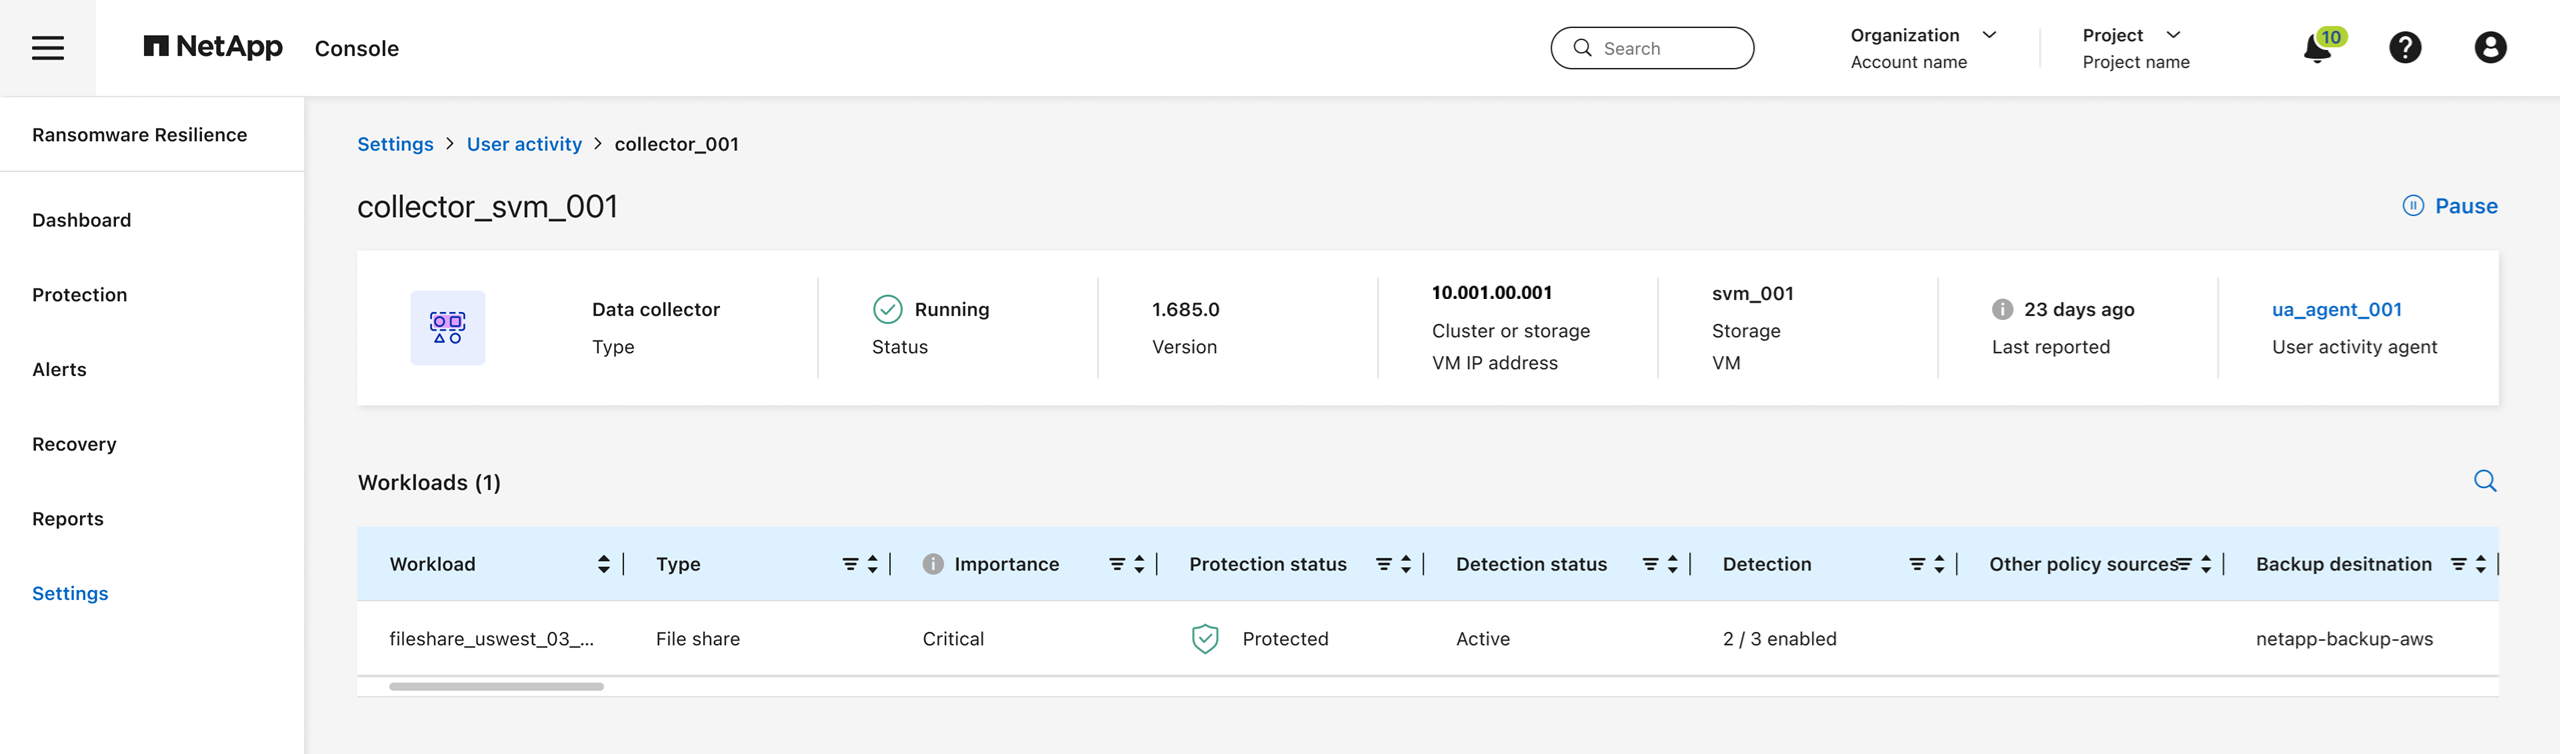
After the user activity agent is successfully created, return to the Settings menu then select Manage in the User activity monitoring tile. Select the User activity agents tab then select the user activity agent to view details about it, including data collectors and user directory connectors.
Add a data collector
Data collectors are created automatically when you enable a ransomware protection strategy with user activity detection. For more information, see add a detection policy.
You can view the details of the data collector. From Settings, select Manage in the User activity monitoring tile. Select the Data collector tab then select the data collector to view its details or pause it.
Create a user directory connector
To map user IDs to usernames, you must create a user directory connector.
-
In Ransomware Resilience, go to Settings.
-
In the User activity monitoring tile, select Manage.
-
Select the User directory connectors tab then Add.
-
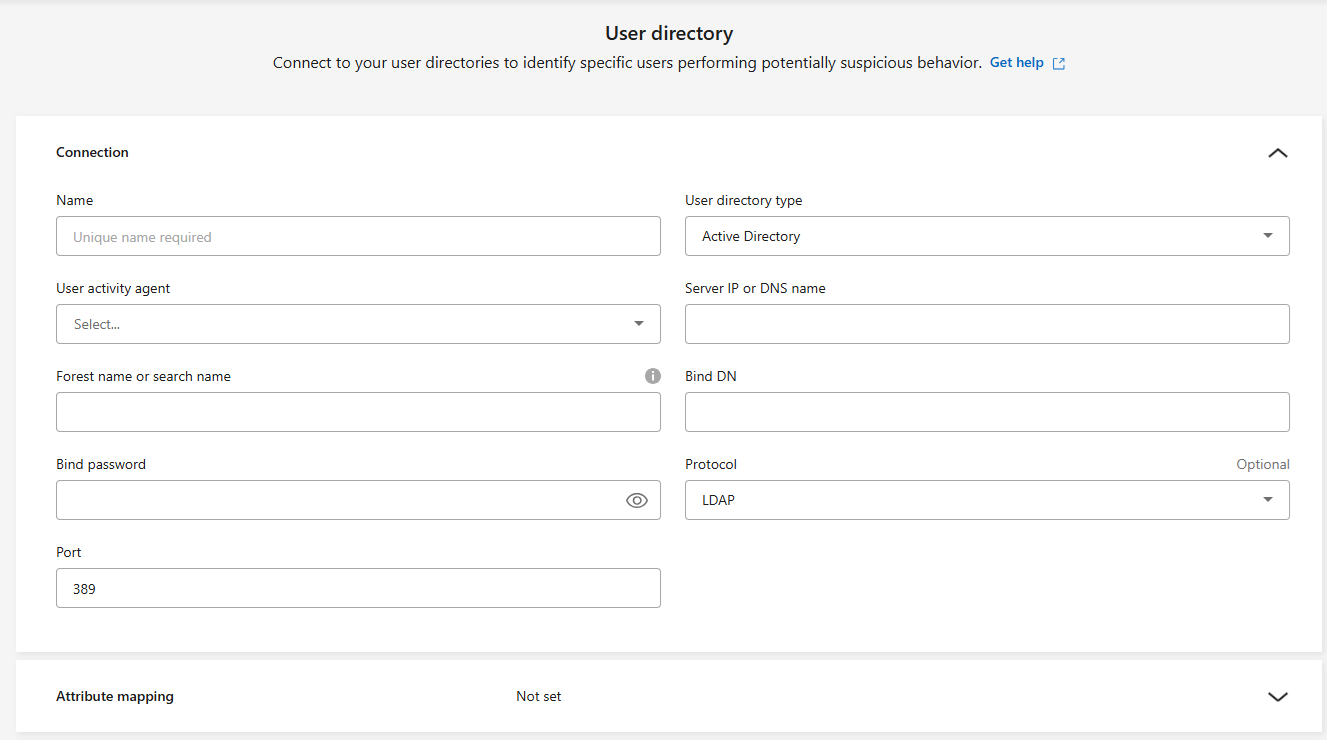
Configure the connection. Enter the required information for each field.
Field Description Name
Enter a unique name for the user directory connector
User directory type
The directory type
Server IP address or domain name
The IP address or Fully-Qualified Domain Name (FQDN) of the server hosting the connection
Forest name or search name
You can specify the forest level of the directory structure as the direct domain name (for example
unit.company.com) or a set of relative distinguished names (for example:DC=unit,DC=company,DC=com). You can also enter anOUto filter by an organizational unit or aCNto limit to a specific user (for example:CN=user,OU=engineering,DC=unit,DC=company,DC=com).BIND DN
The BIND DN is a user account permitted to search the directory, such as user@domain.com. The user requires the Domain Read Only permission.
BIND password
The password for the user provided in BIND DN
Protocol
The protocol field is optional. You can use LDAP, LDAPS, or LDAP over StartTLS.
Port
Enter your chosen port number
Provide the attribute mapping details:
-
Display name
-
SID (if you're using LDAP)
-
User name
-
Unix ID (if you're using NFS)
-
If you select Include optional attributes, you can also add an email address, telephone number, role, state, country, department, photo, manager DN, or groups.
Select Advanced to add an optional search query.
-
-
Select Add.
-
Return to the user directory connectors tab to check the status of your user directory connector. If created successfully, the status of the user directory connector displays as Running.
Delete a user directory connector
-
In Ransomware Resilience, select Settings.
-
Locate the User activity monitoring tile, select Manage.
-
Select the User directory connector tab.
-
Identify the user directory connector you want to delete. In the action menu at the end of the line, select the three dots
…then Delete. -
In the pop-up dialog, select Delete to confirm.
Respond to user activity alerts
After you configure user activity detection, you can monitor events in the alerts page. For more information, see Detect malicious activity and suspicious user behavior.
You can also Automate responses to user activity events.