

Add a backup destination in NetApp Ransomware Resilience
 Suggest changes
When NetApp Ransomware Resilience discovers workloads, if backups are configured, Ransomware Resilience recognizes the backup destinations. If you plan to use backups as part of your ransomware protection strategy but have not configured backup destinations on the workload, you must add a backup destination in NetApp Ransomware Resilience to improve cyber resiliency.
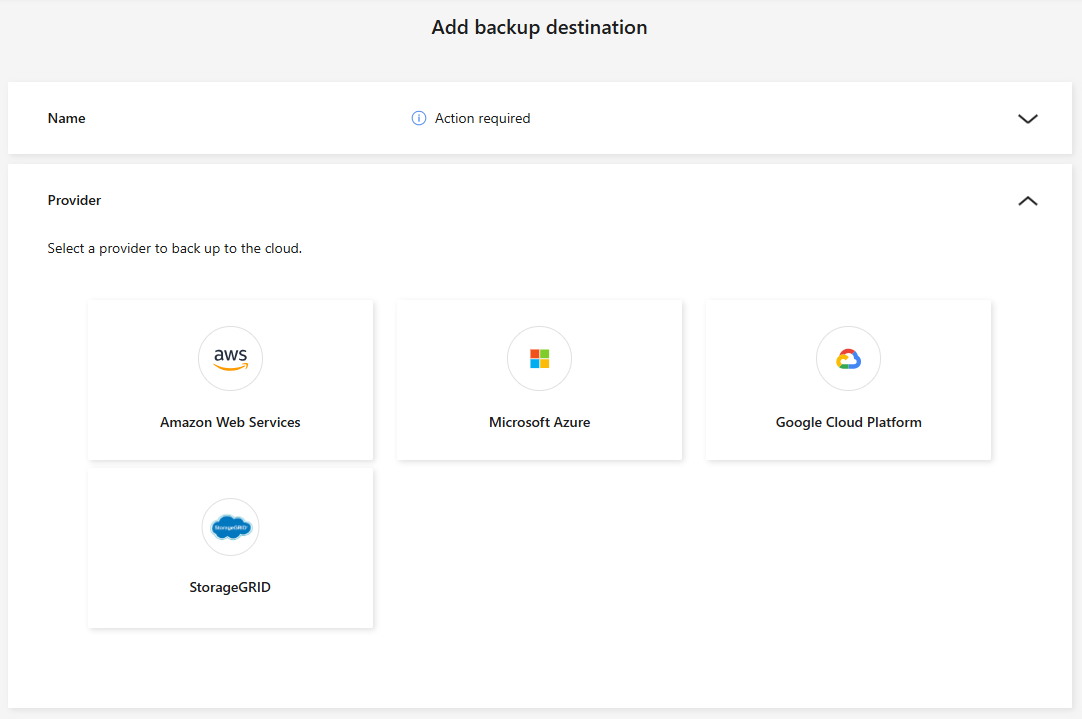
You can choose one of the following backup destinations:
-
NetApp StorageGRID
-
Amazon Web Services (AWS)
-
Google Cloud Platform
-
Microsoft Azure

|
Backup destinations are not available for workloads in Amazon FSx for NetApp ONTAP and Azure NetApp Files. Perform backup operations using native backup solutions: FSx for ONTAP backup service or Azure NetApp Files backups. |
Required Console role
To perform this task, you need the Super admin or Ransomware Resilience admin role. Learn about Ransomware Resilience roles for NetApp Console.
Add StorageGRID as a backup destination
To set up NetApp StorageGRID as a backup destination, enter the following information.
-
In Ransomware Resilience, select Settings.
-
In the Backup Destinations tile, select View.
-
Select Add.
-
Enter a name for the backup destination.
-
Select StorageGRID.
-
Select the down arrow next to each setting to review the required fields:
-
Provider settings:
-
Choose to Create a new bucket or Bring your own bucket.
-
Provide the Gateway node fully qualified domain name (FQDN) and Port.
-
Provide the StorageGRID credentials: Access key and Secret key.
-
-
Networking: Choose the IPspace.
-
The IPspace is the cluster where the volumes you want to back up reside. The intercluster LIFs for this IPspace must have outbound internet access.
-
-
Backup Lock
Choose if you want to configure backup lock. With backup lock, copies are protected from being modified or deleted and scanned for ransomware threats. You cannot modify this setting after configuring the backup destination.
If you don't want backup lock, select None.
Select Governance mode to allow users with specific permissions to overwrite or delete protected backup files during the retention period.
Select Compliance mode** to prevent users from overwriting or deleting protected backup files during the retention period.
-
-
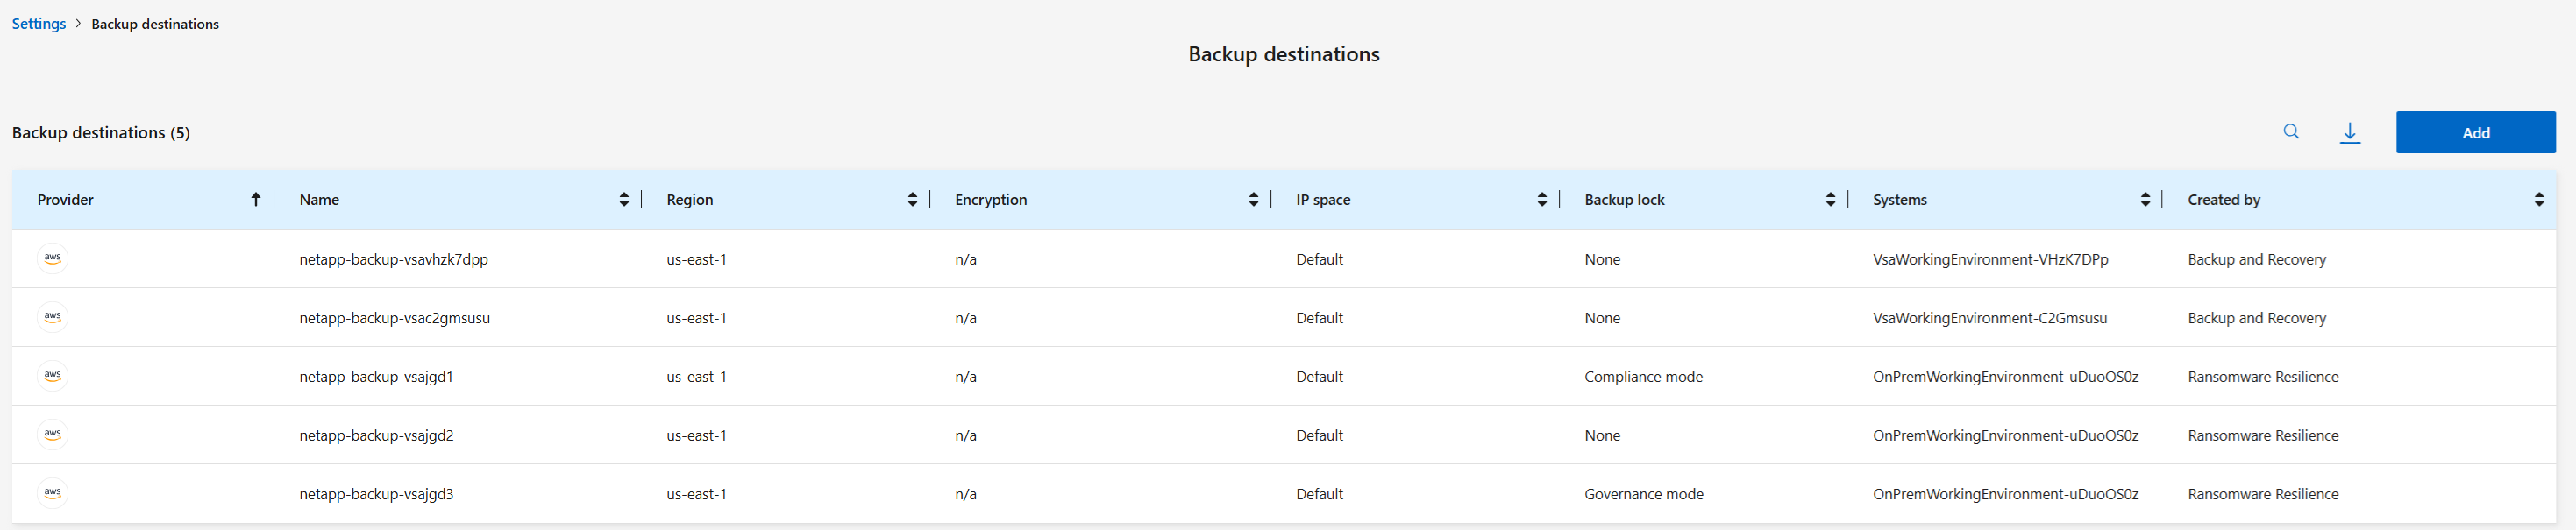
Select Add.
The new backup destination is added to the list of backup destinations.
Add Amazon Web Services as a backup destination
To set up AWS as a backup destination, enter the following information.
For details about managing your AWS storage in the Console, see Manage your Amazon S3 buckets.
-
In Ransomware Resilience, select Settings.
-
In the Backup Destinations tile, select View.
-
Select Add.
-
Select Amazon Web Services.
-
Select the Down arrow next to each setting and enter or select values:
-
Provider settings:
-
Create a new bucket, select an existing bucket if one already exists in the Console, or bring your own bucket that will store the backups.
-
AWS account, region, access key and secret key for AWS credentials
-
-
Encryption: If you are creating a new S3 bucket, enter encryption key information given to you from the provider. If you chose an existing bucket, encryption information is already available.
Data in the bucket is encrypted with AWS-managed keys by default. You can continue to use AWS-managed keys, or you can manage the encryption of your data using your own keys.
-
Networking: Choose the IPspace and whether you'll be using a Private Endpoint.
-
The IPspace is the cluster where the volumes you want to back up reside. The intercluster LIFs for this IPspace must have outbound internet access.
-
Optionally, choose whether you'll use an AWS private endpoint (PrivateLink) that you previously configured.
If you want to use AWS PrivateLink, refer to AWS PrivateLink for Amazon S3.
-
-
Backup lock: Choose whether you want Ransomware Resilience to protect backups from being modified or deleted. This option uses the NetApp DataLock technology. Each backup will be locked during the retention period, or for a minimum of 30 days, plus a buffer period of up to 14 days.

If you configure the backup lock setting now, you cannot change the setting after the backup destination is configured. -
Governance mode: Specific users (with s3:BypassGovernanceRetention permission) can overwrite or delete protected files during the retention period.
-
Compliance mode: Users cannot overwrite or delete protected backup files during the retention period.
-
-
-
Select Add.
The new backup destination is added to the list of backup destinations.
Add Google Cloud Platform as a backup destination
To set up Google Cloud Platform (GCP) as a backup destination, enter the following information.
For details about managing your GCP storage in the Console, refer to Console agent installation options in Google Cloud.
-
In Ransomware Resilience, select Settings.
-
In the Backup Destinations tile, select View.
-
Select Add.
-
Enter a name for the backup destination.
-
Select Google Cloud Platform.
-
Select the Down arrow next to each setting and enter or select values:
-
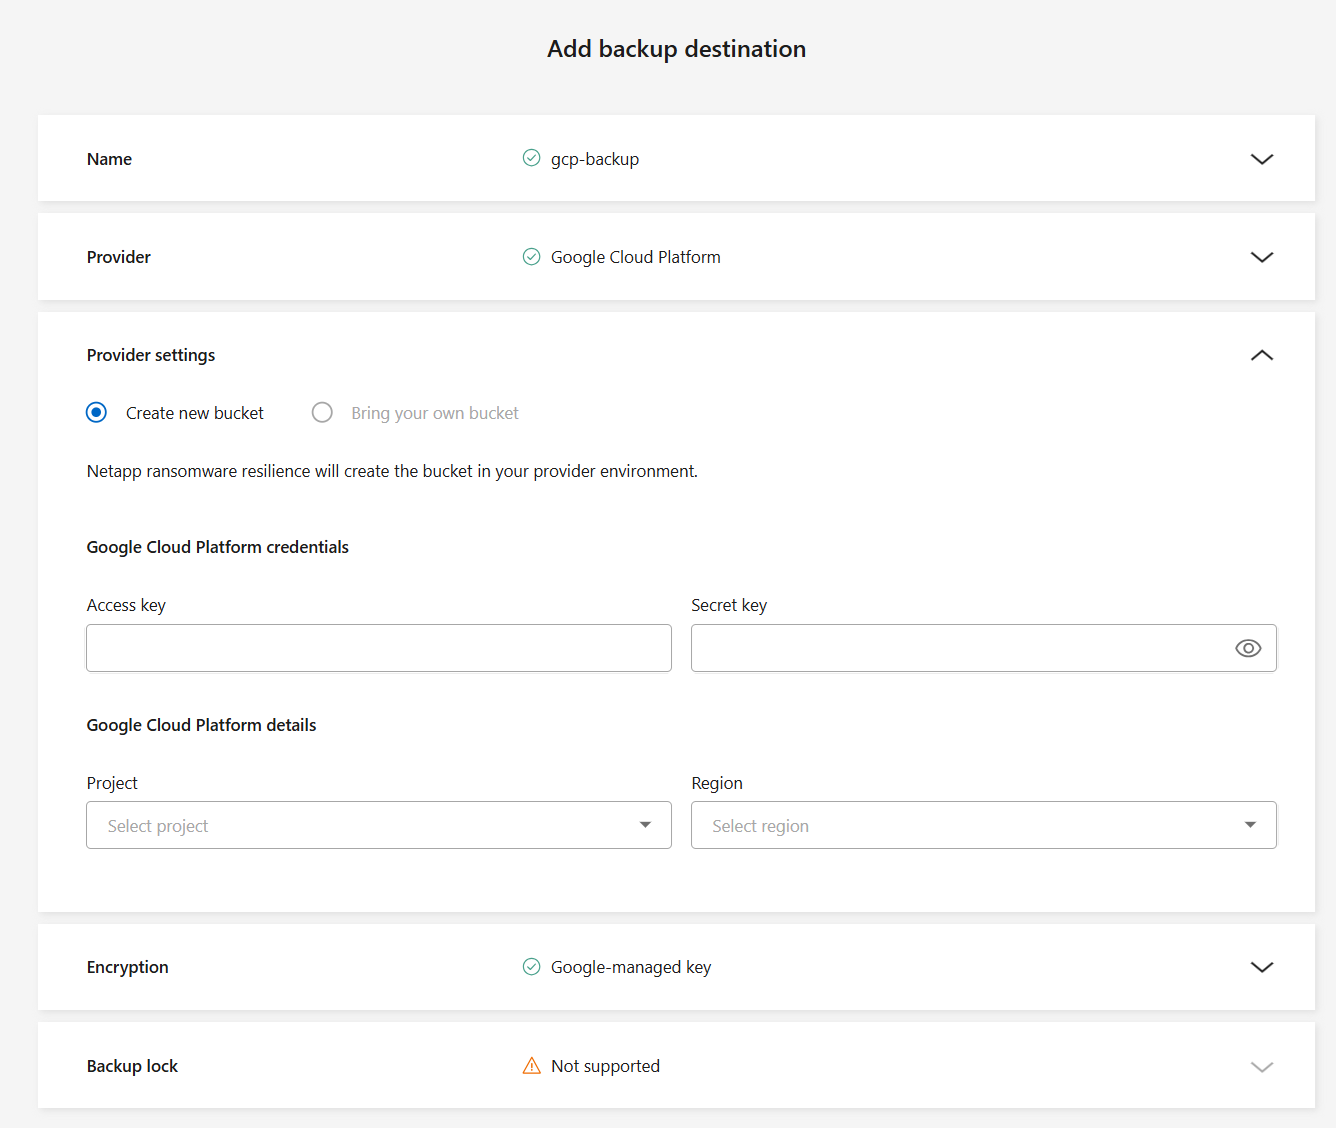
Provider settings:
-
Choose to Create a new bucket or Bring your own bucket.
-
Provide the Google Cloud Platform credentials: Access key and Secret key.
-
Select your Project and the Region it exists in.
-
-
Encryption: If you are creating a new bucket, enter encryption key information given to you from the provider. If you chose an existing bucket, encryption information is already available.
Data in the bucket is encrypted with Google-managed keys by default. You can continue with the default setting by selecting Google-managed keys or use Customer-managed keys.
-
-
Select Add.
The new backup destination is added to the list of backup destinations.
Add Microsoft Azure as a backup destination
To set up Azure as a backup destination, enter the following information.
For details about managing your Azure credentials and marketplace subscriptions in the Console, refer to Manage your Azure credentials and marketplace subscriptions.
-
In Ransomware Resilience, select Settings.
-
In the Backup Destinations tile, select View.
-
Select Add.
-
Select Azure.
-
Select the Down arrow next to each setting and enter or select values:
-
Provider settings:
-
Create a new storage account, select an existing one if one already exists in the Console, or bring your own storage account that will store the backups.
-
Provide the Application (client) ID, Client secret, and Directory (tenant) ID. Select Authenticate.
-
Select the Azure subscription, region, and resource group for your Azure subscription.
-
-
Encryption: By default, data is encrypted with a Microsoft-managed key. Select Microsoft-managed key to maintain this option; alternatively, choose Customer managed key to use your own keys for encryption.
-
Networking: Choose the IPspace and whether you'll be using a Private Endpoint.
-
The IPspace is the cluster where the volumes you want to back up reside. The intercluster LIFs for this IPspace must have outbound internet access.
-
Optionally, choose whether you'll use an Azure private endpoint that you previously configured.
If you want to use Azure PrivateLink, refer to Azure PrivateLink.
-
-
Backup Lock
Choose if you want to configure backup lock. With backup lock, copies are protected from being modified or deleted and scanned for ransomware threats. You cannot modify this setting after configuring the backup destination.
If you don't want backup lock, select None.
Select Governance mode to allow users with specific permissions to overwrite or delete protected backup files during the retention period.
Select Compliance mode** to prevent users from overwriting or deleting protected backup files during the retention period.
-
-
Select Add.
The new backup destination is added to the list of backup destinations.