VMware vCenter Server 6.7U2 and vSphere clustering configuration
 Suggest changes


To configure VMware vCenter Server 6.7 and vSphere clustering, complete the following steps:
-
Navigate to
https://<<FQDN or IP of vCenter>>/vsphere-client/. -
Click Launch vSphere Client.
-
Log in with the user name administrator@vsphere.local and the SSO password you entered during the VCSA setup process.
-
Right-click the vCenter name and select New Datacenter.
-
Enter a name for the data center and click OK.
Create a vSphere cluster
To create a vSphere cluster, complete the following steps:
-
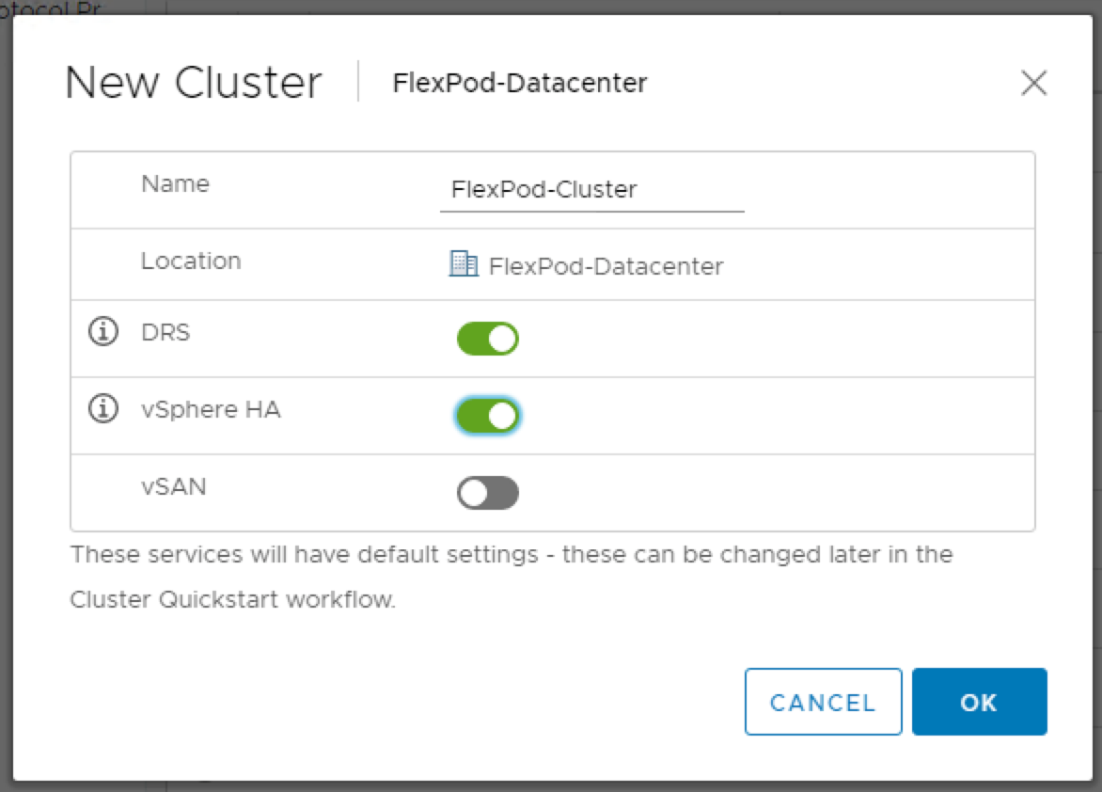
Right-click the newly created data center and select New Cluster.
-
Enter a name for the cluster.
-
Enable DR and vSphere HA by selecting the checkboxes.
-
Click OK.

Add the ESXi hosts to the cluster
To add the ESXi hosts to the cluster, complete the following steps:
-
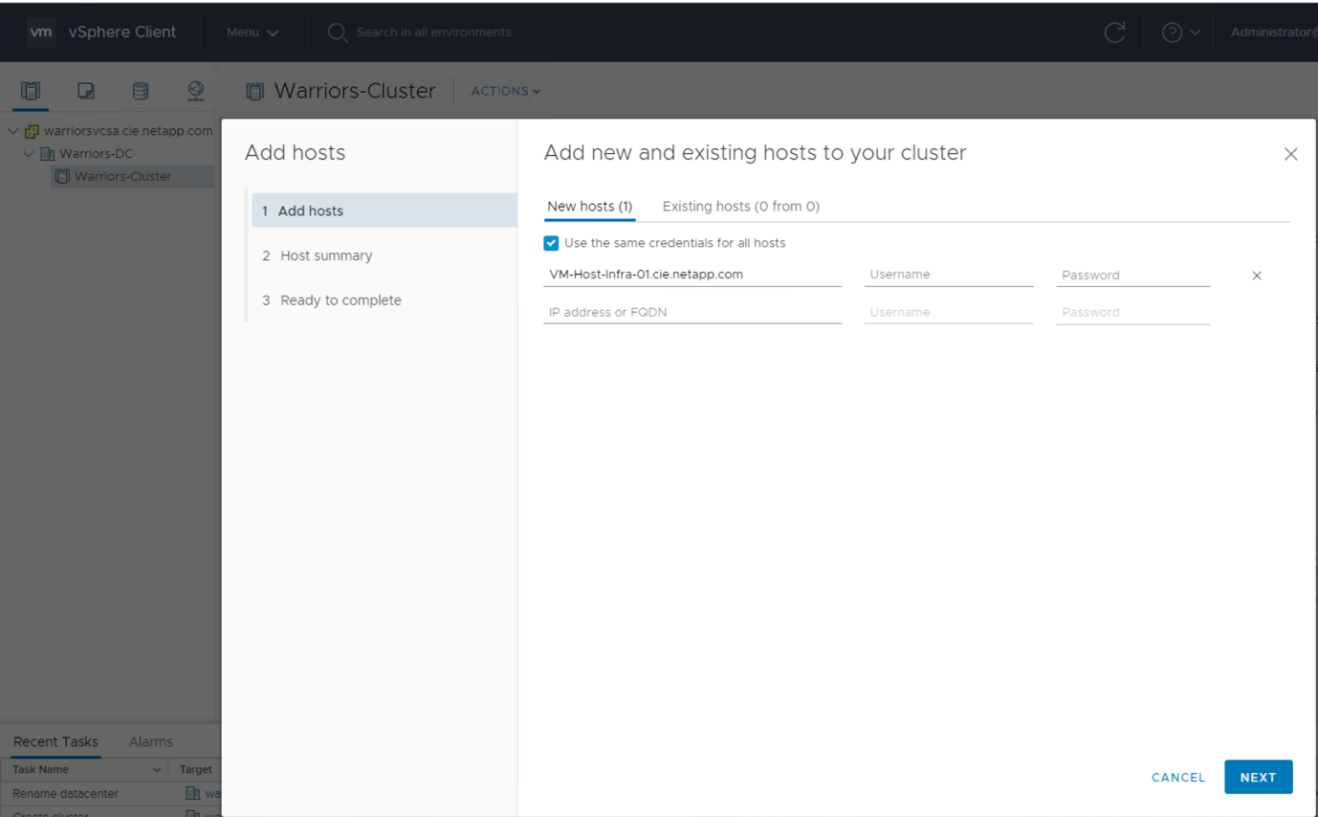
Right-click the cluster and select Add Host.

-
To add an ESXi host to the cluster, complete the following steps:
-
Enter the IP or FQDN of the host. Click Next.
-
Enter the root user name and password. Click Next.
-
Click Yes to replace the host’s certificate with a certificate signed by the VMware certificate server.
-
Click Next on the Host Summary page.
-
Click the green + icon to add a license to the vSphere host.
-
-
This step can be completed later if desired.
-
Click Next to leave lockdown mode disabled.
-
Click Next at the VM location page.
-
Review the Ready to Complete page. Use the back button to make any changes or select Finish.
-
-
Repeat steps 1 and 2 for Cisco UCS host B.
This process must be completed for any additional hosts added to the FlexPod Express configuration.
Configure coredump on the ESXi hosts
To configure coredump on the ESXi hosts, complete the following steps:
-
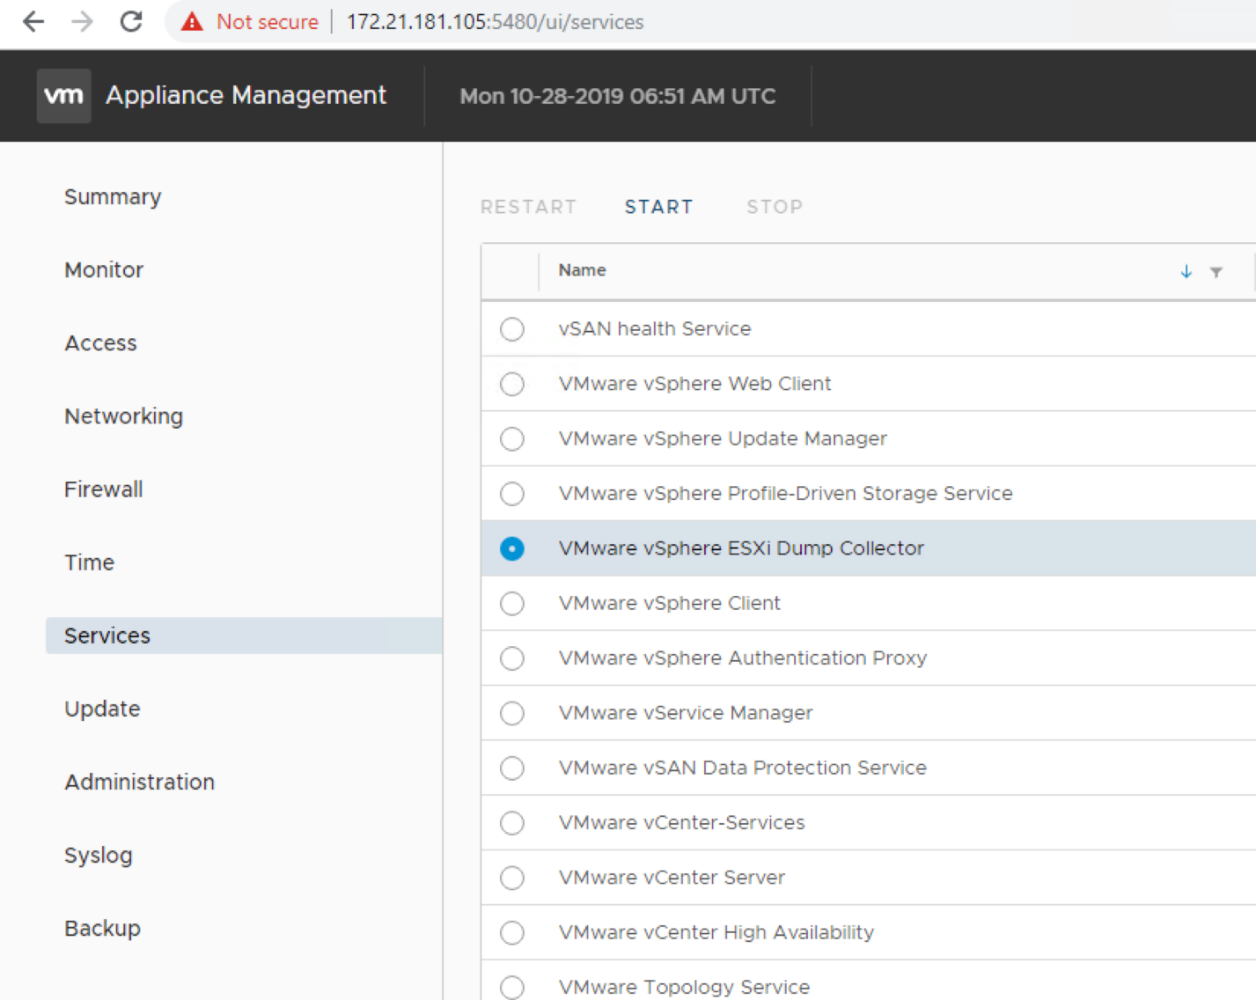
Log into https:// vCenter IP:5480/, enter root for the user name, and enter the root password.
-
Click on services and select VMware vSphere ESXI Dump collector.
-
Start the VMware vSphere ESXI Dump collector service.

-
Using SSH, connect to the management IP ESXi host, enter root for the user name, and enter the root password.
-
Run the following commands:
esxcli system coredump network set -i ip_address_of_core_dump_collector -v vmk0 -o 6500
esxcli system coredump network set --enable=true
esxcli system coredump network check
-
The message
Verified the configured netdump server is runningappears after you enter the final command.
This process must be completed for any additional hosts added to FlexPod Express. ip_address_of_core_dump_collectorin this validation is the vCenter IP.


