10. Enable access to the cluster with the GKE console
 Suggest changes
After clusters are deployed and registered with Google Cloud, they must be logged into with the Google Cloud console to be managed and to receive additional cluster details. The official procedure to gain access to Anthos user clusters after they are deployed is detailed here.

|
The project and the specific user must be whitelisted to access on-premises clusters in the Google Cloud console and use Anthos on VMware services. If you are unable to see the clusters after they are deployed, you might need to open a support ticket with Google. |
The non-whitelisted view looks like this:
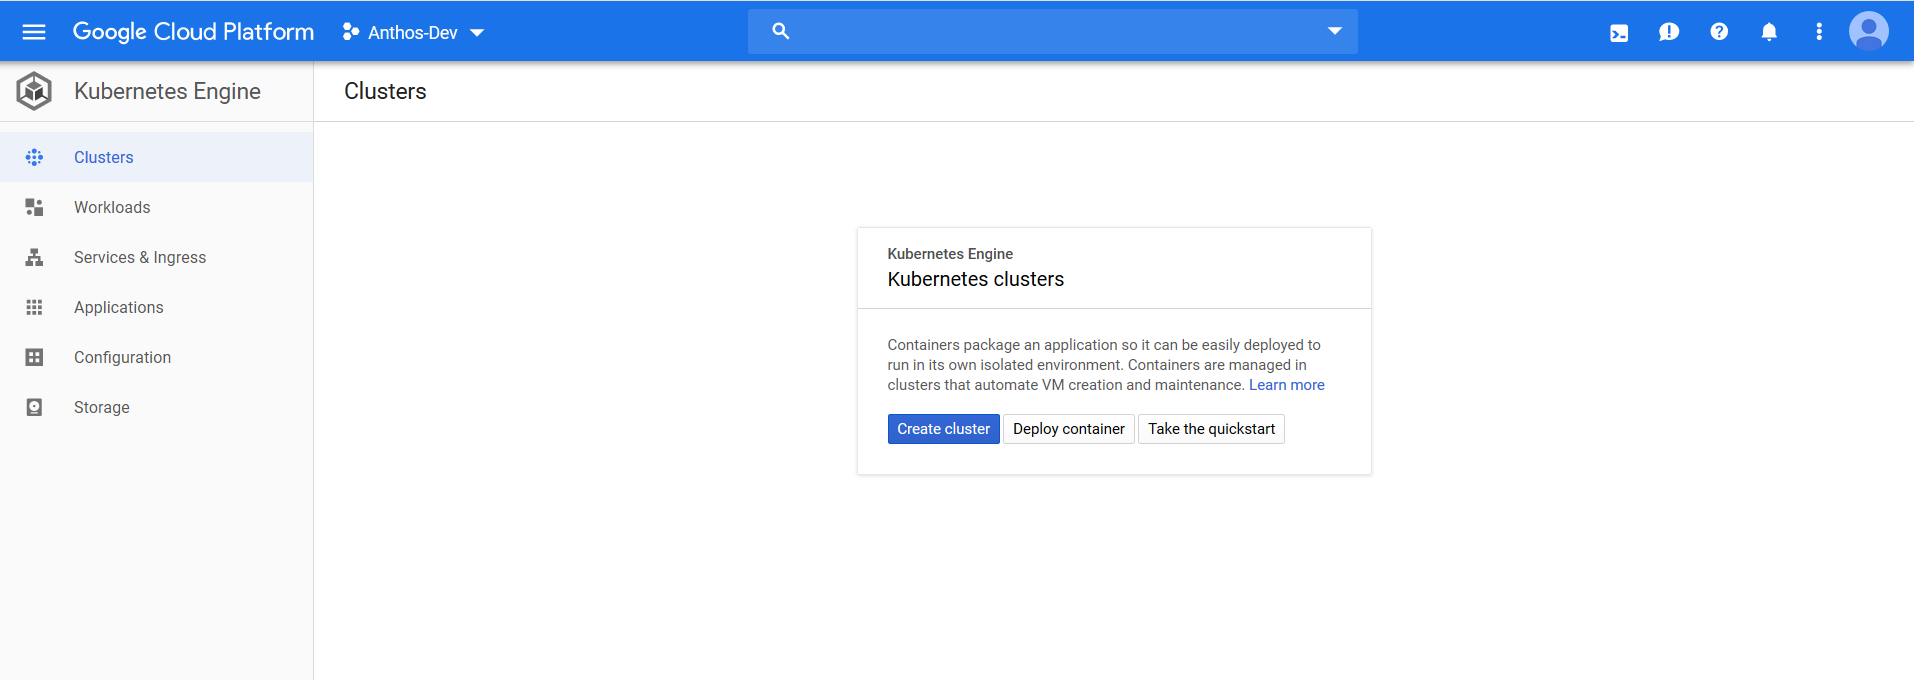
The following figures provides a view of clusters.

To enable access to your user clusters using the GKE console, complete the following steps:
-
Create a
node-reader.yamlfile that allows you to access the cluster.kind: clusterrole apiVersion: rbac.authorization.k8s.io/v1 metadata: name: node-reader rules: - apiGroups: [""] resources: ["nodes"] verbs: ["get", "list", "watch"]
-
Apply this file to the cluster that you want to log into with the
kubectlcommand.ubuntu@Anthos-Admin-Workstation:~$ kubectl apply -f node-reader.yaml --kubeconfig anthos-cluster01-kubeconfig clusterrole.rbac.authorization.k8s.io/node-reader created
-
Create a Kubernetes service account (KSA) that you can use to log in. Name this account after the user that uses this account to log into the cluster.
ubuntu@Anthos-Admin-Workstation:~$ kubectl create serviceaccount netapp-user --kubeconfig anthos-cluster01-kubeconfig
serviceaccount/netapp-user created
-
Create cluster role-binding resources to bind both the view and newly created node-reader roles to the newly created KSA.
ubuntu@Anthos-Admin-Workstation:~$ kubectl create clusterrolebinding netapp-user-view --clusterrole view --serviceaccount default:netapp-user --kubeconfig anthos-cluster01-kubeconfig
clusterrolebinding.rbac.authorization.k8s.io/netapp-user-view created
ubuntu@Anthos-Admin-Workstation:~$ kubectl create clusterrolebinding netapp-user-node-reader --clusterrole node-reader -
-serviceaccount default:netapp-user --kubeconfig anthos-cluster01-kubeconfig
clusterrolebinding.rbac.authorization.k8s.io/netapp-user-node-reader created
-
If you need to extend permissions further, you can grant the KSA user a role with cluster admin permissions in a similar manner.
ubuntu@Anthos-Admin-Workstation:~$ kubectl create clusterrolebinding netapp-user-admin --clusterrole cluster-admin --serviceaccount default:netapp-user --kubeconfig anthos-cluster01-kubeconfig
clusterrolebinding.rbac.authorization.k8s.io/netapp-user-admin created
-
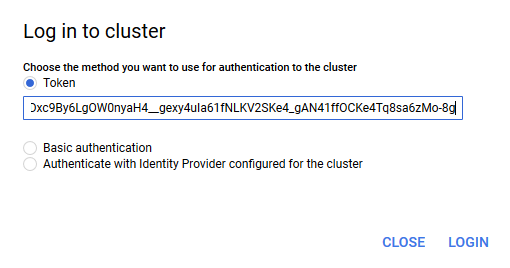
With the KSA account created and assigned with correct permissions, you can create a bearer token to allow access with the GKE Console. To do so, set a system variable for the secret name, and pass that variable through a
kubectlcommand to generate the token.ubuntu@Anthos-Admin-Workstation:~$ SECRET_NAME=$(kubectl get serviceaccount netapp-user --kubeconfig anthos-cluster01-kubeconfig -o jsonpath='{$.secrets[0].name}') ubuntu@Anthos-Admin-Workstation:~$ kubectl get secret ${SECRET_NAME} --kubeconfig anthos-cluster01-kubeconfig -o jsonpath='{$.data.token}' | base64 -d eyJhbGciOiJSUzI1NiIsImtpZCI6IiJ9.eyJpc3MiOiJrdWJlcm5ldGVzL3NlcnZpY2VhY2NvdW50Iiwia3ViZXJuZXRlcy5pby9zZXJ2aWNlYWNjb3VudC9uYW1lc3BhY2UiOiJkZWZhdWx0Iiwia3ViZXJuZXRlcy5pby9zZXJ2aWNlYWNjb3VudC9zZWNyZXQubmFtZSI6Im5ldGFwcC11c2VyLXRva2VuLWJxd3piIiwia3ViZXJuZXRlcy5pby9zZXJ2aWNlYWNjb3VudC9zZXJ2aWNlLWFjY291bnQubmFtZSI6Im5ldGFwcC11c2VyIiwia3ViZXJuZXRlcy5pby9zZXJ2aWNlYWNjb3VudC9zZXJ2aWNlLWFjY291bnQudWlkIjoiNmIzZTFiZjQtMDE3NS0xMWVhLWEzMGUtNmFiZmRlYjYwNDBmIiwic3ViIjoic3lzdGVtOnNlcnZpY2VhY2NvdW50OmRlZmF1bHQ6bmV0YXBwLXVzZXIifQ.YrHn4kYlb3gwxVKCLyo7p6J1f7mwwIgZqNw9eTvIkt4PfyR4IJHxQwawnJ4T6RljIFcbVSQwvWI1yGuTJ98lADdcwtFXHoEfMcOa6SIn4OMVw1d5BGloaESn8150VCK3xES2DHAmLexFBqhVBgckZ0E4fZDvn4EhYvtFVpKlRbSyaE-DHD59P1bIgPdioiKREgbOddKdMn6XTVsuip4V4tVKhktcdRNRAuw6cFDY1fPol3BFHr2aNBIe6lFLkUqvQN-9nMd63JGdHL4hfXu6PPDxc9By6LgOW0nyaH4__gexy4uIa61fNLKV2SKe4_gAN41ffOCKe4Tq8sa6zMo-8g -
With this token, you can visit the Google Cloud Console and log in to the cluster by clicking the login button and pasting in the token.
-
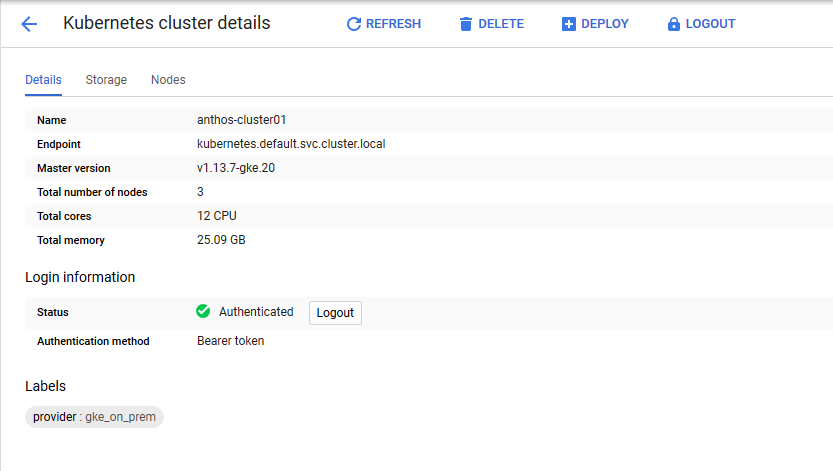
After login is complete, you see a green check mark next to the cluster name, and information is displayed about the physical environment. Clicking the cluster name displays more verbose information.