Protection procedures for databases running on VMware VMDKs with SnapCenter for SQL (SCSQL)
 Suggest changes
The following section shows how to protect databases running on VMware VMDKs with SnapCenter for SQL (SCSQL).
Setting up SCSQL
The set up for using SCSQL to protect databases on VMDKs are as follows:
-
Install and configure SnapCenter Server.
-
Log in to SnapCenter.
-
Configure the SnapCenter environment:
-
Add or assign storage system connections.
-
Create credentials.
-
-
For Microsoft SQL Server databases on VMware VMDKs:
-
Deploy SCV (already covered in the setup section).
-
Register the plug-in with SnapCenter.
-

Setting up a backup policy
The following steps will show how to set up a backup policy.
-
Select the database from the resource tab and select "Protect" from the upper-right corner.

Validations are performed against a SQL Server database running on the guest VM. 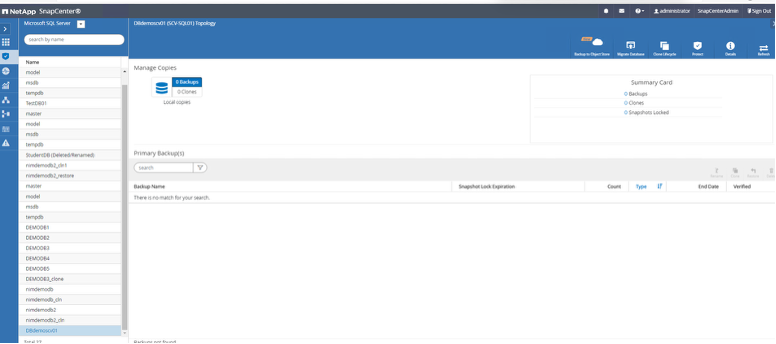
-
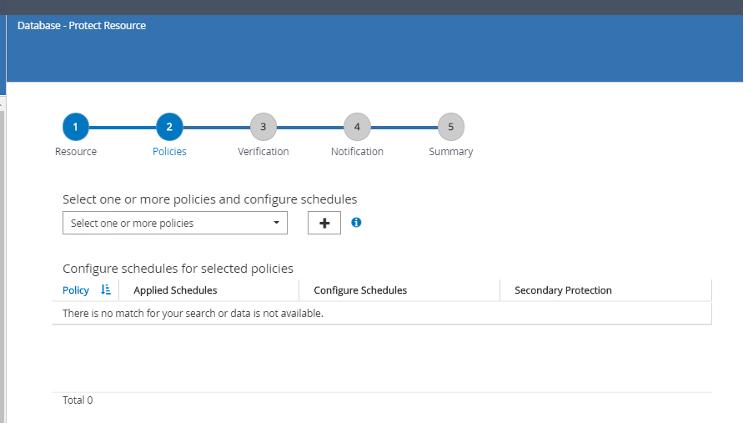
Click on the plus sign icon to configure a SQL Server backup policy.
-
In this demo, "Full backup" is selected. Select "Next" to continue.

-
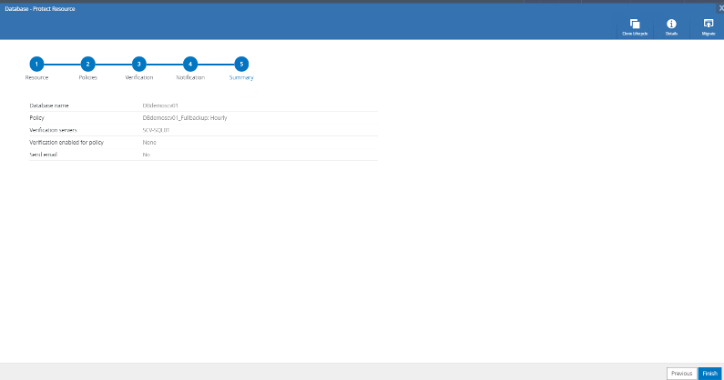
On the Summary page, select "Finish".

-
Proceed to "Finish".
Monitoring a backup
Once you have set up a backup policy, you can monitor your back up operations as they take place. You can do this either by clicking on Backup now to trigger an on-demand back up operation or by waiting for your scheduled backup policy to kick in.
-
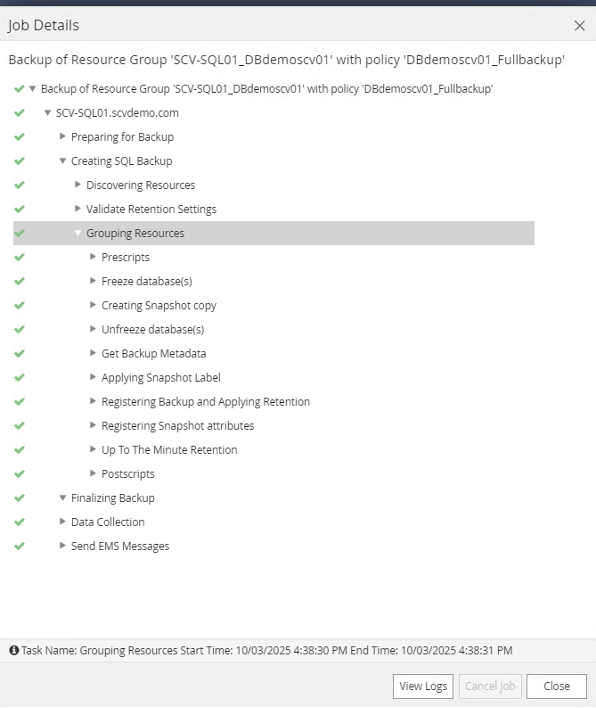
Monitor the job progress using "Monitor > Jobs".
-
Select the backup job, and then click "Details" to view the job details as below.
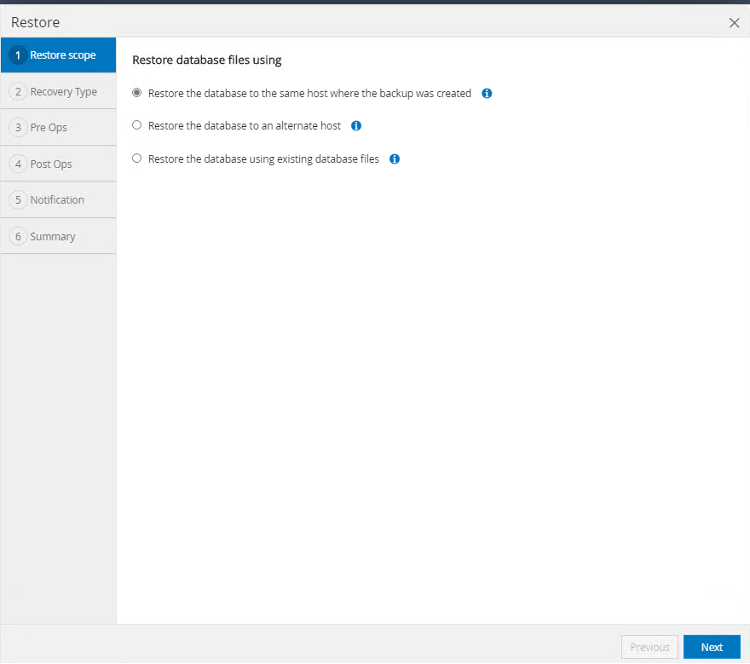
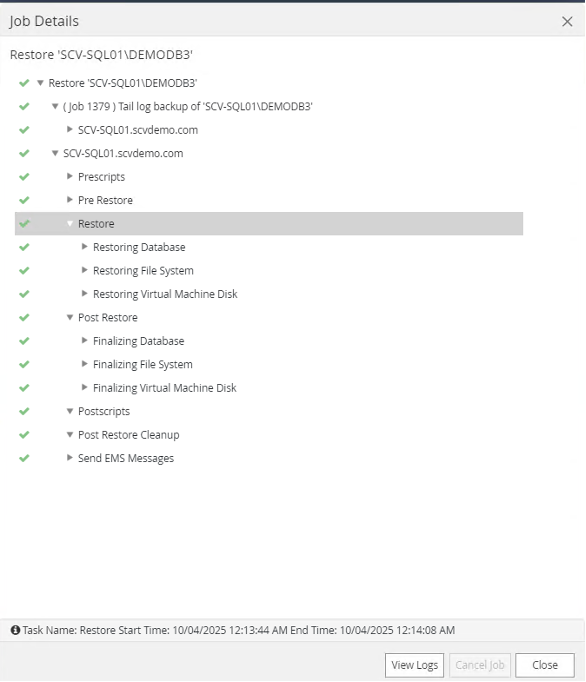
Restore of databases residing on the VMDKs
The database on the VMDK can be restored to a specific point in time.
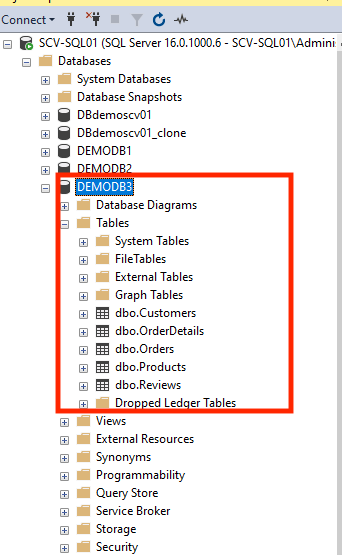
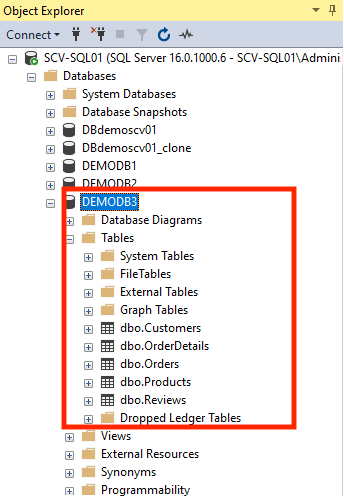
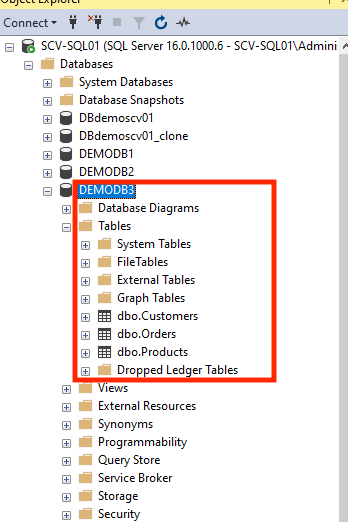
We can simulate the importance of this by deleting some tables in your database which will then be corrected by performing a point-in-time restore.
Below you can see that several tables from our database shown in the first screenshot have been deleted in the second screenshot:
The following steps show how to carry out a restoration to recover those deleted tables:
-
Select the database from the resource group.
-
In the Restore page, select the option "Restore the database to the same host where the backup was created".
-
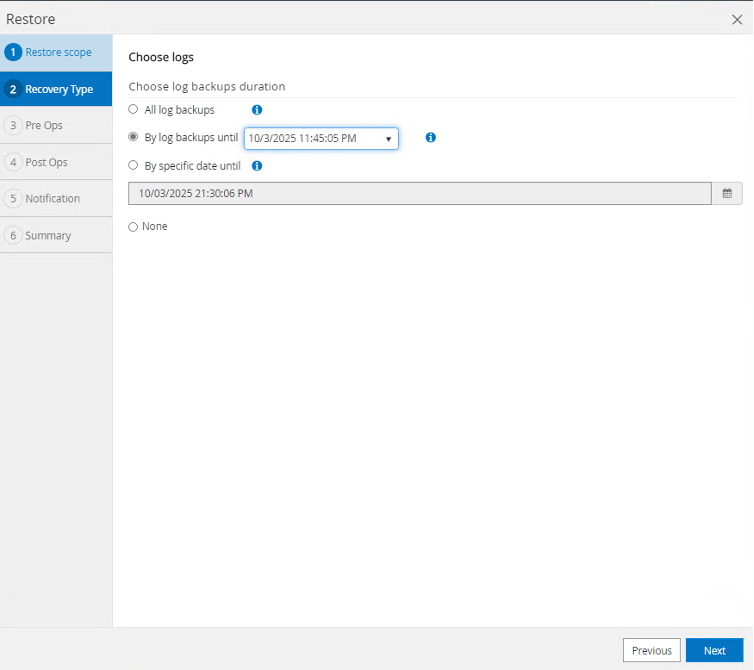
Select the option to use a log backup to a point in time.
-
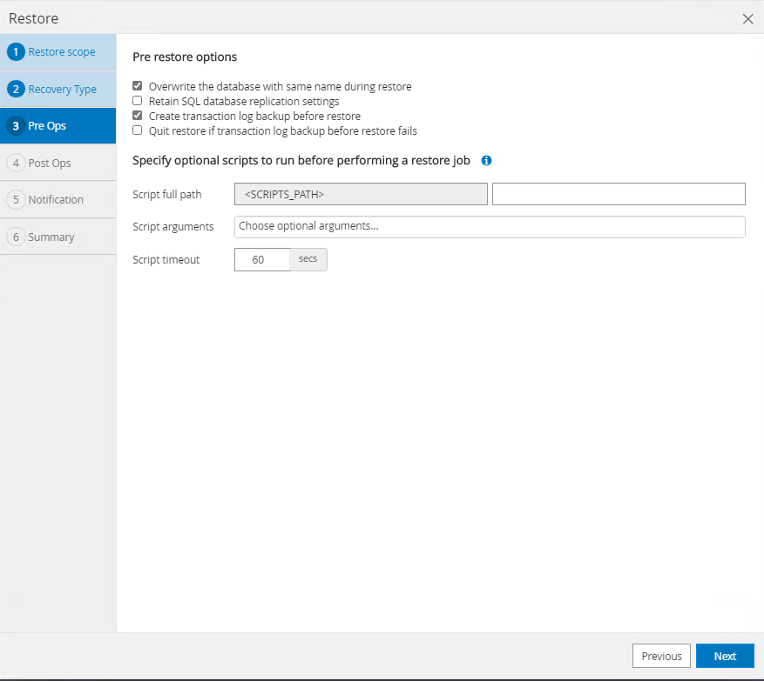
Select "Overwrite database with same name during restore, Create transaction log backup before restore", and select "Next".
-
Select the post-restore state you wish the database to assume from the list options and select "Next".

-
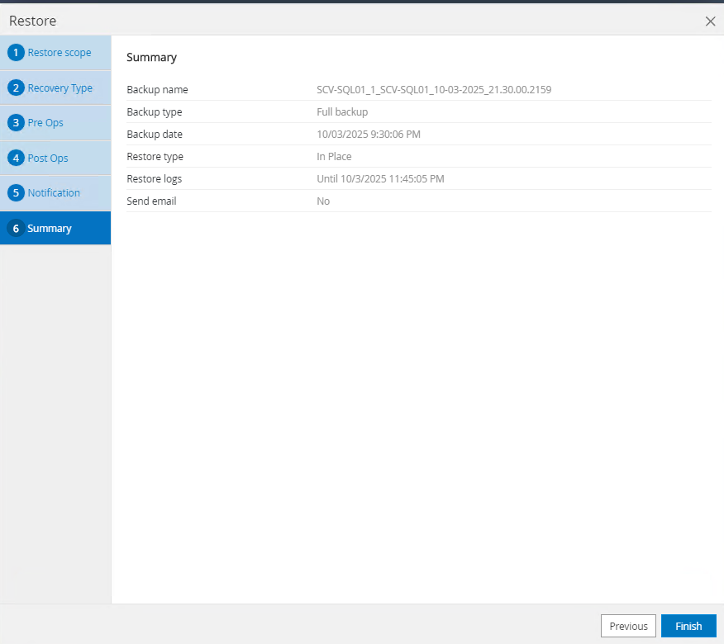
On the summary page, select "Finish".
-
Monitor the job to completion.
-
Verify that the deleted tables have been successfully restored.